It was one of those evenings when the fridge was nearly empty, and the idea of ordering takeout felt both uninspiring and a little too predictable. I remember staring at a sad pack of chicken breasts, wondering if I could pull off something better than the usual. Honestly, I was skeptical—fried chicken sandwiches always seemed like a fast-food thing, not something I could nail at home without a greasy mess or disappointment. But then, on a whim, I decided to try a quick brine and a crispy coating with a few pantry staples. The next thing I knew, I was biting into this crispy chicken sandwich with pickles that had the kind of crunch and flavor that made me pause mid-chew.
The tangy pickles cut through the rich, perfectly seasoned crust, and the bread was toasted just right to hold it all together without getting soggy. It wasn’t fancy, but it was comfort food with a satisfying twist—something that hit the spot after a long day. What stuck with me wasn’t just the crunch or the flavor, but how simple ingredients and a little patience turned into a sandwich that felt like a small celebration. It’s the kind of recipe you’ll find yourself making over and over, not because it’s complicated, but because it just works—every single time.
That quiet realization—that homemade can beat takeout, that a few pickles can change everything—made this crispy chicken sandwich recipe a keeper in my kitchen. And I have a feeling it might just become one in yours, too.
Why You’ll Love This Recipe
- Quick & Easy: Comes together in about 30 minutes, which means you’re enjoying that ultimate crunch and flavor without waiting forever.
- Simple Ingredients: Nothing fancy needed—just chicken, a few pantry staples, and your favorite pickles. No last-minute grocery runs required.
- Perfect for Any Occasion: Whether it’s a casual weeknight dinner, a spontaneous lunch, or a weekend treat, this sandwich fits the bill.
- Crowd-Pleaser: Kids, adults, picky eaters—everyone asks for seconds. I’ve tested this with friends, and it’s always a hit.
- Unbelievably Delicious: The crispy coating is perfectly seasoned and the pickles add a sharp, refreshing bite that keeps you coming back.
This recipe isn’t just another crispy chicken sandwich you find online. What makes it different is the brining step that keeps the chicken juicy inside, combined with a double dredge in seasoned flour for that unbeatable crunch. Plus, the pickles aren’t an afterthought—they’re the star players, adding that tangy punch that balances richness. Honestly, this sandwich is the kind of comfort food that feels homemade but tastes like it belongs in a diner.
It’s the sandwich you close your eyes to savor, the one that makes you forget about takeout menus. Perfect for impressing friends without stress or just treating yourself on a hectic day.
What Ingredients You Will Need
This recipe uses simple, wholesome ingredients to deliver bold flavor and satisfying texture without the fuss. Most of these are pantry staples, with pickles adding that fresh zip. Feel free to swap ingredients based on what you have on hand!
- For the chicken:
– 2 boneless, skinless chicken breasts (about 1 pound / 450 g), pounded to even thickness
– 1 cup buttermilk (240 ml) (helps tenderize and adds tanginess; use low-fat or dairy-free if needed)
– 1 teaspoon hot sauce (optional, for a subtle kick) - For the coating:
– 1 ½ cups all-purpose flour (190 g)
– 1 teaspoon garlic powder
– 1 teaspoon smoked paprika (adds smoky depth)
– 1 teaspoon salt
– ½ teaspoon black pepper
– ½ teaspoon cayenne pepper (optional, for heat) - For frying:
– Vegetable oil or canola oil (enough for about 2 inches / 5 cm in a skillet) - For assembly:
– 4 sandwich buns (brioche or potato buns work great for softness and slight sweetness)
– Dill pickle slices (about 8 slices total, but adjust to taste)
– Mayonnaise (about ¼ cup / 60 ml)
– Optional: lettuce leaves or shredded cabbage for crunch and freshness
I usually go for a trusted brand of all-purpose flour like King Arthur for consistent texture. For pickles, I prefer classic dill slices—there’s something about that tangy crunch that just finishes the sandwich perfectly. If you want a gluten-free option, almond flour can be substituted in the coating, but the texture will be slightly different. And if buttermilk isn’t around, a quick mix of milk and a tablespoon of lemon juice works in a pinch.
Equipment Needed
- Large mixing bowls – for marinating and dredging chicken
- Heavy skillet or cast iron pan – ideal for frying and getting that golden crust
- Tongs – for flipping the chicken without damaging the coating
- Wire rack and baking sheet – to drain excess oil and keep the chicken crispy
- Meat mallet or rolling pin – to pound chicken breasts evenly (a zip-top bag helps keep things tidy)
- Instant-read thermometer (optional but helpful) – to check the chicken’s internal temperature for safety and juiciness
If you don’t have a cast iron skillet, a heavy-bottomed stainless steel pan works fine. I’ve even fried in a deep-sided nonstick pan with good results, just keep an eye on the oil temperature. For budget-friendly options, a simple wire cooling rack placed over a baking sheet can do the trick to drain oil without sogginess. Personally, I like using tongs with silicone tips—they grip well and don’t scrape the coating off.
Preparation Method
- Prepare the chicken: Place the chicken breasts between two sheets of plastic wrap or inside a zip-top bag. Using a meat mallet or rolling pin, gently pound the chicken to about ½-inch (1.3 cm) thickness. This ensures even cooking and tender bites. (5 minutes)
- Brine the chicken: In a large bowl, combine the buttermilk and hot sauce. Submerge the chicken breasts completely and cover. Refrigerate for at least 20 minutes, or up to 1 hour if you have extra time. This step keeps the chicken juicy and adds subtle flavor. (20–60 minutes)
- Make the seasoned flour: In a shallow dish, whisk together the flour, garlic powder, smoked paprika, salt, black pepper, and cayenne pepper. This seasoning mix gives the crust its bold flavor and that irresistible crunch. (3 minutes)
- Coat the chicken: Remove chicken from the buttermilk, letting excess drip off. Dredge each breast in the seasoned flour, pressing lightly to adhere. For extra crunch, dip the chicken back into the buttermilk briefly, then dredge again in the flour. Place coated chicken on a plate and let rest for 10 minutes to help the coating set. (15 minutes)
- Heat the oil: Pour vegetable oil into a heavy skillet to about 2 inches (5 cm) deep. Heat over medium-high heat until the oil reaches 350°F (175°C). Use a thermometer for accuracy—too hot and the crust burns; too cool and the chicken gets greasy. (5–7 minutes)
- Fry the chicken: Carefully place the chicken breasts into the hot oil, working in batches if needed to avoid overcrowding. Fry for 4–5 minutes per side, or until golden brown and cooked through (internal temperature of 165°F / 74°C). You’ll notice a deep golden crust forming—this is where that ultimate crunch comes from. (8–10 minutes)
- Drain and rest: Remove the chicken to a wire rack set over a baking sheet to drain excess oil. Let rest for 5 minutes—the crust firms up and the juices redistribute. (5 minutes)
- Toast the buns: While the chicken rests, toast the sandwich buns lightly in the same skillet or a toaster. This adds flavor and prevents sogginess from the mayo and pickles. (2–3 minutes)
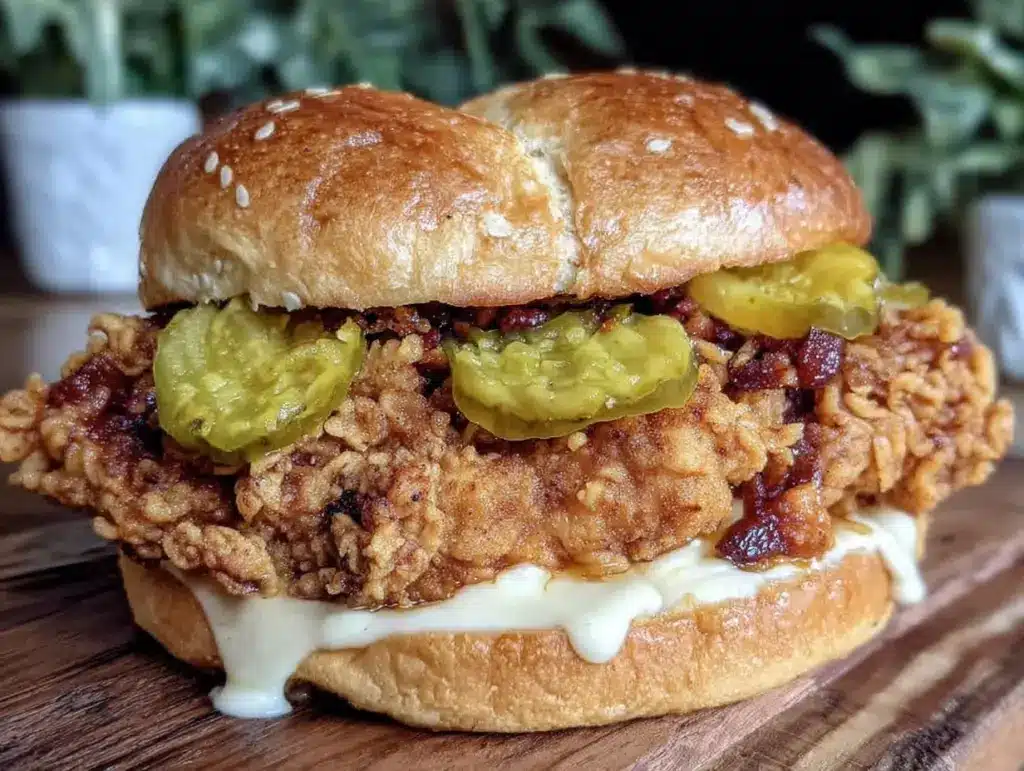
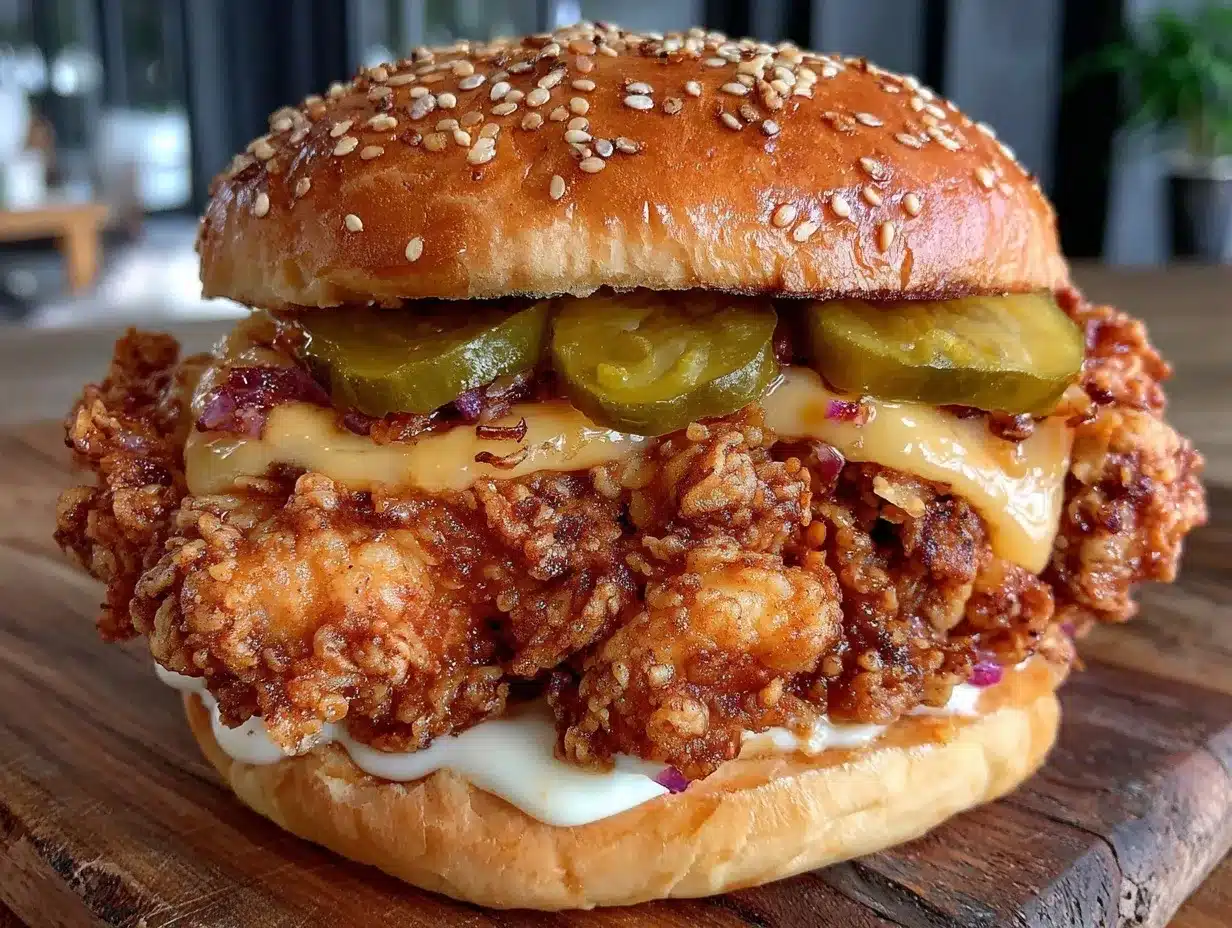
- Assemble the sandwich: Spread mayonnaise on the bottom bun, add the crispy chicken breast, top with dill pickle slices, and finish with lettuce or cabbage if desired. Cap with the top bun and press gently. (2 minutes)
Keep an eye on the oil temperature throughout frying—it tends to drop when chicken is added, so adjust heat as needed. If the coating starts to brown too fast, lower the heat slightly. And don’t skip the resting step after frying; it’s a small detail that makes a big difference.
Cooking Tips & Techniques
Getting that perfect crispy chicken sandwich isn’t about rushing—it’s about layering flavors and textures carefully. One trick I learned is the double dredge in flour and buttermilk; it creates a thicker, crunchier crust that stays crispy even after adding pickles and mayo. Also, don’t skip pounding the chicken breasts to even thickness—that way, they cook evenly without drying out.
Oil temperature is king here. I’ve burned many a batch because I didn’t use a thermometer. Trust me, it’s worth the investment! Keep the heat steady around 350°F (175°C) so you get a golden crust without greasy spots. If you’re frying multiple batches, let the oil come back up to temperature between rounds.
Another little tip: drain the cooked chicken on a wire rack, not paper towels. Paper towels trap steam and can make the crust soggy. The rack lets excess oil drip away and keeps the coating crisp.
Timing wise, prep your ingredients and have buns ready before frying. Toasting buns last-minute keeps them warm and prevents them from drying out. And don’t forget the pickles—they add a fresh crunch and acidity that balances the richness of the chicken and mayo.
Variations & Adaptations
Feel free to tweak this crispy chicken sandwich recipe to match your taste or dietary needs. Here are a few ideas I’ve played around with:
- Spicy Kick: Add cayenne to the flour and swap regular mayo for spicy sriracha mayo. It’s a game changer if you like heat!
- Gluten-Free: Use almond flour or a gluten-free all-purpose blend for the coating. The texture changes slightly but still delivers good crunch.
- Oven-Baked Version: For a lighter option, bake the breaded chicken at 425°F (220°C) for about 20-25 minutes, flipping halfway. It’s less crispy but still tasty.
- Pickle Variations: Try bread-and-butter pickles for a sweeter contrast or spicy pickles for an extra punch. I once swapped dill for quick-pickled red onions—surprisingly delicious.
- Dairy-Free: Replace buttermilk with coconut milk mixed with lemon juice, and use dairy-free mayo. Works well if you avoid dairy.
Serving & Storage Suggestions
This sandwich tastes best hot and fresh, right after assembly, when the crust is at its crunchiest and the pickles crisp. Serve with a side of crispy fries, coleslaw, or a simple green salad for balance. A cold soda or iced tea pairs nicely, cutting through the richness.
If you have leftovers (which is rare!), wrap the chicken breasts tightly in foil and store in the fridge for up to 2 days. Reheat in a toaster oven or under the broiler for a few minutes to bring back some crispness. Avoid microwaving unless you don’t mind losing crunch.
Flavors actually deepen if you let the fried chicken rest wrapped overnight in the fridge before assembling sandwiches the next day. The coating softens slightly but the taste is a bit more developed—worth a try if you want a make-ahead option.
Nutritional Information & Benefits
Each crispy chicken sandwich (including bun, mayo, and pickles) is roughly estimated to provide around 550-650 calories, depending on bun size and mayo amount. It offers a good protein boost from the chicken breast (about 35 grams per serving), along with fats from frying and mayo.
The pickles add minimal calories but bring beneficial probiotics and vitamins, plus fiber if you add lettuce or cabbage. Using buttermilk or dairy-free substitutes provides some calcium and tang without excess fat. This recipe can fit into a balanced diet when paired with fresh veggies or a light side.
For gluten-free or lower-carb versions, swap the bun with lettuce wraps or gluten-free bread. The flexibility makes it possible to enjoy this sandwich while accommodating various eating preferences.
Conclusion
This crispy chicken sandwich with pickles isn’t just a recipe—it’s a little ritual of comfort and crunch that’s surprisingly doable at home. I love how it turns basic ingredients into something that feels special and satisfying every time. Whether you’re feeding a hungry crowd or just craving a cozy meal, this recipe adapts well and always delivers.
Don’t hesitate to customize it—switch up the pickles, spice level, or bread to make it truly your own. And if you do try it, I’d love to hear how it goes or what twists you made. It’s a simple pleasure that brings a bit of joy with every bite, and that’s why I keep coming back to it.
Here’s to crunchy bites and cozy meals ahead!
FAQs
Can I make the crispy chicken sandwich ahead of time?
You can brine and bread the chicken a few hours in advance, but fry just before serving to keep the crust crispy. Cooked chicken sandwiches are best eaten fresh.
What’s the best oil for frying this chicken?
Vegetable oil, canola oil, or peanut oil work well because they have high smoke points and neutral flavors.
How can I make this sandwich less greasy?
Maintain the oil temperature at about 350°F (175°C) and drain the chicken on a wire rack instead of paper towels to keep the coating crisp without excess oil.
Can I use chicken thighs instead of breasts?
Yes! Boneless thighs stay juicy and have more fat, but adjust cooking time as needed because they may cook faster.
What kind of pickles work best for this sandwich?
Dill pickles are classic, but bread-and-butter or spicy pickles also add great flavor. Choose your favorite based on your taste preference.
Pin This Recipe!
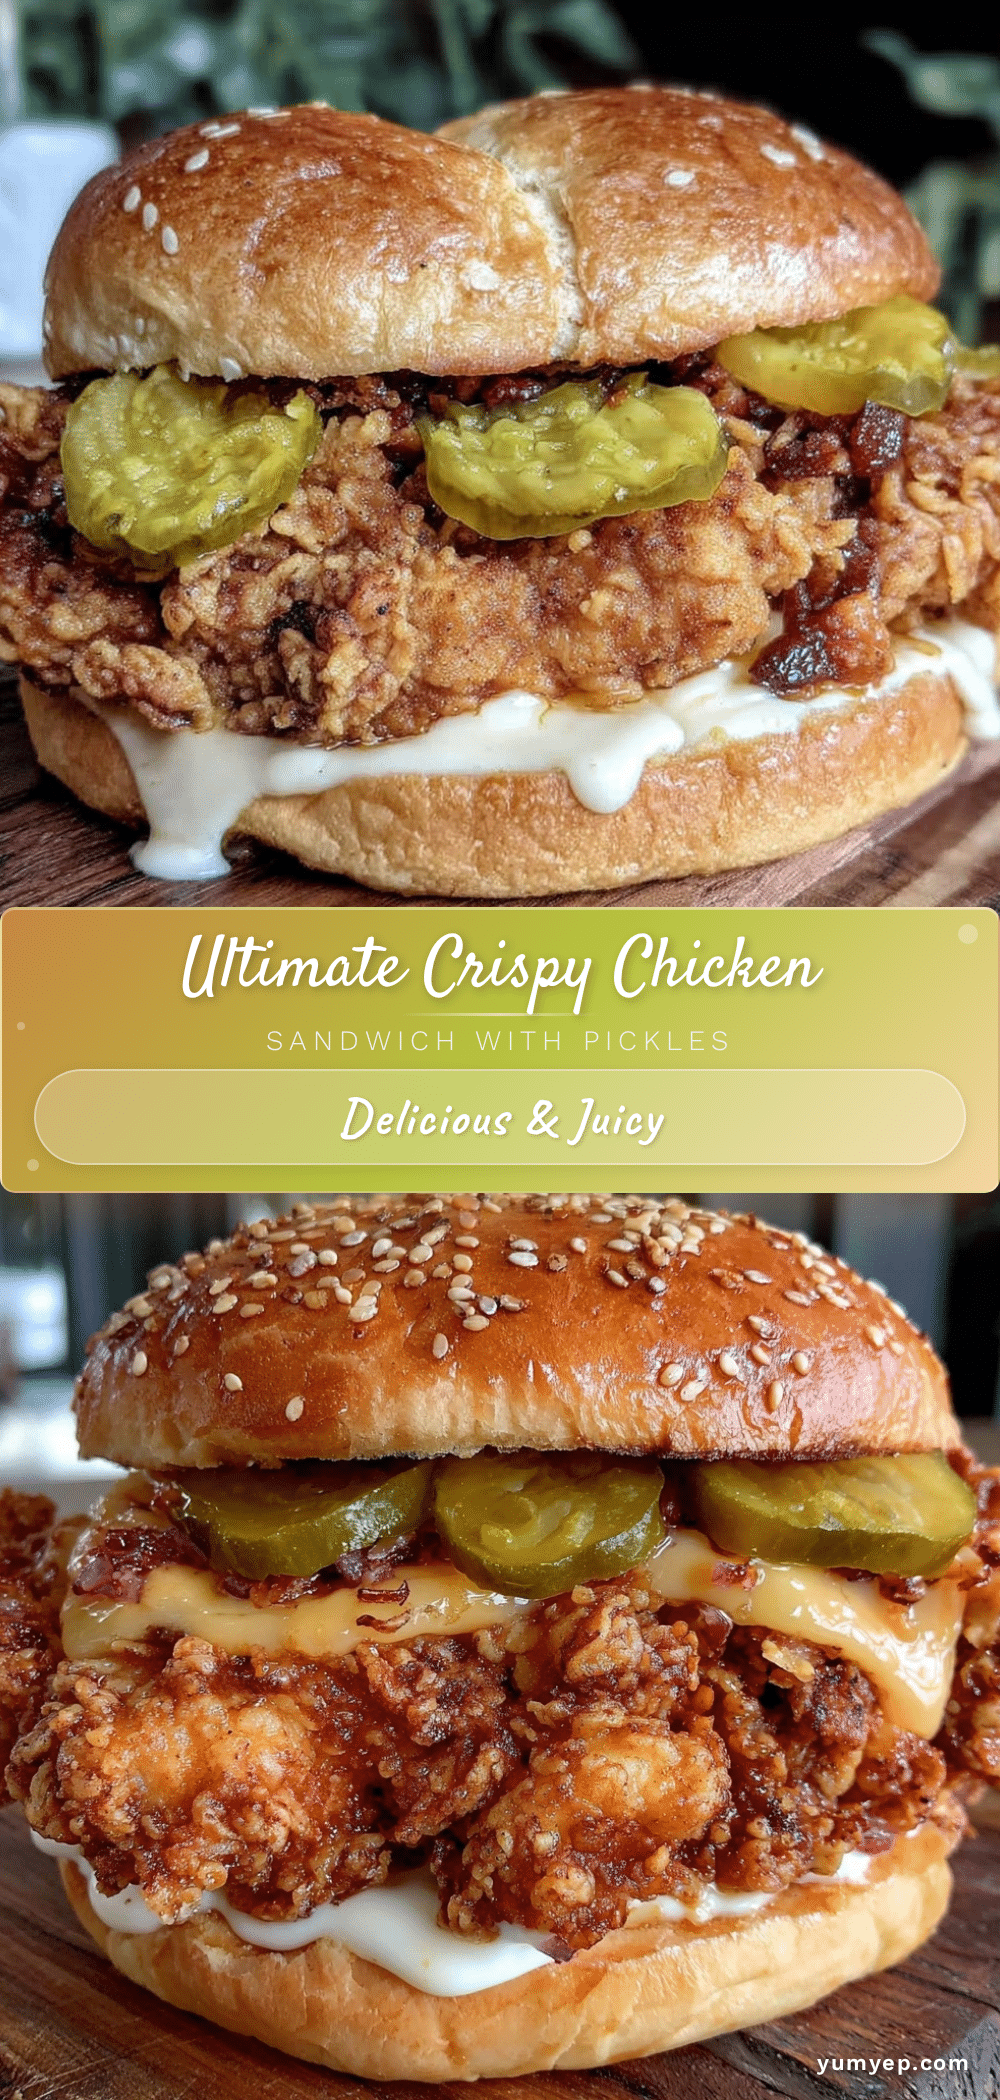
Crispy Chicken Sandwich Recipe Easy Homemade Ultimate Crunch and Flavor

A quick and easy homemade crispy chicken sandwich with a perfectly seasoned crust, tangy pickles, and toasted buns for ultimate crunch and flavor. This recipe uses simple ingredients and a brining step to keep the chicken juicy and flavorful.
- Prep Time: 15 minutes
- Cook Time: 15 minutes
- Total Time: 30 minutes
- Yield: 4 servings 1x
- Category: Main Course
- Cuisine: American
Ingredients
- 2 boneless, skinless chicken breasts (about 1 pound / 450 g), pounded to even thickness
- 1 cup buttermilk (240 ml)
- 1 teaspoon hot sauce (optional)
- 1 ½ cups all-purpose flour (190 g)
- 1 teaspoon garlic powder
- 1 teaspoon smoked paprika
- 1 teaspoon salt
- ½ teaspoon black pepper
- ½ teaspoon cayenne pepper (optional)
- Vegetable oil or canola oil (enough for about 2 inches / 5 cm in a skillet)
- 4 sandwich buns (brioche or potato buns recommended)
- Dill pickle slices (about 8 slices)
- Mayonnaise (about ¼ cup / 60 ml)
- Optional: lettuce leaves or shredded cabbage
Instructions
- Place the chicken breasts between two sheets of plastic wrap or inside a zip-top bag. Using a meat mallet or rolling pin, gently pound the chicken to about ½-inch (1.3 cm) thickness.
- In a large bowl, combine the buttermilk and hot sauce. Submerge the chicken breasts completely and cover. Refrigerate for at least 20 minutes, or up to 1 hour.
- In a shallow dish, whisk together the flour, garlic powder, smoked paprika, salt, black pepper, and cayenne pepper.
- Remove chicken from the buttermilk, letting excess drip off. Dredge each breast in the seasoned flour, pressing lightly to adhere. Dip the chicken back into the buttermilk briefly, then dredge again in the flour. Place coated chicken on a plate and let rest for 10 minutes.
- Pour vegetable oil into a heavy skillet to about 2 inches (5 cm) deep. Heat over medium-high heat until the oil reaches 350°F (175°C).
- Carefully place the chicken breasts into the hot oil, working in batches if needed. Fry for 4–5 minutes per side, or until golden brown and cooked through (internal temperature of 165°F / 74°C).
- Remove the chicken to a wire rack set over a baking sheet to drain excess oil. Let rest for 5 minutes.
- Toast the sandwich buns lightly in the same skillet or a toaster for 2–3 minutes.
- Spread mayonnaise on the bottom bun, add the crispy chicken breast, top with dill pickle slices, and finish with lettuce or cabbage if desired. Cap with the top bun and press gently.
Notes
Maintain oil temperature at 350°F (175°C) to avoid greasy or burnt crust. Double dredging in flour and buttermilk creates a thicker, crunchier crust. Drain fried chicken on a wire rack instead of paper towels to keep crust crisp. Toast buns last-minute to prevent sogginess. Use thermometer for best frying results.
Nutrition
- Serving Size: 1 sandwich
- Calories: 600
- Sugar: 5
- Sodium: 900
- Fat: 30
- Saturated Fat: 6
- Carbohydrates: 50
- Fiber: 2
- Protein: 35
Keywords: crispy chicken sandwich, homemade chicken sandwich, fried chicken sandwich, easy chicken recipe, quick dinner, comfort food


