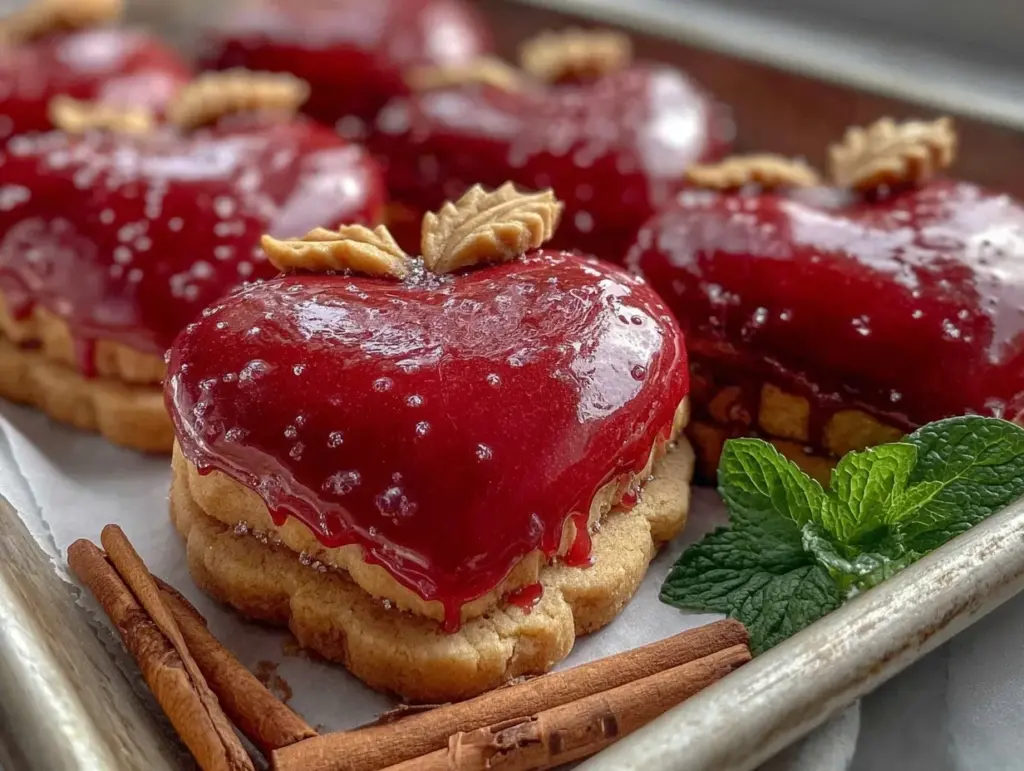
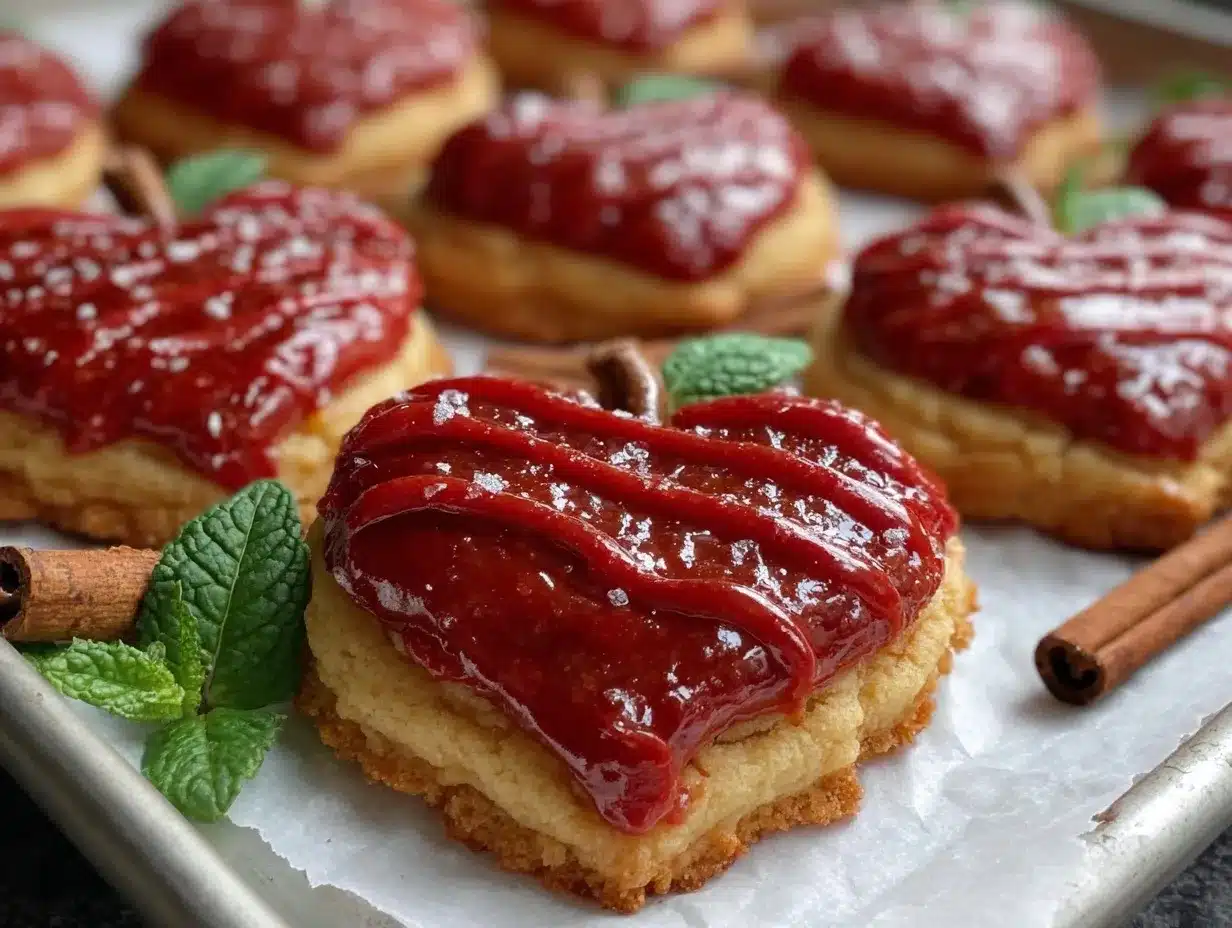
“You know, I wasn’t totally convinced when my neighbor casually dropped off a tin of these apple shaped sugar cookies last fall. I mean, sugar cookies? Shaped like apples? What could be so special?” That’s what I grumbled to myself as I reached for one, half-expecting the usual dry, bland cookie experience. But then—honestly—it was like a little burst of nostalgia wrapped in perfect sweetness, coated with this glossy, vibrant red royal icing glaze that made the whole thing feel like a mini celebration on my tongue.
Turns out, these Perfect Apple Shaped Sugar Cookies with Red Royal Icing Glaze weren’t just any cookies. They were the kind that made me pause, close my eyes, and appreciate the simple joy of a well-made treat. The shape was fun without being gimmicky, and the icing? Smooth, shiny, and just the right balance of sweet and firm. I found myself making them repeatedly over a couple of weeks—sometimes for no reason other than to gift them to friends or sneak one with my afternoon tea.
There’s something about the crackle of royal icing that brings back quiet mornings baking with my mom, and these cookies brought that feeling right back. I realized this recipe stuck because it’s straightforward, reliable, and a little bit special without fuss. So here we are—sharing the recipe that’s become my go-to for fall gatherings, school snacks, or just when I need a little pick-me-up that tastes like a hug.
Why You’ll Love This Recipe
After testing and tweaking this recipe multiple times (yes, I confess, sometimes twice in a week), I can say this is the sugar cookie recipe you’ll want in your rotation. Here’s why it stands out:
- Quick & Easy: Comes together in about 30 minutes plus chilling time—perfect if you want a homemade treat without hours in the kitchen.
- Simple Ingredients: Uses pantry staples you likely have on hand—no hunting for rare extracts or special flours.
- Perfect for Fall & Back-to-School: These cookies are a charming addition to lunchboxes, afternoon snacks, or festive fall parties.
- Crowd-Pleaser: Kids adore the fun apple shape, and adults appreciate the crisp, buttery cookie with the shiny, sweet glaze.
- Unbelievably Delicious: The royal icing glaze isn’t just for looks—it adds a smooth, slightly firm texture that contrasts beautifully with the soft cookie.
What really sets this apart from other sugar cookie recipes is the royal icing technique. I’ve tried a few variations, but blending the glaze just right—without it cracking or getting too sweet—is the secret to that glossy finish and perfect bite. And the apple shape? It brings a nostalgic, homemade vibe without being overly complicated. Honestly, this recipe is like a bridge between classic comfort and a little festive flair, making it a go-to when I want something reliable but special.
What Ingredients You Will Need
This recipe uses simple, wholesome ingredients to deliver bold flavor and satisfying texture without the fuss. Most are pantry staples, which means you don’t have to plan a special grocery trip.
- For the Sugar Cookies:
- All-purpose flour, 2 ¾ cups (345 g) – I prefer King Arthur for consistent texture
- Baking powder, 1 teaspoon – helps give a slight lift
- Salt, ½ teaspoon – balances the sweetness
- Unsalted butter, 1 cup (227 g), softened – room temperature for easy creaming
- Granulated sugar, 1 ¼ cups (250 g) – for the perfect sweet base
- Large egg, 1 – room temperature
- Pure vanilla extract, 1 teaspoon – I like Nielsen-Massey for its rich flavor
- Milk, 1 tablespoon (15 ml) – adds moisture and tenderness
- For the Red Royal Icing Glaze:
- Powdered sugar, 3 cups (360 g), sifted
- Egg whites, 2 large (or 4 tablespoons of meringue powder mixed with water)
- Lemon juice, 1 tablespoon (optional, adds brightness)
- Red gel food coloring, a few drops – gel gives a vibrant color without thinning the icing
- Vanilla extract, ½ teaspoon (optional)
If you want to make this gluten-free, swapping the flour for a 1:1 gluten-free baking flour blend works well, though texture changes slightly. For dairy-free, using a plant-based butter substitute and almond or oat milk keeps the cookies tender and flavorful. In case you want a different color for the icing, the same royal icing method applies—just swap the red gel for your favorite shade.
Equipment Needed
- Mixing bowls (at least two, medium size)
- Electric mixer or stand mixer – helps cream butter and sugar smoothly
- Measuring cups and spoons – precise measurements are key for consistent cookies
- Rolling pin – a smooth, even roll makes all the difference for shaping
- Apple-shaped cookie cutter (3-4 inch size) – I found a sturdy stainless steel cutter works best for clean edges
- Baking sheets lined with parchment paper or silicone mats – prevents sticking and promotes even baking
- Wire cooling rack – for cooling cookies evenly before icing
- Small bowls or cups – for mixing different shades of icing if desired
- Piping bags with small round tips (about #2 or #3) – for outlining and flooding the icing smoothly
If you don’t have a stand mixer, a hand mixer is totally fine, just be patient creaming the butter. For rolling, I sometimes swap a clean wine bottle in a pinch. And while professional piping bags are nice, disposable ones or even a zip-top bag with a tiny snip in the corner work well for the royal icing glaze.
Preparation Method
- Mix Dry Ingredients (5 minutes): In a medium bowl, whisk together the all-purpose flour, baking powder, and salt. Set aside. This ensures even distribution and prevents clumps in your dough.
- Cream Butter and Sugar (8 minutes): Using an electric mixer, beat the softened butter and granulated sugar on medium speed until light and fluffy—usually about 3-5 minutes. You want it pale and airy, which traps air and makes tender cookies.
- Add Wet Ingredients (3 minutes): Beat in the egg and vanilla extract until combined. Add the tablespoon of milk and mix until smooth. The dough will start to come together now.
- Combine Dry and Wet (2 minutes): Gradually add the flour mixture to the wet ingredients, mixing on low speed just until dough forms. Be careful not to overmix, or the cookies could turn tough.
- Chill the Dough (at least 1 hour): Wrap the dough in plastic wrap and refrigerate. This step is crucial for keeping the cookies from spreading too much and helps the flavors meld.
- Preheat Oven and Prepare Baking Sheets: Preheat your oven to 350°F (175°C). Line baking sheets with parchment paper or silicone mats.
- Roll and Cut Cookies (10 minutes): On a lightly floured surface, roll the dough out to about ¼ inch (6 mm) thickness. Use your apple-shaped cookie cutter to cut out shapes. Transfer carefully onto baking sheets, spacing about 1 inch apart.
- Bake Cookies (8-10 minutes): Bake in the preheated oven until the edges are just starting to turn golden but centers remain pale—usually 8-10 minutes. Keep a close eye in those last minutes to avoid overbaking.
- Cool Completely: Let cookies cool on the baking sheets for 5 minutes, then transfer to a wire rack to cool fully before icing. Warm cookies will cause the royal icing to melt and run.
- Prepare Royal Icing Glaze (10 minutes): In a clean bowl, whisk the egg whites (or meringue powder mixture) until frothy. Gradually add sifted powdered sugar, mixing until you reach a smooth, pipeable consistency—thick enough to hold shape but thin enough to flood. Add lemon juice and vanilla if using. Stir in red gel food coloring until you get that vibrant apple red.
- Decorate Cookies: Outline each cookie with a piping bag fitted with a small round tip. Then flood the inside with the glaze using a spoon or piping bag. Use a toothpick to gently spread and remove bubbles. Let the icing set at room temperature for at least 4 hours or overnight for a perfect hard finish.
Pro tip: If you see tiny air bubbles in the icing after flooding, use a toothpick to pop them quickly before the glaze sets. Also, if the royal icing feels too stiff, add a few drops of water to loosen it up; too thin? Add more powdered sugar.
Cooking Tips & Techniques
Getting the perfect sugar cookie and royal icing glaze takes a little finesse, but here are some tips I’ve learned along the way:
- Don’t skip chilling the dough. It’s tempting, but chilling helps the cookies hold their apple shape and prevents spreading in the oven.
- Use room temperature butter. It creams better with sugar, giving the dough a nice texture and flavor.
- Roll dough evenly. Uneven thickness leads to uneven baking—some bites burnt, some underdone. I like to check thickness with a ruler or rolling pin rings.
- Practice royal icing consistency. It’s a bit of trial and error. For outlining, the icing should be thicker; for flooding, thinner but not runny. If you’re new to royal icing, try testing on parchment before decorating cookies.
- Keep all utensils clean and dry. Even a tiny crumb or drop of grease can mess with royal icing.
- Work in a cool, dry environment. Humidity can cause the icing to set too slowly or stay tacky.
One time I rushed the icing and didn’t chill the dough enough; the cookies spread into blobs and the icing cracked. Lesson learned! Now, I always plan ahead and let the dough rest properly. Multitasking while baking these—like prepping the glaze while cookies bake—really helps keep things moving smoothly.
Variations & Adaptations
This apple shaped sugar cookie recipe is quite versatile, and I’ve tried a few fun twists:
- Flavor Variations: Add a teaspoon of cinnamon or apple pie spice to the dough for a subtle warm spice that complements the apple shape perfectly.
- Glaze Colors: Instead of classic red, try green royal icing for a Granny Smith apple look or even yellow for a golden apple vibe. You can also mix colors for a marbled effect.
- Dietary Adjustments: For gluten-free, use a 1:1 gluten-free flour blend. For vegan, swap butter with coconut oil and use aquafaba (chickpea water) whipped instead of egg whites for the royal icing—though the texture changes a bit.
- Alternate Icing Ideas: If royal icing isn’t your thing, try a simple powdered sugar glaze with apple juice and a touch of lemon for a softer finish that still looks pretty.
One variation I loved was adding finely chopped candied ginger into the dough—gave an unexpected zing that was delightful alongside the sweet glaze. When I want a quick treat, I sometimes skip the royal icing and sprinkle the cookies with colored sugar before baking for a crunchy, sparkly top.
Serving & Storage Suggestions
These cookies are best served at room temperature when the royal icing has fully set to a firm, glossy finish. They make a charming addition to fall dessert tables, school lunchboxes, or as a thoughtful homemade gift.
Pair them with a warm cup of chai tea or a crisp apple cider to bring out the apple theme—you know, a little taste harmony. They also go well alongside buttery treats like the snowball cookies for a festive cookie platter.
For storage, keep the cookies in an airtight container at room temperature for up to 5 days. To prevent the royal icing from sticking together, place parchment paper between layers. These cookies freeze well too—wrap tightly and freeze up to 3 months. Thaw at room temperature before serving.
Reheating isn’t necessary and can soften the icing, but if you prefer a softer cookie, warm gently in a low oven for a few minutes. Over time, the cookie flavor deepens and the icing may develop a slight sheen, making them taste even better a day after baking.
Nutritional Information & Benefits
Each apple shaped sugar cookie contains approximately 150-170 calories, with around 7 grams of fat and 20 grams of carbohydrates. The royal icing adds sweetness but is low in fat.
While these are definitely a treat, the simple ingredients mean no preservatives or artificial additives. Using real butter and fresh eggs adds richness and protein, while the flour provides energy-sustaining carbs.
For those watching allergens, this recipe contains gluten, dairy, and eggs. Substitutions can help with gluten and dairy sensitivities. It’s a festive, indulgent snack that fits well into balanced eating when enjoyed in moderation.
From a wellness angle, baking at home means you control the ingredients, so you can skip artificial colors and preservatives common in store-bought decorated cookies. Plus, sharing these cookies is a sweet way to connect with friends and family, which I believe is part of good health too.
Conclusion
These Perfect Apple Shaped Sugar Cookies with Red Royal Icing Glaze have become a quiet favorite in my kitchen—not just for their look or sweetness, but because they bring a little joy and satisfaction every time I make them. They’re approachable, forgiving for beginners, and pretty enough to impress without stress.
Feel free to tweak the spices, colors, or icing consistency to fit your mood or occasion. Baking is, after all, a little bit of science and a lot of heart. I love that these cookies manage to be both simple and special—a reminder that the best recipes often come from small, thoughtful touches.
Whenever you try them, I’d love to hear how you made them your own or what memories they sparked. Baking’s better when shared, don’t you think? So go ahead, bake a batch, and see who you can surprise or delight with these charming apple cookies.
FAQs
- Can I make the dough ahead of time? Absolutely! You can refrigerate the dough for up to 3 days or freeze it for up to 1 month. Just thaw and roll before cutting.
- How do I prevent royal icing from cracking? Make sure to use fresh egg whites or meringue powder and avoid adding too much water. Let the icing dry slowly at room temperature, and don’t refrigerate cookies while wet.
- What’s the best way to store decorated cookies? Store in an airtight container at room temperature with parchment paper between layers. Avoid stacking if icing hasn’t fully dried.
- Can I use powdered sugar glaze instead of royal icing? Yes! A simple glaze made from powdered sugar and apple juice or lemon juice works, but it won’t harden as firmly as royal icing.
- How do I get the bright red color in the icing without it tasting bitter? Use gel food coloring sparingly; a few drops go a long way. Adding a bit of lemon juice can balance any bitterness.
Pin This Recipe!
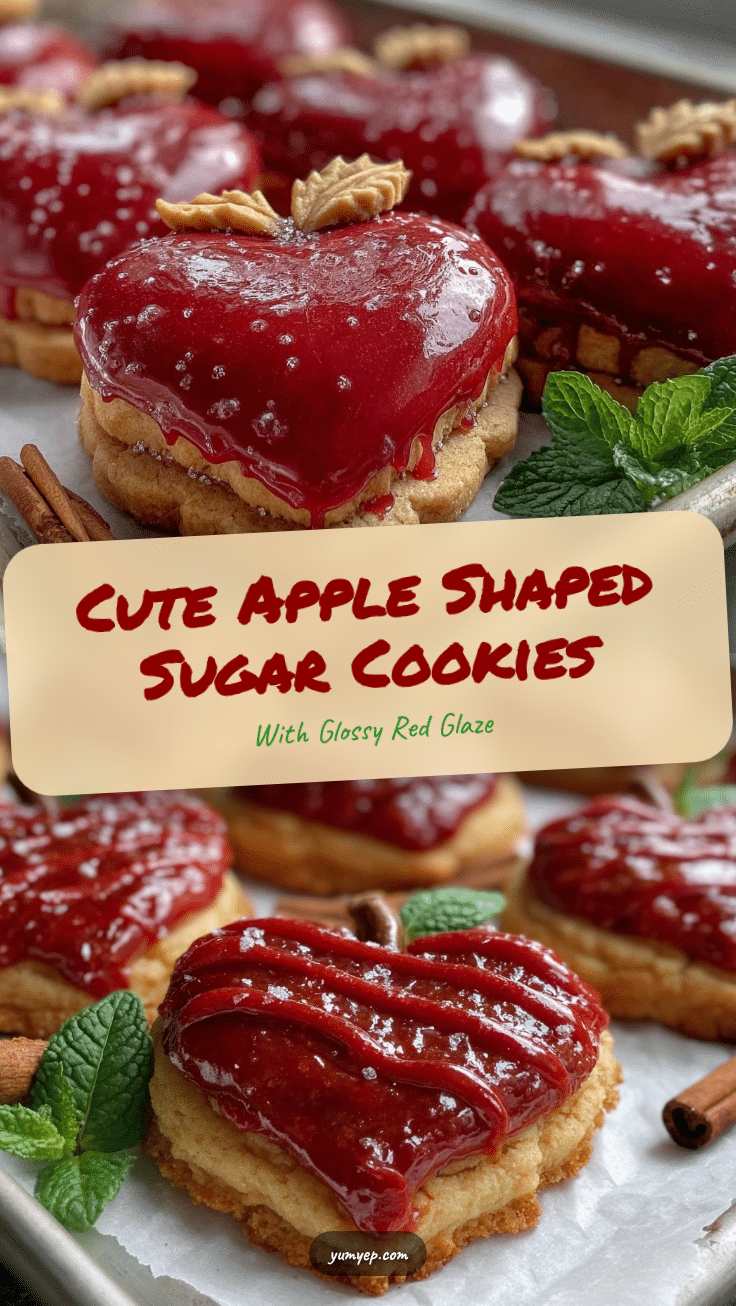
Perfect Apple Shaped Sugar Cookies Recipe Easy Homemade Red Royal Icing Glaze

These apple shaped sugar cookies feature a soft, buttery base topped with a smooth, glossy red royal icing glaze, perfect for fall gatherings, school snacks, or festive treats.
- Prep Time: 30 minutes plus chilling time
- Cook Time: 8-10 minutes
- Total Time: 1 hour 40 minutes to 2 hours (including chilling and icing set time)
- Yield: About 24 cookies (3-4 inch size) 1x
- Category: Dessert
- Cuisine: American
Ingredients
- 2 ¾ cups (345 g) all-purpose flour
- 1 teaspoon baking powder
- ½ teaspoon salt
- 1 cup (227 g) unsalted butter, softened
- 1 ¼ cups (250 g) granulated sugar
- 1 large egg
- 1 teaspoon pure vanilla extract
- 1 tablespoon (15 ml) milk
- 3 cups (360 g) powdered sugar, sifted
- 2 large egg whites (or 4 tablespoons meringue powder mixed with water)
- 1 tablespoon lemon juice (optional)
- A few drops red gel food coloring
- ½ teaspoon vanilla extract (optional)
Instructions
- Mix Dry Ingredients (5 minutes): In a medium bowl, whisk together the all-purpose flour, baking powder, and salt. Set aside.
- Cream Butter and Sugar (8 minutes): Using an electric mixer, beat the softened butter and granulated sugar on medium speed until light and fluffy, about 3-5 minutes.
- Add Wet Ingredients (3 minutes): Beat in the egg and vanilla extract until combined. Add the tablespoon of milk and mix until smooth.
- Combine Dry and Wet (2 minutes): Gradually add the flour mixture to the wet ingredients, mixing on low speed just until dough forms. Avoid overmixing.
- Chill the Dough (at least 1 hour): Wrap the dough in plastic wrap and refrigerate.
- Preheat Oven and Prepare Baking Sheets: Preheat oven to 350°F (175°C). Line baking sheets with parchment paper or silicone mats.
- Roll and Cut Cookies (10 minutes): Roll dough on a lightly floured surface to ¼ inch (6 mm) thickness. Use apple-shaped cookie cutter to cut shapes and place on baking sheets about 1 inch apart.
- Bake Cookies (8-10 minutes): Bake until edges start to turn golden but centers remain pale, about 8-10 minutes.
- Cool Completely: Cool on baking sheets for 5 minutes, then transfer to wire rack to cool fully before icing.
- Prepare Royal Icing Glaze (10 minutes): Whisk egg whites or meringue powder until frothy. Gradually add sifted powdered sugar until smooth and pipeable. Add lemon juice and vanilla if using. Stir in red gel food coloring until vibrant red.
- Decorate Cookies: Outline each cookie with piping bag fitted with small round tip. Flood inside with glaze using spoon or piping bag. Use toothpick to remove bubbles. Let icing set at room temperature for at least 4 hours or overnight.
Notes
Chill dough at least 1 hour to prevent spreading. Use room temperature butter for better creaming. Adjust royal icing consistency by adding water or powdered sugar as needed. Pop air bubbles in icing with a toothpick before it sets. Store cookies in airtight container with parchment paper between layers. Cookies freeze well up to 3 months.
Nutrition
- Serving Size: 1 cookie (approximat
- Calories: 160
- Sugar: 14
- Sodium: 90
- Fat: 7
- Saturated Fat: 4
- Carbohydrates: 20
- Fiber: 0.5
- Protein: 2
Keywords: apple shaped sugar cookies, royal icing glaze, fall cookies, homemade sugar cookies, easy sugar cookies, decorated cookies, holiday cookies