“You sure you brought enough?” my cousin asked while eyeing the giant bowl of banana pudding I was lugging through the backyard. Honestly, I wasn’t sure either. This recipe for creamy cookout banana pudding with Nilla wafers started out as a bit of a last-minute rescue during one of those chaotic family gatherings where everyone pitches in but somehow the dessert gets forgotten. I grabbed some bananas, pudding mix, and a box of Nilla wafers, thinking, “Well, let’s just see if this works.” Turns out, it wasn’t just a filler — it became the centerpiece.
There’s something about the cool, velvety pudding paired with those crunchy wafers that makes it feel like the ultimate Southern treat — but for a crowd. I remember sitting back on the porch swing, the sun dipping low, and hearing that familiar crunch of wafer and banana melded with creamy sweetness. It was a quiet moment of relief amid the noise, and honestly, the recipe stuck with me because it was that simple, comforting, and crowd-friendly.
Sure, you’ve probably seen banana pudding before, but this version is different. It’s not just about layering — it’s about layering with care, folding in whipped cream just so, and letting those flavors mingle overnight. And let me tell you, the way those Nilla wafers soak up some moisture but still keep a bit of their snap? That’s the magic that makes this creamy cookout banana pudding stand out every time. It’s the kind of recipe that friends ask you to bring again, and you find yourself making it multiple times a week because, well, sometimes you just want that kind of easy, delicious comfort without the fuss.
Why You’ll Love This Recipe
Having tested this creamy cookout banana pudding for years — from small family dinners to large backyard barbecues — I can say it holds up beautifully no matter the occasion. Here’s why you’ll want to keep this recipe in your back pocket:
- Quick & Easy: It comes together in under 30 minutes, making it perfect for busy weeknights or those last-minute cookout invites.
- Simple Ingredients: You don’t need a fancy grocery run — just basics like bananas, vanilla pudding mix, Nilla wafers, and a few pantry staples.
- Perfect for a Crowd: This recipe scales up effortlessly, so whether it’s a family reunion or neighborhood potluck, you’ll have enough to go around.
- Crowd-Pleaser: Kids and adults alike rave about the creamy texture and familiar flavors — it’s a guaranteed hit every time.
- Unbelievably Delicious: That balance of creamy pudding, fresh bananas, and slightly softened Nilla wafers is next-level comfort food you’ll want seconds of.
What sets this banana pudding apart from the rest? It’s the way the pudding is made creamy with real vanilla, then gently folded with whipped cream (not just whipped topping), giving it a light yet rich mouthfeel. Plus, the layering technique — alternating wafers and banana slices — ensures every spoonful has a perfect mix of textures. This isn’t just another banana pudding; it’s the kind that makes you close your eyes after the first bite and smile.
What Ingredients You Will Need
This creamy cookout banana pudding recipe uses simple, wholesome ingredients to deliver bold flavor and satisfying texture without the fuss. Most of these are pantry staples or easy to find, which makes assembling this dessert super straightforward.
- Vanilla pudding mix: Instant pudding is best for quick prep (I like Jell-O brand for consistent flavor).
- Whole milk: For richer pudding, though 2% works fine too.
- Heavy cream: Chilled, to whip into soft peaks adding lightness and volume.
- Granulated sugar: Just a touch to sweeten the whipped cream.
- Ripe bananas: Sliced thin — the star flavor and texture component. Look for firm bananas, not overly mushy.
- Nilla wafers: The classic choice for that slightly crunchy, vanilla-flavored base. You can swap for gluten-free wafers if needed.
- Vanilla extract: A splash to boost the pudding’s vanilla notes.
- Cream cheese (optional): For a tangy twist, some versions add softened cream cheese whisked into the pudding.
If you’re feeling adventurous, in summer swap the bananas for fresh berries or mix in some toasted pecans for crunch. For a dairy-free option, almond or oat milk works well, and you can use coconut whipped cream instead of heavy cream.
Equipment Needed
- Large mixing bowls — one for pudding, one for whipping cream.
- Electric mixer or stand mixer — to whip the heavy cream to soft peaks.
- Measuring cups and spoons — for accuracy.
- Spatula — for folding pudding and cream gently.
- Large trifle bowl or deep rectangular dish — to layer the pudding, bananas, and wafers.
If you don’t have an electric mixer, a sturdy whisk works too, but whipping cream by hand takes some muscle and patience. I recommend using glass or ceramic bowls over metal when whipping cream, as they keep it cooler longer, which helps achieve the best volume. If you want to keep things budget-friendly, any mixing bowl and a hand mixer work perfectly fine — no need for expensive gadgets here.
Preparation Method
- Prepare the pudding: In a large bowl, whisk together 2 (3.4-ounce / 96 g) boxes of instant vanilla pudding mix with 4 cups (960 ml) of cold whole milk until smooth and thickened (about 2 minutes). Set aside to chill for 5 minutes.
- Whip the cream: In a separate chilled bowl, beat 2 cups (480 ml) heavy cream with 2 tablespoons (25 g) granulated sugar and 1 teaspoon (5 ml) vanilla extract until soft peaks form (takes about 3-4 minutes with an electric mixer).
- Combine pudding and cream: Gently fold the whipped cream into the pudding mixture using a spatula. This adds lightness to the creamy base — don’t overmix or you’ll lose volume.
- Slice the bananas: Peel and slice 6 ripe bananas into thin rounds, about 1/4 inch (0.6 cm) thick. Keep them from browning by layering immediately.
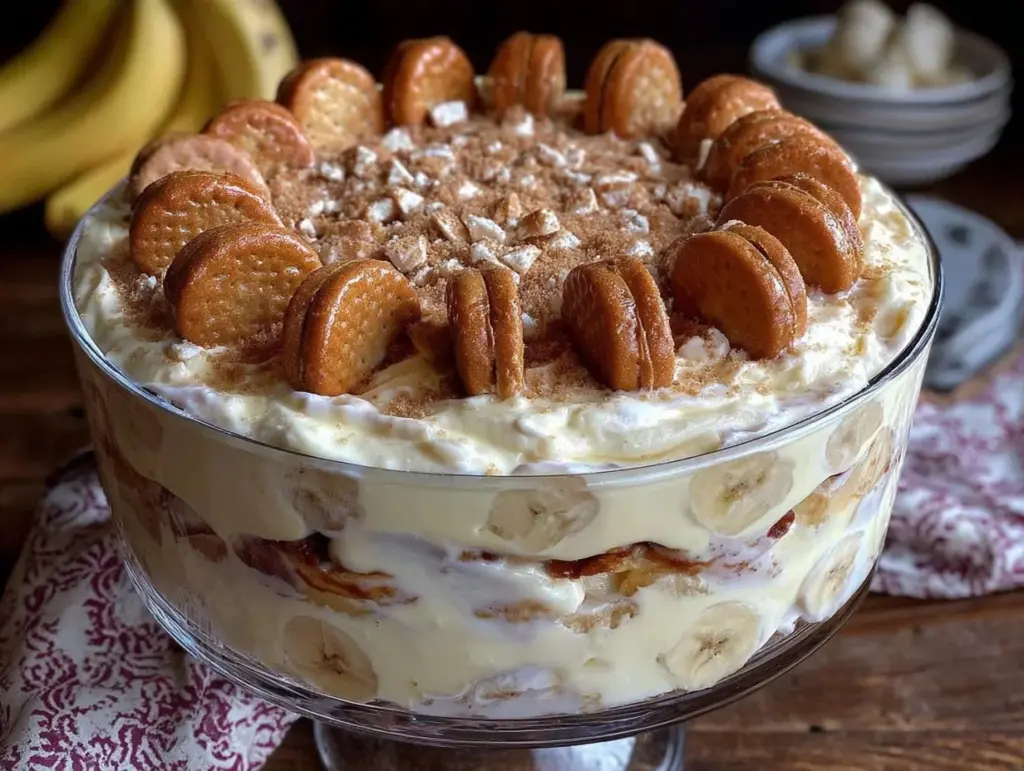
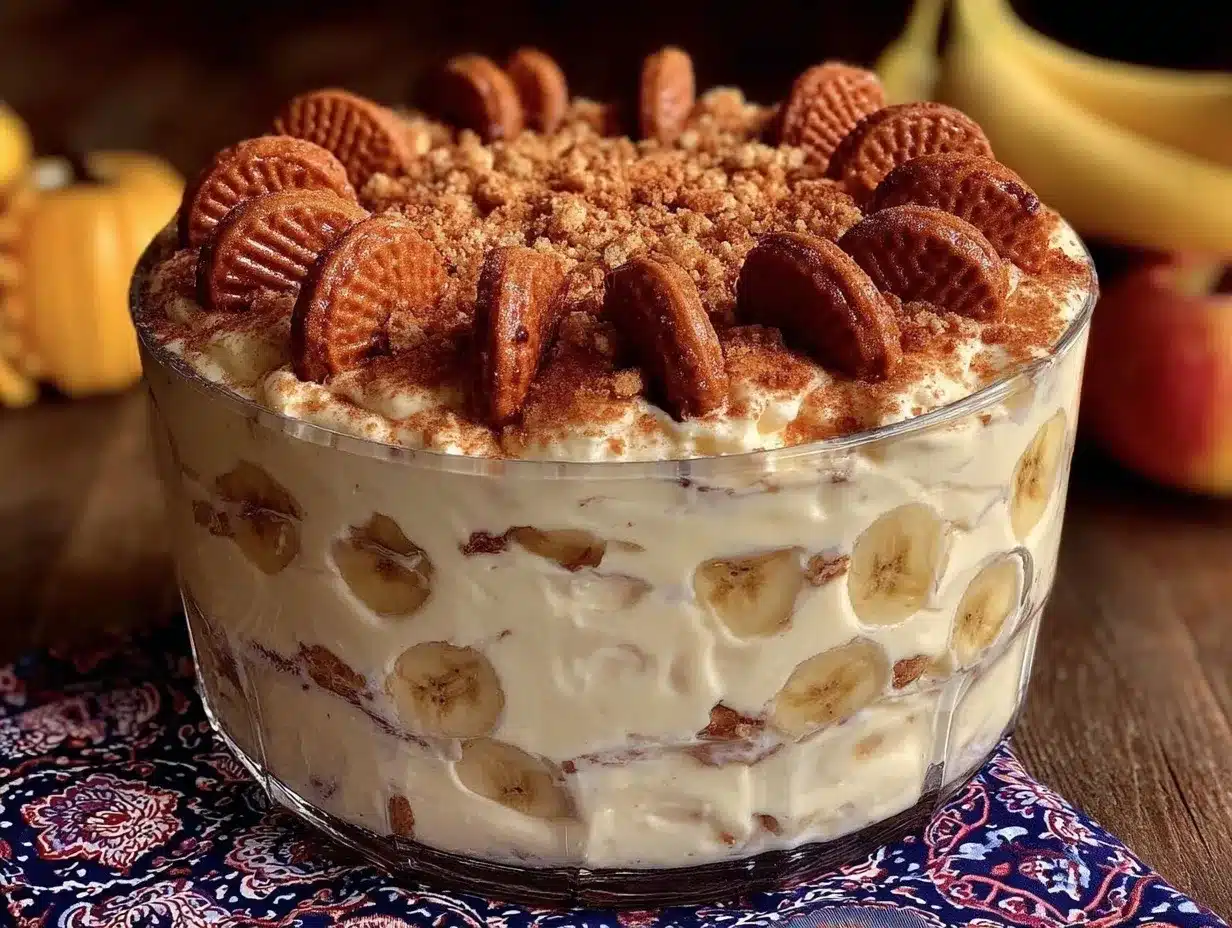
- Layer the pudding: In your serving dish, start with a layer of Nilla wafers (about 1 cup / 125 g), then add a layer of banana slices, followed by a generous layer of the pudding mixture. Repeat these layers until you use all ingredients, finishing with pudding on top.
- Chill overnight: Cover the dish tightly with plastic wrap and refrigerate for at least 6 hours or overnight. This resting time lets the wafers soften slightly without losing all their crunch and the flavors meld beautifully.
- Serve: Just before serving, top with a few extra Nilla wafers or whipped cream dollops for presentation.
Tip: If your bananas brown too fast during prep, lightly toss them in fresh lemon juice to keep that bright yellow color. Also, keep your pudding and whipped cream cold to maintain texture and avoid any watery separation.
Cooking Tips & Techniques
Making creamy cookout banana pudding isn’t rocket science, but a few tricks really make a difference:
- Whip cream just right: Stop whipping as soon as soft peaks form. Overwhipping leads to a buttery texture that’s not great for folding.
- Folding technique: Use a gentle folding motion rather than stirring vigorously. This keeps the pudding airy and light.
- Layering matters: Make sure to evenly distribute bananas and wafers — uneven layers can cause sogginess in some spots.
- Rest time: Don’t skip chilling overnight. It’s the secret to getting that perfect pudding texture and flavor meld.
- Banana selection: Use bananas that are ripe but firm; too mushy and the texture suffers.
I remember the first time I didn’t chill it long enough — the wafers went completely mushy, and the pudding lost its structure. Since then, I always make it a day ahead. Also, if you want a sturdier pudding, try adding a bit of softened cream cheese to the mix — it’s a trick I picked up from a dear friend and it adds a subtle tang.
Variations & Adaptations
You can easily tweak this creamy cookout banana pudding to suit your taste or dietary needs:
- Gluten-free version: Swap Nilla wafers for gluten-free vanilla cookies or homemade almond flour crackers.
- Nutty twist: Add a layer of chopped pecans or crispy candied pecans for extra texture and flavor.
- Berry banana pudding: Mix in fresh raspberries or sliced strawberries for a fruity contrast that brightens the classic flavor.
- Dairy-free option: Use coconut milk pudding mix and coconut whipped cream to keep it creamy without dairy.
- Chocolate banana pudding: Add a layer of chocolate pudding or sprinkle shaved chocolate over the top for a decadent twist.
One variation I personally enjoy is swapping half the bananas with sliced peaches in summer — it adds a juicy sweetness that complements the creamy pudding perfectly. Also, if you’re familiar with our cranberry orange bread, you’ll appreciate how fresh fruit changes up baked goods and desserts alike.
Serving & Storage Suggestions
This creamy cookout banana pudding is best served chilled, straight from the fridge. You can garnish with extra Nilla wafers or a dollop of fresh whipped cream for added flair. It pairs wonderfully with a light iced tea or fresh lemonade to balance the sweetness.
For storage, cover tightly and refrigerate. It keeps well for up to 3 days, though I recommend eating it sooner rather than later to enjoy the wafers at their best texture. If you need to prep in advance, the pudding will hold flavor and creaminess but the wafers will soften more as time passes.
Reheating isn’t really necessary here — this dessert is meant to be cold and refreshing. However, if you want to serve it at room temperature, just take it out of the fridge 15 minutes before serving. The flavors actually deepen as it rests, making each bite more flavorful.
Nutritional Information & Benefits
Per serving (assuming 12 servings): approximately 250 calories, 9g fat, 38g carbohydrates, 3g protein.
Bananas add natural sweetness and provide potassium and vitamin C, while the pudding base offers calcium and some protein. Using whole milk and heavy cream contributes to the creamy texture and richness, but you can lighten the recipe by using low-fat milk or whipped topping alternatives.
If you’re watching gluten or dairy, you can adapt the recipe with gluten-free cookies and dairy-free milk or cream substitutes. This recipe is free from nuts unless you add them as a variation, making it friendly for many allergen-sensitive eaters.
Conclusion
This creamy cookout banana pudding with Nilla wafers has become my go-to for feeding a crowd when I want something fuss-free but unforgettable. It’s a dessert that feels homemade and special without hours in the kitchen. Plus, it’s a recipe that invites you to make it your own — whether that’s adding nuts, swapping fruits, or trying that cream cheese twist.
Honestly, I love this recipe because it’s the kind of dish that brings people together, sparks conversation, and leaves everyone with a sweet, satisfied smile. If you give it a try, I’d love to hear how you customize it or what memories it brings up for you. After all, good food is all about sharing moments and stories.
FAQs about Creamy Cookout Banana Pudding
Can I make banana pudding ahead of time?
Yes! In fact, it’s best to prepare it at least 6 hours or overnight so the flavors meld and wafers soften just right.
What if I want to make it gluten-free?
Simply swap the Nilla wafers for gluten-free vanilla cookies or a similar substitute. The pudding and bananas remain naturally gluten-free.
How do I keep bananas from browning?
Lightly toss banana slices with a bit of lemon juice before layering. This slows oxidation and keeps the fruit looking fresh.
Can I use homemade pudding instead of instant mix?
Absolutely! You can make a cooked vanilla pudding, but note it takes longer to prepare and may change the texture slightly.
What’s the best way to serve banana pudding for a crowd?
Use a large trifle bowl or deep dish for easy layering and serving. Provide spoons and encourage guests to dig in straight from the dish for that classic experience.
Pin This Recipe!
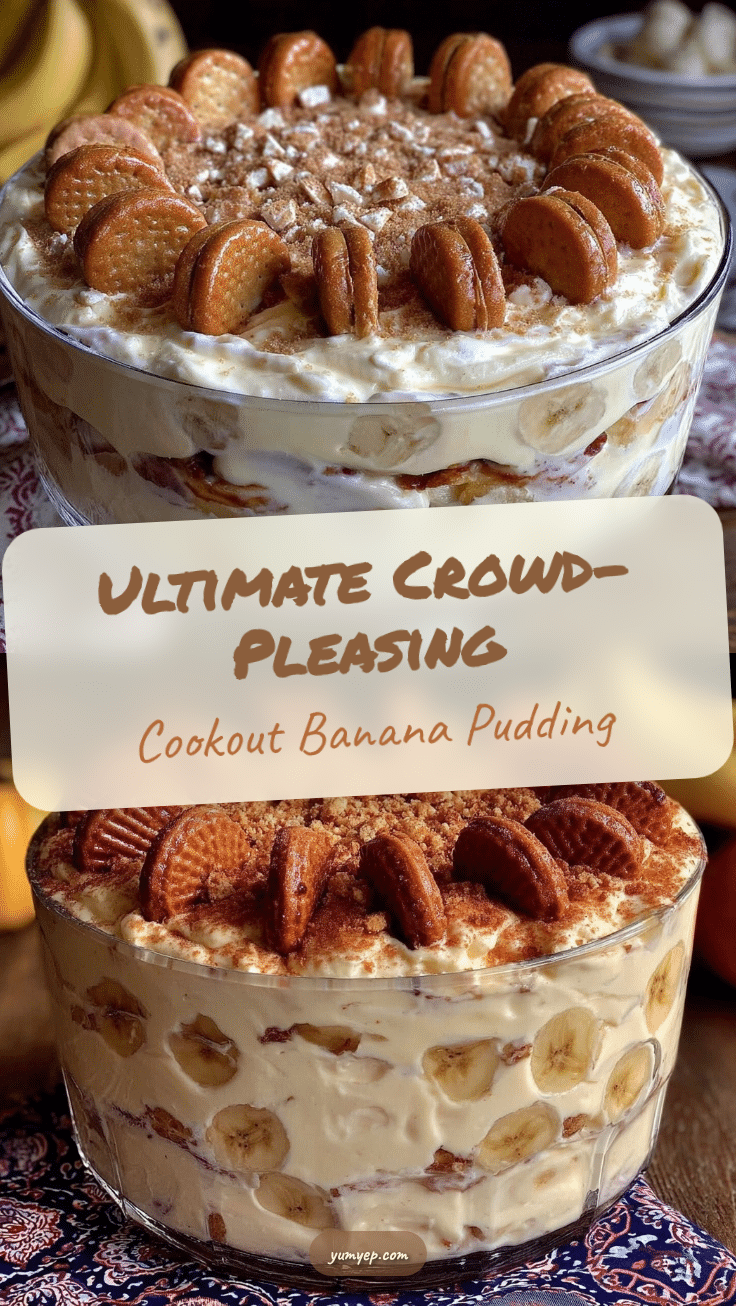
Creamy Cookout Banana Pudding Recipe with Nilla Wafers Perfect for a Crowd

A creamy, crowd-pleasing banana pudding layered with Nilla wafers and whipped cream, perfect for cookouts and family gatherings. This recipe is easy to make, uses simple ingredients, and is best chilled overnight for the perfect texture.
- Prep Time: 15 minutes
- Cook Time: 0 minutes
- Total Time: 6 hours 15 minutes
- Yield: 12 servings 1x
- Category: Dessert
- Cuisine: Southern American
Ingredients
- 2 (3.4-ounce / 96 g) boxes instant vanilla pudding mix
- 4 cups (960 ml) cold whole milk
- 2 cups (480 ml) heavy cream, chilled
- 2 tablespoons (25 g) granulated sugar
- 1 teaspoon (5 ml) vanilla extract
- 6 ripe bananas, peeled and sliced thin (about 1/4 inch thick)
- 1 cup (125 g) Nilla wafers
- Optional: softened cream cheese for tangy twist
Instructions
- In a large bowl, whisk together the instant vanilla pudding mix with cold whole milk until smooth and thickened, about 2 minutes. Set aside to chill for 5 minutes.
- In a separate chilled bowl, beat heavy cream with granulated sugar and vanilla extract until soft peaks form, about 3-4 minutes with an electric mixer.
- Gently fold the whipped cream into the pudding mixture using a spatula, being careful not to overmix.
- Peel and slice bananas into thin rounds, about 1/4 inch thick. To prevent browning, toss slices lightly with lemon juice if desired.
- In a large trifle bowl or deep dish, layer Nilla wafers, banana slices, and pudding mixture. Repeat layers until all ingredients are used, finishing with pudding on top.
- Cover the dish tightly with plastic wrap and refrigerate for at least 6 hours or overnight to allow flavors to meld and wafers to soften slightly.
- Before serving, garnish with extra Nilla wafers or whipped cream dollops if desired.
Notes
Whip cream to soft peaks only to avoid buttery texture. Use ripe but firm bananas to maintain texture. Chill pudding overnight for best flavor and texture. Toss banana slices with lemon juice to prevent browning. For a tangy twist, add softened cream cheese to pudding. Gluten-free and dairy-free variations are possible by swapping ingredients.
Nutrition
- Serving Size: 1 serving (approx. 1
- Calories: 250
- Fat: 9
- Carbohydrates: 38
- Protein: 3
Keywords: banana pudding, Nilla wafers, creamy dessert, cookout dessert, crowd-pleaser, easy banana pudding, layered pudding


