“You just brought this?” my friend said, eyeing the colorful spread on the picnic table with a mix of surprise and delight. That afternoon, I hadn’t planned anything fancy—just wanted to toss together some snacks before we all got too hungry waiting for the barbecue. Honestly, I was a bit skeptical when I grabbed random fruits and cheeses from the fridge, thinking it might look a little thrown together. But as the sun warmed the wood table and the laughter picked up, that fresh vibrant fruit and cheese summer board quickly became the centerpiece of the afternoon.
There’s something about the way those juicy berries glisten next to creamy cheese cubes that feels effortlessly festive. I remember the tang of the goat cheese paired with honey-drizzled figs, the crunch of toasted nuts scattered here and there, and the burst of citrus from slices of ripe peaches. It wasn’t planned or perfected—more like a happy accident that turned out to be exactly what we needed on that lazy summer day. Since then, I’ve made this board several times a week, tweaking it a bit but always sticking to that vibrant, fresh feeling it gives off.
What stuck with me is how simple it is to put together yet feels special enough for guests or just a quiet moment on the porch. No stress, no oven, just fresh ingredients that speak for themselves. This fresh vibrant fruit and cheese summer board is the kind of recipe that brings people together and invites conversation without any pressure—just good food and good company. It’s a quiet promise of summer’s best flavors, easy to share and impossible to ignore.
Why You’ll Love This Recipe
This fresh vibrant fruit and cheese summer board is more than just a pretty platter—it’s a go-to that I’ve tested thoroughly for fuss-free entertaining and flavor balance. Here’s why it holds a special spot in my kitchen repertoire:
- Quick & Easy: Comes together in under 15 minutes, perfect for last-minute get-togethers or casual snacking.
- Simple Ingredients: No fancy shopping needed; many components are pantry staples or easily found at your local market.
- Perfect for Any Occasion: Great for summer picnics, brunch gatherings, or even a light dinner on a warm evening.
- Crowd-Pleaser: The mix of sweet, savory, creamy, and crunchy textures always gets raves from kids and adults alike.
- Unbelievably Delicious: The way fresh fruit pairs with artisanal cheeses creates a flavor combo that feels both indulgent and refreshing.
What sets this board apart from other fruit and cheese platters? For one, I like to add a touch of honey or a sprinkle of cracked black pepper to the cheese—a small detail that makes a big difference. Plus, combining seasonal fruits with a variety of textures keeps the board lively and appealing. It’s not just about piling fruit and cheese on a plate; it’s about creating a sensory experience that invites you to slow down and savor each bite.
Honestly, every time I make this board, I find myself closing my eyes just a little longer after the first bite. It’s that kind of comfort food that doesn’t feel heavy but leaves you feeling satisfied and a bit spoiled. Whether you’re hosting friends or looking for a refreshing snack for yourself, this board quietly promises a moment of joy and connection.
What Ingredients You Will Need
This recipe uses simple, wholesome ingredients to deliver bold flavor and satisfying texture without the fuss. Most are pantry staples or fresh market finds, and you can easily swap in alternatives depending on what’s in season or what you have on hand.
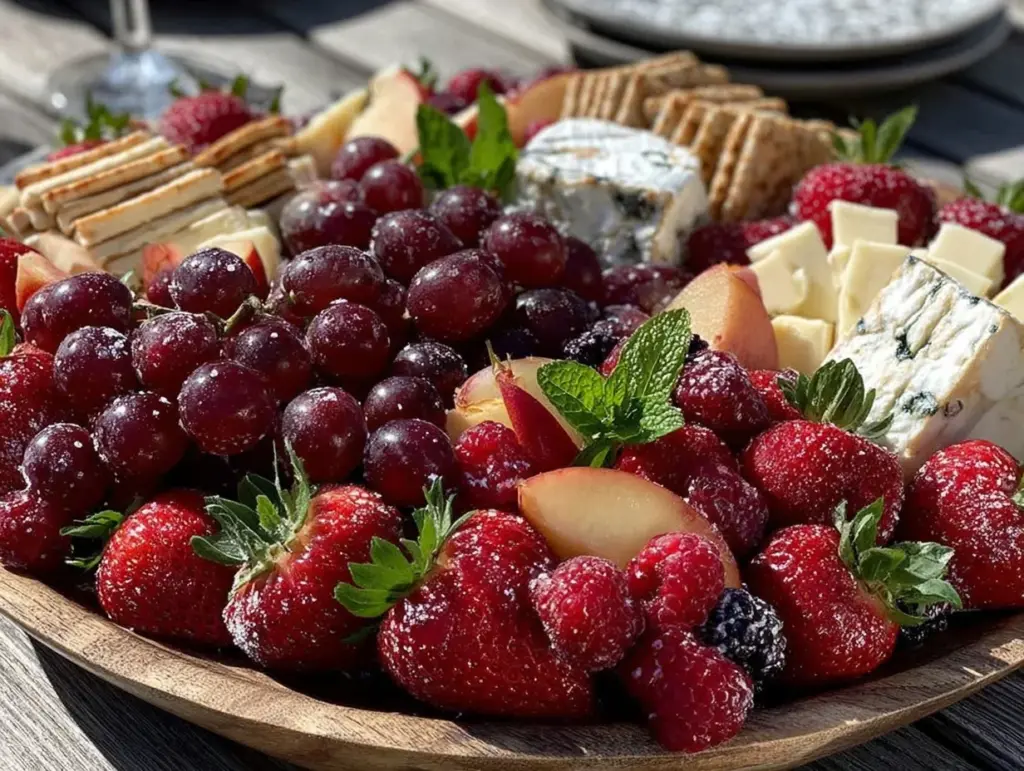
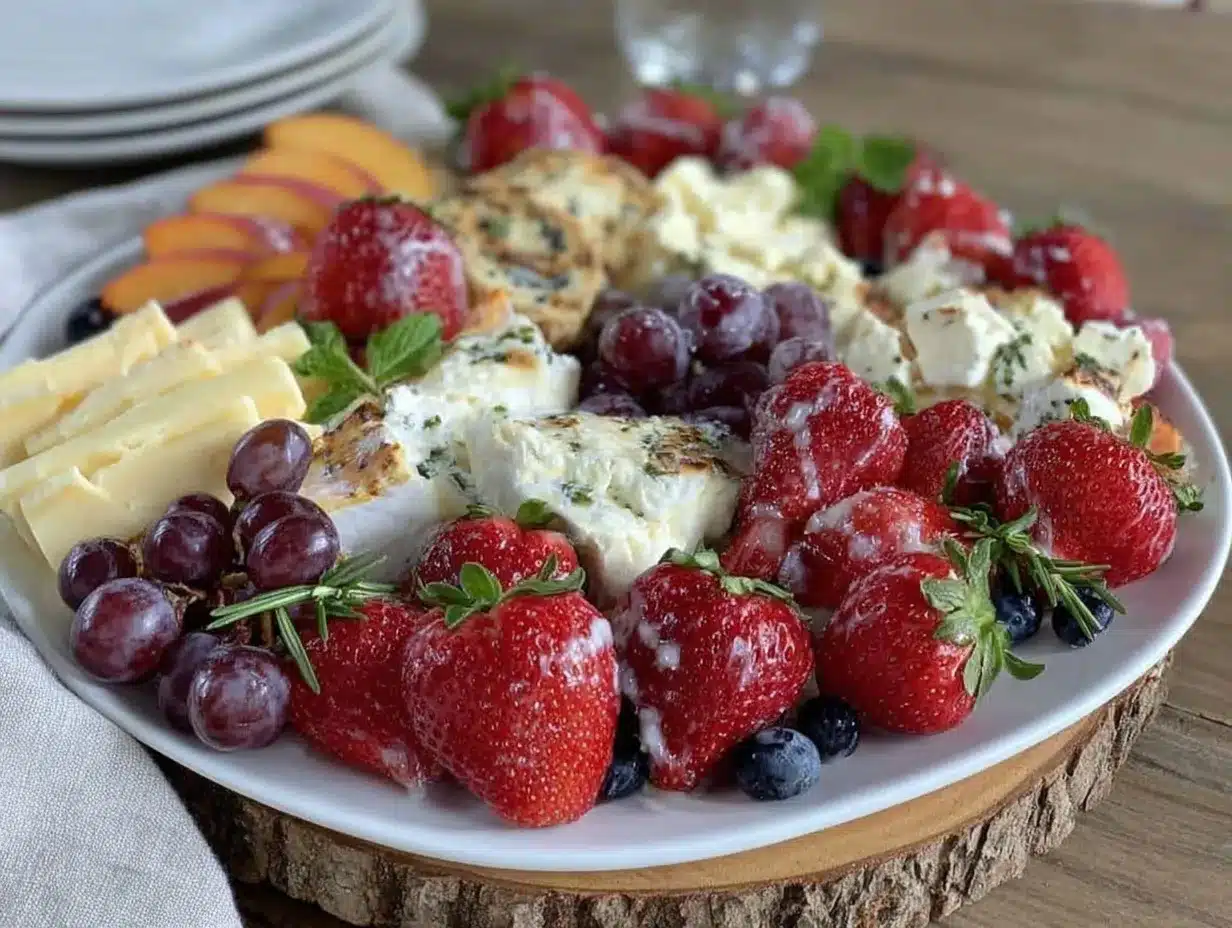
- Fresh Fruits: A mix of vibrant colors and flavors works best—think strawberries (hulled and halved), blueberries, green and red grapes (washed and stemmed), ripe peaches or nectarines (sliced), fresh figs (quartered), and maybe some juicy cherries or apricots if you can find them.
- Cheeses: Variety is key here. I recommend a creamy goat cheese (for tang), aged cheddar (for sharpness), and a soft brie or camembert (for richness). If you prefer something milder, mozzarella balls or fresh ricotta work beautifully too.
- Nuts and Seeds: Toasted almonds, candied pecans (try this crispy candied pecans recipe for a sweet crunch), or walnuts add texture and depth.
- Honey or Maple Syrup: For drizzling—adds a natural sweetness that contrasts nicely with savory cheese.
- Fresh Herbs: A few sprigs of fresh mint or basil brighten the whole board and add a subtle aroma.
- Crackers or Bread: Thin crackers, water biscuits, or slices of baguette to accompany the cheeses and fruit.
- Optional Extras: Olives, dried apricots, or a small bowl of fig jam for more complexity.
For best results, pick firm, ripe fruits that aren’t too soft (no one wants mushy grapes on their board). When choosing cheeses, I like brands like Cabot for cheddar or a local creamery’s goat cheese for freshness. If you want a gluten-free option, swap crackers for nuts or crisp apple slices. You can also replace honey with agave syrup if you want to keep it vegan-friendly.
Equipment Needed
- Serving Board or Platter: A large wooden cutting board or a flat serving platter works great. I personally prefer a rustic wood board for that casual summer vibe.
- Small Bowls: For nuts, olives, or jams to keep things tidy and easy to grab.
- Cheese Knife and Paring Knife: A sharp cheese knife for soft cheeses, and a smaller paring knife for slicing fruit precisely.
- Small Spoon or Honey Drizzler: For adding honey or syrup elegantly.
- Optional: Tongs or toothpicks if you want to offer guests a no-mess way to pick items.
If you don’t have a fancy cheese knife, a regular sharp kitchen knife works fine—just be careful with soft cheeses. I’ve found that investing in a good wooden board pays off since it’s sturdy and adds warmth to presentation. Plus, it’s easy to clean with just a quick wipe and occasional oiling with food-grade mineral oil.
Preparation Method
- Wash and Prep the Fruits (10 minutes): Rinse all fruits thoroughly under cold water. Hull and halve strawberries, stem grapes, slice peaches or nectarines thinly, and quarter figs if using. Dry gently with paper towels to avoid sogginess.
- Slice the Cheeses (5 minutes): Cut the cheddar into bite-size cubes or thin slices. For the goat cheese, you can leave it in a log or crumble it gently. Soft cheeses like brie should be sliced into wedges for easy serving.
- Toast Nuts (optional, 5 minutes): If using raw nuts, toast them lightly in a dry skillet over medium heat until fragrant and golden, stirring frequently. Let cool before adding to the board.
- Arrange the Board (10 minutes): Start by placing cheeses spaced evenly across the board. Fill in around them with clusters of fruit, small bowls of nuts or jams, and crackers or bread slices. Aim for a mix of colors and textures close to each other to make the board visually inviting.
- Finish with Garnishes (2 minutes): Drizzle honey or maple syrup over cheeses and fruit where it feels right. Scatter fresh mint or basil leaves for a pop of green and a fresh scent.
A quick note: keep soft cheeses refrigerated until just before serving to maintain their texture. When slicing fruit, try to keep pieces similar in size so everything feels balanced. If you’re short on time, pre-sliced fruit from the market works too, but fresh is always best for flavor.
Cooking Tips & Techniques
Even though this board is more assembling than cooking, a few tricks can really make a difference. First, always taste your cheeses and fruits together before plating. I’ve learned the hard way that some combos clash—like overly ripe fruit with strong blue cheese—so adjusting your pairings on the fly is smart.
Another tip: let your cheeses sit out at room temperature for about 20 minutes before serving. It’s a small step that helps unlock their full flavor and creamy texture.
When toasting nuts, watch them closely—they go from perfectly toasted to burnt in seconds. I’ve scorched a batch or two and trust me, it kills the board’s vibe.
Lastly, balance is key. Don’t overcrowd the board; leave little gaps and groupings so guests can easily pick what they want. This also leaves room for adding last-minute extras like olives or a small bowl of dip.
Variations & Adaptations
The beauty of this fruit and cheese board is how flexible it is. Here are a few tweaks I’ve tried that add something new:
- Seasonal Spin: In autumn, swap the summer fruits for crisp apples, pears, and dried cranberries. Add a sprinkle of cinnamon to the nuts for warmth.
- Dietary Adjustments: For a vegan version, use plant-based cheese alternatives and swap honey for maple syrup or agave nectar.
- Flavor Twists: Add a spicy kick by including peppery arugula, pickled jalapeños, or a smear of harissa on the bread slices.
- Cooking Method: Try grilling some peach halves or figs before adding them to the board for a smoky layer of flavor.
One personal favorite variation is adding a bowl of marinated olives and some crunchy, herbed pita chips. It gives the board a Mediterranean vibe that guests love.
Serving & Storage Suggestions
This board is best served at room temperature so all the flavors shine through. I usually bring the cheeses out about 20 minutes before guests arrive and keep the fruit chilled until just before plating. Presentation-wise, layering the colors and shapes so they look abundant but accessible is key.
Pair this board with a crisp white wine or sparkling water with fresh lemon slices for a refreshing summer combo. It also makes a perfect starter before a grilled dinner or alongside light sandwiches, like those featured in my creamy lemon chicken piccata recipe.
Leftovers? Wrap cheeses tightly in parchment and store in the fridge. Fruits like grapes and berries keep well in airtight containers for a day or two but avoid mixing them with softer fruits that bruise easily. Reheat any toasted nuts briefly in a warm oven to bring back their crunch if needed.
Nutritional Information & Benefits
This fresh vibrant fruit and cheese summer board offers a balanced mix of protein, healthy fats, fiber, and vitamins. Fresh fruits bring antioxidants, vitamin C, and natural hydration, while cheeses provide calcium and protein for satiety.
Depending on your cheese choices and portions, this board can fit various dietary needs. Opt for gluten-free crackers or substitute with extra fruit slices for a gluten-free treat. Using nuts adds heart-healthy fats and a satisfying crunch.
From a wellness angle, this board is a reminder that eating well doesn’t have to be complicated. It encourages mindful snacking with fresh ingredients that nourish and delight.
Conclusion
This fresh vibrant fruit and cheese summer board is a simple recipe that delivers big on flavor and style without the fuss. It’s perfect for those moments when you want to impress without stress or just treat yourself to something fresh and colorful. I love how it brings together the best of summer’s bounty in a way that feels both casual and a little special.
Feel free to customize with your favorite fruits, cheeses, and extras—make it your own signature board. And if you’ve ever tried stacking cheeses and fruits before, you know how fun it is to experiment with pairings and textures. I’d love to hear what combinations you come up with!
Whether you’re planning a picnic or a no-fuss appetizer for friends, this board quietly promises to brighten your table and your day.
FAQs About the Fresh Vibrant Fruit and Cheese Summer Board
What fruits work best on a summer cheese board?
Choose fresh, firm fruits like strawberries, grapes, peaches, blueberries, and figs. Seasonal berries and stone fruits usually shine, but avoid overly soft fruits that bruise easily.
Can I prepare the board ahead of time?
You can prep and slice ingredients a few hours in advance, but assemble the board just before serving to keep fruits fresh and cheeses at their best texture.
How do I keep the cheese from drying out?
Store cheeses wrapped in parchment or wax paper in the fridge and bring them out about 20 minutes before serving to let them soften and develop flavor.
What if I have guests with nut allergies?
Simply leave out nuts and replace them with extra fruits, crunchy veggies, or gluten-free crackers to keep the texture interesting.
Are there any good drink pairings for this board?
Light white wines, sparkling rosé, or even iced herbal teas complement the fresh fruit and creamy cheeses beautifully without overpowering the flavors.
Pin This Recipe!
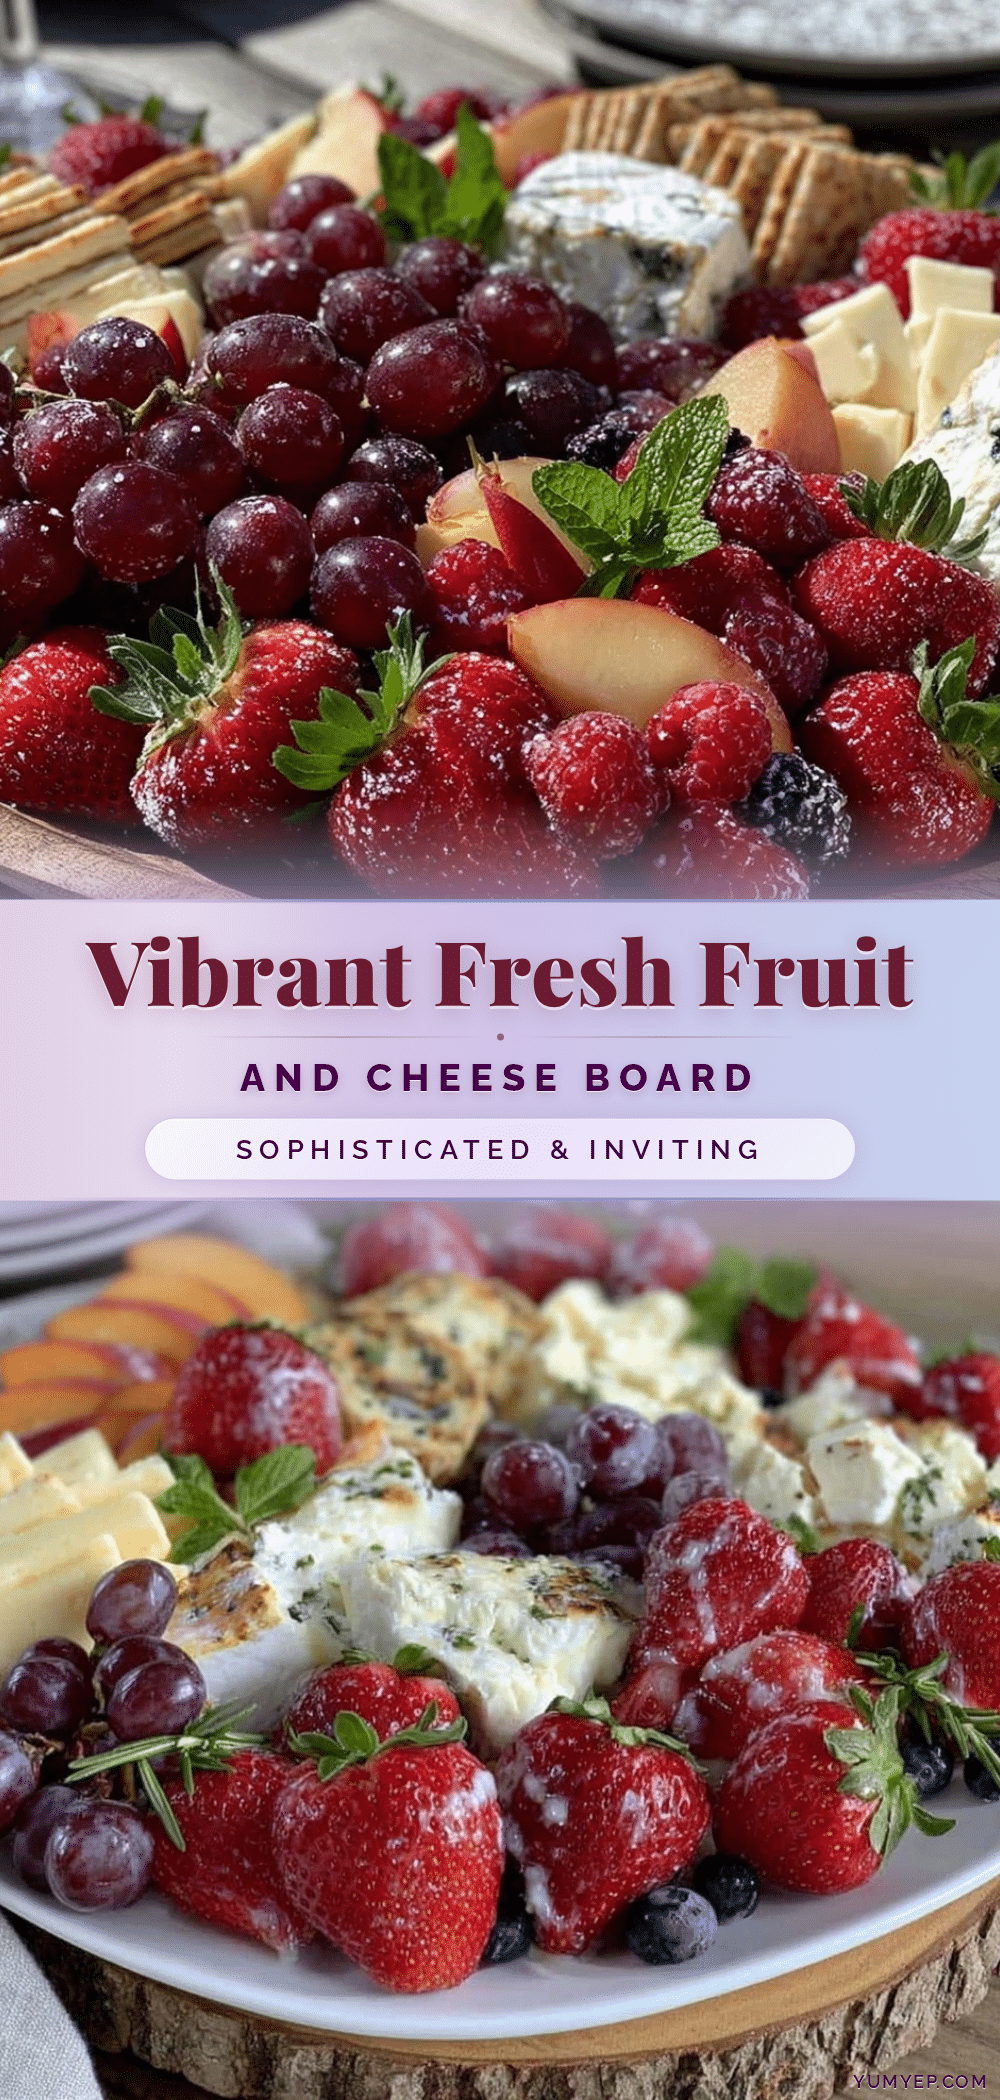
Fresh Vibrant Fruit and Cheese Summer Board

A quick and easy summer board featuring a colorful mix of fresh fruits, artisanal cheeses, nuts, and complementary accompaniments, perfect for casual entertaining or a light snack.
- Prep Time: 15 minutes
- Cook Time: 5 minutes (optional for toasting nuts)
- Total Time: 20 minutes
- Yield: 4 servings
- Category: Appetizer
- Cuisine: American
Ingredients
- Strawberries, hulled and halved
- Blueberries
- Green and red grapes, washed and stemmed
- Ripe peaches or nectarines, sliced
- Fresh figs, quartered
- Cherries or apricots (optional)
- Creamy goat cheese
- Aged cheddar cheese
- Soft brie or camembert cheese
- Mozzarella balls or fresh ricotta (optional)
- Toasted almonds
- Candied pecans
- Walnuts
- Honey or maple syrup for drizzling
- Fresh mint or basil sprigs
- Thin crackers, water biscuits, or baguette slices
- Olives (optional)
- Dried apricots (optional)
- Fig jam (optional)
Instructions
- Wash and prep the fruits: rinse thoroughly, hull and halve strawberries, stem grapes, slice peaches or nectarines thinly, quarter figs if using, and dry gently with paper towels.
- Slice the cheeses: cut cheddar into bite-size cubes or thin slices, crumble or leave goat cheese in a log, and slice soft cheeses like brie into wedges.
- Toast nuts (optional): lightly toast raw nuts in a dry skillet over medium heat until fragrant and golden, stirring frequently. Let cool.
- Arrange the board: place cheeses spaced evenly across the board, fill in with clusters of fruit, small bowls of nuts or jams, and crackers or bread slices, mixing colors and textures.
- Finish with garnishes: drizzle honey or maple syrup over cheeses and fruit, and scatter fresh mint or basil leaves.
Notes
Keep soft cheeses refrigerated until just before serving to maintain texture. Let cheeses sit at room temperature for about 20 minutes before serving to enhance flavor. Toast nuts carefully to avoid burning. Balance the board with colors and textures, and leave space for easy picking. For gluten-free options, substitute crackers with nuts or crisp apple slices. For vegan versions, use plant-based cheeses and replace honey with maple syrup or agave nectar.
Nutrition
- Serving Size: Approximately 1/4 of
- Calories: 300
- Sugar: 14
- Sodium: 250
- Fat: 20
- Saturated Fat: 8
- Carbohydrates: 18
- Fiber: 3
- Protein: 8
Keywords: fruit and cheese board, summer appetizer, easy entertaining, picnic snacks, fresh fruit platter, cheese platter, no-cook recipe


