For a while, I just accepted that lion mane cakes—those whimsical, spiky creations that look like they belong in a fairy tale—weren’t going to taste like anything more than a sugar rush. Sure, they were beautiful, but the flavor? Meh. I remember watching a friend attempt one once, and the frosting was so sweet it made your teeth ache, and the cake itself felt dry, like it had been baked for too long just to hold up the decoration. There was a gap between the look and the taste that I couldn’t ignore, especially since I’m the kind of baker who likes to nibble on the edges while decorating.
One afternoon, while fiddling with a batch of buttercream for a simple holiday dessert, I paused and thought: why not try something a little different? Something that looks intricate but tastes balanced—where the cake is moist and tender, and the buttercream rosettes are rich without being cloying. I wasn’t chasing perfection, just a quietly satisfying cake that felt as good on the palate as it looked on the table.
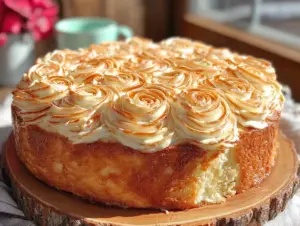
The “Perfect Golden Lion Mane Cake with Buttercream Rosettes” came from those quiet kitchen experiments—the kind where you adjust sugar a pinch at a time and watch frosting peaks hold their shape just right. It’s not a flashy breakthrough, but it’s the kind of cake that’s stuck with me because it feels honest. The golden hue isn’t just for show; it hints at toasted butter and vanilla warmth in every bite. The rosettes? Soft and silky, with just enough structure to keep their lion mane character without being stiff or fake.
Honestly, this cake is for those moments when you want something special but not fussy, and you want the taste to match the look. It’s a quiet sort of joy that’s hard to explain but easy to appreciate once you’ve had a slice.
Why You’ll Love This Recipe
There’s something about the “Perfect Golden Lion Mane Cake with Buttercream Rosettes” that just clicks in the kitchen. This isn’t your average frosted cake—it’s a blend of simple ingredients and a frosting technique that makes every bite memorable. Here’s what makes it stand apart:
- Quick & Easy: The cake comes together in about an hour, including baking and cooling, making it doable even on a busy afternoon.
- Simple Ingredients: You don’t have to hunt down anything fancy. Basic pantry staples like unsalted butter, eggs, and vanilla extract do the heavy lifting here.
- Perfect for Celebrations: Whether it’s a birthday, a cozy tea party, or a weekend treat, this cake looks impressive but stays friendly to any occasion.
- Crowd-Pleaser: I’ve served this to kids and adults alike, and the rosettes always get a few admiring glances before they vanish.
- Unbelievably Delicious: The butter-to-vanilla ratio in the cake creates a golden crumb that’s moist and tender, while the buttercream rosettes add that silky smooth texture without being overly sweet.
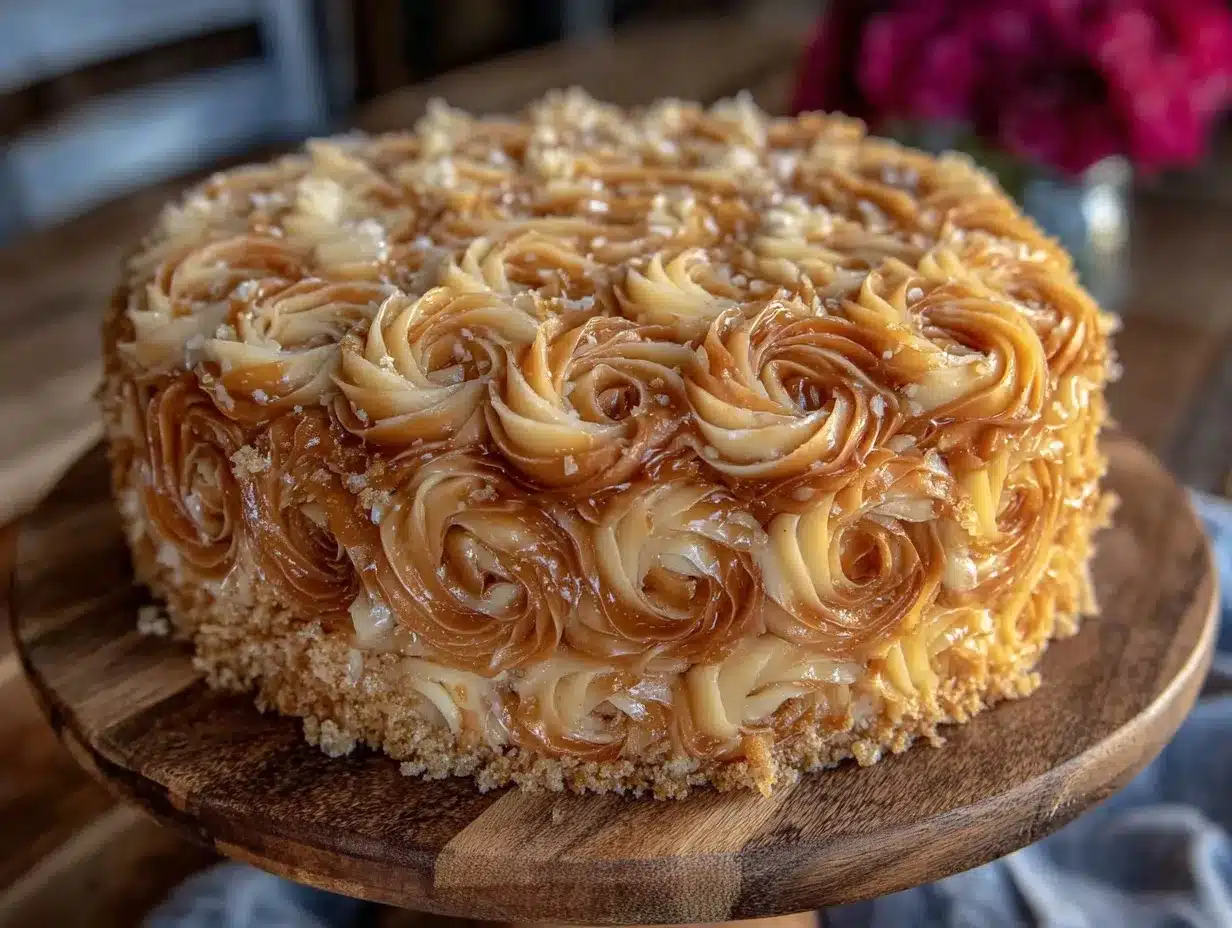
What’s different here? It’s the way the buttercream is whipped and stabilized just enough to hold those rosettes without feeling heavy or grainy. Plus, the cake uses browned butter for that golden color and a subtle nutty flavor that’s a little unexpected but very welcome. This recipe is my take on a classic lion mane cake that doesn’t just look good on the table but feels right when you bite into it.
It’s the kind of cake that makes you pause, close your eyes, and appreciate the simple joy of good baking with a touch of artistry. If you’ve ever tried decorating with buttercream and felt like your rosettes flopped or your cake was too dry, this recipe is a quiet promise that it doesn’t have to be that way.
What Ingredients You Will Need
This recipe uses simple, wholesome ingredients to deliver a bold flavor and satisfying texture without any fuss. Most of these are pantry staples, and substitutions are easy if you have dietary needs or preferences.
- For the Cake:
- 1 cup (227g) unsalted butter, browned and cooled slightly (this adds a nutty richness and golden color)
- 1 ½ cups (300g) granulated sugar
- 4 large eggs, room temperature (helps with fluffiness and structure)
- 2 ½ cups (312g) all-purpose flour (King Arthur is my go-to for consistent texture)
- 1 tbsp baking powder (for that nice lift)
- ½ tsp salt
- 1 cup (240ml) whole milk, warmed (you can swap for almond milk if needed)
- 2 tsp pure vanilla extract (quality matters here—it’s the flavor backbone)
- For the Buttercream Rosettes:
- 1 ½ cups (340g) unsalted butter, softened (not melted—softened to room temp for best whipping)
- 4 cups (480g) powdered sugar, sifted (to avoid lumps)
- 2 tsp vanilla extract
- 2-4 tbsp heavy cream or whole milk (to adjust consistency)
- A pinch of salt (balances sweetness)
Pro tip: I find that using real butter (rather than margarine or shortening) makes a world of difference in both cake flavor and buttercream texture. Also, if you want a dairy-free version, swap the butter and milk with coconut oil and coconut milk—but your rosettes will taste slightly different.
Equipment Needed
Getting the perfect golden lion mane cake with those pretty rosettes doesn’t require fancy gadgets, but a few tools make the job smoother:
- 9-inch (23 cm) round cake pans: Two pans work best so you can bake two layers simultaneously. If you only have one, bake in batches.
- Electric mixer: A stand mixer with a paddle and whisk attachment is ideal for both the batter and buttercream, but a hand mixer works fine too.
- Mixing bowls: Medium and large bowls for batter and frosting prep.
- Offset spatula: For smoothing the buttercream between layers and on the cake edges.
- Piping bags and star piping tips: A large open star tip (such as Wilton 1M) is perfect for creating the signature rosettes.
- Cooling racks: To cool the cake layers evenly and avoid sogginess.
If you don’t have piping bags, reusable silicone ones are a budget-friendly option and easy to clean. Also, keeping your butter at room temperature but not too soft is crucial—too warm and the buttercream won’t hold shape; too cold and it won’t whip properly. A simple tip: if your kitchen is warm, chill the bowl and beaters briefly before whipping.
Preparation Method
- Brown the butter: In a medium saucepan, melt 1 cup (227g) of unsalted butter over medium heat. Stir frequently until it turns golden brown with a nutty aroma, about 5-7 minutes. Be careful not to burn it! Pour into a heatproof bowl and let cool for 10 minutes.
- Prepare dry ingredients: In a large bowl, whisk together 2 ½ cups (312g) all-purpose flour, 1 tbsp baking powder, and ½ tsp salt. Set aside.
- Cream sugar and browned butter: Using a stand mixer fitted with a paddle attachment, beat the cooled browned butter with 1 ½ cups (300g) granulated sugar on medium speed until smooth and slightly fluffy, about 2 minutes.
- Add eggs: Add 4 large eggs one at a time, beating well after each addition. Scrape down the bowl as needed to keep things even.
- Mix in vanilla: Stir in 2 tsp pure vanilla extract for that warm, inviting flavor.
- Alternate adding dry ingredients and milk: Reduce mixer speed to low. Add the flour mixture in three parts, alternating with 1 cup (240ml) warmed whole milk, beginning and ending with flour. Mix until just combined—don’t overmix or the cake will get tough.
- Prepare cake pans: Grease two 9-inch pans and line bottoms with parchment paper. Divide batter evenly between pans.
- Bake: Bake at 350°F (175°C) for 30-35 minutes, or until a toothpick inserted in the center comes out clean. Rotate pans halfway through for even baking.
- Cool: Let cakes cool in pans for 10 minutes, then turn out onto wire racks to cool completely before frosting.
- Make buttercream: Beat 1 ½ cups (340g) softened unsalted butter on medium-high speed until creamy and pale, about 3-4 minutes. Gradually add 4 cups (480g) sifted powdered sugar, mixing on low speed to avoid a sugar cloud. Add 2 tsp vanilla extract, a pinch of salt, and 2 tablespoons of heavy cream or milk. Increase speed to high and whip until light and fluffy, 3-5 minutes. Adjust consistency with more cream or sugar as needed.
- Assemble and frost: Level cake layers if needed. Place one layer on a serving plate. Spread a thick layer of buttercream evenly on top. Place second layer on top. Apply a thin crumb coat of frosting all over the cake, then chill for 15 minutes.
- Pipe rosettes: Fill a piping bag fitted with a large star tip with buttercream. Starting at the center of each rosette, pipe in a tight spiral moving outward. Cover the entire cake surface with rosettes to create the lion mane effect.
Watch the rosettes as you go—if the buttercream feels too soft, pop the cake in the fridge for a few minutes to firm up. The whole process from start to finish usually takes about 2 to 2 ½ hours, including cooling and decorating.
Cooking Tips & Techniques
Getting those buttercream rosettes just right took me a few tries. Here are some things I learned that might save you some time and fuss!
- Brown the butter slowly: Rushing this step or turning the heat too high will burn the butter, which ruins the flavor. Patience here means a deep, nutty undertone that makes the cake golden and special.
- Don’t overmix the batter: Once you add the flour, mix just enough to combine. Overmixing develops gluten and leads to a dense cake, which you don’t want for this soft, fluffy texture.
- Buttercream temperature is key: The butter should be soft but cool. If it’s too warm, the rosettes won’t hold shape and will flatten. If too cold, it won’t whip up smooth. Keep a close eye and refrigerate briefly if needed.
- Use a consistent pressure while piping: This helps keep the rosettes uniform. It’s easy to get uneven results if you speed up or slow down mid-pipe.
- Chill the cake after crumb coat: This step helps lock in crumbs so the rosettes stay neat rather than mixed with cake bits.
- Practice piping on parchment first: If you’re new to rosettes, try a few test runs on parchment paper to get a feel for the pressure and motion.
One time, I rushed the cooling step and ended up with a few rosettes melting into one another. Lesson learned: always give the cake enough chill time before decorating. Also, multitasking is your friend—prep the frosting while the cake cools, so you’re not waiting around.
Variations & Adaptations
This recipe is versatile, and you can tweak it to suit different tastes or dietary needs without losing the lion mane charm:
- Chocolate Golden Lion Mane: Add ¼ cup (25g) cocoa powder to the dry ingredients for a subtle chocolate twist. The browned butter pairs surprisingly well with cocoa.
- Gluten-Free Version: Swap all-purpose flour with a 1:1 gluten-free baking flour blend. Make sure it includes xanthan gum for structure.
- Dairy-Free Buttercream: Use dairy-free margarine or coconut oil instead of butter, and substitute heavy cream with canned coconut milk. The rosettes will taste a bit different but still pipe beautifully.
- Fruit-Infused Buttercream: Add 2-3 tbsp of pureed raspberries or mango to the buttercream for a fresh flavor pop. Reduce cream slightly to keep the right consistency.
- Seasonal Touch: Around holidays, I like to add a pinch of cinnamon or nutmeg to the cake batter for warmth, similar to what’s done in cranberry-orange bread—it gives the cake a cozy note without overpowering the vanilla.
When I made a batch with lemon zest and swapped vanilla for lemon extract, the result was a refreshing summer cake that looked just as regal but tasted lighter and brighter. It’s a nice way to customize if you want something less rich but still fun.
Serving & Storage Suggestions
Serve this cake at room temperature for the best texture and flavor. The buttercream softens slightly, allowing those rosettes to melt on your tongue. It pairs beautifully with a cup of black tea or a rich coffee, balancing the sweetness.
If you’re planning to serve it later, store the cake in an airtight cake carrier or cover loosely with plastic wrap in the fridge. The buttercream rosettes will firm up, which is great if you want the decorations to hold shape during transport.
To reheat, let the cake sit at room temperature for about 30 minutes before slicing. This helps the buttercream soften again. Avoid microwaving as it can melt the frosting unevenly.
Flavors tend to develop overnight—the browned butter in the cake deepens, and the vanilla buttercream smooths out. I sometimes make the cake a day ahead just so the flavors have time to settle.
For a festive spread, serve slices alongside light fruit salads or a plate of snowball cookies for a lovely balance of textures and tastes.
Nutritional Information & Benefits
This cake is rich and indulgent, so it’s definitely a treat! Each slice (based on 12 servings) contains approximately:
| Calories | Fat | Carbohydrates | Protein |
|---|---|---|---|
| 350 kcal | 22g | 38g | 4g |
The browned butter adds healthy fats and a depth of flavor that feels satisfying without needing extra sugar. Using real butter and whole milk provides some vitamin A and calcium. This cake is naturally gluten-containing, but as mentioned, a gluten-free flour swap works well.
From a wellness perspective, I think of this cake as a joyful indulgence—something to savor slowly, especially when shared with friends or family. It’s not everyday fare but a reminder that good baking can be simple, honest, and a little bit special.
Conclusion
The Perfect Golden Lion Mane Cake with Buttercream Rosettes is one of those recipes that quietly earns its place in the repertoire. It’s not flashy or overly complicated, but it balances flavor, texture, and appearance in a way that makes you want to bake it again and again. Whether you’re decorating for a birthday or just craving a sweet moment, this cake offers a little bit of magic without fuss.
Feel free to adjust the buttercream or try variations to fit your taste—maybe a hint of citrus or a chocolate twist. I love that it invites creativity while still being reliably delicious.
If you give this recipe a try, I’d love to hear how your rosettes turned out or what flavor you added—sharing those little baking stories makes it all the better. And hey, if you’re in the mood for other festive treats, my perfect yule log cake might catch your eye, or for a crunchy-sweet side, check out my crispy candied pecans.
Happy baking, and may your kitchen be filled with golden warmth and sweet rosettes!
FAQs
How do I keep the buttercream rosettes from melting?
Keep the buttercream cool but not cold before piping. If your kitchen is warm, chill the cake briefly after crumb coating, and pipe the rosettes in a cooler spot. Using real butter helps the rosettes hold shape better than margarine or shortening.
Can I make the cake layers ahead of time?
Yes! You can bake the layers a day in advance and wrap them tightly in plastic wrap. Store in the fridge and bring to room temperature before frosting.
What if I don’t have a piping bag or star tip?
You can create rosettes with a plastic zip-top bag by cutting a small hole in one corner, though the shape won’t be as defined. Alternatively, use a spoon to dollop and swirl the buttercream for a rustic look.
Is this recipe suitable for gluten-free diets?
By swapping the all-purpose flour with a 1:1 gluten-free baking blend that includes xanthan gum, you can make this cake gluten-free while maintaining texture and flavor.
How do I fix grainy buttercream?
Grainy buttercream often happens if the powdered sugar isn’t sifted or if the butter is too cold. Beat the frosting longer on medium-high speed and add a splash of cream to smooth it out. If needed, warm the bowl slightly and whip again.
Pin This Recipe!
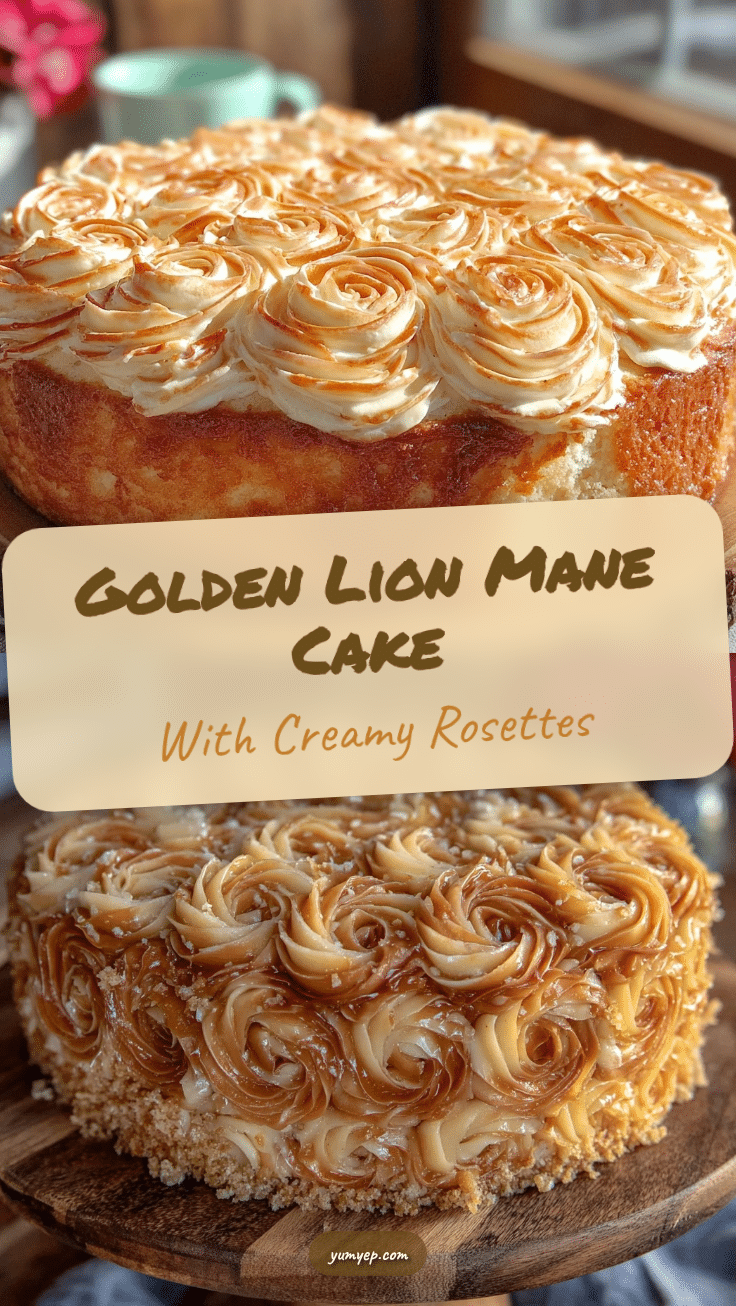
Perfect Golden Lion Mane Cake with Buttercream Rosettes

A moist and tender golden cake with nutty browned butter flavor, decorated with silky smooth buttercream rosettes that hold their shape beautifully. Perfect for celebrations and easy to make with simple pantry ingredients.
- Prep Time: 30 minutes
- Cook Time: 30-35 minutes
- Total Time: 2 hours 15 minutes
- Yield: 12 servings 1x
- Category: Dessert
- Cuisine: American
Ingredients
- 1 cup (227g) unsalted butter, browned and cooled slightly
- 1 ½ cups (300g) granulated sugar
- 4 large eggs, room temperature
- 2 ½ cups (312g) all-purpose flour
- 1 tbsp baking powder
- ½ tsp salt
- 1 cup (240ml) whole milk, warmed
- 2 tsp pure vanilla extract
- 1 ½ cups (340g) unsalted butter, softened (for buttercream)
- 4 cups (480g) powdered sugar, sifted
- 2 tsp vanilla extract (for buttercream)
- 2–4 tbsp heavy cream or whole milk (for buttercream)
- A pinch of salt (for buttercream)
Instructions
- Brown the butter: Melt 1 cup (227g) unsalted butter over medium heat, stirring frequently until golden brown and nutty, about 5-7 minutes. Pour into a heatproof bowl and cool for 10 minutes.
- Prepare dry ingredients: Whisk together 2 ½ cups (312g) all-purpose flour, 1 tbsp baking powder, and ½ tsp salt in a large bowl. Set aside.
- Cream sugar and browned butter: Beat cooled browned butter with 1 ½ cups (300g) granulated sugar on medium speed until smooth and slightly fluffy, about 2 minutes.
- Add eggs: Add 4 large eggs one at a time, beating well after each addition. Scrape down bowl as needed.
- Mix in vanilla: Stir in 2 tsp pure vanilla extract.
- Alternate adding dry ingredients and milk: On low speed, add flour mixture in three parts alternating with 1 cup (240ml) warmed whole milk, beginning and ending with flour. Mix until just combined.
- Prepare cake pans: Grease two 9-inch round pans and line bottoms with parchment paper. Divide batter evenly between pans.
- Bake: Bake at 350°F (175°C) for 30-35 minutes or until toothpick inserted comes out clean. Rotate pans halfway through baking.
- Cool: Let cakes cool in pans for 10 minutes, then turn out onto wire racks to cool completely.
- Make buttercream: Beat 1 ½ cups (340g) softened unsalted butter on medium-high speed until creamy and pale, 3-4 minutes. Gradually add 4 cups (480g) sifted powdered sugar on low speed. Add 2 tsp vanilla extract, a pinch of salt, and 2 tbsp heavy cream or milk. Whip on high until light and fluffy, 3-5 minutes. Adjust consistency with more cream or sugar as needed.
- Assemble and frost: Level cake layers if needed. Place one layer on serving plate, spread thick layer of buttercream on top. Place second layer on top. Apply thin crumb coat all over cake and chill for 15 minutes.
- Pipe rosettes: Fill piping bag fitted with large star tip with buttercream. Pipe tight spiral rosettes starting at center moving outward, covering entire cake to create lion mane effect.
Notes
Use real butter for best flavor and texture. Brown butter slowly to avoid burning. Do not overmix batter after adding flour to keep cake tender. Keep buttercream at room temperature but not too soft for piping rosettes. Chill cake after crumb coat to lock in crumbs. Practice piping rosettes on parchment paper if new to technique. Cake layers can be baked a day ahead and stored wrapped in fridge.
Nutrition
- Serving Size: 1 slice (1/12 of cak
- Calories: 350
- Fat: 22
- Carbohydrates: 38
- Protein: 4
Keywords: lion mane cake, buttercream rosettes, browned butter cake, easy cake recipe, celebration cake, moist cake, buttercream frosting