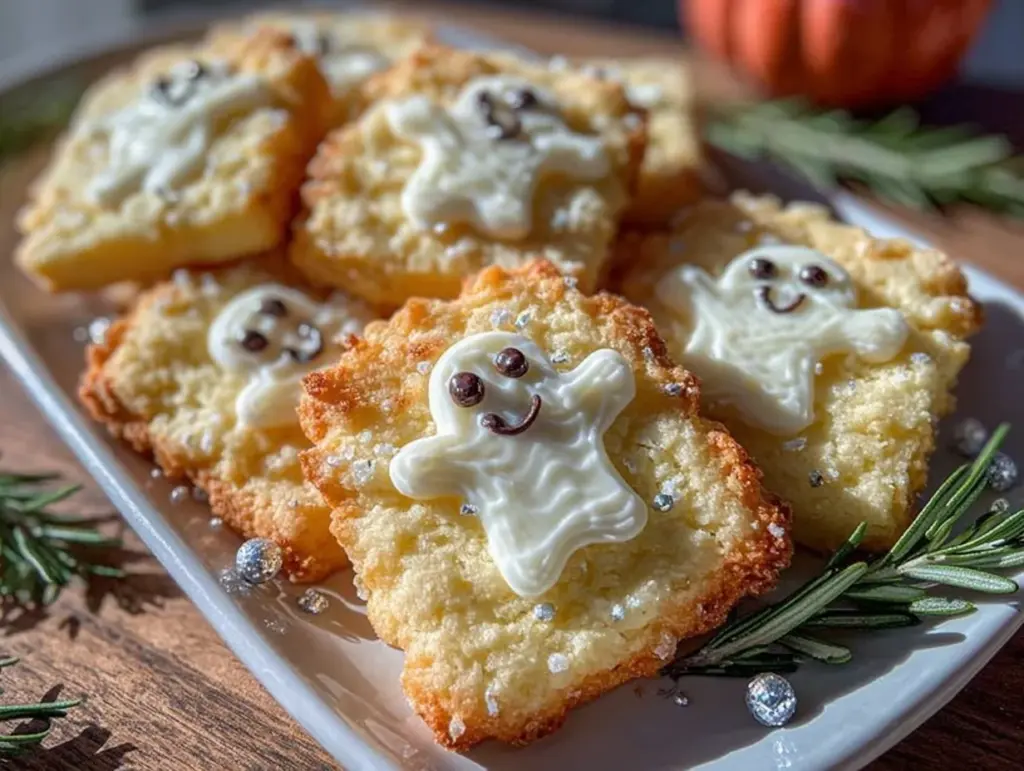
That’s what my niece blurted out mid-bite during our last Halloween get-together, and honestly, it stuck with me. You know how some Halloween sugar cookies can be all show and no go, right? They look cute but end up tasting dry or oddly sweet in a way that makes you question the whole idea of festive baking. Well, these Perfect Cream Cheese Halloween Sugar Cookies with Royal Icing Designs flipped that script completely.
It wasn’t some fancy bakery or a clever Instagram trick—it was just a quiet afternoon, me experimenting with my grandma’s old sugar cookie recipe, but with a creamy twist. The cream cheese in the dough keeps the cookies tender and soft, not the usual rock-hard sugar cookie that chips your teeth. Plus, the royal icing? It’s not just about the spooky shapes and colors; it’s about getting that smooth finish that dries just right for stacking or gifting without any cracking or weird glossiness.
The kitchen smelled like cinnamon and vanilla, with a faint undertone of pumpkin spice from a batch of my favorite fall candles nearby. It was one of those moments where baking feels like less of a chore and more like a cozy ritual. I probably obsessed a little too much over the little royal icing details—the bats, pumpkins, ghosts—but hey, it’s Halloween, and this cookie project was my way of soaking up the season.
Now, every time I make these cookies, I remember that little comment from my niece. It’s the kind of recipe that doesn’t just fill a plate but feels like a tiny celebration with every bite. If you’re after Halloween treats that are more than just decoration, that actually taste like something special and keep you coming back for more, you might find yourself holding onto this recipe like I do.
Why You’ll Love This Recipe
Here’s the real talk about why these Perfect Cream Cheese Halloween Sugar Cookies with Royal Icing Designs have earned a permanent spot in my seasonal baking list:
- Quick & Easy: You’re looking at about 30 minutes of hands-on prep and under 15 minutes to bake, making it perfect for those last-minute Halloween plans or when your sweet tooth just can’t wait.
- Simple Ingredients: No obscure stuff here—cream cheese, basic pantry staples, and icing ingredients you probably already have lying around.
- Perfect for Halloween Parties: These cookies bring that festive vibe with their adorable royal icing designs, great for school parties, neighborhood trick-or-treaters, or cozy family nights.
- Crowd-Pleaser: Both kids and adults keep asking for more, which is saying something because I’m usually the one hoarding the cookies!
- Unbelievably Delicious: The cream cheese dough bakes up soft with the perfect crumb, and the royal icing adds just the right sweetness without overpowering the cookie itself.
- What sets it apart: Instead of that typical dry sugar cookie, cream cheese adds richness and moisture. Plus, the royal icing recipe I use dries perfectly smooth and matte, so your spooky designs look professional without fuss.
- Emotional Connection: Baking these cookies feels like a little Halloween hug—comfort food with a fun twist that makes the whole holiday feel more special.
What Ingredients You Will Need
This recipe uses simple, wholesome ingredients to deliver bold flavor and satisfying texture without the fuss. Most of these are pantry staples, and if you want, you can swap out a few items to suit your needs.
- For the Cookie Dough:
- Unsalted butter, softened (1/2 cup / 115 grams) — I prefer using Land O’Lakes for consistency
- Cream cheese, softened (4 ounces / 115 grams) — makes the dough tender and rich
- Granulated sugar (3/4 cup / 150 grams) — balances the cream cheese tang
- Large egg, room temperature (1) — binds the dough
- Pure vanilla extract (1 teaspoon / 5 ml) — adds warmth
- All-purpose flour (2 cups / 250 grams) — the base of the dough
- Baking powder (1/2 teaspoon / 2 grams) — for a slight lift
- Salt (1/4 teaspoon / 1.5 grams) — enhances all flavors
- For the Royal Icing:
- Powdered sugar (4 cups / 480 grams), sifted — smooth sweetness
- Egg whites or meringue powder (2 large egg whites or 2 tablespoons meringue powder + 4 tablespoons water) — for that perfect stiff peak
- Fresh lemon juice (1 teaspoon / 5 ml) — brightens flavor and stabilizes icing
- Food coloring gels (orange, black, purple, green) — for those Halloween vibes
- Vanilla or almond extract (optional, 1/2 teaspoon / 2.5 ml) — adds subtle depth
Pro tip: If you want a gluten-free version, swapping all-purpose flour with a gluten-free blend works well, but expect a slightly different texture. Also, fresh lemon juice really makes the royal icing pop, so don’t skip it if you can help it!
Equipment Needed
- Mixing bowls — I like a medium and a large one, preferably glass or stainless steel
- Electric mixer or stand mixer — makes creaming butter and cream cheese a breeze, but a strong hand whisk can work if you’re patient
- Measuring cups and spoons — accuracy matters especially for the flour and baking powder
- Rolling pin — a classic wooden one is great, but silicone is easier to clean
- Cookie cutters — Halloween-themed shapes like pumpkins, ghosts, bats, and witches’ hats
- Baking sheets — lined with parchment paper or silicone mats for even baking and easy cleanup
- Piping bags and small round tips — essential for neat royal icing designs (you can also use zip-top bags with a tiny corner snipped)
- Sifter or fine mesh sieve — for the powdered sugar and flour, to keep things smooth
I once tried piping royal icing without a bag—big mistake. The bags give you way better control, so think of them as your secret weapon for those tiny haunted house details. If you want budget-friendly piping bags, reusable silicone ones are a good call and more eco-friendly too.
Preparation Method
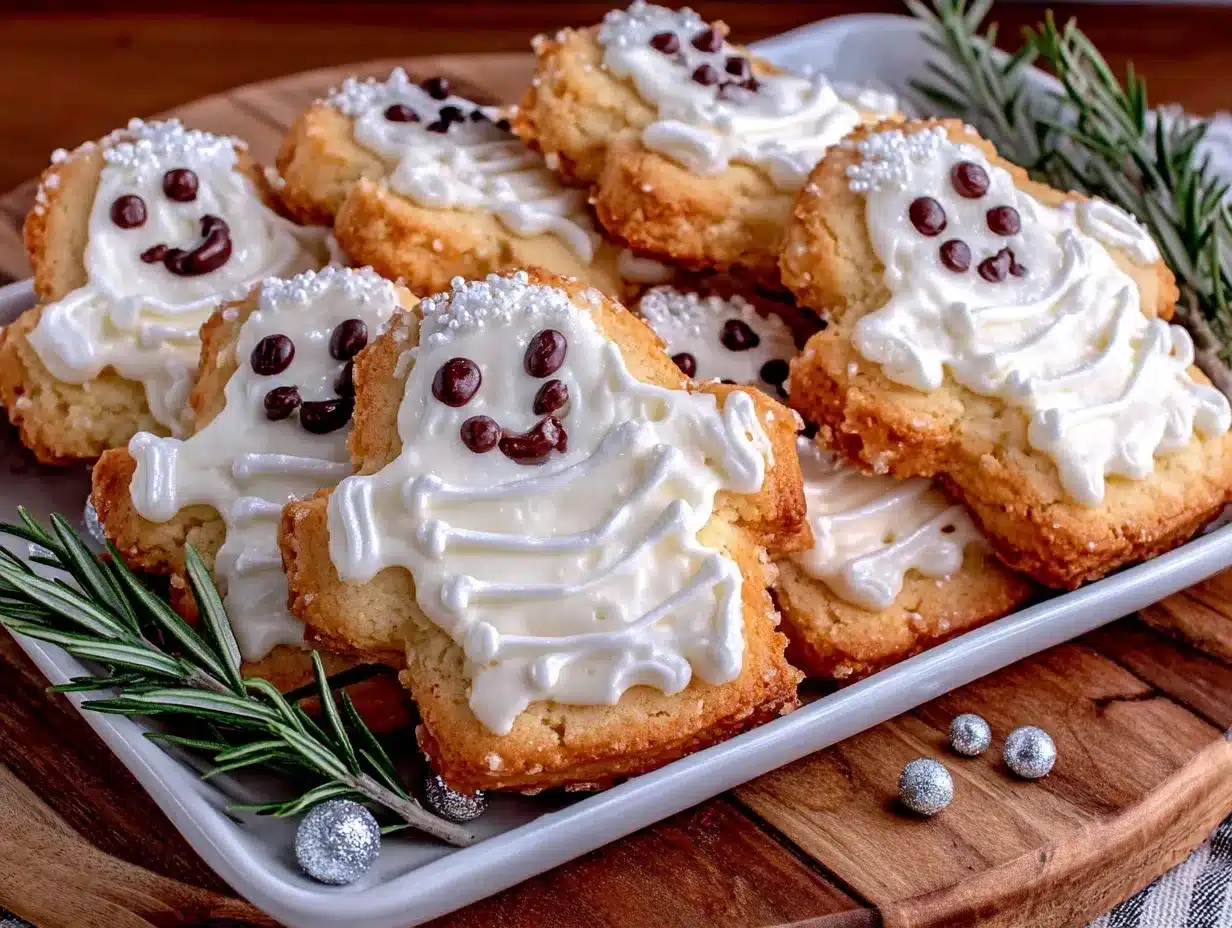
- Cream the butter and cream cheese: In a large bowl, beat together the softened butter (1/2 cup / 115 grams) and cream cheese (4 ounces / 115 grams) until smooth and fluffy, about 2-3 minutes. This is where the magic starts—the mixture should look creamy, not grainy.
- Add sugar and egg: Mix in the granulated sugar (3/4 cup / 150 grams) gradually, then beat in the large egg (1) and vanilla extract (1 teaspoon / 5 ml). The mixture will lighten and smell wonderfully sweet.
- Combine dry ingredients: In a separate bowl, whisk together all-purpose flour (2 cups / 250 grams), baking powder (1/2 teaspoon / 2 grams), and salt (1/4 teaspoon / 1.5 grams). This step is key for even rising and texture.
- Mix dry into wet: Gradually add the dry ingredients to the wet mixture, stirring gently until just combined. Don’t overmix or you’ll risk tough cookies. The dough should be soft but hold together without sticking wildly to your hands.
- Chill the dough: Wrap the dough in plastic and refrigerate for at least 1 hour. This step helps the dough firm up for easier rolling and prevents spreading during baking.
- Preheat oven and prepare work surface: Set your oven to 350°F (175°C). Lightly flour your countertop or use parchment paper. Roll out dough to about 1/4 inch (6 mm) thickness.
- Cut shapes: Use your Halloween-themed cookie cutters to stamp out shapes. Place them 1 inch (2.5 cm) apart on baking sheets lined with parchment paper.
- Bake: Bake cookies for 10-12 minutes or until edges just start to turn golden. Watch closely because they can go from perfect to overdone quickly.
- Cool: Let cookies cool completely on wire racks before decorating. Cooling is crucial so the royal icing doesn’t melt or slide off.
- Prepare royal icing: Beat powdered sugar (4 cups / 480 grams) with egg whites or meringue powder, lemon juice (1 teaspoon / 5 ml), and optional extract until stiff peaks form. Adjust consistency with water for outlining (thicker) or flooding (thinner).
- Decorate: Outline each cookie with thicker icing and let set 10 minutes. Then flood the inside with thinner icing. Use food coloring gels to create your Halloween palette. Let dry 6-8 hours or overnight for best results.
One time, I rushed the icing drying and ended up with smudged designs all over the place. Patience is your friend here—trust me, it pays off!
Cooking Tips & Techniques
Here are some nuggets from my cookie-baking escapades that might save you a few headaches:
- Softened ingredients: Make sure your butter and cream cheese are really soft before mixing—this helps avoid lumps and creates a silky dough.
- Don’t over-flour: It’s tempting to add extra flour if the dough feels sticky, but try chilling it longer first. Too much flour means dry, crumbly cookies.
- Rolling thickness: Keep your dough about 1/4 inch thick. Thinner cookies tend to burn on the edges, thicker ones lose the delicate crisp-soft balance.
- Royal icing consistency: For outlining, it should hold its shape on a spoon. For flooding, it should spread slowly but not be watery. Mix small batches if you’re coloring different shades.
- Use a toothpick: To spread icing evenly in small spots or to pop any air bubbles immediately after flooding.
- Multitasking: While cookies bake, prep your royal icing. This keeps the workflow smooth.
My biggest rookie mistake was ignoring the chilling step. The first batch turned into a flat mess before I learned that little patience trick.
Variations & Adaptations
Want to mix things up? Here are some fun ways to make these cookies your own:
- Dietary swaps: Use almond flour for a gluten-free twist. I’ve also swapped the cream cheese for vegan cream cheese to make a dairy-free version that still tastes rich.
- Flavor twists: Add a teaspoon of pumpkin spice or ground cinnamon to the dough for extra fall vibes. I sometimes toss in a bit of orange zest for a bright, fresh note.
- Alternative decorating: Instead of royal icing, try a simple glaze of powdered sugar and lemon juice with sprinkles on top for a fuss-free option.
- Different shapes and themes: You can swap Halloween cutters for winter shapes and use pastel icing colors to turn this into a Christmas sugar cookie cutout project.
- Creative toppings: Add edible glitter or small candy eyes on your pumpkins and ghosts for an extra spooky look.
Once, I tried making spider web designs with black royal icing, and it turned out so cool that everyone asked for the recipe. It’s a simple detail that’s surprisingly impressive.
Serving & Storage Suggestions
These cookies are best enjoyed at room temperature, which helps the cream cheese flavor shine through. I like to serve them on a festive Halloween platter alongside warm apple cider or a spiced chai tea.
If you’re gifting or storing, place the cookies in an airtight container with parchment paper between layers to prevent sticking. They keep well for up to a week at room temperature.
For longer storage, freeze baked and decorated cookies in a single layer on a baking sheet, then transfer them to a freezer bag. Thaw at room temperature before serving, and the royal icing remains just as pretty.
Fun fact: The flavors actually mellow and deepen if you let the cookies rest a day before eating, making your spooky treats even tastier.
Nutritional Information & Benefits
Each cookie (about 2.5 inches / 6 cm diameter) contains roughly:
| Calories | 120 |
|---|---|
| Fat | 6 g |
| Carbohydrates | 17 g |
| Protein | 2 g |
Using cream cheese adds a modest amount of protein and calcium, while the cookies remain a treat with moderate sugar. The recipe is naturally gluten-based but can be adapted for gluten-free diets with almond or oat flour.
This is not a low-sugar or low-fat snack, but it’s the kind of treat that feels homemade and less processed than store-bought Halloween sweets. I always feel better sharing these with family and friends because I know what’s in them.
Conclusion
These Perfect Cream Cheese Halloween Sugar Cookies with Royal Icing Designs aren’t your run-of-the-mill spooky sweets. They’re soft, flavorful, and just the right balance between festive fun and serious yum. I’ve made them for years now, tweaking and perfecting, and they always bring a smile (and sometimes a little awe) to the table.
Feel free to customize the shapes, colors, or flavors to match your Halloween vibe. Whether you’re baking with kids or treating yourself, these cookies are a reliable way to bring a little joy and sweetness to the season.
So go ahead—give them a try, and if you want a break from decorating, you might enjoy pairing them with a warm drink or alongside a batch of crispy candied pecans for a crunchy contrast.
Can’t wait to hear how your cookies turn out!
FAQs About Perfect Cream Cheese Halloween Sugar Cookies
- Can I use store-bought icing instead of making royal icing? Yes, you can use store-bought royal icing or decorating gel, but homemade royal icing dries harder and smoother, which helps with stacking and presentation.
- How long do these cookies stay fresh? Stored in an airtight container at room temperature, they stay fresh for about a week. For longer storage, freezing is best.
- Can I make the dough ahead of time? Absolutely! You can prepare the dough and refrigerate it for up to 48 hours before rolling and cutting.
- What’s the best way to color royal icing? Use gel food coloring for vibrant colors without thinning the icing. Liquid colors can make the icing runny.
- Are these cookies suitable for kids to decorate? Definitely! The dough is easy to handle, and royal icing is fun to pipe and color. Just supervise if using raw egg whites and consider pasteurized meringue powder for safety.
Pin This Recipe!
Perfect Cream Cheese Halloween Sugar Cookies Easy Royal Icing Designs Tutorial
Soft and tender Halloween sugar cookies made with cream cheese for moisture and richness, decorated with smooth royal icing for festive designs perfect for parties and gifting.
- Prep Time: 30 minutes
- Cook Time: 12 minutes
- Total Time: 1 hour 42 minutes
- Yield: 24 cookies 1x
- Category: Dessert
- Cuisine: American
Ingredients
- 1/2 cup unsalted butter, softened (115 grams)
- 4 ounces cream cheese, softened (115 grams)
- 3/4 cup granulated sugar (150 grams)
- 1 large egg, room temperature
- 1 teaspoon pure vanilla extract (5 ml)
- 2 cups all-purpose flour (250 grams)
- 1/2 teaspoon baking powder (2 grams)
- 1/4 teaspoon salt (1.5 grams)
- 4 cups powdered sugar, sifted (480 grams)
- 2 large egg whites or 2 tablespoons meringue powder + 4 tablespoons water
- 1 teaspoon fresh lemon juice (5 ml)
- Food coloring gels (orange, black, purple, green)
- Optional: 1/2 teaspoon vanilla or almond extract (2.5 ml)
Instructions
- Cream the butter and cream cheese together in a large bowl until smooth and fluffy, about 2-3 minutes.
- Gradually mix in the granulated sugar, then beat in the egg and vanilla extract until light and fragrant.
- In a separate bowl, whisk together the flour, baking powder, and salt.
- Gradually add the dry ingredients to the wet mixture, stirring gently until just combined. Avoid overmixing.
- Wrap the dough in plastic wrap and refrigerate for at least 1 hour.
- Preheat oven to 350°F (175°C). Lightly flour your work surface or use parchment paper.
- Roll out the dough to about 1/4 inch (6 mm) thickness.
- Cut out shapes using Halloween-themed cookie cutters and place them 1 inch apart on baking sheets lined with parchment paper.
- Bake for 10-12 minutes or until edges just start to turn golden. Watch closely to avoid overbaking.
- Cool cookies completely on wire racks before decorating.
- Prepare royal icing by beating powdered sugar with egg whites or meringue powder, lemon juice, and optional extract until stiff peaks form. Adjust consistency with water for outlining (thicker) or flooding (thinner).
- Outline each cookie with thicker icing and let set for 10 minutes, then flood the inside with thinner icing. Use food coloring gels for Halloween colors.
- Let decorated cookies dry for 6-8 hours or overnight for best results.
Notes
Use softened butter and cream cheese for a smooth dough. Chill dough at least 1 hour to prevent spreading. Roll dough to 1/4 inch thickness for best texture. Use piping bags for neat royal icing designs. Let icing dry fully (6-8 hours or overnight) to avoid smudging. For gluten-free, substitute flour with almond or gluten-free blend. Fresh lemon juice brightens and stabilizes royal icing.
Nutrition
- Serving Size: 1 cookie (about 2.5
- Calories: 120
- Fat: 6
- Carbohydrates: 17
- Protein: 2
Keywords: Halloween sugar cookies, cream cheese cookies, royal icing, Halloween treats, festive cookies, soft sugar cookies, easy Halloween baking