Have you ever wanted a creamy, nutty milk alternative that’s not only delicious but also packed with nutrients? Let me tell you, the first time I blended up homemade pumpkin seed milk, the aroma of roasted seeds and the velvety texture had me hooked. It’s the kind of kitchen moment where you take a sip, close your eyes, and think, “This is what I’ve been missing!”
Pumpkin seed milk feels like a hidden gem in the world of dairy-free alternatives. It’s rich, subtly nutty, and has a stunning pale green hue that just screams wholesome goodness. I first stumbled upon this idea while experimenting with different seed milks one rainy weekend. I was trying to recreate that creamy satisfaction I missed from regular milk, but without the dairy. A bag of pumpkin seeds sitting in my pantry caught my eye, and the rest is history.
My family was skeptical at first. “Pumpkin seed milk? That’s a thing?” But once they tasted it, the glasses were emptied faster than I could make more. It’s now become a staple in our house, whether we’re sipping it on its own, blending it into smoothies, or pouring it over cereal. Honestly, it’s so simple to make, I wish I’d discovered it years ago. No fancy equipment or hard-to-find ingredients—just pure, creamy comfort. Bookmark this recipe, because it’s bound to become one of your favorites too!
Why You’ll Love This Recipe
- Quick & Easy: Ready in under 15 minutes! Perfect for busy mornings or when you’re craving a dairy-free milk alternative in a pinch.
- Simple Ingredients: Just a handful of pantry staples, no need for a grocery store trip.
- Budget-Friendly: Homemade pumpkin seed milk is much cheaper than store-bought options, and you control the quality of ingredients.
- Nut-Free & Allergy-Friendly: A fantastic alternative for anyone avoiding nuts or dairy.
- Unbelievably Creamy: The texture is rich and luxurious with a mild, nutty flavor that’s perfect for coffee, tea, smoothies, or even baking.
- Customizable: Add your favorite sweeteners, spices, or flavorings to make it uniquely yours.
What sets this recipe apart is the use of raw pumpkin seeds, which are packed with nutrients like magnesium, zinc, and healthy fats. It’s a wholesome way to enjoy a milk alternative without compromising on flavor or texture. Plus, it’s ridiculously satisfying to make your own milk from scratch—there’s something so rewarding about seeing those seeds transform into a creamy, vibrant liquid.
This recipe is perfect for anyone trying to embrace a healthier lifestyle, impress guests with a unique plant-based option, or just enjoy a moment of pure comfort. Trust me, once you try it, you’ll never look at store-bought alternatives the same way again.
What Ingredients You Will Need
This creamy pumpkin seed milk comes together with just a few simple ingredients that you probably already have on hand. Here’s what you’ll need:
- Raw pumpkin seeds: Also known as pepitas, these little green seeds are the star of the show. Make sure they’re raw and unsalted for the best flavor and texture. Roast them lightly for a nuttier flavor, if desired.
- Water: Filtered water works best for a clean taste. You’ll need enough to soak the seeds and blend them into milk.
- Vanilla extract: Adds a warm, sweet aroma and flavor. Opt for pure vanilla extract for the best result.
- Maple syrup: A natural sweetener that pairs beautifully with the nutty flavor of pumpkin seeds. You can also use honey, agave, or a sugar-free alternative.
- Pinch of salt: Enhances the flavors and balances the sweetness.
- Optional spices: A dash of cinnamon or nutmeg can give your pumpkin seed milk a cozy, comforting vibe—perfect for fall!
If you’re feeling adventurous, you can add a few extras like cocoa powder for chocolate pumpkin seed milk or a handful of fresh berries for a fruity twist. The possibilities are endless!
Equipment Needed
You don’t need a fancy kitchen setup to make this recipe. Here’s what you’ll need:
- Blender: A high-speed blender works best to ensure a creamy texture, but a regular blender will do the trick—just blend a little longer.
- Nut milk bag or fine mesh strainer: For straining the milk to remove any leftover pulp. Cheesecloth can also be used.
- Bowl: For soaking the pumpkin seeds.
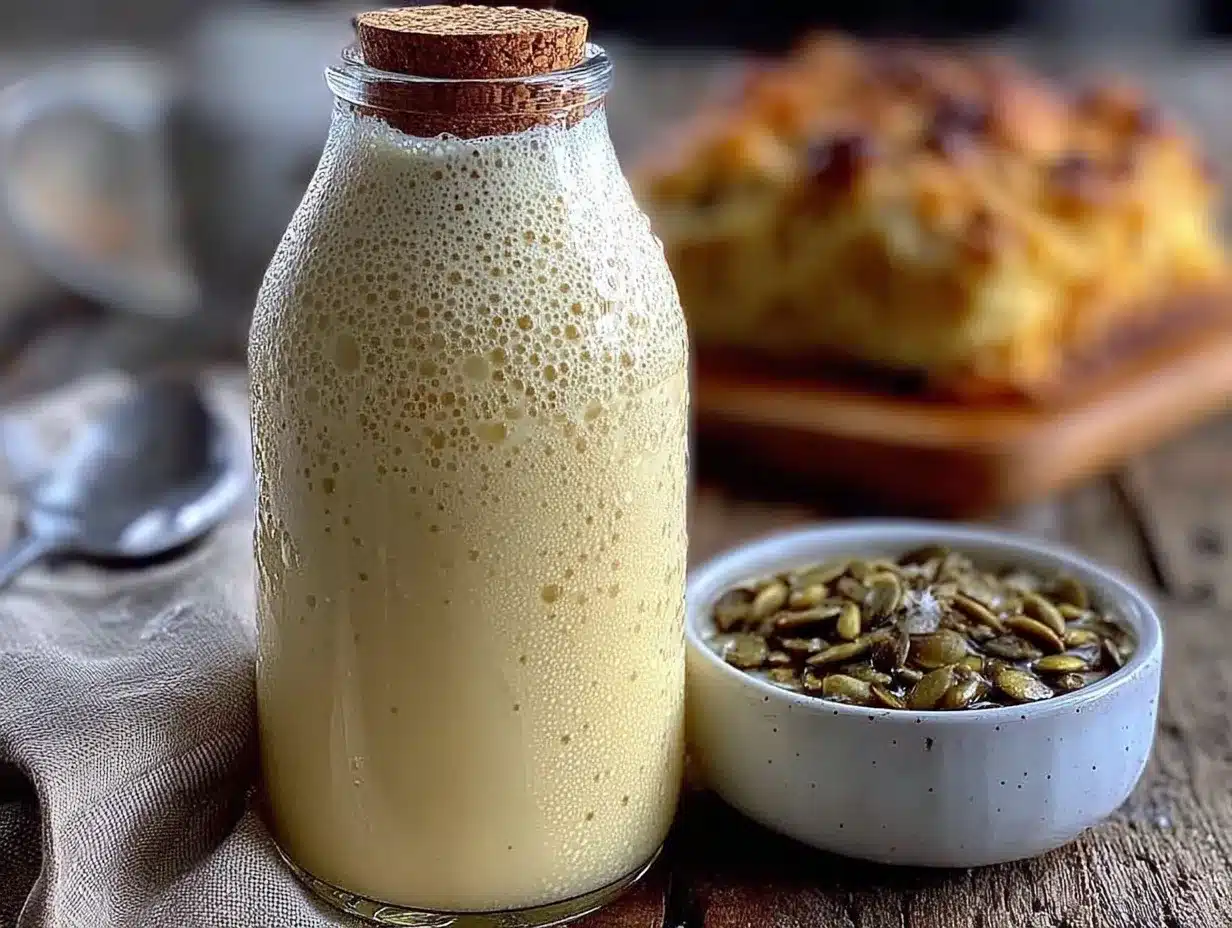
- Glass jar or bottle: To store the finished milk. Mason jars are perfect!
If you’re new to homemade milk, don’t worry! These tools are easy to find and affordable, and once you’ve tried this recipe, you’ll wonder why you didn’t start making your own milk sooner.
Preparation Method
- Soak the pumpkin seeds: Rinse 1 cup (150g) of raw pumpkin seeds under cold water to clean them. Transfer to a bowl and add 2 cups (475ml) of water. Let them soak for at least 4 hours or overnight—this softens the seeds for blending and improves digestibility.
- Drain and rinse: After soaking, drain the seeds and rinse them under cold water to remove any residue.
- Blend: Add the soaked seeds to your blender along with 4 cups (950ml) of filtered water. Blend on high for 1-2 minutes until the mixture is smooth and creamy. You may need to scrape down the sides of the blender halfway through.
- Strain: Hold your nut milk bag or fine mesh strainer over a bowl or pitcher. Pour the blended mixture through the strainer, squeezing or pressing out as much liquid as possible. Discard the leftover pulp or save it to use in baking or smoothies.
- Add flavor: Stir in 1 teaspoon (5ml) of vanilla extract, 2-3 tablespoons (30-45ml) of maple syrup, and a pinch of salt. For extra flavor, add a dash of cinnamon or nutmeg.
- Adjust to taste: Taste your pumpkin seed milk and add more sweetener or spices if needed. Blend again if you’ve added anything extra.
- Store: Pour the milk into a glass jar or bottle and refrigerate. It will stay fresh for up to 5 days. Shake well before serving, as natural separation may occur.
Cooking Tips & Techniques
Here are some tips to ensure your pumpkin seed milk turns out perfect every time:
- If you’re short on time, a quick soak in warm water for 30 minutes can help soften the seeds for blending.
- For a more pronounced nutty flavor, lightly toast the pumpkin seeds before soaking. Just be sure to let them cool completely before adding water.
- Don’t skip straining the milk! Even high-speed blenders can leave tiny bits of pulp, and straining ensures a silky-smooth texture.
- Save the leftover pulp—it’s packed with nutrients and can be used in baked goods, smoothies, or even as a base for veggie patties.
- Experiment with flavors! Try adding cocoa powder for a chocolaty twist or a dash of turmeric for an anti-inflammatory boost.
Also, don’t be afraid to adjust the sweetness or salt levels to your taste. Some people like it lightly sweetened, while others prefer it a little richer. It’s all about making it your own!
Variations & Adaptations
One of the best things about homemade pumpkin seed milk is how versatile it is. Here are some fun ways to mix it up:
- Chocolate Pumpkin Seed Milk: Add 2 tablespoons (10g) of unsweetened cocoa powder and an extra tablespoon of maple syrup for a rich, chocolaty treat.
- Seasonal Twist: Blend in ½ cup (75g) of fresh or frozen berries for a fruity, refreshing flavor—perfect for summer mornings.
- Spiced Pumpkin Seed Milk: Add a pinch of ground ginger and cloves along with cinnamon for a chai-inspired drink.
- Low-Calorie Version: Use less maple syrup or a sugar-free sweetener like stevia to reduce the calorie count.
- Protein Boost: Blend in a scoop of your favorite plant-based protein powder for a post-workout drink.
Feel free to experiment with other flavors and textures—this recipe is a blank canvas for your creativity!
Serving & Storage Suggestions
Once you’ve made your creamy pumpkin seed milk, there are endless ways to enjoy it:
- Serve chilled over ice for a refreshing drink.
- Pour it over your favorite cereal or granola for breakfast.
- Use it as a base for smoothies or protein shakes.
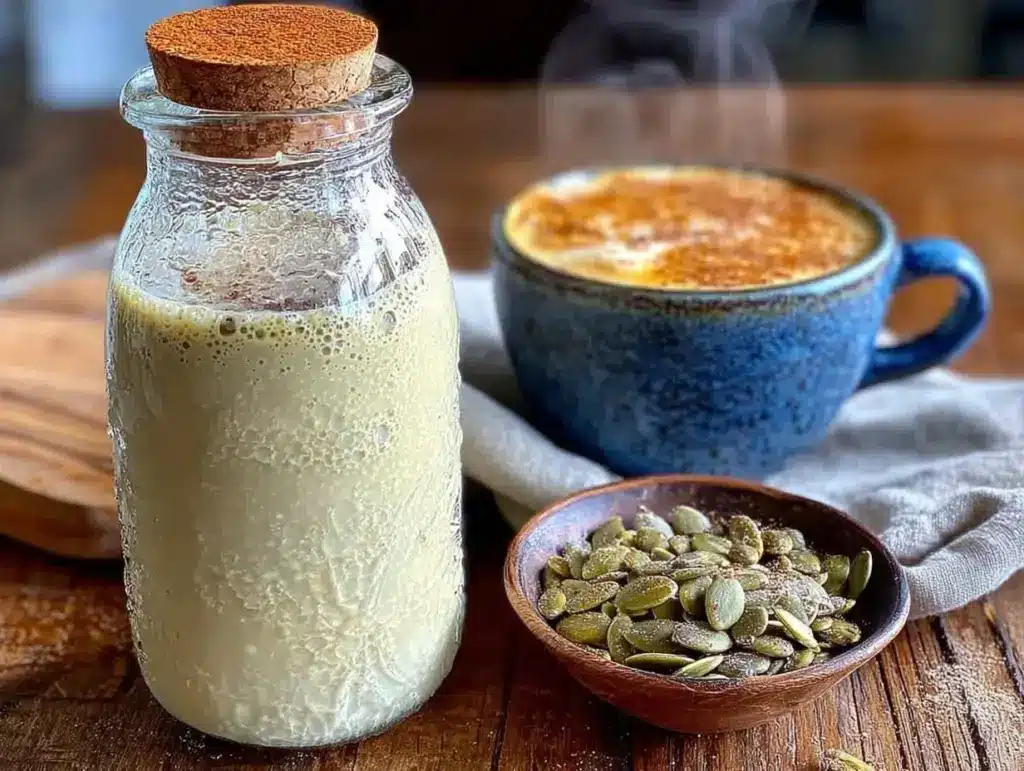
- Stir it into coffee or tea for a dairy-free creamer alternative.
- Get creative with your baking! Pumpkin seed milk works beautifully in muffins, pancakes, or even creamy soups.
For storage, keep your pumpkin seed milk in a sealed glass jar or bottle in the refrigerator. It will stay fresh for up to 5 days. If you notice natural separation, just give the jar a good shake before using. You can also freeze the milk in ice cube trays for longer storage—these are great for adding to smoothies or recipes later.
Nutritional Information & Benefits
Pumpkin seed milk isn’t just delicious—it’s packed with nutrients that your body will thank you for:
- Rich in magnesium: Supports healthy bones and muscles.
- High in zinc: Great for boosting your immune system.
- Healthy fats: Promotes heart health and keeps you feeling full longer.
- Low-carb & dairy-free: Perfect for keto diets, vegan lifestyles, or those with lactose intolerance.
Keep in mind that homemade pumpkin seed milk is free from preservatives and additives, unlike many store-bought options. If you’re looking for a clean, wholesome alternative, this recipe is a winner.
Conclusion
If you’ve been searching for a creamy, delicious, dairy-free milk alternative, you’ve found it. This homemade pumpkin seed milk is easy to make, packed with nutrients, and endlessly customizable. The nutty flavor and velvety texture make it a standout option for everything from breakfast to baking.
Now, go grab some pumpkin seeds and whip up a batch. I promise you’ll never look at plant-based milk the same way again!
FAQs
How long does pumpkin seed milk last?
Homemade pumpkin seed milk lasts up to 5 days when stored in a sealed container in the refrigerator. Be sure to shake it before using, as natural separation may occur.
Can I use roasted pumpkin seeds instead of raw?
Yes! Roasted pumpkin seeds will give the milk a deeper, nuttier flavor. Just make sure they’re unsalted and not overly seasoned.
Is pumpkin seed milk good for coffee?
Absolutely! It’s creamy and mild, making it a great dairy-free creamer for coffee or tea. You can even froth it for lattes.
Can I freeze pumpkin seed milk?
Yes, you can freeze pumpkin seed milk in ice cube trays for up to 3 months. Use the cubes in smoothies or recipes as needed.
What can I do with the leftover pulp?
The leftover pulp can be added to smoothies, baked goods, or used as a base for veggie patties. Don’t let it go to waste—it’s full of nutrients!
Pin This Recipe!
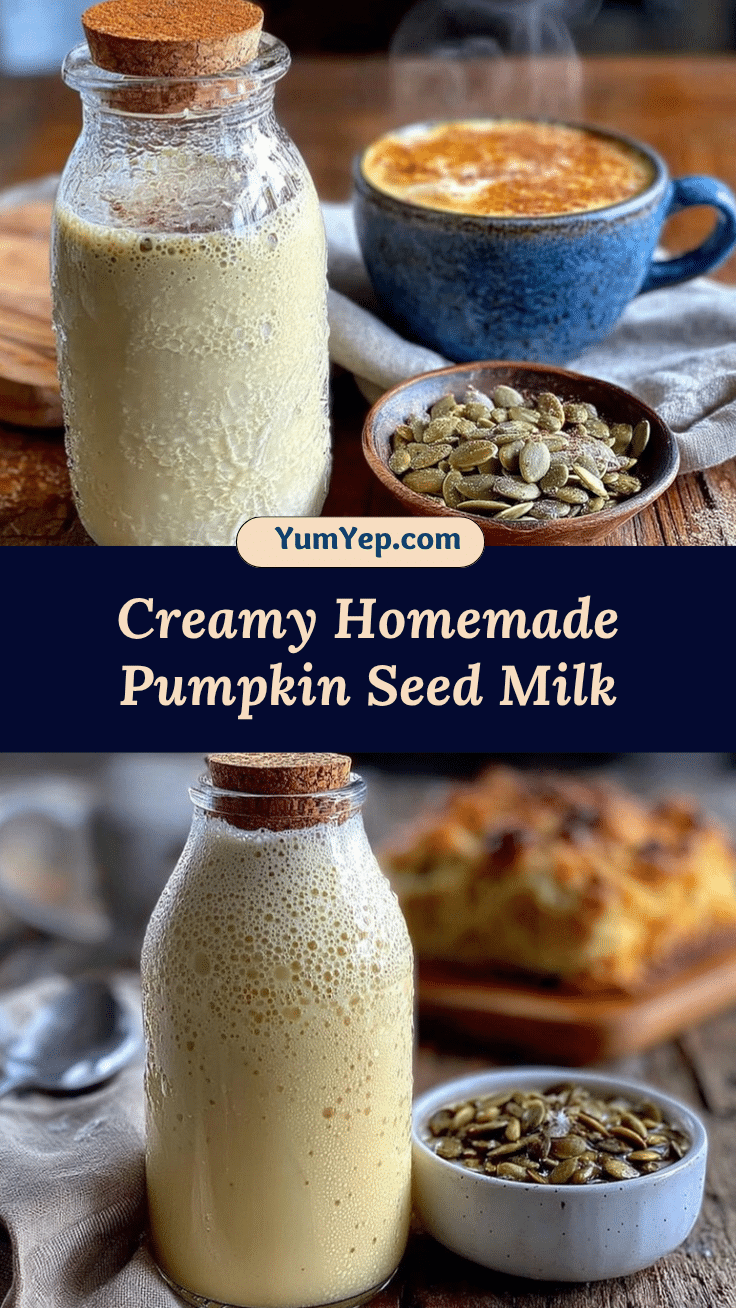
Creamy Pumpkin Seed Milk Recipe – Easy Dairy-Free Alternative

A creamy, nutty, and nutrient-packed dairy-free milk alternative made from raw pumpkin seeds. Perfect for smoothies, coffee, or baking.
- Prep Time: 4 hours (including soaking time)
- Cook Time: 15 minutes
- Total Time: 4 hours 15 minutes
- Yield: 4 cups 1x
- Category: Beverage
- Cuisine: Plant-Based
Ingredients
- 1 cup (150g) raw pumpkin seeds
- 2 cups (475ml) water for soaking
- 4 cups (950ml) filtered water for blending
- 1 teaspoon (5ml) vanilla extract
- 2–3 tablespoons (30-45ml) maple syrup
- Pinch of salt
- Optional: cinnamon or nutmeg for flavor
Instructions
- Rinse 1 cup (150g) of raw pumpkin seeds under cold water to clean them. Transfer to a bowl and add 2 cups (475ml) of water. Let them soak for at least 4 hours or overnight.
- After soaking, drain the seeds and rinse them under cold water to remove any residue.
- Add the soaked seeds to your blender along with 4 cups (950ml) of filtered water. Blend on high for 1-2 minutes until the mixture is smooth and creamy.
- Hold your nut milk bag or fine mesh strainer over a bowl or pitcher. Pour the blended mixture through the strainer, squeezing or pressing out as much liquid as possible. Discard the leftover pulp or save it for other uses.
- Stir in 1 teaspoon (5ml) of vanilla extract, 2-3 tablespoons (30-45ml) of maple syrup, and a pinch of salt. Optionally, add a dash of cinnamon or nutmeg for extra flavor.
- Taste your pumpkin seed milk and adjust sweetness or spices as needed. Blend again if you’ve added anything extra.
- Pour the milk into a glass jar or bottle and refrigerate. Shake well before serving, as natural separation may occur.
Notes
[‘For a nuttier flavor, lightly toast the pumpkin seeds before soaking.’, ‘Save the leftover pulp for use in smoothies, baked goods, or veggie patties.’, ‘Experiment with flavors like cocoa powder, turmeric, or fresh berries for variations.’]
Nutrition
- Serving Size: 1 cup
- Calories: 50
- Sugar: 1
- Sodium: 10
- Fat: 3
- Saturated Fat: 0.5
- Carbohydrates: 2
- Fiber: 1
- Protein: 2
Keywords: Pumpkin seed milk, dairy-free milk, nut-free milk, vegan milk, homemade milk, plant-based milk, healthy milk alternative


