Let me set the scene for you: the kitchen is filled with the rich, buttery aroma of bubbling cheese, soft noodles twirling around a wooden spoon, and that unmistakable scent that makes everyone come running. Creamy homemade mac and cheese isn’t just a recipe—it’s a warm hug on a cold night, the kind of comfort food that melts stress away and brings everyone to the table with wide-eyed anticipation. The first time I whipped up a batch of this dreamy, cheesy goodness, I remember standing at the stove, watching the sauce thicken and wondering if anything could possibly taste this good.
I’ll never forget that moment—my kids sneaking spoonfuls straight from the pot, giggling like they had just discovered gold. Honestly, I was instantly hooked. It was one of those “pause and smile” moments, where you know you’ve stumbled onto something that’s about to become a family legend. Growing up, my grandma would make a pan of mac and cheese that was so creamy, it practically floated off the spoon. She’d say, “the secret is in the sauce, honey,” and now, I finally get it.
This creamy homemade mac and cheese recipe has been my go-to for everything—from potlucks to cozy movie nights. It’s dangerously easy, yet delivers pure, nostalgic comfort. I wish I’d found this exact method years ago (could’ve saved myself from all those clumpy, bland attempts). Whether you’re looking to brighten up your Pinterest board or searching for a sweet treat for your kids after school, this dish fits the bill. Friends have begged for the recipe, and honestly, I’ve tested it more times than I care to admit (in the name of research, of course!). It’s now a staple for our family gatherings and gifting—creamy, cheesy, and so satisfying that you’re going to want to bookmark this one for every occasion.
Why You’ll Love This Creamy Homemade Mac and Cheese
Let’s face it, there are mac and cheese recipes, and then there’s creamy homemade mac and cheese. I’ve spent ages perfecting this dish, tweaking the sauce ratio and cheese blend until it was just right. After countless taste tests, I can promise you this isn’t just another pasta dish—it’s the one you’ll crave forever.
- Quick & Easy: Ready in under 30 minutes—perfect for busy weeknights or when you need comfort food, fast.
- Simple Ingredients: No fancy grocery trips. If you’ve got pasta, cheese, and a few pantry staples, you’re halfway there.
- Perfect for Any Occasion: From brunch to potlucks, holiday feasts, or just a rainy-day family dinner, this mac and cheese shines.
- Crowd-Pleaser: Kids, teens, adults—everyone fights for seconds (and sometimes thirds).
- Unbelievably Delicious: Velvety sauce, tender noodles, and that golden cheese crust—pure bliss in every bite.
What sets this creamy homemade mac and cheese apart? For starters, the sauce is ultra-smooth thanks to a special blend of sharp cheddar and creamy Monterey Jack. I use just the right touch of seasoning—never too salty, always well-balanced. No grainy cheese here; just silky, cheesy perfection. I’ve even tested a one-pot method that saves on dishes and time.
Honestly, this is comfort food like you remember—only better. It’s healthier than boxed versions (you control what goes in!), faster than fancy restaurant fare, and still delivers that soul-satisfying, close-your-eyes-and-sigh feeling. Impress your guests, treat your family, or just spoil yourself after a long day. I promise, you’ll never look at mac and cheese the same way again.
What Ingredients You Will Need
This creamy homemade mac and cheese relies on wholesome, easy-to-find ingredients. Nothing fussy—just pure comfort, straight from the pantry and fridge. Here’s everything you’ll need:
- For the Pasta:
- Elbow macaroni – 12 oz (340g) (classic choice for perfect sauce-to-pasta ratio)
- Salt – for boiling water (helps flavor the pasta)
- For the Cheese Sauce:
- Unsalted butter – 1/4 cup (60g), cut into pieces (adds richness)
- All-purpose flour – 1/4 cup (30g) (thickens the sauce)
- Whole milk – 2 cups (480ml) (for extra creaminess; use 2% for lighter sauce)
- Heavy cream – 1 cup (240ml) (makes sauce ultra-creamy; can sub with half-and-half)
- Sharp cheddar cheese – 2 cups (200g), freshly grated (for bold flavor; I love Tillamook or Cabot)
- Monterey Jack cheese – 1 cup (100g), freshly grated (melts smoothly; can swap with mozzarella or fontina)
- Parmesan cheese – 1/2 cup (50g), finely grated (adds salty kick; optional but recommended)
- Ground mustard – 1/2 tsp (gives a subtle tang; don’t skip!)
- Garlic powder – 1/2 tsp (for extra depth)
- Black pepper – 1/4 tsp (adjust to taste)
- Salt – 1/2 tsp (or more, to taste)
- For the Topping (Optional):
- Panko breadcrumbs – 1/2 cup (30g) (for crispy finish)
- Melted butter – 2 tbsp (28g)
- Extra cheddar – 1/2 cup (50g), grated (for golden crust)
Ingredient tips: Always grate your own cheese—it melts better and gives a smoother sauce. If you need a gluten-free version, swap in your favorite GF pasta and use a gluten-free flour blend for the roux. Dairy-free? Try oat milk and vegan cheese shreds. In summer, toss in a handful of fresh peas or roasted red peppers for a seasonal twist.
Trust me, keeping it simple and sticking with high-quality cheese is the secret here. I recommend buying blocks and grating them yourself (pre-shredded can make the sauce gritty). For extra flavor, a pinch of smoked paprika is a fun addition!
Equipment Needed
- Large pot or Dutch oven: For boiling pasta and mixing everything together. I love my enameled Dutch oven (easy to clean and distributes heat evenly).
- Medium saucepan: To prepare the cheese sauce separately if you prefer (helps avoid burning).
- Whisk: Essential for making a lump-free sauce. If you don’t have one, a sturdy fork can work in a pinch.
- Colander: For draining the pasta. A mesh strainer works too!
- Wooden spoon or spatula: For stirring and folding pasta and sauce together.
- Casserole dish (optional): If you’re baking with a topping, a 9×13-inch (23x33cm) pan is perfect.
Honestly, you don’t need any fancy gadgets for creamy homemade mac and cheese. I’ve made this recipe with basic pots and pans, and it turns out just as good. If you use nonstick cookware, remember to avoid metal utensils to keep your pots scratch-free. For budget-friendly options, check thrift stores for sturdy whisks and casserole dishes—they last forever!
How to Make Creamy Homemade Mac and Cheese
-
Cook the Pasta:
Bring a large pot of salted water to a rolling boil. Add 12 oz (340g) elbow macaroni and cook for 7–8 minutes (until just al dente). Drain well and set aside. Don’t overcook—the pasta will soften more in the sauce.
Personal tip: Toss the drained pasta with a little butter to keep it from sticking while you prep the sauce. -
Make the Roux:
In the same pot (wipe it out if needed), melt 1/4 cup (60g) unsalted butter over medium heat. Sprinkle in 1/4 cup (30g) flour and whisk constantly for about 1 minute, until smooth and bubbly. The mixture should smell slightly nutty but not burnt.
Warning: Don’t let it brown; if it does, start over—it’ll taste bitter. -
Add Milk and Cream:
Gradually pour in 2 cups (480ml) whole milk and 1 cup (240ml) heavy cream, whisking all the while. Keep whisking until the mixture thickens—about 3–5 minutes. The sauce should coat the back of a spoon.
Sensory cue: You’ll know it’s ready when it feels silky and smooth. -
Season the Sauce:
Stir in 1/2 tsp ground mustard, 1/2 tsp garlic powder, 1/4 tsp black pepper, and 1/2 tsp salt. Taste and adjust seasoning if needed.
Note: Mustard adds depth but won’t make it taste “mustardy”—trust me! -
Stir in the Cheese:
Remove the pot from heat. Add 2 cups (200g) sharp cheddar, 1 cup (100g) Monterey Jack, and 1/2 cup (50g) Parmesan, a handful at a time, stirring until melted and smooth. The sauce will look glossy and rich.
Troubleshooting: If the cheese looks grainy, lower the heat and stir steadily. -
Combine Pasta and Sauce:
Add the drained macaroni to the cheese sauce. Fold gently until every noodle is coated. Taste and adjust salt or pepper if needed.
Efficiency tip: Use a wide, sturdy spoon to mix—makes it easier! -
Optional Topping and Bake:
If you love a crunchy top, preheat your oven to 375°F (190°C). Spread mac and cheese in a buttered 9×13-inch (23x33cm) casserole dish. Mix 1/2 cup (30g) panko breadcrumbs with 2 tbsp (28g) melted butter and sprinkle over the top, followed by 1/2 cup (50g) extra cheddar. Bake for 15–20 minutes until bubbling and golden.
Personal note: Sometimes I skip the topping when I’m short on time—it’s just as creamy and dreamy!
This recipe makes about 6 servings. Total time: 30–40 minutes, depending on whether you bake it. If you want to keep things easy, stick to the stovetop version—fewer dishes, more comfort!
Cooking Tips & Techniques
Here’s where years of mac and cheese trial and error come in handy. I’ve had lumpy sauces, burnt cheese, and even the dreaded curdled mess. Let me help you sidestep those headaches:
- Freshly Grated Cheese: Always grate your own cheese! Pre-shredded cheese contains anti-caking agents that can make your sauce gritty.
- Low and Slow: Melt cheese over low heat and never let the sauce boil. High heat breaks down the proteins and can cause separation (trust me, I learned that the hard way).
- Whisk, Don’t Rush: When adding milk and cream, go slow and keep whisking to avoid lumps. If your roux clumps, just strain it before adding cheese.
- Timing is Everything: Start your cheese sauce as soon as the pasta goes into the water. Multitasking keeps everything hot and ready at the same time.
- Season Early and Taste Often: The right amount of salt, pepper, and mustard is key. Taste before and after adding cheese—adjust to your own liking.
- Don’t Overbake: If baking, watch closely after 15 minutes. The topping should be golden, not dry.
- Failures and Fixes: Once, I used too much flour and ended up with paste. If your sauce is too thick, add more milk a splash at a time until smooth.
Consistency comes with practice, but these shortcuts and reminders will help you get that perfect, creamy homemade mac and cheese every single time.
Variations & Adaptations
Creamy homemade mac and cheese is endlessly customizable! I’ve tried loads of tweaks over the years, and here are my favorite ways to mix things up:
- Gluten-Free: Use gluten-free elbow macaroni and swap the flour for a gluten-free blend. The sauce stays just as creamy.
- Low-Carb: Try using cauliflower florets instead of pasta. Steam until fork-tender, then fold into the cheese sauce.
- Spicy Kick: Add 1/4 tsp cayenne pepper or a dash of hot sauce to the cheese sauce. You can even toss in diced jalapeños for extra heat.
- Seasonal Veggies: Stir in roasted broccoli, peas, or diced tomatoes for color and flavor. In fall, a handful of sautéed mushrooms is delicious.
- Dairy-Free: Use plant-based butter, unsweetened oat milk, and your favorite vegan cheese shreds. The sauce may be a bit thinner but still tasty!
- Personal favorite: I sometimes mix in shredded rotisserie chicken or crispy bacon for a heartier, protein-packed dinner. It’s a total crowd-pleaser!
Don’t be afraid to get creative. Adjust the cheese blend to your taste—try Gruyere, fontina, or smoked gouda for different flavor profiles. Allergies? Omit Parmesan or use a nut-free breadcrumb topping. The core technique stays the same, so you can customize as much as you want.
Serving & Storage Suggestions
Creamy homemade mac and cheese is best served piping hot, straight out of the pot or oven. I love presenting it in a rustic casserole dish, sprinkled with fresh parsley for a pop of color. Pair it with a crisp green salad, roasted veggies, or juicy grilled chicken for a complete meal.
For drinks, iced tea or sparkling lemonade balances the richness nicely. If you’re serving at a party, keep it warm in a slow cooker set to “low”—guests will keep coming back for more.
Leftovers? Let the mac and cheese cool, then transfer to an airtight container. Refrigerate for up to 4 days. Reheat gently on the stove with a splash of milk to revive the creaminess, or microwave in 30-second bursts, stirring in between. It freezes well, too—just portion into freezer bags and thaw overnight before reheating.
Honestly, the flavors deepen overnight, making it even better the next day. I sometimes sneak a cold spoonful straight from the fridge (no shame!).
Nutritional Information & Benefits
Each serving of creamy homemade mac and cheese (about 1 cup) packs roughly:
- Calories: 450
- Protein: 16g
- Fat: 26g
- Carbs: 38g
- Sugar: 4g
- Sodium: 650mg
Key ingredients like sharp cheddar offer calcium and protein, while whole milk brings vitamin D and extra creaminess. Using whole grains or adding veggies can boost fiber and nutrients. If you’re gluten-free, sub in GF pasta and flour—easy peasy. Allergens to watch: dairy, wheat, and sometimes eggs (if using enriched pasta).
From a wellness perspective, homemade mac and cheese is more balanced than boxed versions—no weird additives, just real food. I see it as a treat, but one you can feel good about thanks to fresh ingredients and simple swaps.
Conclusion
If you’re hunting for the ultimate comfort, creamy homemade mac and cheese is worth every single bite. It’s quick, customizable, and downright delicious. Make it your own—switch up the cheeses, toss in veggies, or add a crunchy topping. No matter what, you’re getting a dish that delivers smiles every time.
This recipe has become my kitchen MVP, and I hope you’ll love it as much as my family does. Let me know your favorite twists, drop a comment with your results, or share how you serve it at home. Your feedback and photos always make my day, so don’t be shy!
Here’s to cheesy comfort, easy dinners, and memories made around the table—bookmark this one, because you’ll want to come back again and again!
Frequently Asked Questions
Can I use pre-shredded cheese?
You can, but freshly grated cheese melts better and gives a smoother, creamier sauce. Pre-shredded cheese often leads to a grainy texture.
Is this recipe freezer-friendly?
Yes! Let the mac and cheese cool, portion into freezer-safe containers, and freeze for up to 2 months. Thaw overnight and reheat gently with a splash of milk.
How do I make this mac and cheese gluten-free?
Use gluten-free elbow pasta and swap the flour for a gluten-free blend. The sauce stays creamy and delicious—no one will notice the difference!
Can I add meat or vegetables?
Absolutely. Stir in cooked chicken, crispy bacon, or roasted veggies after mixing the pasta and sauce. It’s a great way to make it a complete meal.
What’s the best way to reheat leftovers?
Warm gently on the stove with a splash of milk, stirring until creamy. For single servings, microwave for 30 seconds at a time, stirring in between.
Pin This Recipe!

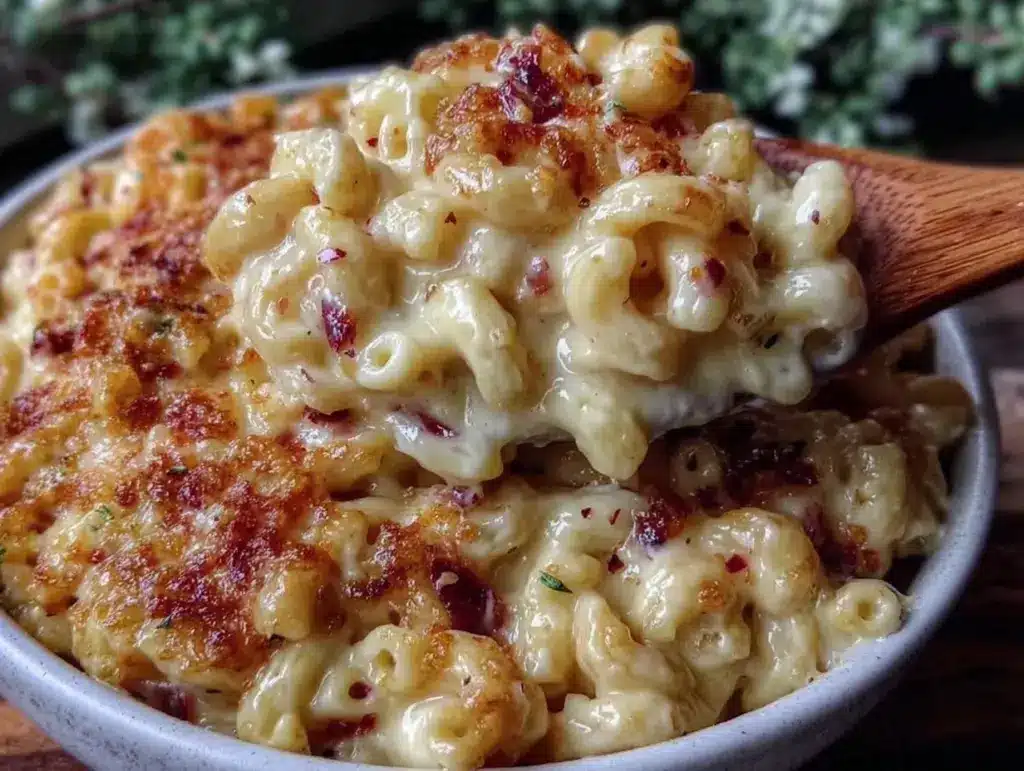
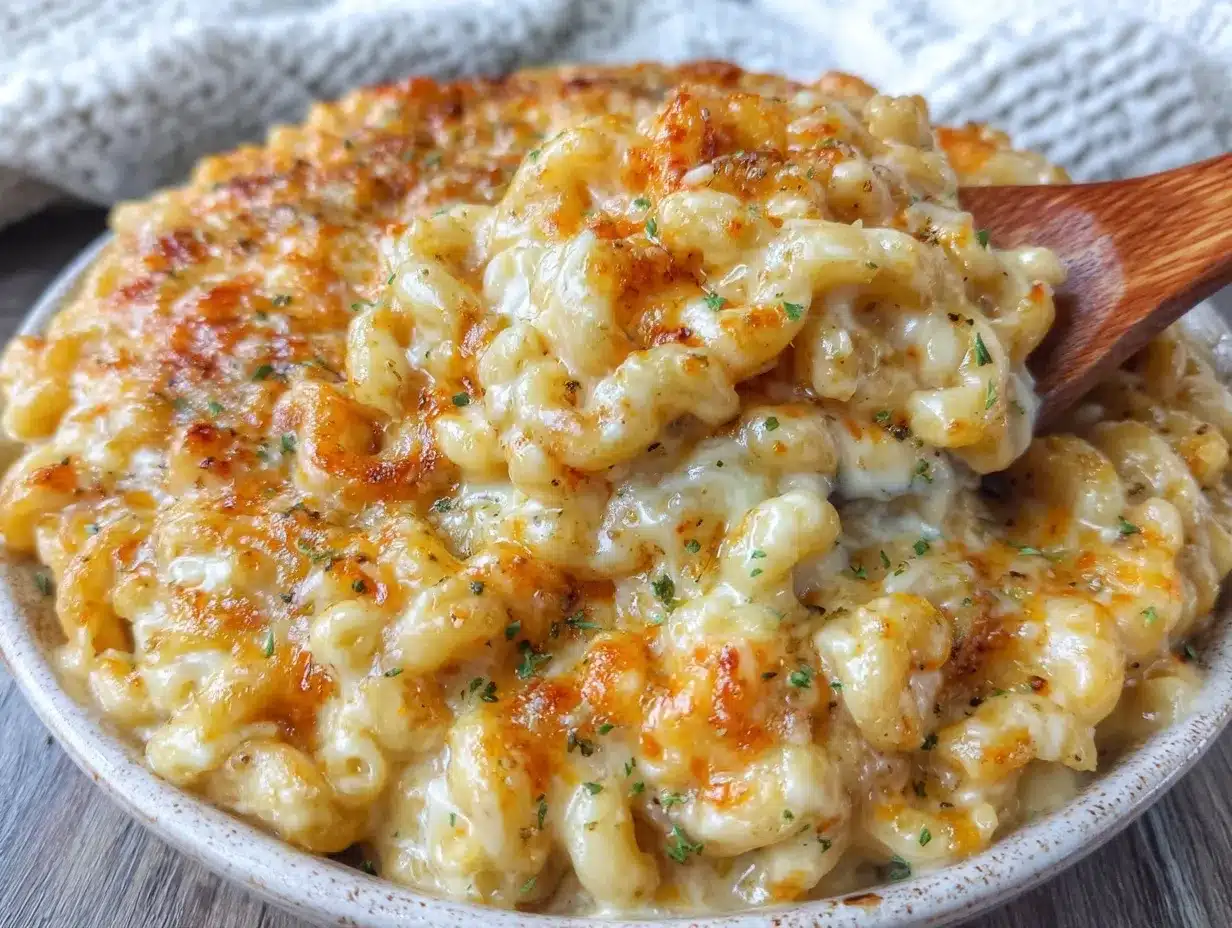
Creamy Homemade Mac and Cheese

This easy one-pot mac and cheese is the ultimate comfort food—creamy, cheesy, and ready in under 40 minutes. Perfect for family dinners, potlucks, or cozy nights in, it features a velvety sauce and tender noodles that everyone will love.
- Prep Time: 10 minutes
- Cook Time: 20–30 minutes
- Total Time: 30–40 minutes
- Yield: 6 servings 1x
- Category: Main Course
- Cuisine: American
Ingredients
- 12 oz elbow macaroni
- Salt (for boiling water and seasoning)
- 1/4 cup unsalted butter
- 1/4 cup all-purpose flour
- 2 cups whole milk
- 1 cup heavy cream
- 2 cups sharp cheddar cheese, freshly grated
- 1 cup Monterey Jack cheese, freshly grated
- 1/2 cup Parmesan cheese, finely grated (optional but recommended)
- 1/2 tsp ground mustard
- 1/2 tsp garlic powder
- 1/4 tsp black pepper
- 1/2 tsp salt (or more, to taste)
- 1/2 cup panko breadcrumbs (optional topping)
- 2 tbsp melted butter (optional topping)
- 1/2 cup extra cheddar cheese, grated (optional topping)
Instructions
- Bring a large pot of salted water to a rolling boil. Add elbow macaroni and cook for 7–8 minutes until just al dente. Drain well and set aside.
- In the same pot, melt unsalted butter over medium heat. Sprinkle in flour and whisk constantly for about 1 minute until smooth and bubbly.
- Gradually pour in whole milk and heavy cream, whisking continuously. Cook for 3–5 minutes until the mixture thickens and coats the back of a spoon.
- Stir in ground mustard, garlic powder, black pepper, and salt. Taste and adjust seasoning if needed.
- Remove the pot from heat. Add sharp cheddar, Monterey Jack, and Parmesan cheese a handful at a time, stirring until melted and smooth.
- Add the drained macaroni to the cheese sauce. Fold gently until every noodle is coated. Taste and adjust salt or pepper if needed.
- Optional: For a crunchy topping, preheat oven to 375°F. Spread mac and cheese in a buttered 9×13-inch casserole dish. Mix panko breadcrumbs with melted butter and sprinkle over the top, followed by extra cheddar. Bake for 15–20 minutes until bubbling and golden.
Notes
Always grate your own cheese for the smoothest sauce. For gluten-free, use GF pasta and flour. Add veggies or cooked meats for variety. If baking, watch closely after 15 minutes to avoid drying out. Leftovers can be refrigerated for up to 4 days or frozen for 2 months.
Nutrition
- Serving Size: About 1 cup per serv
- Calories: 450
- Sugar: 4
- Sodium: 650
- Fat: 26
- Saturated Fat: 15
- Carbohydrates: 38
- Fiber: 2
- Protein: 16
Keywords: mac and cheese, creamy mac and cheese, homemade mac and cheese, comfort food, easy pasta, one-pot mac and cheese, family dinner, kid-friendly, cheese sauce, casserole


