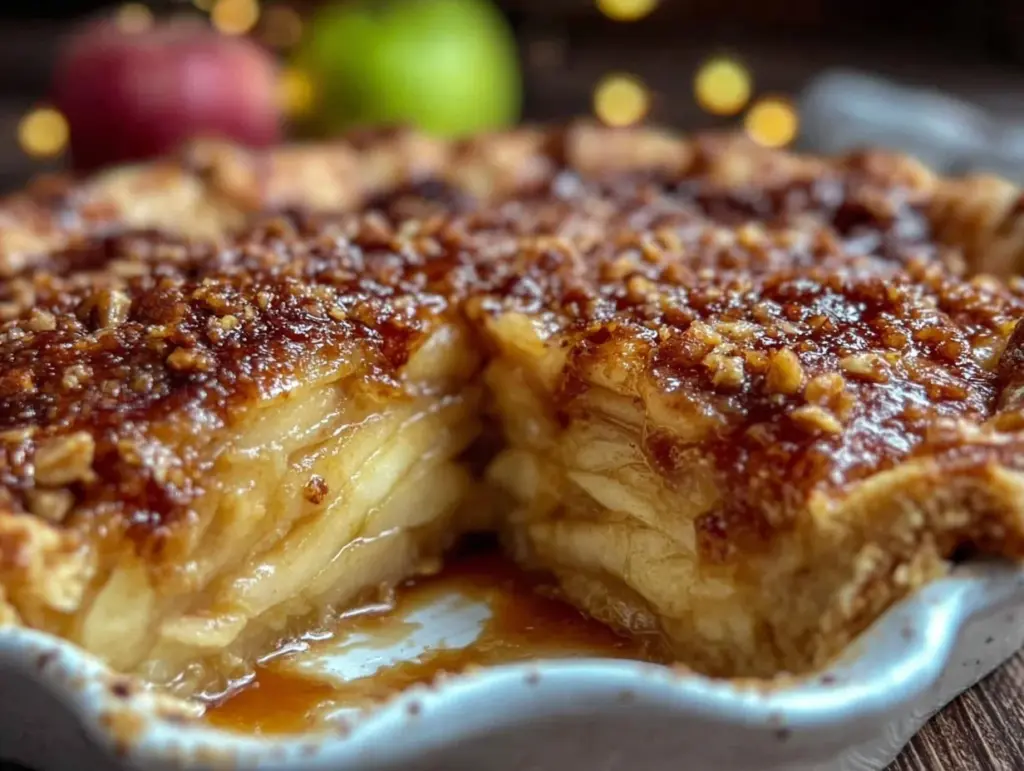
There’s a certain magic to the way the aroma of ripe pears, golden maple syrup, and vanilla wafts through my kitchen on a crisp fall afternoon. I’ll never forget the first time I pulled this maple vanilla walnut pear pie out of the oven—the bubbling filling, the way the walnuts turned fragrant, and the buttery crust turning a lovely golden hue. The scent alone had everyone in my house lingering around the kitchen, drawn in by that irresistible combination of sweet fruit and warm spice. Honestly, the first forkful was pure, nostalgic comfort—tender pears mingling with earthy walnuts, all wrapped in vanilla-scented syrup. It’s one of those moments where you pause, take a deep breath, and just smile because you know you’ve stumbled upon something truly special.
My family has always adored pie, especially as the leaves start to turn. When I was knee-high to a grasshopper, my grandma would bake pies from whatever fruit was in season—we’d gather around the table, laughing and sneaking bites as soon as they were cool enough to handle. Years ago, I tried combining maple and vanilla with pears just out of curiosity, and it instantly became a staple. I wish I’d thought of it sooner! The combination is dangerously easy and so cozy—perfect for chilly evenings, potlucks, or just a sweet treat after a long week.
Let’s face it, this maple vanilla walnut pear pie is the kind folks can’t stop talking about. My kids try to steal slices before I’ve even finished slicing (and you know what, I can’t blame them). Friends have started requesting it for every gathering. After testing and tweaking the recipe more times than I can count (in the name of research, of course!), it’s become my go-to for family get-togethers and gifting. If you’re searching for a fall pie that feels like a warm hug, you’re going to want to bookmark this one—it’s baking bliss every time.
Why You’ll Love This Maple Vanilla Walnut Pear Pie
- Quick & Easy: You can whip up this pie in under 30 minutes of prep—no fancy techniques required. Seriously, perfect for busy weeknights or when those last-minute cravings hit.
- Simple Ingredients: Most of what you need is probably already in your pantry. No wild goose chase for obscure spices or specialty pears. Just honest, everyday stuff.
- Perfect for Fall Gatherings: This pie is a showstopper for Thanksgiving, Friendsgiving, or any autumn potluck. The flavors scream sweater weather and cozy evenings.
- Crowd-Pleaser: Kids, adults, picky eaters—everyone comes back for seconds. Trust me, I’ve seen folks fight over the last piece more than once.
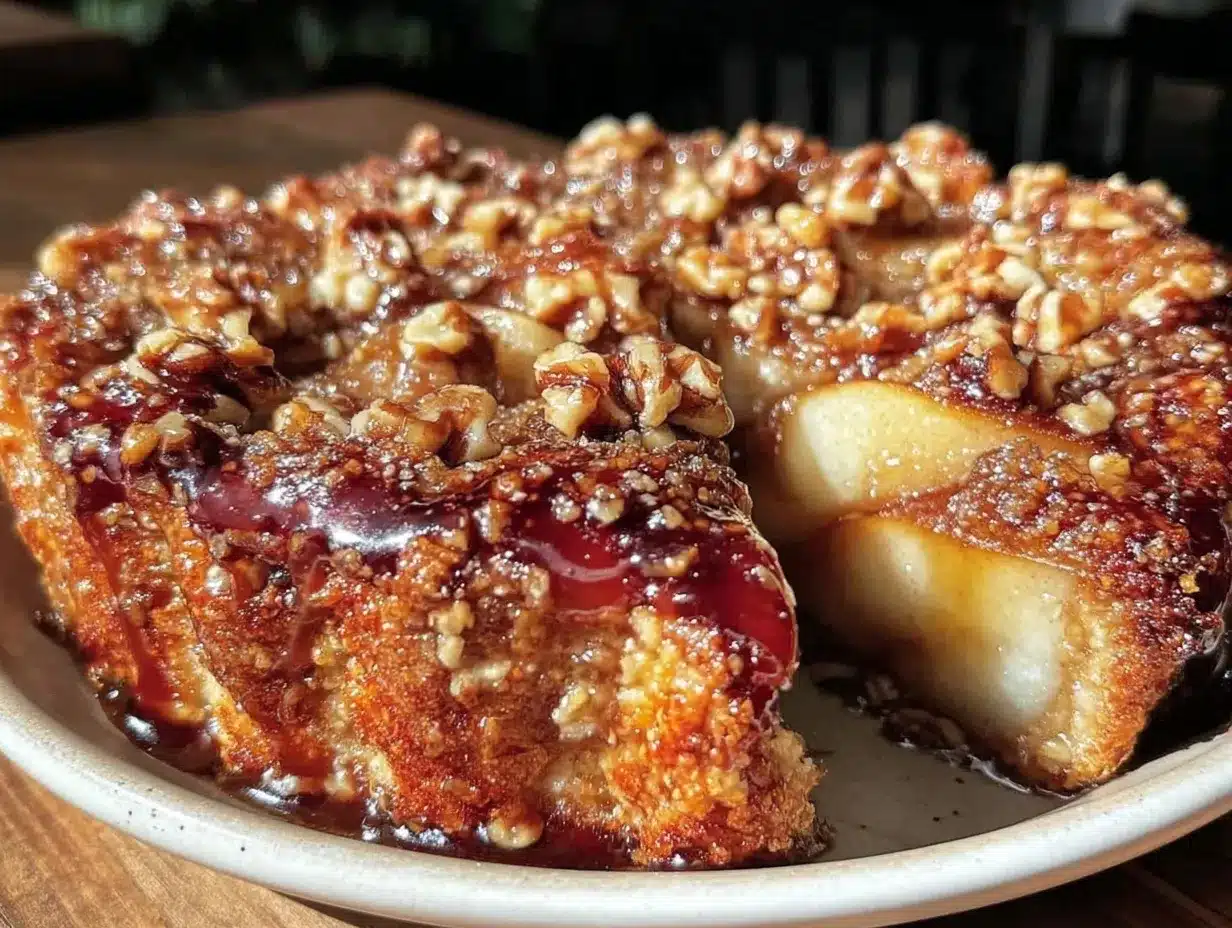
- Unbelievably Delicious: The tender pears soak up that maple vanilla goodness, the walnuts add a satisfying crunch, and the crust is light yet sturdy. Each bite gives you a mix of sweet, nutty, and buttery flavors—comfort food at its finest.
What sets this maple vanilla walnut pear pie apart is the way those flavors meld. Instead of just tossing fruit and sugar in a shell, you’re layering in rich maple syrup, pure vanilla extract, and toasted walnuts for depth. I use a touch of cinnamon for warmth but keep the spices subtle so the pears shine. The result? A pie that’s not too sweet, never soggy, and absolutely packed with autumn personality.
This recipe is honestly the kind that makes you close your eyes after the first bite. It’s comfort food—made a little lighter, a tad healthier, and way faster than traditional fruit pies. Perfect for impressing guests (without breaking a sweat), and ideal for making ordinary days feel a bit more special. Whether you’re a seasoned baker or just dipping your toes into fall baking, you’ll find this pie forgiving, fun, and full of heart.
What Ingredients You Will Need
This maple vanilla walnut pear pie is all about using simple, wholesome ingredients to build bold flavor and a satisfying texture. Most of these are pantry staples, and you can easily swap things out to fit what you have on hand or dietary preferences. Here’s what you’ll need:
- For the Pie Filling:
- 4–5 large ripe pears, peeled, cored, and sliced (about 900g; Bartlett or Bosc work well for texture and sweetness)
- 1/3 cup (80ml) pure maple syrup (Grade A, for the deepest flavor)
- 1/4 cup (50g) brown sugar (light or dark, adds caramel notes)
- 2 teaspoons pure vanilla extract (I love Nielsen-Massey for extra depth)
- 1 1/2 tablespoons (12g) cornstarch (helps thicken up the juices)
- 1 teaspoon ground cinnamon (adds warmth but doesn’t overpower)
- 1/2 teaspoon fine sea salt
- 3/4 cup (75g) walnuts, roughly chopped (toasted for best flavor)
- 1 tablespoon (14g) unsalted butter, cut into small cubes (dots on top for richness)
- For the Pie Crust:
- 1 single 9-inch pie crust (homemade or store-bought; I use a classic butter crust for flakiness)
- Optional: 1 egg, beaten (for egg wash, gives a glossy finish)
- For Finishing:
- Extra maple syrup, for drizzling (after baking)
- Vanilla ice cream or whipped cream (for serving, totally optional but highly recommended!)
Ingredient Tips: Want to keep things gluten-free? Swap in your favorite gluten-free pie crust. Prefer a dairy-free version? Use plant-based butter and skip the egg wash. In summer, you could swap pears for peaches or apples for a totally different vibe. If you’re out of walnuts, pecans make a lovely substitute. For a lower-sugar version, you can reduce the brown sugar by half—the maple syrup alone gives plenty of sweetness.
I always look for pears that are just barely ripe—not mushy but yielding to gentle pressure. If your pears are super juicy, add a touch more cornstarch. And for the nuts, toasting them first (just five minutes in a dry skillet!) makes all the difference in flavor.
Equipment Needed
- 9-inch pie pan (ceramic or glass gives the most even bake)
- Mixing bowls (at least two: one for pears, one for dry ingredients)
- Measuring cups and spoons (I like stainless steel for accuracy and durability)
- Cutting board and sharp knife (for peeling and slicing pears)
- Peeler (makes quick work of those pears)
- Whisk or fork (to mix filling and egg wash)
- Spatula or wooden spoon (for tossing pears with syrup and spices)
- Pastry brush (for applying egg wash—if you don’t have one, use your fingers!)
- Baking sheet (to catch drips under the pie pan)
- Oven mitts (because nobody likes burnt fingers!)
If you don’t have a pie pan, you can use a cake pan or even a cast-iron skillet in a pinch—the crust will still bake up nicely. I’ve used budget-friendly glass pans from the grocery store for years, and they still work like a charm. For maintenance, always hand-wash your pie pan and dry it thoroughly—especially if it’s ceramic or glass, to prevent cracking. And if you’re short on measuring spoons, just eyeball it (grandma-style)—the recipe is forgiving!
Preparation Method
- Prep the Pie Crust:
- If using homemade, roll your dough out on a floured surface until it’s about 1/8-inch (3mm) thick. Fit it into your 9-inch pie pan, gently pressing into the corners. Trim any overhang to about 1/2-inch (1cm).
- Crimp or flute the edges as you like. Chill the crust in the fridge while you make the filling (10 minutes helps prevent soggy bottoms).
- Make the Filling:
- In a large bowl, combine the sliced pears, maple syrup, brown sugar, vanilla extract, cornstarch, cinnamon, and salt. Toss gently with a spatula until pears are well coated and everything looks glossy.
- If your pears are very juicy, sprinkle in an extra teaspoon of cornstarch to help thicken.
- Stir in the chopped toasted walnuts, reserving a tablespoon for topping if you like more crunch.
- Assemble the Pie:
- Pour the pear filling into the chilled crust, spreading evenly. Dot the top with small cubes of butter (this melts into the filling and adds richness).
- If you saved extra walnuts, sprinkle them over the top for a pretty finish.
- Brush and Bake:
- If you want a shiny crust, brush the edges lightly with beaten egg.
- Place the pie pan on a baking sheet to catch drips.
- Bake at 375°F (190°C) for 45–55 minutes, until the crust is golden and the filling is bubbling.
- If the edges brown too quickly, cover them with strips of foil halfway through.
- Cool and Serve:
- Let the pie cool on a wire rack for at least 1 hour before slicing—this helps the filling set and keeps those slices neat.
- For extra flair, drizzle a little maple syrup over each slice and top with a scoop of vanilla ice cream or whipped cream.
Notes and Troubleshooting: If the filling seems too runny after baking, give the pie more time to cool—it thickens as it sits. I’ve had pies bubble over more than once, so always use a baking sheet underneath. If your crust tears while fitting, patch it with leftover dough—nobody will know! Pears can be slippery, so work slowly when slicing. And if you’re in a hurry, store-bought crust is perfectly fine—honestly, sometimes you just need pie fast.
Cooking Tips & Techniques
Here’s what I’ve learned from baking this maple vanilla walnut pear pie over and over—and a few little mistakes along the way!
- Toasting Walnuts: Always toast your walnuts in a dry skillet for 4–5 minutes until fragrant. It brings out their nuttiness and keeps them from tasting bland.
- Preventing Soggy Bottoms: Chilling your pie crust just before filling is key. If you’re worried, you can blind-bake for 10 minutes at 375°F (190°C) before adding the pears—just prick with a fork and skip the weights.
- Pie Filling Consistency: Pears release more juice than apples, so don’t skip the cornstarch. If your pears are super ripe, add a little extra.
- Perfect Slicing: Let’s face it, slicing warm pie is tempting, but messy. Give it an hour to set—trust me, the slices hold together much better.
- Multitasking: While your crust chills, prep the filling. If you’re short on time, use pre-peeled pears from the produce section.
- Flavor Boost: For deeper flavor, add a dash of cardamom or swap half the walnuts for pecans. I sometimes add a splash of bourbon for grown-up gatherings!
- Personal Lessons: I once forgot to add the butter cubes and the pie filling was a tad dry—don’t skip it! And if you’ve ever had a burnt crust, foil strips are your friend.
Consistency comes from practice and a little patience—the more you bake, the better you’ll get at reading your crust and filling. Always trust your nose—the smell is the best sign your pie is nearly done!
Variations & Adaptations
- Gluten-Free: Use a gluten-free pie crust (store-bought or homemade). Bob’s Red Mill makes a great mix! The filling works perfectly as-is.
- Dairy-Free: Swap plant-based butter for the regular, skip the egg wash, and use coconut whipped cream for serving.
- Seasonal Swap: Try apples or peaches instead of pears. In spring, I love adding fresh berries for a twist—just reduce the sugar a touch.
- Nut-Free: Leave out the walnuts or use toasted pumpkin seeds for crunch. I’ve made this for nut-allergic friends and it’s still delicious.
- Spice it Up: Add ground ginger or cardamom for extra warmth. Sometimes I sprinkle a little orange zest on top for brightness.
Personally, my favorite variation is adding a handful of dried cranberries to the filling in late fall—it gives a little tart pop that balances the sweet pears and maple. You can also bake this recipe as hand pies or galettes if you’re not up for full pie assembly. And for a low-sugar option, just use maple syrup and skip the brown sugar entirely—the flavor holds up!
Serving & Storage Suggestions
Serve this maple vanilla walnut pear pie slightly warm or at room temperature—both ways are delicious. I love presenting it on a rustic wooden board with a dollop of whipped cream or a scoop of vanilla ice cream on the side. As for beverages, a hot mug of chai or mulled cider pairs perfectly!
Leftovers store beautifully: Cover your pie loosely with foil and refrigerate for up to 4 days. The flavors actually deepen overnight, so don’t be surprised if it tastes even better the next day. For longer storage, wrap tightly and freeze slices for up to a month—just thaw in the fridge and reheat in a 325°F (160°C) oven for 10 minutes.
If reheating, avoid the microwave (the crust gets soggy). Oven is best! And if you want to serve pie for breakfast (no judgment here), it’s just as good cold with a spoonful of yogurt. The walnuts stay crunchy, the pears stay tender, and the maple flavor shines through every time.
Nutritional Information & Benefits
This pie serves 8 and each slice is roughly 320 calories, with 18g fat, 42g carbs, and 4g protein. Pears are a great source of fiber and vitamin C, while walnuts bring heart-healthy fats and a little protein. Maple syrup has a lower glycemic index than refined sugar, and the recipe is free from artificial flavors.
If you use a gluten-free crust or plant-based butter, it’s easy to adapt for dietary needs. Watch out for nut allergies, and remember the pie contains eggs if you use the wash. I love that this recipe balances wholesome ingredients with a bit of indulgence—perfect for those cozy fall vibes without feeling too heavy.
Conclusion
If you’re craving something sweet, warm, and totally autumnal, this maple vanilla walnut pear pie is worth every minute. It’s the kind of recipe that brings people together, sparks conversation, and leaves everyone asking for seconds. Make it your own—swap out nuts, play with spices, or try a different crust. There’s no wrong way to enjoy it!
I keep coming back to this pie because it reminds me of family, fall, and those simple joys that come from sharing good food. So go ahead, bake it, adapt it, and tell me how it turned out. I’d love to hear your stories! Drop a comment below, pin it for later, or share your favorite twist—let’s keep the fall baking bliss going strong.
FAQs
Can I make this maple vanilla walnut pear pie ahead of time?
Absolutely! You can bake the pie a day ahead and store it in the fridge. The flavors deepen overnight and the crust stays crisp if loosely covered.
Can I use canned pears instead of fresh?
Yes, just drain them very well and pat dry. Fresh pears give the best texture, but canned work in a pinch—just skip the added sugar if they’re packed in syrup.
What’s the best way to toast walnuts for the filling?
Place walnuts in a dry skillet over medium heat for 4–5 minutes, stirring often. They’ll smell nutty and turn golden—don’t walk away, they burn quickly!
How do I make this pie gluten-free?
Just swap in your favorite gluten-free pie crust. The filling is naturally gluten-free, so it’s a super easy switch.
Can I freeze leftovers of this pie?
Yes! Wrap individual slices tightly and freeze for up to a month. Thaw in the fridge and reheat in the oven for best texture.
Pin This Recipe!
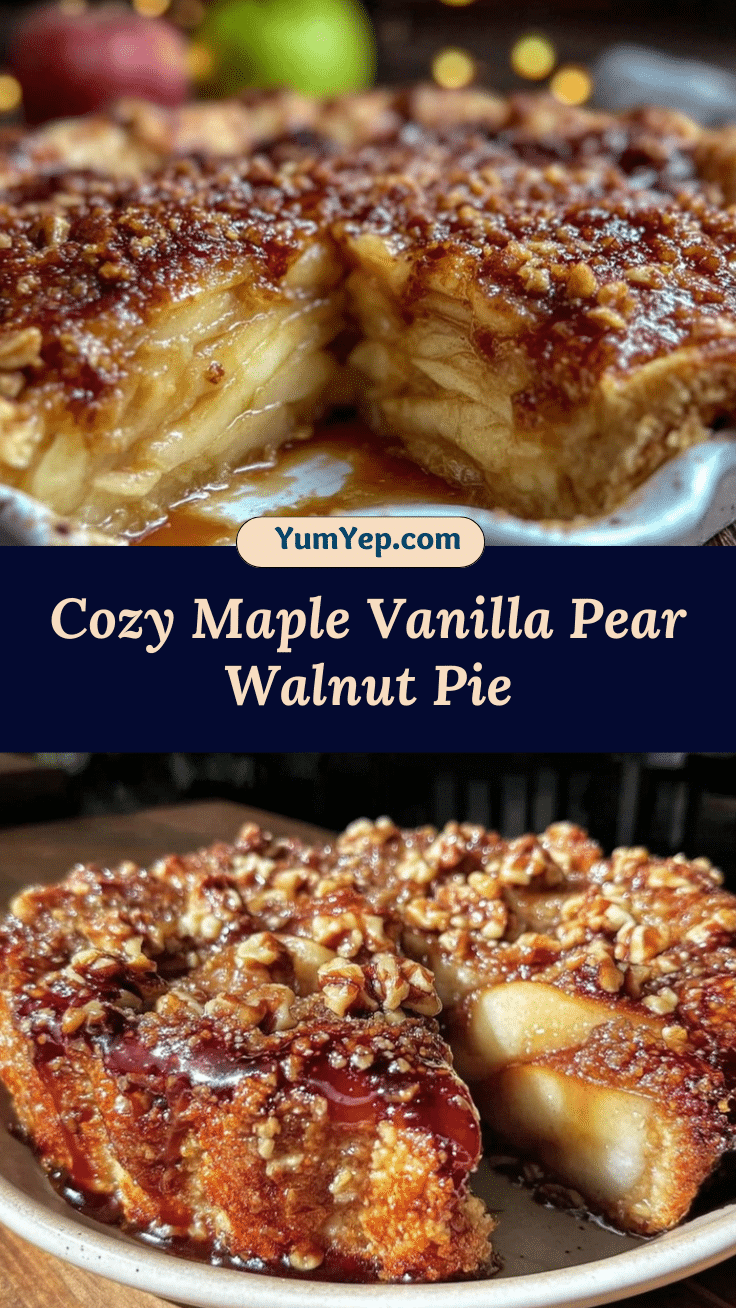
Maple Vanilla Walnut Pear Pie

This cozy fall pie features tender pears, toasted walnuts, and a luscious maple-vanilla filling in a buttery crust. It’s easy to make, crowd-pleasing, and perfect for gatherings or a comforting treat on chilly evenings.
- Prep Time: 25 minutes
- Cook Time: 50 minutes
- Total Time: 1 hour 15 minutes
- Yield: 8 servings 1x
- Category: Dessert
- Cuisine: American
Ingredients
- 4–5 large ripe pears, peeled, cored, and sliced (about 2 lbs; Bartlett or Bosc recommended)
- 1/3 cup pure maple syrup
- 1/4 cup brown sugar (light or dark)
- 2 teaspoons pure vanilla extract
- 1 1/2 tablespoons cornstarch
- 1 teaspoon ground cinnamon
- 1/2 teaspoon fine sea salt
- 3/4 cup walnuts, roughly chopped (toasted for best flavor)
- 1 tablespoon unsalted butter, cut into small cubes
- 1 single 9-inch pie crust (homemade or store-bought, classic butter crust preferred)
- Optional: 1 egg, beaten (for egg wash)
- Extra maple syrup, for drizzling after baking
- Vanilla ice cream or whipped cream, for serving (optional)
Instructions
- If using homemade crust, roll dough out on a floured surface to about 1/8-inch thick. Fit into a 9-inch pie pan, trim overhang to 1/2-inch, and crimp or flute edges. Chill crust in fridge for 10 minutes.
- In a large bowl, combine sliced pears, maple syrup, brown sugar, vanilla extract, cornstarch, cinnamon, and salt. Toss gently until pears are coated and glossy.
- If pears are very juicy, add an extra teaspoon of cornstarch.
- Stir in chopped toasted walnuts, reserving a tablespoon for topping if desired.
- Pour pear filling into chilled crust and spread evenly. Dot top with butter cubes. Sprinkle reserved walnuts on top if using.
- Brush crust edges lightly with beaten egg for a glossy finish (optional).
- Place pie pan on a baking sheet to catch drips. Bake at 375°F for 45–55 minutes, until crust is golden and filling is bubbling. Cover edges with foil strips if browning too quickly.
- Cool pie on a wire rack for at least 1 hour before slicing.
- Drizzle slices with extra maple syrup and serve with vanilla ice cream or whipped cream if desired.
Notes
For gluten-free, use a GF pie crust. Toast walnuts for best flavor. If pears are very ripe, add extra cornstarch. Chill crust before filling to prevent soggy bottoms. Let pie cool fully for neat slices. Store leftovers covered in fridge up to 4 days or freeze slices for up to 1 month. For dairy-free, use plant-based butter and skip egg wash.
Nutrition
- Serving Size: 1 slice (1/8 of pie)
- Calories: 320
- Sugar: 24
- Sodium: 220
- Fat: 18
- Saturated Fat: 5
- Carbohydrates: 42
- Fiber: 5
- Protein: 4
Keywords: pear pie, maple vanilla pie, walnut pie, fall dessert, easy pie recipe, Thanksgiving dessert, autumn baking, fruit pie, comfort food, homemade pie


