Introduction
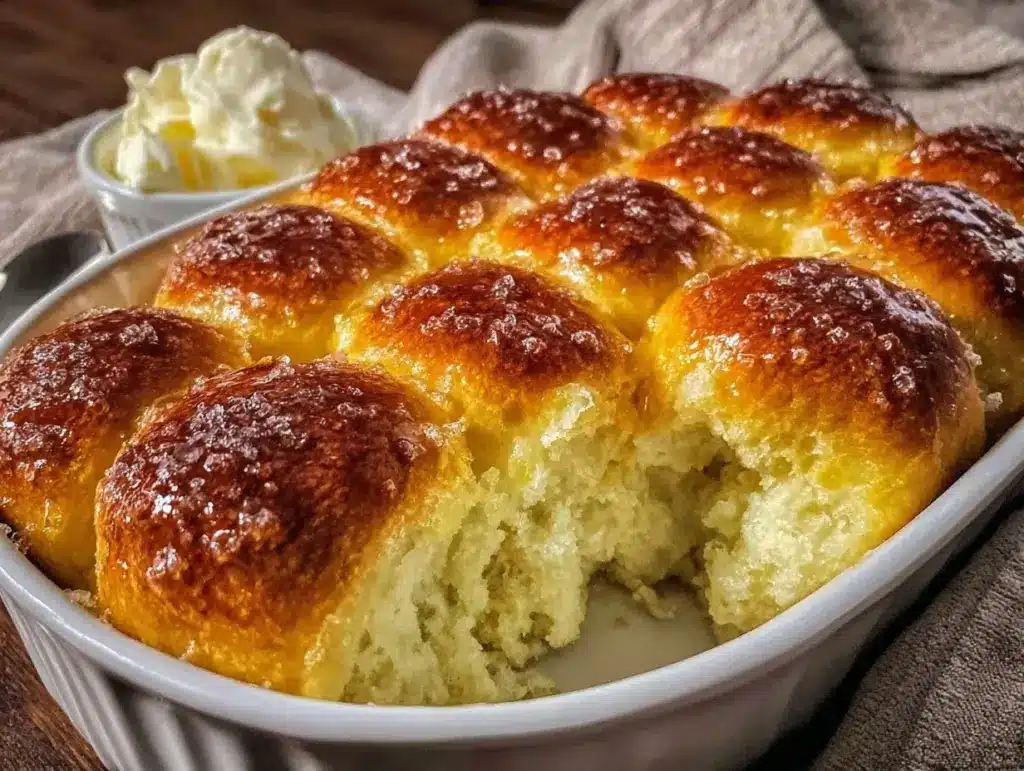
Let me tell you, the aroma of homemade dinner rolls—soft, fluffy, and buttery—drifting through my kitchen is honestly one of life’s purest joys. Imagine the sweet scent of yeast, the warmth of fresh bread, and that golden, pillowy look that just begs to be pulled apart. That first time I made these fluffy dinner rolls, it was one of those moments where you pause, take a deep breath, and grin because you realize you’ve stumbled upon something truly special.
I remember being knee-high to a grasshopper, watching my grandma knead dough with strong, flour-dusted hands. She’d always say, “Patience makes the bread rise higher!” These rolls became a family tradition—served for Sunday suppers, holiday feasts, and even those rainy weekends when comfort food was all we craved. When I tried to recreate her recipe as a young adult (let’s face it, I was desperate for bread that tasted like home), I realized how dangerously easy these rolls are to make. I only wish I’d discovered the secret to fluffy, soft, and buttery dinner rolls years ago!
My family couldn’t stop sneaking them off the cooling rack (I get it, warm rolls are irresistible). Even picky eaters gobbled them up with grins and buttery fingers. Whether you’re looking for the perfect sharing bread for potlucks, a sweet treat for your kids’ lunchboxes, or just want to brighten up your Pinterest dinner board, these dinner rolls are your ticket. After testing this recipe more times than I’ll admit (for research, of course), I can promise it’s now a staple at every gathering. These rolls feel like a warm hug from the oven—bookmark this one, because you’ll come back to it again and again.
Why You’ll Love This Recipe
Honestly, after years of baking and tweaking, this dinner rolls recipe stands out for all the right reasons. I’ve learned a few tricks over time—like letting the dough rise in a slightly warm oven and brushing with melted butter twice for extra richness. Trust me, the little details make these rolls unforgettable. Here’s what makes them truly special:
- Quick & Easy: You’ll have fresh, fluffy dinner rolls in under 90 minutes—no endless waiting around.
- Simple Ingredients: Everything you need is probably already in your kitchen. No fancy bread flour or weird additives—just the good stuff.
- Perfect for Sharing: Whether it’s a cozy family supper, holiday feasting, or a potluck with friends, these rolls fit right in. They’re made for passing around the table.
- Crowd-Pleaser: Kids, adults, and even the carb-cautious can’t resist these. I’ve seen entire pans disappear before dinner even starts!
- Unbelievably Delicious: The combination of pillowy softness and buttery flavor is pure comfort food. You’ll close your eyes after the first bite—it’s that good.
What sets this dinner rolls recipe apart? The secret is in the technique: a super simple yeast base, a touch of milk for tenderness, and double butter brushing for richness. No complicated steps, just tried-and-true methods. You won’t find dry, crumbly bread here—these are melt-in-your-mouth, soft dinner rolls you’ll crave again and again.
I’ve tested this recipe on busy weeknights, holiday mornings, and even for brunch with friends. It’s always a hit, and honestly, it’s the kind of bread that transforms an ordinary meal into something memorable. If you want a foolproof, fluffy, and shareable dinner roll recipe, this is the one you need in your recipe box.
What Ingredients You Will Need
This dinner rolls recipe uses simple, wholesome ingredients that come together to create a rich, buttery, and fluffy bread. Most are pantry staples and easy to substitute if you need to. Here’s what you’ll need (grouped for easy scanning):
- For the Dough:
- 3 1/2 cups (440g) all-purpose flour (King Arthur is my go-to for consistent results)
- 1/4 cup (50g) granulated sugar (adds a hint of sweetness)
- 2 1/4 teaspoons (1 packet, 7g) instant yeast (or active dry yeast—see notes below)
- 1 teaspoon fine sea salt (Diamond Crystal for balanced flavor)
- 1 cup (240ml) whole milk, warmed (for tenderness; use plant-based milk if needed)
- 1/4 cup (60g) unsalted butter, melted (plus extra for brushing—Land O’Lakes has a nice flavor)
- 1 large egg, room temperature (binds and enriches the dough)
- For the Butter Glaze:
- 2 tablespoons (28g) unsalted butter, melted (for brushing rolls before and after baking)
- Optional: Sprinkle of flaky sea salt (Maldon is wonderful for finishing)
Ingredient Selection Notes:
- If you’re gluten-free, swap in a 1:1 gluten-free all-purpose flour blend (Bob’s Red Mill works well).
- For dairy-free, use plant milk and vegan butter. The flavor stays rich and the texture remains soft.
- Prefer a less sweet roll? Cut the sugar to 2 tablespoons. Need more sweetness? Add an extra tablespoon.
- Don’t have instant yeast? Active dry yeast works fine—just proof it in warm milk with the sugar before mixing.
- Fresh herbs (like chopped rosemary or thyme) can be mixed in for a savory twist. I love adding minced chives in spring!
Most ingredients are easy to find and substitute. The key to these fluffy dinner rolls is using fresh yeast, a touch of milk, and real butter—each one plays a role in the irresistible texture and flavor.
Equipment Needed
You don’t need fancy gear to make these dinner rolls—just the basics (and a few handy swaps if you’re missing something):
- Mixing bowl (large): For combining ingredients. I use a sturdy glass bowl; any large bowl will do.
- Wooden spoon or dough hook: A wooden spoon works for mixing by hand, or use a stand mixer with dough hook for less elbow grease.
- Measuring cups and spoons: Precise measurements keep rolls fluffy. Both US and metric are listed for accuracy.
- 9×13-inch (23x33cm) baking pan: Metal or glass works. You can also use two 8-inch round pans for smaller batches.
- Clean kitchen towel or plastic wrap: For covering dough during rise.
- Pastry brush: For brushing on that glorious melted butter (a silicone brush is easy to clean).
- Bench scraper (optional): Handy for dividing dough evenly, but a sharp knife works too.
If you’re just starting out, don’t worry—mixing by hand is totally doable (and a fun workout!). Maintenance tip: Wash mixing bowls and dough hooks right away to avoid stuck-on dough. Budget-friendly? Most of these tools are probably already in your kitchen, and thrift stores are gold mines for cheap pans and utensils.
Preparation Method
Here’s how to make these fluffy, soft, and buttery dinner rolls from start to finish. Follow these steps for bakery-quality results at home!
- Warm the Milk: In a small saucepan or microwave, gently warm 1 cup (240ml) of milk until just warm to the touch (around 110°F/43°C). Don’t overheat—if it’s too hot, it’ll kill the yeast!
- Mix Dry Ingredients: In a large mixing bowl, combine 3 1/2 cups (440g) all-purpose flour, 1/4 cup (50g) sugar, 2 1/4 teaspoons (7g) instant yeast, and 1 teaspoon salt. Give it a quick stir to distribute.
- Add Wet Ingredients: Pour the warmed milk, 1/4 cup (60g) melted butter, and 1 large egg into the dry mix. Stir well with a wooden spoon or dough hook until a shaggy dough forms.
- Knead the Dough: Knead by hand on a lightly floured surface for about 8-10 minutes, or in a stand mixer for 5-6 minutes, until the dough is smooth and elastic. If the dough feels sticky, add a tablespoon of flour at a time—don’t go overboard or rolls will be dense.
- First Rise: Place dough in a lightly greased bowl, cover with a clean towel or plastic wrap, and let rise in a warm spot until doubled—about 45-60 minutes. Tip: I sometimes pop mine in a barely-warm oven with the door cracked (not hot!).
- Shape the Rolls: Punch down the dough gently to release air. Divide into 15-18 equal pieces (about 2 ounces/55g each). Roll each into a ball—if they’re sticky, dust your hands lightly with flour.
- Second Rise: Arrange balls in a greased 9×13-inch (23x33cm) pan, spacing evenly. Cover and let rise again for 25-35 minutes, until rolls puff and touch. Don’t rush—this is what makes them fluffy!
- Preheat and Butter: Preheat oven to 375°F (190°C). Brush rolls with 2 tablespoons melted butter for that rich, golden finish.
- Bake: Bake 18-22 minutes, until tops are golden brown and rolls sound hollow when tapped. If they’re browning too fast, tent loosely with foil halfway through.
- Final Butter Brush: Remove from oven and immediately brush with more melted butter. Sprinkle with flaky sea salt if you like.
- Cool & Serve: Let rolls cool for 10 minutes in the pan, then transfer to a wire rack. Serve warm for maximum fluffiness!
Troubleshooting: If rolls don’t rise, check your yeast—it might be expired or the milk was too hot. Dough too dense? You may have added too much flour. Rolls too pale? Bake a few more minutes for golden tops. I often set a timer and peek at 15 minutes—just to be safe!
Efficiency tip: Measure ingredients before you start (mise en place!). It makes the process smoother and you’ll catch any missing items before you’re elbow-deep in dough.
Cooking Tips & Techniques
Over the years, I’ve learned a few tricks to guarantee fluffy dinner rolls every time. Here’s what I wish I’d known from the start (and a few mistakes I’ve made along the way):
- Yeast Freshness: Always check the date on your yeast. Nothing’s sadder than dough that won’t rise!
- Warm, Not Hot: Milk should be warm—never hot. Hot milk kills yeast, while cold milk slows everything down.
- Kneading Counts: Knead long enough to develop gluten, but don’t overdo it. Dough should feel stretchy, not tough. If it tears easily, knead a bit more.
- Double Butter Brush: Brushing before and after baking gives rolls that irresistible, glossy, buttery finish. Don’t skip it!
- Multitasking: While dough rises, prep your pan and set out butter for brushing. It saves time (and keeps you moving).
- Even Shaping: Use a bench scraper or kitchen scale for even-sized rolls. They bake uniformly and look picture-perfect for sharing.
- Second Rise Matters: Don’t rush the second rise. This step is the secret to those pillowy-soft, fluffy dinner rolls you dream about.
- Common Mistakes: Too much flour = dense rolls. Not enough rise = flat, sad bread. If you end up with either, don’t worry—just keep practicing! I’ve had my fair share of “hockey puck” rolls in the early days.
Consistency tip: Always measure ingredients carefully and use the same pan each time for reliable baking. And if you forget the butter brush (it happens!), you can always add a little extra after baking—trust me, no one complains.
Variations & Adaptations
One of the best parts about this dinner rolls recipe is how flexible it is. Over the years, I’ve tried all sorts of tweaks for different tastes and occasions. Here are my favorite variations:
- Gluten-Free: Substitute all-purpose flour with a quality gluten-free blend (Bob’s Red Mill 1:1 works beautifully). The rolls stay soft, though texture is a bit different—still delicious!
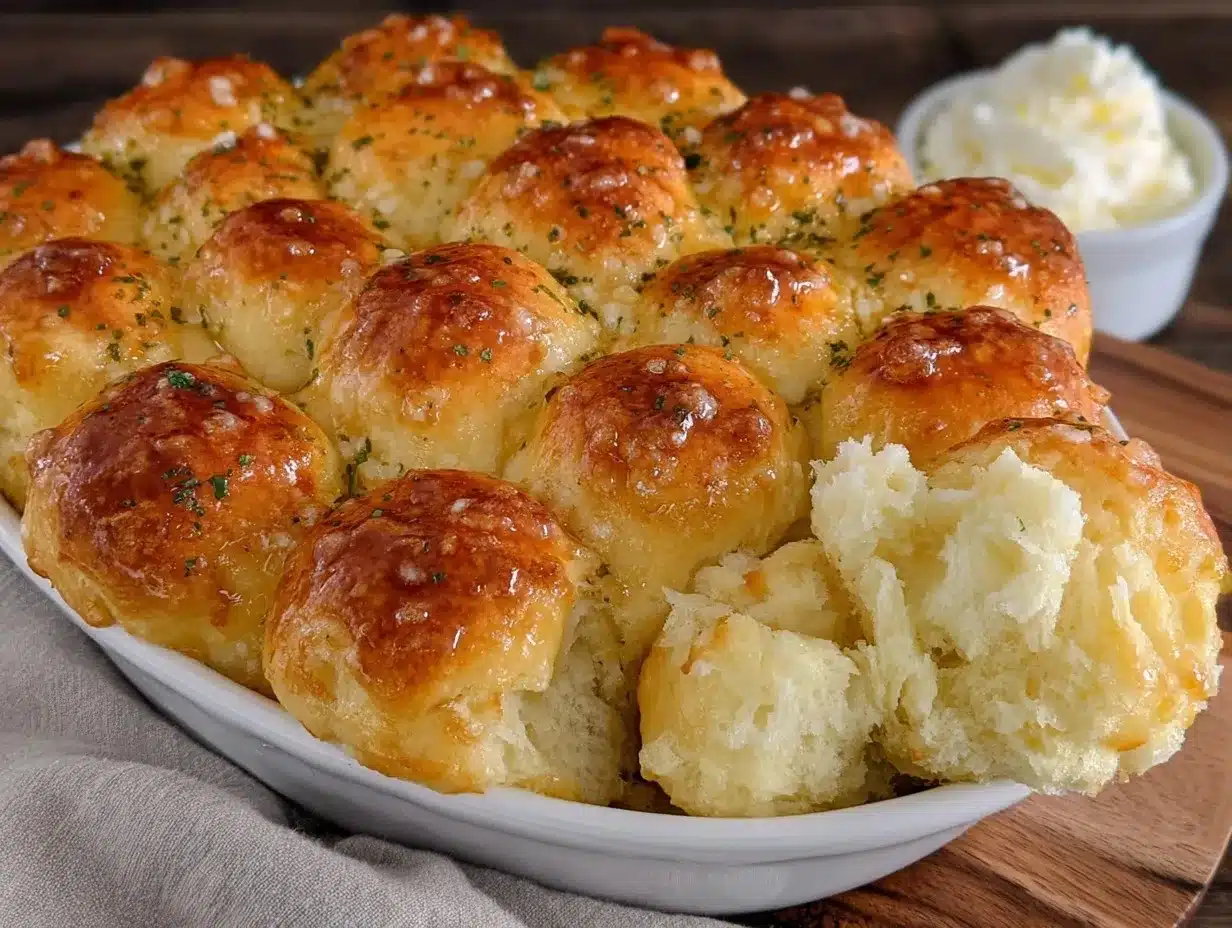
- Herb & Cheese: Mix 1/4 cup chopped fresh herbs (like rosemary, thyme, or parsley) and 1/2 cup shredded cheddar or parmesan into the dough for savory, cheesy rolls. Perfect for holiday dinners!
- Sweet Rolls: Add 1/2 cup raisins or dried cranberries and a sprinkle of cinnamon to the dough. Brush with a little honey butter after baking for a sweet twist.
- Dairy-Free: Use vegan butter and plant-based milk. I’ve made these with oat milk and Earth Balance—still soft and flavorful.
- Mini Rolls: Shape dough into smaller balls (about 1 ounce/28g each) for bite-sized dinner rolls. Great for parties and lunchboxes.
If you want to bake these in a cast iron skillet or Dutch oven, just adjust the bake time (check at 15 minutes). I’ve done this at campouts and the crust is extra golden! For allergen-friendly rolls, skip the egg and add 2 tablespoons extra melted butter—texture stays soft. My personal favorite? Herb and cheese rolls for a cozy weekend brunch. Don’t be afraid to experiment—these rolls are forgiving!
Serving & Storage Suggestions
These fluffy, soft dinner rolls are best served warm—straight from the oven with a swipe of butter. For sharing, arrange them in a basket lined with a cloth napkin to keep them cozy and soft. They pair perfectly with soups, chili, roasted meats, or even as a sweet snack with jam.
- Presentation: Stack rolls in a rustic bread basket, sprinkle with flaky salt, and add a sprig of rosemary for a Pinterest-worthy look.
- Complementary Dishes: Serve alongside creamy potato soup, roast chicken, or holiday ham for crowd-pleasing comfort.
- Storage: Store cooled rolls in a zip-top bag or airtight container at room temperature for up to 3 days. For longer storage, freeze in a single layer, then transfer to a freezer bag—keeps for 2 months.
- Reheating: Warm rolls in a 300°F (150°C) oven for 8-10 minutes, or microwave for 10-20 seconds each. Brush with melted butter to refresh flavor and softness.
- Flavor Development: Rolls mellow and deepen in flavor after a day. Leftovers make excellent mini sandwiches or breakfast toast!
If you’re planning ahead for a big dinner, bake the rolls the day before and reheat just before serving. Honestly, they’re so good fresh, but leftovers never go to waste in my house!
Nutritional Information & Benefits
Here’s an estimate of the nutritional values per serving (one roll, based on 18 rolls):
- Calories: Approximately 140 kcal
- Carbohydrates: 22g
- Protein: 3g
- Fat: 4g
- Sodium: 120mg
Key health benefits come from using whole milk and real butter—providing calcium, vitamin D, and healthy fats. If you need a lower-carb or gluten-free option, swap ingredients as needed. Potential allergens include wheat, milk, and egg, so consider substitutions for sensitivities. Personally, I love knowing these rolls deliver comfort with wholesome ingredients and can be adapted for almost any diet.
Conclusion
If you’re searching for the ultimate dinner rolls recipe—easy, fluffy, soft, and buttery—this is the one you’ll want to share at every meal. The process is simple, the results are bakery-worthy, and the flavor is pure nostalgia. Customize them with your favorite herbs or cheeses, or keep them classic for crowd-pleasing comfort food.
Honestly, these rolls are my go-to for family gatherings, gifting, and those cozy dinners when only homemade bread will do. I hope you love them as much as my family does! If you try this recipe, let me know in the comments—share your own twists or dinner stories. Bookmark it for your next potluck or holiday feast (and don’t forget to pin it for easy reference!). Happy baking, and may your kitchen always smell like warm, buttery bread!
FAQs
How do I know if my dough has risen enough?
The dough should be doubled in size and look puffy. If you gently press it, it should spring back slowly—if it stays flat, it needs more time.
Can I make these dinner rolls ahead of time?
Absolutely! Shape the rolls and refrigerate overnight (covered). Let them come to room temperature and rise before baking the next day.
Can I freeze the baked rolls?
Yes! Let them cool completely, then freeze in an airtight bag for up to 2 months. Reheat in the oven for best flavor and texture.
What if I don’t have instant yeast?
Active dry yeast works fine. Just proof it in warm milk with the sugar for 5 minutes until foamy before mixing with other ingredients.
How do I make these rolls dairy-free?
Use plant-based milk and vegan butter—texture and flavor stay delicious!
Pin This Recipe!
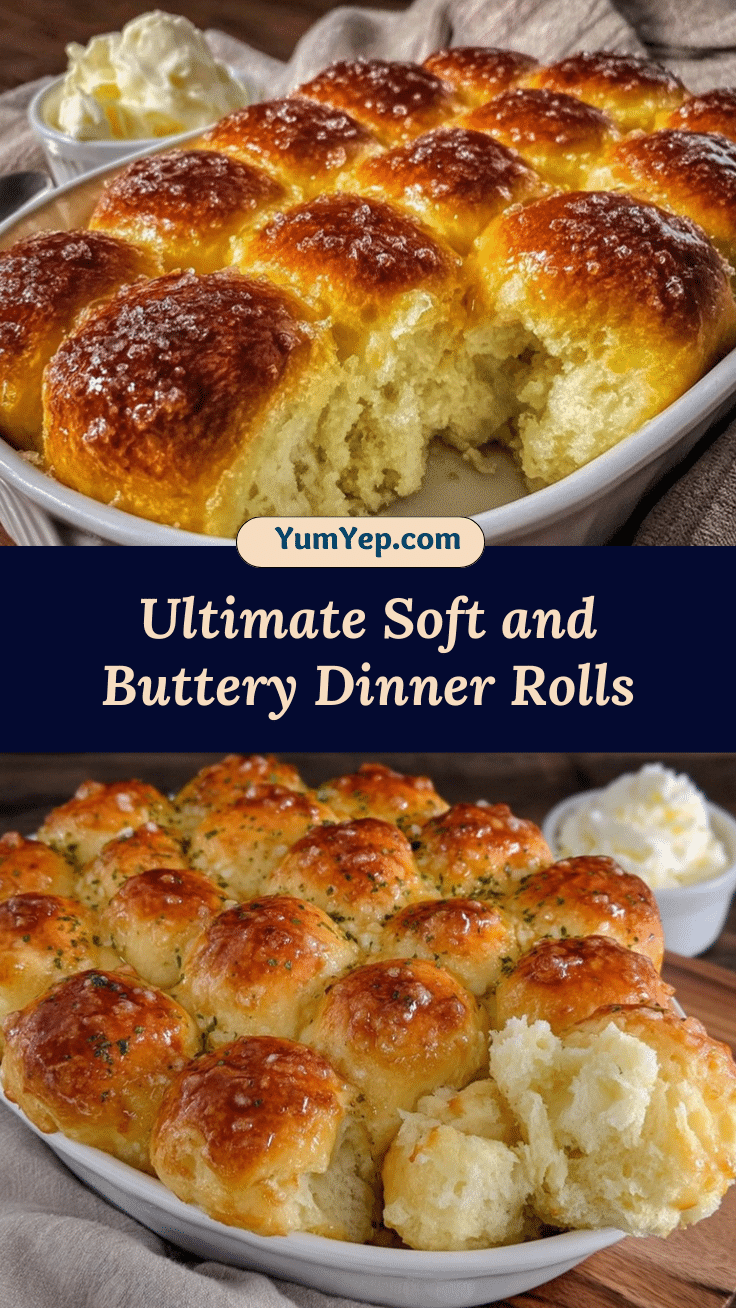
Dinner Rolls Recipe Easy Fluffy Soft & Buttery for Sharing

These homemade dinner rolls are soft, fluffy, and buttery—perfect for sharing at family gatherings, holiday feasts, or cozy dinners. Quick to make and irresistibly delicious, they’re a crowd-pleasing comfort food staple.
- Prep Time: 20 minutes
- Cook Time: 22 minutes
- Total Time: 90 minutes
- Yield: 15-18 rolls 1x
- Category: Bread
- Cuisine: American
Ingredients
- 3 1/2 cups all-purpose flour
- 1/4 cup granulated sugar
- 2 1/4 teaspoons (1 packet) instant yeast or active dry yeast
- 1 teaspoon fine sea salt
- 1 cup whole milk, warmed
- 1/4 cup unsalted butter, melted (plus extra for brushing)
- 1 large egg, room temperature
- 2 tablespoons unsalted butter, melted (for brushing rolls before and after baking)
- Optional: Sprinkle of flaky sea salt
Instructions
- Warm the milk in a small saucepan or microwave until just warm to the touch (about 110°F).
- In a large mixing bowl, combine flour, sugar, yeast, and salt. Stir to distribute.
- Add the warmed milk, melted butter, and egg to the dry ingredients. Stir until a shaggy dough forms.
- Knead the dough by hand on a lightly floured surface for 8-10 minutes, or in a stand mixer for 5-6 minutes, until smooth and elastic. Add flour a tablespoon at a time if sticky.
- Place dough in a lightly greased bowl, cover, and let rise in a warm spot until doubled (45-60 minutes).
- Punch down the dough gently. Divide into 15-18 equal pieces (about 2 ounces each) and roll into balls.
- Arrange balls in a greased 9×13-inch pan, spacing evenly. Cover and let rise again for 25-35 minutes, until rolls puff and touch.
- Preheat oven to 375°F. Brush rolls with 2 tablespoons melted butter.
- Bake for 18-22 minutes, until tops are golden brown and rolls sound hollow when tapped. Tent with foil if browning too fast.
- Remove from oven and immediately brush with more melted butter. Sprinkle with flaky sea salt if desired.
- Let rolls cool for 10 minutes in the pan, then transfer to a wire rack. Serve warm.
Notes
For gluten-free rolls, substitute with a 1:1 gluten-free flour blend. For dairy-free, use plant-based milk and vegan butter. Don’t rush the second rise for maximum fluffiness. Brushing with butter before and after baking adds extra richness. Rolls can be made ahead and refrigerated overnight before baking. Freeze baked rolls for up to 2 months.
Nutrition
- Serving Size: 1 roll (based on 18
- Calories: 140
- Sugar: 4
- Sodium: 120
- Fat: 4
- Saturated Fat: 2
- Carbohydrates: 22
- Fiber: 1
- Protein: 3
Keywords: dinner rolls, fluffy rolls, soft rolls, buttery rolls, homemade bread, easy bread recipe, sharing bread, holiday rolls, comfort food, yeast rolls