
Let me just say, the moment that spiced molasses aroma starts curling around the corners of my kitchen, it feels like the holidays have officially arrived. The sweet, peppery scent of ginger and cinnamon—mixed with that deep, caramel-y molasses—honestly, it’s enough to make anyone pause and just breathe in pure nostalgia. The first time I ever made gingerbread house cookies, I was knee-high to a grasshopper, standing on a wobbly chair, trying to help my grandma cut out little windows and doors. She’d always let me sneak a tiny taste of the dough (and I still do, if I’m being honest).
You know what? There’s something magical about gingerbread cookies—especially when you transform them into adorable, bite-sized houses. My family can’t help but wander through the kitchen, “just checking” if the cookies are cool enough to decorate (spoiler: they never wait). It’s become a staple for holiday gatherings, gifting, and—let’s face it—showing off just a little on Instagram and Pinterest. I remember one snowy weekend when we decided to make a whole gingerbread village. The laughter, the icing everywhere, the not-so-perfect walls (hey, crooked roofs have their own charm!)—it was the kind of moment where you just smile, knowing you’re onto something truly special.
If you’re looking for a holiday treat that’s as fun to make as it is to eat, these gingerbread house cookies with easy royal icing are perfect for potlucks, sweet treats for kids, or just a cozy night in with some hot cocoa. I’ve tested this recipe more times than I’d like to admit (in the name of research, of course), and every batch feels like a warm hug. You’re going to want to bookmark this one—trust me, it’s dangerously easy and pure, nostalgic comfort in every bite.
Why You’ll Love This Gingerbread House Cookies Recipe
After years of holiday baking (and a few burnt batches), let me share why these gingerbread house cookies are the ones you’ll keep coming back to. I’ve tweaked, tested, and tasted countless versions, and this one checks every box for festive fun and flawless results. Here’s what sets it apart:
- Quick & Easy: Ready in under 90 minutes, including decorating time. Perfect for spontaneous cookie sessions or last-minute holiday parties.
- Simple Ingredients: No fancy grocery trips required. Most of what you need is probably already in your pantry—flour, butter, spices, and molasses.
- Perfect for Holiday Gatherings: Whether you’re hosting a big Christmas brunch or sending sweet treats to school, these cookies are a hit for every occasion.
- Crowd-Pleaser: Kids love decorating, adults love eating, and everyone ends up sneaking an extra cookie (or three) from the tray.
- Unbelievably Delicious: The perfect balance of warmth from ginger and cinnamon, paired with that crisp snap and soft chew you crave in a holiday cookie.
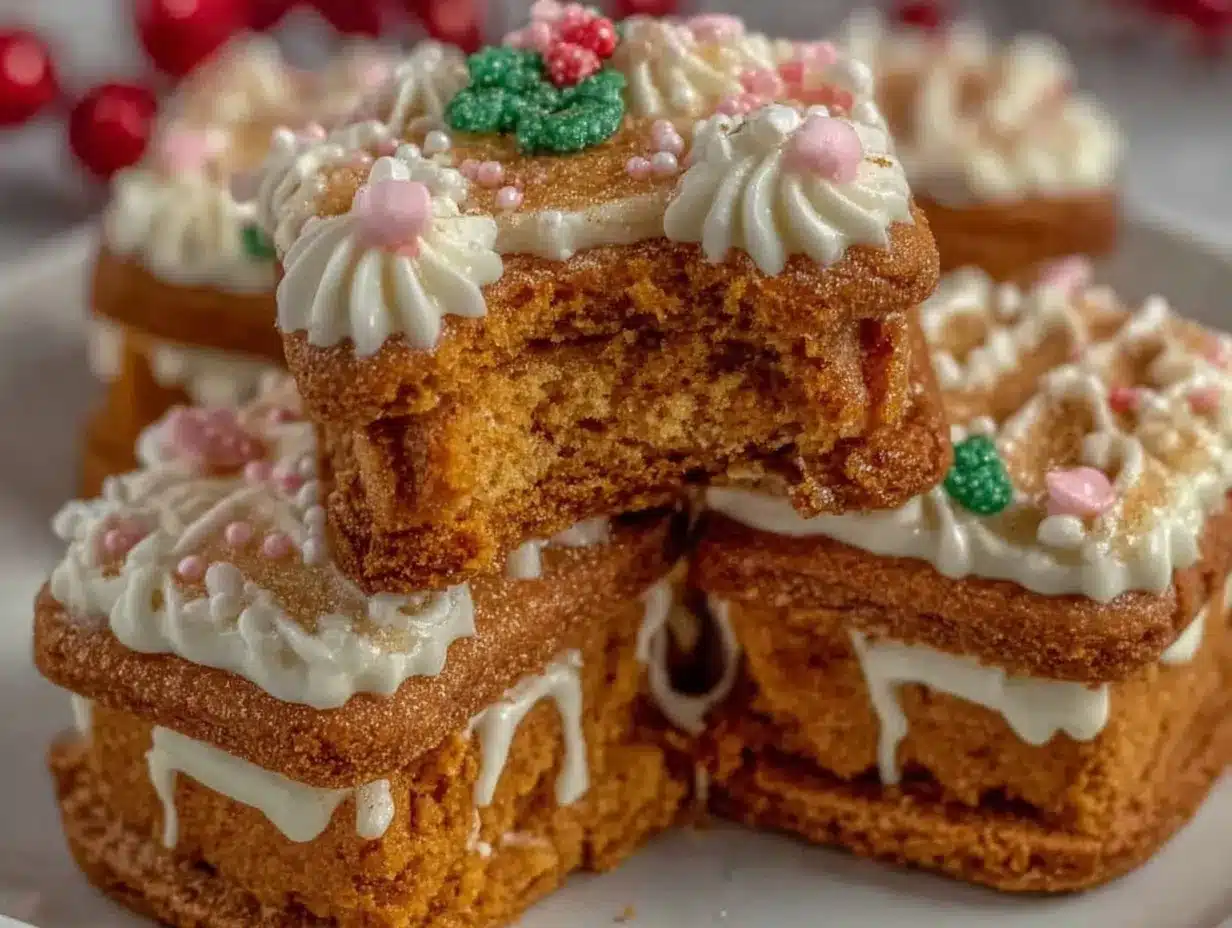
But honestly, what makes these gingerbread house cookies special is the royal icing. I’ve tried every trick in the book—egg whites, meringue powder, lemon juice—for a perfectly pipeable, glossy finish that actually dries hard (so your houses stay standing!). The dough holds its shape, the spices are spot-on, and the texture is ideal for decorating.
When you bite into one, it’s not just about the flavor—it’s a little holiday memory. This recipe isn’t just another gingerbread cookie; it’s the kind that makes you close your eyes and smile after the first bite. Comfort food, but festive; creative, but not complicated. You’ll impress guests without fuss, and suddenly, a simple batch of cookies becomes a centerpiece for joyful gatherings.
What Ingredients You Will Need
This recipe uses simple, wholesome ingredients to deliver bold flavor and a satisfying texture—without any fuss or hard-to-find items. Most are pantry staples, but I’ll toss in a few personal tips and easy swaps for you!
For the Gingerbread Cookie Dough:
- All-purpose flour (3 cups / 375g) – Provides structure for sturdy cookies.
- Unsalted butter (½ cup / 113g, softened) – Adds richness and helps the dough stay tender.
- Dark brown sugar (½ cup / 100g, packed) – Deep flavor and chewiness.
- Molasses (½ cup / 120ml) – The secret to classic gingerbread taste (I love Grandma’s or Brer Rabbit brands).
- Large egg (1, room temperature) – Binds everything together.
- Baking soda (1 tsp / 5g) – Gives a bit of lift, so cookies don’t turn out flat.
- Ground ginger (2 tsp / 4g) – The star spice (freshly ground if you’re feeling fancy).
- Ground cinnamon (1½ tsp / 3g) – For warmth and a little extra “holiday” in every bite.
- Ground cloves (½ tsp / 1g) – Just a pinch, for depth.
- Salt (½ tsp / 2g) – Balances the sweetness.
For the Easy Royal Icing:
- Powdered sugar (2 cups / 240g, sifted) – Makes a smooth, glossy icing.
- Meringue powder (2 tbsp / 15g) – Helps the icing set firm (Wilton or CK brands are reliable).
- Water (5-6 tbsp / 75-90ml, room temperature) – Adjust for desired consistency.
- Lemon juice (1 tsp / 5ml, optional) – Brightens flavor and helps icing harden.
For Decorating:
- Assorted sprinkles (holiday colors, mini candies, pearls)
- Mini chocolate chips (for windows or roof “shingles”)
- Colored gel food coloring (for custom icing shades)
- Small candies (gumdrops, M&Ms, candy canes)
If you’re gluten-free, swap in a cup-for-cup blend like King Arthur’s. For dairy-free, use vegan butter. And if you can’t find meringue powder, pasteurized egg whites work (just reduce water). In summer, you can add lemon zest for a citrusy twist, but during winter? Stick with classic spices for that deep, comforting flavor.
Equipment Needed
- Mixing bowls: One large for dough, one medium for icing.
- Electric mixer: Stand or hand—both work! I’ve used a whisk in a pinch, but your arm will get a workout.
- Measuring cups & spoons: For precise (and foolproof) results.
- Rolling pin: Essential for even dough thickness. If you don’t have one, a clean wine bottle works (done it plenty of times!).
- Gingerbread house cookie cutters: You can buy sets with house shapes, or use cardboard templates and a sharp knife.
- Baking sheets: Heavy-duty is best—prevents warping and uneven baking.
- Parchment paper: For easy cleanup and non-stick cookies.
- Wire cooling rack: Helps cookies cool quickly and evenly.
- Piping bags and tips: For neat icing work. Zip-top bags with a snipped corner are a great budget substitute.
- Small offset spatula: Handy for spreading icing and fixing little decorating mishaps.
Maintenance tip: Keep mixer beaters and rolling pins clean and dry before starting—this prevents sticky dough disasters. I’ve tried cheap plastic cookie cutters, but metal ones really hold up better over years of cookie-building marathons.
Preparation Method
- Prepare the dough: In a large mixing bowl, cream together ½ cup (113g) unsalted butter and ½ cup (100g) dark brown sugar on medium speed for 2-3 minutes, until light and fluffy. Scrape the bowl as needed.
- Add wet ingredients: Beat in ½ cup (120ml) molasses and 1 large egg. Mix until well combined and glossy. The aroma at this stage is unreal—deep and spicy!
- Mix dry ingredients: In a separate bowl, whisk together 3 cups (375g) all-purpose flour, 1 tsp (5g) baking soda, 2 tsp (4g) ground ginger, 1½ tsp (3g) ground cinnamon, ½ tsp (1g) ground cloves, and ½ tsp (2g) salt.
- Combine: Gradually add the dry mix to the wet, beating on low. The dough will get thick—switch to a sturdy spatula if your mixer protests. If dough feels sticky, add up to ¼ cup (30g) extra flour.
- Chill: Divide dough into two disks, wrap in plastic, and chill for at least 30 minutes (or up to 2 hours). Chilling is key for easy rolling and crisp, sharp cookie edges.
- Preheat oven: Set to 350°F (175°C). Line baking sheets with parchment paper.
- Roll out dough: On a lightly floured surface, roll dough to ¼-inch (6mm) thickness. If dough cracks, let it warm up for 5 minutes. Use gingerbread house cutters or homemade templates to cut shapes.
- Arrange and bake: Transfer cookies to prepared baking sheets, leaving 1 inch (2.5cm) apart. Bake for 10-12 minutes, or until edges are set and centers look slightly soft. (They firm up as they cool.)
- Cool: Let cookies sit on the pan for 5 minutes, then move to a wire rack. Cool completely before decorating—royal icing works best on room temperature cookies.
- Prepare royal icing: In a bowl, combine 2 cups (240g) powdered sugar, 2 tbsp (15g) meringue powder, and 5 tbsp (75ml) water. Beat on high speed for 3-4 minutes until glossy and thick. Add more water, a teaspoon at a time, for looser icing. Mix in 1 tsp (5ml) lemon juice if using.
- Color and fill: Divide icing into bowls and tint with gel food coloring. Transfer to piping bags (or zip-top bags). Cover unused icing tightly—it dries out fast!
- Decorate: Pipe outlines first, then “flood” inside shapes with thinner icing. Add sprinkles, candies, chocolate chips, or pearls while icing is wet. For crisp lines, let each color dry before adding the next.
- Set and serve: Let decorated cookies dry uncovered for 1-2 hours until icing is firm. Enjoy or gift your gingerbread house cookies!
Troubleshooting: If cookies spread too much, chill cut-outs for 10 minutes before baking. For icing that’s too runny, whisk in more powdered sugar. And if cookies stick to the parchment, let them cool a bit longer—they’ll lift off easier. I always keep a damp towel over my icing bowl while decorating to prevent crusting.
Cooking Tips & Techniques
Over the years, I’ve picked up a few tricks that make gingerbread house cookies come out picture-perfect (or close enough!). Here’s what you’ll want to know:
- Keep the dough cold: Warm dough gets sticky and hard to shape. If the kitchen’s toasty, work in small batches and stash extras in the fridge.
- Roll evenly: Aim for ¼-inch (6mm) thickness. Too thin, and your houses crack. Too thick, and they puff up unevenly. I use two wooden dowels as guides—works like a charm.
- Don’t overmix: Once the flour goes in, mix just until combined. Overworking makes cookies tough instead of tender.
- Baking sheet swap: For even baking, rotate trays halfway through. If your oven has hot spots (mine sure does), this helps prevent burnt edges.
- Royal icing consistency: For outlining, you want icing that holds a peak. For flooding, thin it with a little extra water until it settles smoothly. If the icing gets grainy, sift the sugar before mixing.
- Multitask smart: While cookies cool, prep your icing and sort decorating candies. This way, you’re ready to go once the cookies are set.
I’ve had my share of failures—like runny icing pooling everywhere, or cookies that baked into funny shapes. Don’t stress! Most decorating “mistakes” turn into creative fixes. If your cookie cracks, glue it with a bit of icing. If you’re short on time, skip the elaborate piping and stick to sprinkles. Consistency comes with practice, and honestly, the imperfect ones always get eaten first.
Variations & Adaptations
One of the best parts of gingerbread house cookies is customizing them to fit your style, dietary needs, or whatever’s in your pantry. Here are some fun ways to switch things up:
- Gluten-Free: Use a cup-for-cup gluten-free flour blend instead of regular flour. I’ve tried King Arthur and Bob’s Red Mill—they both work great.
- Vegan: Swap butter for vegan margarine and use aquafaba (chickpea water) or flaxseed “egg” instead of the egg. For royal icing, stick with meringue powder or vegan alternatives.
- Spiced Citrus: Add 1 tbsp (6g) orange zest to the dough and replace lemon juice in the icing with orange juice for a zesty twist.
- Chocolate Gingerbread: Stir in 2 tbsp (15g) cocoa powder with the dry ingredients for a deeper flavor and darker color.
- Different Shapes: Make trees, stars, or animals if you don’t have house cutters—just adjust baking time for smaller shapes.
- Nut-Free: Omit any nut-based decorations and double-check candy labels. My cousin has allergies, so we stick to classic sprinkles and chocolate chips.
My favorite adaptation? Mini gingerbread house cookies that perch on the rim of a mug. They’re tiny, adorable, and perfect for gifting with hot chocolate. If you like a softer cookie, decrease baking time by a minute. For crunchier, bake a bit longer (but keep an eye out for burnt edges!).
Serving & Storage Suggestions
Gingerbread house cookies are best served at room temperature, on a festive platter with a mug of spiced cider or cocoa. They look amazing nestled among pine cones and twinkle lights—Pinterest-worthy, for sure!
Pair them with a cheese board, fresh fruit, or a steaming cup of tea for a cozy afternoon. They’re also gorgeous as edible place settings or holiday party favors (just wrap in cellophane bags and tie with ribbon).
For storage, keep cookies in an airtight container at room temp for up to 7 days. If you’re stacking, layer wax paper between to protect the icing. Freeze undecorated cookies for up to 2 months; just thaw and decorate before serving. To reheat, pop them in the oven at 300°F (150°C) for 3 minutes—just enough to revive that fresh-baked smell.
Over time, the spices mellow and the flavor deepens. Honestly, I think they’re best on day two—if you can wait that long!
Nutritional Information & Benefits
| Per Cookie (approx.) | Amount |
|---|---|
| Calories | 120 |
| Fat | 3g |
| Carbs | 22g |
| Protein | 1g |
| Sugar | 12g |
Key ingredients like ginger and cinnamon offer natural antioxidants and anti-inflammatory benefits. Molasses packs a little iron and calcium, while the cookies themselves are low in saturated fat. For gluten-free or vegan versions, nutrition changes slightly—less protein, different fats, and sometimes lower sugar.
Potential allergens include wheat, eggs, and dairy (depending on your substitutions). If you’re nut-free, check your decorations. From a personal wellness perspective, these gingerbread house cookies are a treat—enjoyed in moderation, they’re perfect for celebrating the season!
Conclusion
If you’re searching for a holiday recipe that’s as fun to make as it is delicious, these gingerbread house cookies with royal icing are it. They’re easy, customizable, and guaranteed to bring smiles—whether you’re sharing with family, friends, or just having a solo baking night. There’s something about building tiny edible houses that feels like pure holiday magic.
Don’t be afraid to make them your own—switch up the spices, try new shapes, or play with colors. My favorite part? Watching everyone gather around, decorating and laughing (and sneaking bites). This recipe isn’t just about cookies—it’s about creating memories. So go ahead, give it a try, and let me know how your gingerbread house cookies turn out!
I’d love to hear your twists, tips, and decorating stories in the comments below. Share your cookie photos, pin this recipe, or tag me on social—I can’t wait to see your holiday creations. Wishing you warmth, joy, and plenty of sweet moments this season!
FAQs
How do I keep gingerbread house cookies from spreading?
Chill the dough before rolling and cut shapes, then chill again for 10 minutes before baking. This helps the cookies keep crisp edges.
Can I make royal icing without meringue powder?
Yes! Use 2 large pasteurized egg whites in place of meringue powder and adjust water accordingly. The icing will still set hard.
How far in advance can I make gingerbread house cookies?
Bake cookies up to a week ahead. Store in an airtight container and decorate as needed. Undecorated cookies freeze well for up to 2 months.
What’s the best way to decorate with kids?
Set up an assembly line: pipe outlines, fill in icing, then add sprinkles and candies. Use squeeze bottles or zip-top bags for less mess.
Do gingerbread house cookies work as gifts?
Absolutely! Package decorated cookies in cellophane bags or boxes, tie with festive ribbon, and add a little tag. They’re perfect for holiday gifting.
Pin This Recipe!
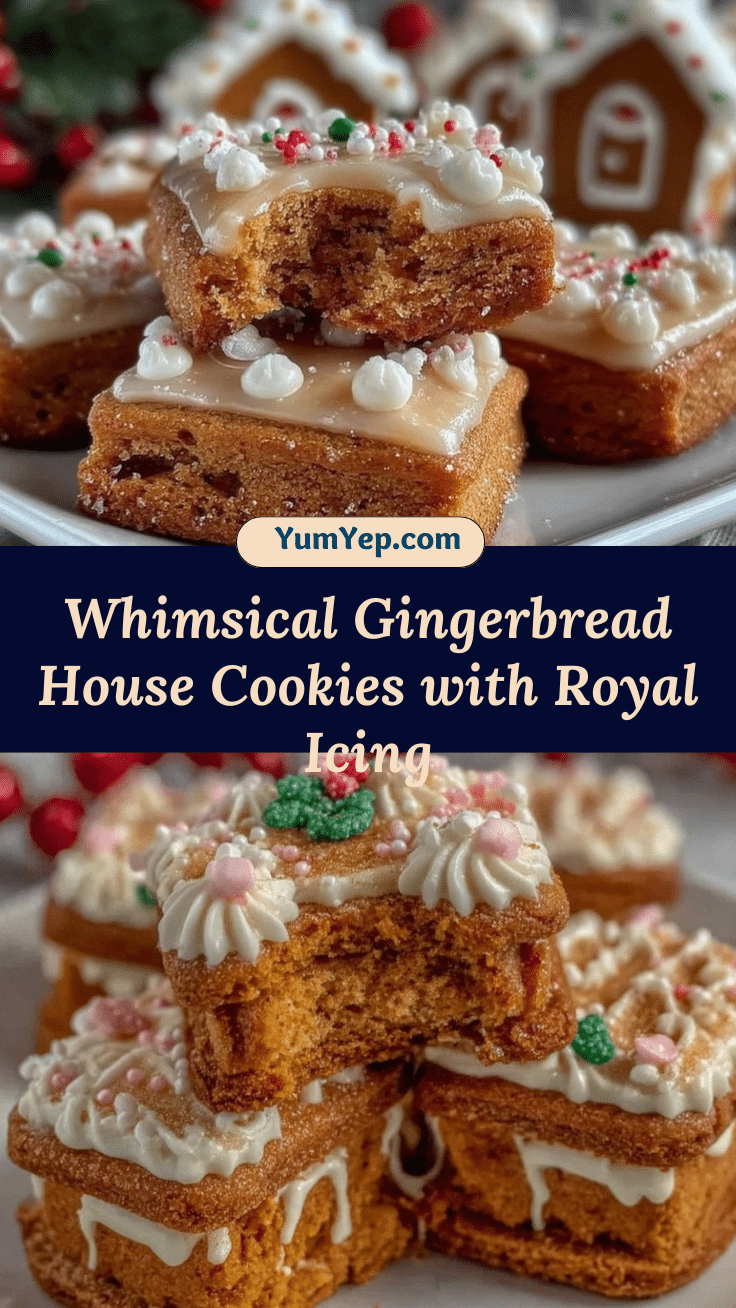
Gingerbread House Cookies with Easy Royal Icing

These festive gingerbread house cookies are spiced with ginger, cinnamon, and molasses, then decorated with a simple royal icing for a fun and delicious holiday treat. Perfect for gatherings, gifting, or cozy nights in, they’re easy to make and customizable for all ages.
- Prep Time: 30 minutes
- Cook Time: 12 minutes
- Total Time: 1 hour 30 minutes
- Yield: 24 cookies 1x
- Category: Dessert
- Cuisine: American
Ingredients
- 3 cups all-purpose flour
- 1/2 cup unsalted butter, softened
- 1/2 cup dark brown sugar, packed
- 1/2 cup molasses
- 1 large egg, room temperature
- 1 teaspoon baking soda
- 2 teaspoons ground ginger
- 1 1/2 teaspoons ground cinnamon
- 1/2 teaspoon ground cloves
- 1/2 teaspoon salt
- 2 cups powdered sugar, sifted
- 2 tablespoons meringue powder
- 5–6 tablespoons water, room temperature
- 1 teaspoon lemon juice (optional)
- Assorted sprinkles (holiday colors, mini candies, pearls)
- Mini chocolate chips
- Colored gel food coloring
- Small candies (gumdrops, M&Ms, candy canes)
Instructions
- In a large mixing bowl, cream together unsalted butter and dark brown sugar on medium speed for 2-3 minutes until light and fluffy. Scrape the bowl as needed.
- Beat in molasses and egg. Mix until well combined and glossy.
- In a separate bowl, whisk together flour, baking soda, ground ginger, ground cinnamon, ground cloves, and salt.
- Gradually add the dry mix to the wet ingredients, beating on low. Switch to a sturdy spatula if dough becomes thick. If dough feels sticky, add up to 1/4 cup extra flour.
- Divide dough into two disks, wrap in plastic, and chill for at least 30 minutes (or up to 2 hours).
- Preheat oven to 350°F (175°C). Line baking sheets with parchment paper.
- On a lightly floured surface, roll dough to 1/4-inch thickness. Use gingerbread house cutters or templates to cut shapes.
- Transfer cookies to prepared baking sheets, leaving 1 inch apart. Bake for 10-12 minutes, or until edges are set and centers look slightly soft.
- Let cookies sit on the pan for 5 minutes, then move to a wire rack. Cool completely before decorating.
- For royal icing: In a bowl, combine powdered sugar, meringue powder, and 5 tablespoons water. Beat on high speed for 3-4 minutes until glossy and thick. Add more water, a teaspoon at a time, for looser icing. Mix in lemon juice if using.
- Divide icing into bowls and tint with gel food coloring. Transfer to piping bags or zip-top bags.
- Pipe outlines first, then flood inside shapes with thinner icing. Add sprinkles, candies, chocolate chips, or pearls while icing is wet. Let each color dry before adding the next.
- Let decorated cookies dry uncovered for 1-2 hours until icing is firm. Enjoy or gift your gingerbread house cookies!
Notes
Keep dough cold for easy shaping and crisp edges. For gluten-free or vegan adaptations, use cup-for-cup flour blends and vegan butter. Chill cut-outs before baking to prevent spreading. Royal icing dries quickly, so cover unused portions. Decorating is fun for kids—set up an assembly line for less mess. Cookies are best on day two as flavors deepen.
Nutrition
- Serving Size: 1 cookie
- Calories: 120
- Sugar: 12
- Sodium: 60
- Fat: 3
- Saturated Fat: 1
- Carbohydrates: 22
- Fiber: 1
- Protein: 1
Keywords: gingerbread, holiday cookies, royal icing, Christmas, gingerbread house, festive, easy cookies, decorating, edible gifts


