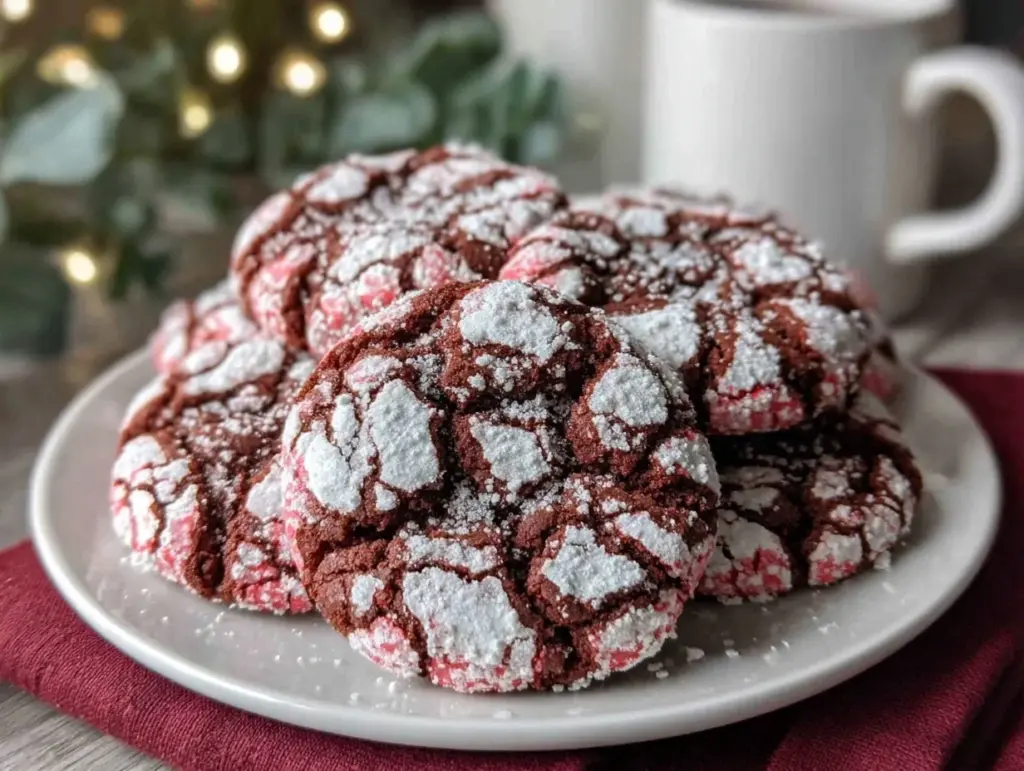
Let me set the scene: the aroma of cocoa and vanilla swirling through the kitchen as trays of red velvet crinkle cookies bake, sending up little puffs of sugary magic. The moment these cookies emerge from the oven, their deep ruby color peeking through a snowy blanket of powdered sugar, you just know something special is happening. They’re soft, warm, and irresistibly festive—each bite delivers a gentle sweetness with a hint of tang and a chewy center that’s pretty much pure comfort. Honestly, when I first made these, I couldn’t help but pause and smile—watching the crackly tops form was like witnessing a little miracle.
Years ago, when I was knee-high to a grasshopper, my grandma would whip up batches of her famous holiday cookies, but red velvet was always reserved for the fanciest occasions. One rainy Saturday, I tried to recreate those flavors with a twist—crinkle cookies that were as gorgeous as they were easy to make. The result? Cookies that disappeared faster than I could stack them on the platter. My family couldn’t resist sneaking them straight off the cooling rack (and, you know, I didn’t even bother stopping them). There’s something about that classic red velvet flavor, wrapped in a soft, chewy cookie form, that feels like a warm hug from home.
Honestly, these red velvet crinkle cookies are a dream for anyone looking to brighten up their Pinterest boards or add a pop of color to a holiday dessert table. Perfect for cookie exchanges, gifting, or just those nights when you crave a sweet treat with a little nostalgia. I’ve tested and tweaked this recipe more times than I can count (in the name of research, of course), and it’s become a staple for family gatherings and festive celebrations. Trust me, you’re going to want to bookmark this one—it’s dangerously easy, and the comfort it brings is the real deal.
Why You’ll Love This Red Velvet Crinkle Cookies Recipe
After countless batches (and a few kitchen mishaps), I’ve honed these red velvet crinkle cookies down to perfection. Here’s why you’ll reach for this recipe again and again:
- Quick & Easy: Whips up in under an hour—no chilling overnight, no waiting around. Perfect for last-minute holiday baking or cookie cravings after dinner.
- Simple Ingredients: You don’t need anything fancy. Most of these are pantry staples (think flour, cocoa, eggs, sugar) with a splash of food coloring for drama.
- Perfect for Any Occasion: These cookies steal the show at potlucks, holiday parties, or as a sweet surprise for your kids after school. They add instant cheer wherever they land.
- Crowd-Pleaser: I’ve never met a kid—or grown-up—who didn’t come back for seconds. The soft, chewy texture and classic red velvet taste are an instant hit.
- Unbelievably Delicious: The crackly powdered sugar coating gives way to a moist, tender center. The cocoa notes balance perfectly with a subtle tang, and the vibrant color makes them totally irresistible.
What makes these red velvet crinkle cookies different? I use a touch more cocoa for depth, a dash of vinegar for true red velvet tang, and a gentle hand with the mixing for the softest results. Honestly, it’s comfort food in cookie form—rich, chewy, and nostalgic but with a festive twist. It’s not just another crinkle cookie recipe; it’s the kind that makes you close your eyes after the first bite and think, “Wow, this is what homemade should taste like.” Whether you want to impress guests without breaking a sweat or just treat yourself to something memorable, this recipe has you covered.
What Ingredients You Will Need
This recipe uses simple, wholesome ingredients to deliver bold flavor and that signature crinkle cookie texture—without any fuss. Most of them are probably hanging out in your pantry right now, and if not, they’re easy to find. Here’s your shopping (or scavenging) list:
- For the Cookie Dough:
- All-purpose flour (2 cups / 240g) – Gives structure and that tender crumb.
- Unsweetened cocoa powder (2 tbsp / 15g) – Adds depth and classic red velvet flavor. I love using Dutch-process for a richer taste.
- Baking powder (1 tsp / 5g) – Helps the cookies rise and crinkle beautifully.
- Salt (1/2 tsp / 2g) – Balances the sweetness (don’t skip it!).
- Granulated sugar (1 cup / 200g) – For sweetness and a slightly crisp edge.
- Vegetable oil (1/2 cup / 120ml) – Keeps the cookies super moist. Canola works, too.
- Large eggs (2, room temperature) – Binds everything together and adds richness.
- Vanilla extract (1 tsp / 5ml) – Rounds out the flavors.
- Distilled white vinegar (1/2 tsp / 2ml) – For authentic red velvet tang.
- Red gel food coloring (1 tbsp / about 15g) – For that deep, vibrant hue. Gel gives the best color without thinning the dough.
- For Rolling:
- Powdered sugar (1 cup / 120g) – The magic ingredient for that snowy finish.
- Optional: granulated sugar (1/2 cup / 100g) – Some folks roll in granulated before powdered for extra crunch, but I usually skip it for a softer bite.
Ingredient Tips: For the cocoa, I usually reach for Ghirardelli or Hershey’s (the flavor is just right). If you need gluten-free, swap in a 1:1 baking blend. Vegan? Try flax eggs and plant-based oil—just note the texture will be a tad different but still delicious. If you want extra tang, add a bit more vinegar, but don’t overdo it or the dough might get sticky. And, PSA: always use gel food coloring for the best red velvet color—liquid can make the dough too runny.
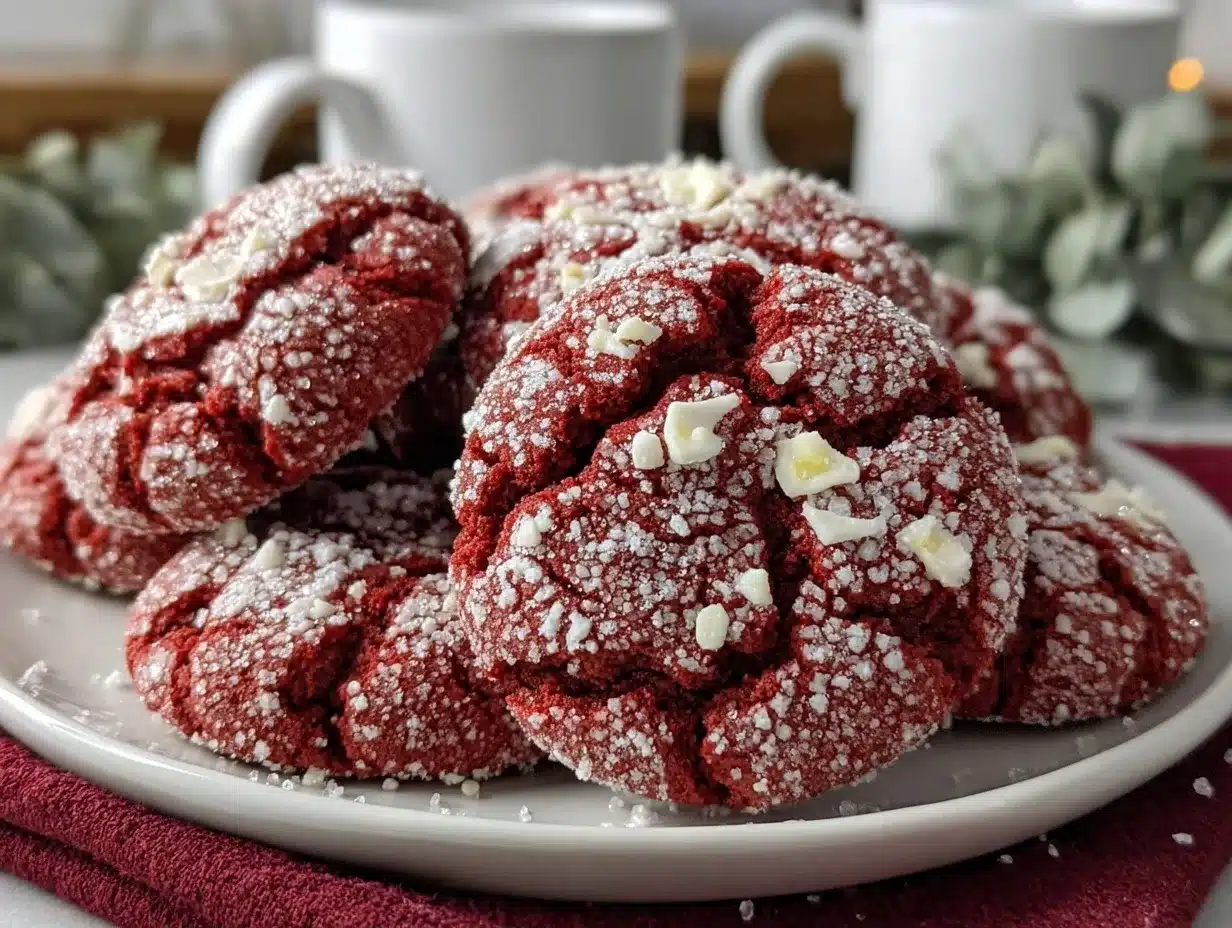
In summer, toss in a handful of mini white chocolate chips for an extra creamy bite, or swap the cocoa for black cocoa if you’re feeling dramatic. The base is forgiving, so play around!
Equipment Needed
You don’t need a fancy kitchen to whip up these red velvet crinkle cookies. Here’s what I use every time (with some budget-friendly alternatives):
- Mixing bowls (at least two—one for wet, one for dry ingredients)
- Whisk and spatula (a hand whisk works, but a stand mixer or hand mixer makes things quicker)
- Measuring cups and spoons (for accuracy—trust me, it matters)
- Baking sheets (lined with parchment or silicone baking mats for easy cleanup)
- Small cookie scoop (for uniform cookies; a tablespoon works in a pinch)
- Wire cooling rack (not essential, but really helps keep cookies soft as they cool)
If you don’t have a cookie scoop, just use a regular spoon and roll the dough between your palms. (It gets a little messy, but hey, that’s the fun part.) For parchment, I’ve used everything from bargain store brands to pricey silicone mats—both work fine, just keep an eye on sticking if you use plain pans. If you bake a lot, invest in sturdy baking sheets; mine have survived dozens of batches and still look decent.
Maintenance tip: If you use a silicone mat, wash it in warm, soapy water after each use to prevent a greasy build-up. For whisks, make sure to dry thoroughly so you don’t get rust. Honestly, you can make these cookies with just the basics—and that’s part of their charm.
Preparation Method
- Preheat the Oven: Set your oven to 350°F (175°C). Line two baking sheets with parchment paper or silicone mats. This helps prevent sticking and gives you those nice, even bottoms.
- Mix the Dry Ingredients: In a medium bowl, whisk together 2 cups (240g) all-purpose flour, 2 tbsp (15g) unsweetened cocoa powder, 1 tsp (5g) baking powder, and 1/2 tsp (2g) salt. Make sure there are no lumps—cocoa likes to clump!
- Combine the Wet Ingredients: In a large bowl, whisk 1 cup (200g) granulated sugar with 1/2 cup (120ml) vegetable oil until smooth. Add 2 large eggs, 1 tsp (5ml) vanilla extract, 1/2 tsp (2ml) vinegar, and 1 tbsp (about 15g) red gel food coloring. Mix until fully combined and vibrant. (It’ll look almost too red at first—don’t worry, it mellows during baking.)
- Bring the Dough Together: Gradually add the dry mixture to the wet, stirring gently with a spatula. Don’t overmix—just until you see no dry streaks. The dough should be thick and slightly sticky. If it’s too loose, pop it in the fridge for 10-15 minutes.
- Shape the Cookies: Scoop tablespoon-sized balls (about 20g each) of dough. Roll between your hands to form a smooth ball. (Pro tip: Lightly oil your hands to prevent sticking.)
- Coat with Powdered Sugar: Roll each ball generously in powdered sugar (1 cup / 120g). You want a thick coat—this is what gives that signature crinkle look. If you want an extra crunch, roll first in granulated sugar, then powdered.
- Bake: Arrange cookies about 2 inches (5cm) apart on the prepared sheets. Bake for 10-12 minutes, until the tops are cracked and cookies are set around the edges but still soft in the center. (They’ll look slightly underbaked—trust the process!)
- Cool: Let cookies sit on the tray for 5 minutes before transferring to a wire rack. They’ll firm up as they cool, but stay wonderfully tender inside.
- Troubleshooting: If cookies spread too much, chill the dough longer. If they’re dry, double-check your flour measurement. (I learned that the hard way—less flour equals chewier cookies!)
- Enjoy! Once cooled, enjoy the cookies as-is or with a glass of milk. They keep well for several days, and honestly, they get even softer overnight.
Preparation notes: The dough is sticky—don’t panic! That’s what gives you a chewy texture. If you want perfectly round cookies, use a cookie scoop. The powdered sugar coating should be thick; if it’s too thin, the crinkle effect won’t pop. And if your cookies aren’t cracking, check your oven temperature—it needs to be hot for that signature look.
Cooking Tips & Techniques
Here are some tried-and-true tips from years of baking (and, let’s face it, a few flops):
- Don’t Overmix: Once you add the dry ingredients, mix just until combined. Overworking the dough can make cookies tough instead of tender.
- Chill the Dough (If Needed): If your kitchen is warm or dough feels too sticky, chill for 15 minutes. This helps prevent spreading and gives thicker cookies.
- Thick Sugar Coating: For the best crinkle, roll cookies in a generous layer of powdered sugar. I’ve made the mistake of skimping, and the cookies lost their crackly “snow” effect.
- Watch Baking Time: It’s easy to overbake—these cookies should be just set around the edges but soft in the center. They’ll firm up as they cool.
- Batch Testing: Every oven is a little different. Bake a test cookie first to check spread and timing. Adjust chill time or temperature if needed.
- Uniform Size: Use a cookie scoop for even baking. If you make cookies too large, they may not crinkle as well.
- Multitasking: While one tray bakes, shape the next batch. This keeps things moving and makes the process smoother.
Personal lesson learned: I once forgot to chill the dough and ended up with pancake-flat cookies—not the goal! Now, I always check dough texture before baking. Consistency is key for that signature look and soft chew. If you want the cookies extra soft, underbake by a minute or two—they’ll be perfect for dunking in milk.
Variations & Adaptations
These red velvet crinkle cookies are super adaptable. Here are some fun twists I’ve tried (and loved):
- Gluten-Free: Swap the all-purpose flour for a 1:1 gluten-free baking blend. Bob’s Red Mill works well and keeps the texture spot-on.
- Vegan: Use flax eggs (2 tbsp ground flax + 5 tbsp water) and plant-based oil. The cookies stay chewy and delicious, just a bit more delicate.
- Seasonal Flavors: Mix in white chocolate chips or peppermint extract for a wintery variation. In spring, add a handful of dried cranberries for tartness.
- Low-Sugar: Reduce granulated sugar by 1/4 cup (50g) if you prefer a less sweet cookie. They’ll still be flavorful, just a touch less sweet.
- Different Cooking Methods: For air fryer fans, you can bake small batches at 330°F (165°C) for 7-8 minutes—watch closely, as they brown quickly.
- Allergen-Friendly: Substitute almond flour for a nutty twist (but skip if you have nut allergies). Oat flour also works for a hearty texture.
My personal favorite? Adding mini white chocolate chips to the dough. The creamy bursts pair perfectly with the classic red velvet flavor, and friends always ask for the recipe when I bring them to parties. Don’t be afraid to experiment—the base dough is forgiving and loves a little creativity.
Serving & Storage Suggestions
Serve these red velvet crinkle cookies at room temperature—just right for that soft, chewy center. Stack them on a festive platter, sprinkle with extra powdered sugar, and they’ll be the star of your holiday spread. Pair with hot cocoa, coffee, or even a glass of cold milk for pure comfort.
For presentation, arrange cookies in neat circles, alternating with classic chocolate crinkles for contrast. They’re a knockout on Pinterest boards and gift baskets alike. If you’re planning a dessert buffet, these cookies sit beautifully alongside cheesecakes, brownies, or citrus bars.
Storage is simple: Keep cookies in an airtight container at room temperature for up to 5 days. They get even softer after a day or two (honestly, almost melt-in-your-mouth). For longer storage, freeze in a single layer, then transfer to a bag—thaw at room temp or microwave for 10 seconds to revive the chewiness. If you want to prep ahead, shape dough balls, freeze, and bake from frozen (just add a minute or two to the baking time).
Note: The flavors deepen overnight, so they’re even better the next day. If you like a crisp edge, enjoy fresh; for a fudgier bite, wait until day two. Either way, you can’t go wrong.
Nutritional Information & Benefits
Here’s a quick look at what you’re getting in each red velvet crinkle cookie (about 24 cookies per batch):
- Calories: ~110 per cookie
- Fat: 5g
- Carbs: 15g
- Protein: 2g
- Sugar: 10g
The cocoa adds antioxidants, while using oil instead of butter keeps them moist and reduces saturated fat (a little heart-friendly perk). If you use whole wheat flour or almond flour, you’ll boost fiber. For gluten-free or vegan diets, the adaptations above work beautifully.
Potential allergens include wheat (unless using gluten-free flour), eggs (unless vegan), and possible nut traces if you swap in almond flour. From a wellness perspective, these cookies are a treat—best enjoyed in moderation, but they’re a nice way to satisfy a sweet tooth while skipping heavy frostings or fillings. I find a couple of cookies after dinner is just the right amount of comfort.
Conclusion
Red velvet crinkle cookies are more than just a holiday treat—they’re a memory-making, crowd-pleasing recipe you’ll turn to over and over. Their vibrant color, soft chewy texture, and snowy powdered sugar finish make them perfect for any occasion, whether you’re gifting, hosting, or just craving something sweet. Feel free to swap ingredients, try new mix-ins, or shape them bigger or smaller—this recipe loves a little customization.
Personally, I love how these cookies bring out the best in gatherings (and, let’s face it, make me look like a baking superstar with minimal effort). I hope you try them soon and share your own tweaks or traditions. If you give them a whirl, drop a comment below, pin to your favorite board, or tag me with your creations—I can’t wait to see what you come up with!
Wishing you lots of sweet moments and chewy cookies ahead—bake a batch, share with someone you love, and enjoy every bite!
FAQs
Can I make red velvet crinkle cookies ahead of time?
Absolutely! You can prep the dough, shape into balls, and refrigerate for up to 2 days before baking. Or freeze the dough balls and bake straight from the freezer—just add an extra minute or two to the bake time.
Why aren’t my cookies crinkling?
This usually means the dough wasn’t coated with enough powdered sugar, or the oven wasn’t hot enough. Make sure your oven is fully preheated and roll each cookie in a thick layer of sugar.
Can I use liquid food coloring instead of gel?
Gel food coloring is best because it gives intense color without making the dough too runny. If using liquid, reduce the amount and add a touch more flour if the dough feels thin.
How do I keep my cookies soft for days?
Store in an airtight container at room temperature. Add a slice of bread to the container—it helps maintain moisture! The cookies actually get softer as they sit.
Can I double this recipe for a crowd?
Definitely! Just double all ingredients and bake in batches. Make sure to chill the dough as needed, and rotate trays for even baking if your oven is packed.
Pin This Recipe!

Red Velvet Crinkle Cookies

These soft and chewy red velvet crinkle cookies are a festive holiday treat with a classic cocoa flavor, vibrant color, and a snowy powdered sugar coating. Perfect for cookie exchanges, gifting, or adding a pop of color to your dessert table.
- Prep Time: 15 minutes
- Cook Time: 12 minutes
- Total Time: 27 minutes
- Yield: 24 cookies 1x
- Category: Dessert
- Cuisine: American
Ingredients
- 2 cups all-purpose flour
- 2 tablespoons unsweetened cocoa powder (preferably Dutch-process)
- 1 teaspoon baking powder
- 1/2 teaspoon salt
- 1 cup granulated sugar
- 1/2 cup vegetable oil (or canola oil)
- 2 large eggs, room temperature
- 1 teaspoon vanilla extract
- 1/2 teaspoon distilled white vinegar
- 1 tablespoon red gel food coloring
- 1 cup powdered sugar (for rolling)
- Optional: 1/2 cup granulated sugar (for rolling before powdered sugar)
Instructions
- Preheat oven to 350°F (175°C). Line two baking sheets with parchment paper or silicone mats.
- In a medium bowl, whisk together flour, cocoa powder, baking powder, and salt until well combined and no lumps remain.
- In a large bowl, whisk granulated sugar and vegetable oil until smooth. Add eggs, vanilla extract, vinegar, and red gel food coloring. Mix until fully combined and vibrant.
- Gradually add the dry ingredients to the wet mixture, stirring gently with a spatula until just combined and no dry streaks remain. Do not overmix.
- If dough is too sticky, chill in the refrigerator for 10-15 minutes.
- Scoop tablespoon-sized balls of dough (about 20g each). Roll between your hands to form smooth balls.
- Roll each ball generously in powdered sugar (and granulated sugar first if desired for extra crunch). Ensure a thick coating for the best crinkle effect.
- Arrange cookies about 2 inches apart on prepared baking sheets.
- Bake for 10-12 minutes, until tops are cracked and edges are set but centers are still soft.
- Let cookies cool on the tray for 5 minutes, then transfer to a wire rack to cool completely.
- Enjoy once cooled, or store in an airtight container at room temperature for up to 5 days.
Notes
For best results, use gel food coloring for vibrant color and a thick powdered sugar coating for a dramatic crinkle effect. If dough is too sticky, chill before shaping. Cookies keep well for several days and get softer overnight. For gluten-free or vegan adaptations, see blog tips. Add mini white chocolate chips for a fun twist.
Nutrition
- Serving Size: 1 cookie
- Calories: 110
- Sugar: 10
- Sodium: 60
- Fat: 5
- Saturated Fat: 1
- Carbohydrates: 15
- Fiber: 0.5
- Protein: 2
Keywords: red velvet, crinkle cookies, holiday cookies, Christmas cookies, easy cookie recipe, chewy cookies, festive dessert, powdered sugar cookies


