
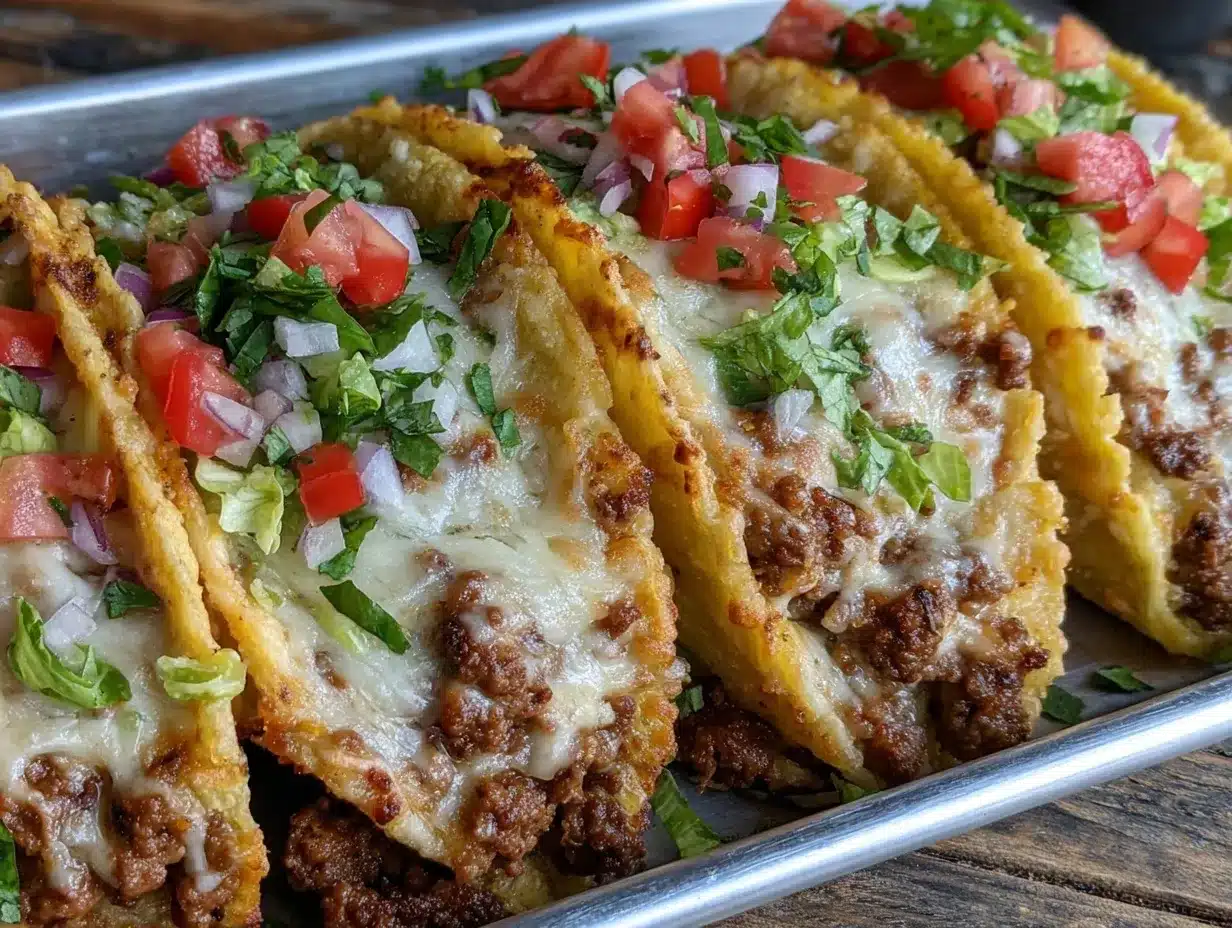
Let me tell you, the scent of melted cheese, toasted tortillas, and perfectly seasoned beef wafting from my oven is enough to make anyone’s mouth water. The first time I baked these crispy oven-baked cheesy tacos, I was instantly hooked—the kind of moment where you pause, take a deep breath, and just smile because you know you’re onto something truly special. You know, when I was knee-high to a grasshopper, tacos were always a fun Friday night treat, but this recipe brings that nostalgic comfort with a twist that feels fresh and exciting. I stumbled upon this idea on a rainy weekend, trying to avoid the usual pan-frying mess and craving that perfect crunch without the grease. What I wish I’d discovered years ago is how easy and delightfully mess-free tacos can be when baked in the oven!
My family couldn’t stop sneaking these cheesy tacos off the cooling rack (and honestly, I can’t blame them). The way the cheese crisps up on the edges while the filling stays juicy inside is dangerously easy to love. Whether it’s a casual weeknight, a last-minute family dinner, or even a fun potluck dish, these oven-baked cheesy tacos fit right in. They’re perfect for brightening up your Pinterest taco board, and yeah, you’re going to want to bookmark this one for those nights when comfort food and simplicity collide. After testing this recipe multiple times—in the name of research, of course—it’s become a staple for family gatherings, gifting, and those moments when you just want a warm hug on a plate.
Why You’ll Love This Recipe
Honestly, this crispy oven-baked cheesy tacos recipe has been a game-changer in my kitchen. It’s one of those recipes that feels both indulgent and approachable, making it an instant hit with everyone at the table. Here’s why you’re going to want to keep this recipe close:
- Quick & Easy: Comes together in under 30 minutes, perfect for busy weeknights or those last-minute taco cravings.
- Simple Ingredients: No fancy trips to specialty stores—just pantry staples and fresh basics you likely already have.
- Perfect for Family Dinner: Great for feeding a crowd without the usual taco night chaos.
- Crowd-Pleaser: Kids, adults, picky eaters—you name it, this recipe gets rave reviews every time.
- Unbelievably Delicious: The crispy edges combined with gooey cheese and savory filling make for next-level comfort food.
What sets this recipe apart isn’t just the baking method that cuts down on oil and mess. It’s the way the cheese melts and crisps perfectly around the tortilla edges, creating that irresistible crunch. Plus, the seasoning blend I use is balanced just right—savory with a hint of smoky warmth, but not overpowering. This isn’t just another taco recipe; it’s a family-approved, stress-free meal that makes you close your eyes after the first bite and say, “Yep, that’s the good stuff.” Perfect for impressing guests without stress or turning a simple weeknight into something memorable.
What Ingredients You Will Need
This recipe uses simple, wholesome ingredients to deliver bold flavor and satisfying texture without the fuss. Most of these are pantry staples, and if you want to swap or skip a few things, I’ve got you covered below.
- For the Filling:
- 1 lb (450g) ground beef (or ground turkey for a lighter option)
- 1 small onion, finely chopped (adds sweetness and depth)
- 2 cloves garlic, minced (for that punch of flavor)
- 1 packet taco seasoning mix (or homemade blend: chili powder, cumin, paprika, oregano, salt, and pepper)
- 1/4 cup (60ml) water (to help the seasoning marry with the meat)
- For the Tacos:
- 8 small flour or corn tortillas (I personally prefer small flour tortillas for that soft yet crispy texture)
- 2 cups (200g) shredded sharp cheddar cheese (feel free to mix with Monterey Jack for creaminess)
- Non-stick cooking spray or a light brush of oil (to help crisp the shells)
- For Topping & Serving (optional but highly recommended):
- Sour cream or Greek yogurt (adds cool creaminess)
- Fresh cilantro, chopped
- Diced tomatoes or pico de gallo
- Avocado slices or guacamole
- Fresh lime wedges (a squeeze really brightens it up!)
- Large skillet or frying pan (for browning the meat)
- Mixing spoon or spatula
- Baking sheet (rimmed, to catch any drips)
- Wire rack or an inverted cooling rack (optional, but helps crisp the bottom of the tacos evenly)
- Aluminum foil or parchment paper (for easy cleanup)
- Measuring cups and spoons
- Sharp knife and cutting board (for prepping veggies)
- Preheat your oven to 400°F (200°C). Line a rimmed baking sheet with aluminum foil or parchment paper for easy cleanup. If you have a wire rack, place it upside down on the baking sheet—this helps air circulate and keeps your tacos crispy all over. (5 minutes)
- Cook the filling: Heat your skillet over medium-high heat. Add the ground beef and chopped onion, cooking until the meat is browned and the onions are soft, about 6-8 minutes. Break up the meat into small pieces as it cooks. (Use a wooden spoon or spatula for best results.) Drain excess fat if needed. (8 minutes)
- Add garlic and seasoning: Stir in the minced garlic and cook for 30 seconds until fragrant—don’t let it burn! Sprinkle in the taco seasoning mix and pour in 1/4 cup (60ml) water. Stir well to combine and simmer for 2-3 minutes until the mixture thickens slightly. Taste and adjust seasoning if needed. (4 minutes)
- Prepare the tortillas: Lightly spray or brush both sides of each tortilla with cooking spray or oil. This helps them crisp up beautifully in the oven. (2 minutes)
- Assemble the tacos: Place each tortilla on the wire rack or baking sheet, and spoon about 2 tablespoons of the beef filling down the center of each. Sprinkle roughly 1/4 cup (25g) shredded cheese over the filling, then fold the tortilla in half to form a taco shape. (This folding trick keeps the filling snug and cheese melting perfectly inside.)
- Bake: Place the baking sheet in the preheated oven and bake for 10-12 minutes. Halfway through, carefully flip each taco over to crisp both sides evenly. You’re looking for golden brown, bubbly cheese edges, and a slightly toasted tortilla. (Keep an eye in the last few minutes to prevent burning!)
- Serve: Remove from oven and let the tacos cool for a minute or two—they’ll be hot and melty! Add your favorite toppings like sour cream, diced tomatoes, and cilantro. A squeeze of fresh lime juice adds a zing that’s hard to beat. (2 minutes)
- Vegetarian Version: Swap the ground beef for seasoned black beans or sautéed mushrooms. Add a bit of smoked paprika for that smoky depth.
- Low-Carb Option: Use low-carb or keto-friendly tortillas (like almond flour tortillas). The baking method still delivers that satisfying crunch without the carbs.
- Spicy Kick: Add diced jalapeños or a dash of cayenne pepper into the meat mixture. Top with some spicy salsa or hot sauce for extra heat.
- Cheese Swap: Try pepper jack or a Mexican blend cheese to give the tacos an extra creamy, spicy vibe.
- Seasonal Twist: In summer, toss in fresh corn kernels or diced avocado for brightness. In winter, add a pinch of cinnamon or chipotle powder to the seasoning for warmth.
Ingredient tips: I usually go for 80/20 ground beef for juicier results. If you’re gluten-free, corn tortillas are your best bet, but watch carefully as they can be a bit fragile when baking. For cheese, I swear by Sargento shredded sharp cheddar—it melts beautifully and crisps up nicely.
Equipment Needed
If you don’t have a wire rack, no worries—just place the tacos directly on the baking sheet and gently flip halfway through baking for even crisping. I’ve also tried silicone baking mats instead of foil; they’re a bit more eco-friendly and work great for this. For cleanup, using parchment paper saves time and keeps the cheese from sticking. Honestly, a good non-stick skillet makes browning the meat less of a chore, and if you’re on a budget, any sturdy pan will do just fine.
Preparation Method
Pro tip: If you notice your cheese isn’t melting evenly, try using a blend of cheeses with different melt points—sharp cheddar plus Monterey Jack does the trick every time. Also, don’t overcrowd the baking sheet; give each taco some breathing room for that perfect crunch.
Cooking Tips & Techniques
Let’s face it, crispy oven-baked cheesy tacos might sound straightforward, but a few tricks make all the difference. First, browning the meat properly is key—it builds flavor and keeps the filling juicy. Make sure your skillet is hot before adding the meat to get that nice sear. I’ve learned the hard way that rushing this step can leave you with bland, soggy filling.
When seasoning, adding the water after the spices helps everything meld together without drying out your meat. Trust me, it’s a small step that changes everything. Also, spraying the tortillas with oil is a game-changer for crispiness—you can’t really skip this unless you want soggy shells.
Don’t forget to flip the tacos halfway through baking. I once skipped this step and ended up with one side perfectly crisp and the other barely toasted—lesson learned! Using an inverted wire rack is a little trick I picked up from a pro chef friend; it lets heat circulate all around the taco, making the bottom just as crunchy as the top edges.
Timing is everything here. Don’t overbake, or the cheese can burn and the tortillas get too hard. Set a timer for 10 minutes, then check every couple of minutes after flipping. Multitasking tip: While tacos bake, prep your toppings or set the table—makes dinner feel like less of a scramble.
Variations & Adaptations
One of the best things about this crispy oven-baked cheesy tacos recipe is how easy it is to tweak for different tastes and diets. Here are some ideas I’ve tried and loved:
Personally, I once made this recipe with ground turkey and added chopped fresh pineapple for a fun sweet-savory combo—my family was surprised, but they loved it! Feel free to experiment with what you have on hand; this recipe is forgiving and always delicious.
Serving & Storage Suggestions
These crispy oven-baked cheesy tacos are best served hot and fresh—right out of the oven when that cheese is still melty and the shells are crunchy. I like to plate them with a side of Mexican rice or a fresh green salad to balance the richness. For drinks, a cold cerveza or a zesty lime agua fresca pairs beautifully.
If you have leftovers (which is rare in my house!), store them in an airtight container in the fridge for up to 2 days. To reheat, pop them back in a 350°F (175°C) oven for about 5 minutes to bring back the crispness. Avoid microwaving if you want to keep that satisfying crunch.
Flavors actually deepen a bit overnight, so if you’re meal prepping, these tacos can taste even better the next day once all those spices have mingled. Just remember to re-crisp before serving!
Nutritional Information & Benefits
Here’s a rough estimate per serving (2 tacos): approximately 400 calories, 25g protein, 25g carbohydrates, and 20g fat. Using lean ground beef or turkey can reduce the fat content, and swapping in whole wheat or corn tortillas bumps up the fiber.
Cheese provides calcium and protein, while the onions and garlic add antioxidants and flavor without calories. Plus, this recipe is gluten-free if you choose corn tortillas. For those watching carbs, low-carb tortilla options keep it keto-friendly.
From a wellness perspective, this meal feels indulgent but balanced—protein-packed and satisfying, making it a great option for family dinners when you want comfort without overdoing it.
Conclusion
Honestly, these crispy oven-baked cheesy tacos combine all the best things: quick prep, simple ingredients, and that irresistible crunch with gooey, flavorful filling. Whether you’re feeding a hungry family or just craving some nostalgic comfort food with a modern twist, this recipe is a winner every time. Feel free to customize it to suit your tastes or dietary needs—you really can’t go wrong.
I love this recipe because it turns taco night into something special without the usual mess or fuss. Plus, it’s become a go-to for my family, and I’m betting it will be for yours too. So why not give it a try and let me know how it goes? Share your adaptations, tips, or favorite toppings in the comments—I’d love to hear from you!
Here’s to many cozy, cheesy, crispy taco nights ahead!
FAQs About Crispy Oven-Baked Cheesy Tacos
Can I make these tacos ahead of time?
You sure can! Prepare the filling and assemble the tacos, then cover and refrigerate for up to 24 hours before baking. Just add a couple of extra minutes to the baking time if they’re cold from the fridge.
Can I freeze these tacos?
Yes! Freeze the baked tacos in a single layer on a baking sheet, then transfer to a freezer-safe container. Reheat in the oven from frozen at 350°F (175°C) for about 15 minutes until heated through and crispy.
What’s the best cheese to use for melting and crispiness?
Sharp cheddar is my top pick for flavor and melt. Mixing in Monterey Jack or a Mexican cheese blend adds creaminess and helps with even melting.
Can I use corn tortillas instead of flour?
Absolutely. Corn tortillas work well, but they can be a bit more fragile when baking, so handle with care and keep an eye on them to avoid burning.
How do I make the filling less spicy for kids?
Use a mild taco seasoning or reduce the chili powder and cayenne. You can also add a pinch of sugar to balance heat or serve with cooling toppings like sour cream or avocado.
Pin This Recipe!
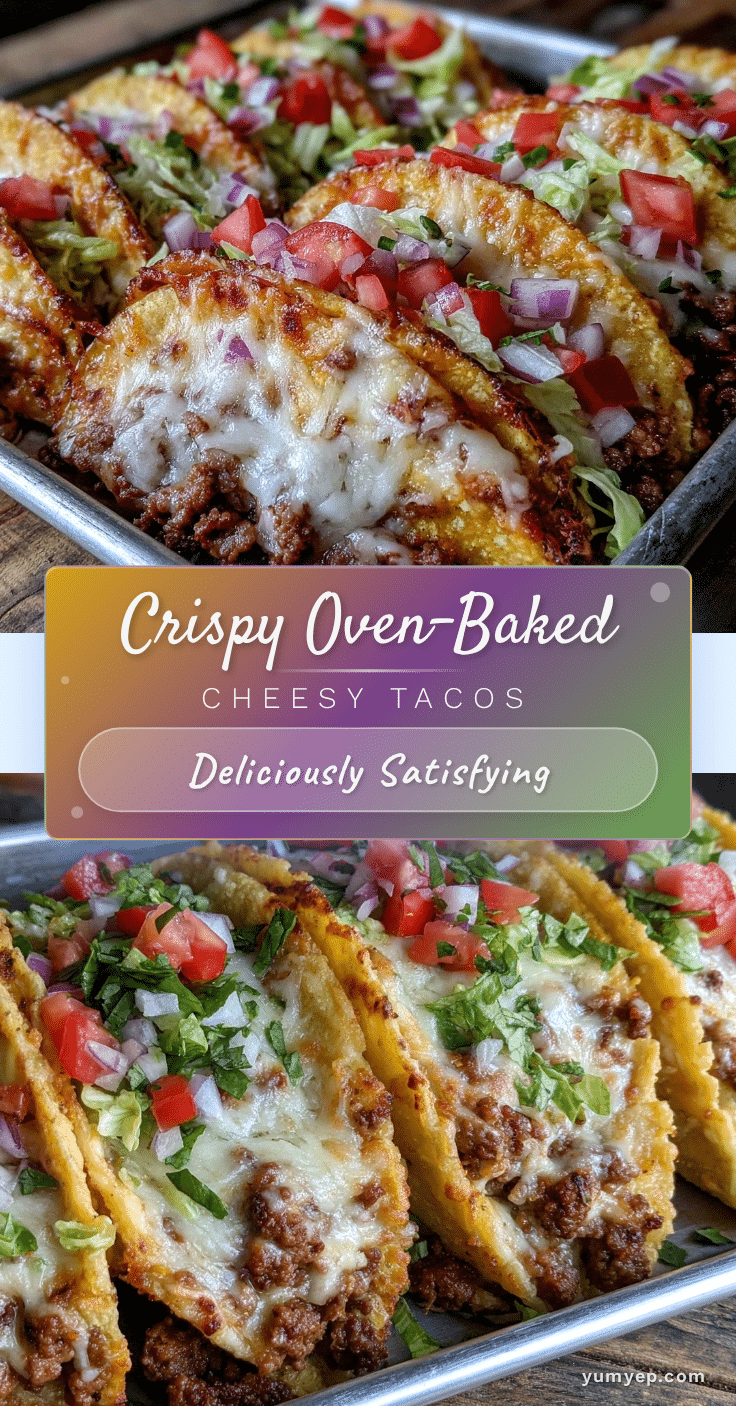
Crispy Oven-Baked Cheesy Tacos

These crispy oven-baked cheesy tacos combine melted cheese, toasted tortillas, and perfectly seasoned beef for a quick, mess-free family dinner that’s both indulgent and approachable.
- Prep Time: 15 minutes
- Cook Time: 15 minutes
- Total Time: 30 minutes
- Yield: 8 tacos (4 servings) 1x
- Category: Main Course
- Cuisine: Mexican
Ingredients
- 1 lb ground beef (or ground turkey for a lighter option)
- 1 small onion, finely chopped
- 2 cloves garlic, minced
- 1 packet taco seasoning mix (or homemade blend: chili powder, cumin, paprika, oregano, salt, and pepper)
- 1/4 cup water
- 8 small flour or corn tortillas
- 2 cups shredded sharp cheddar cheese (can mix with Monterey Jack)
- Non-stick cooking spray or a light brush of oil
- Optional toppings: sour cream or Greek yogurt, fresh cilantro chopped, diced tomatoes or pico de gallo, avocado slices or guacamole, fresh lime wedges
Instructions
- Preheat your oven to 400°F (200°C). Line a rimmed baking sheet with aluminum foil or parchment paper. If available, place an inverted wire rack on the baking sheet to help crisp the tacos evenly.
- Heat a large skillet over medium-high heat. Add ground beef and chopped onion, cooking until meat is browned and onions are soft, about 6-8 minutes. Break up meat as it cooks. Drain excess fat if needed.
- Stir in minced garlic and cook for 30 seconds until fragrant. Add taco seasoning mix and 1/4 cup water. Stir well and simmer for 2-3 minutes until mixture thickens slightly. Adjust seasoning to taste.
- Lightly spray or brush both sides of each tortilla with cooking spray or oil to help crisp them in the oven.
- Place each tortilla on the wire rack or baking sheet. Spoon about 2 tablespoons of beef filling down the center of each. Sprinkle roughly 1/4 cup shredded cheese over the filling, then fold the tortilla in half to form a taco.
- Bake in the preheated oven for 10-12 minutes. Halfway through baking, carefully flip each taco to crisp both sides evenly. Watch closely to prevent burning.
- Remove from oven and let cool for 1-2 minutes. Serve with optional toppings such as sour cream, diced tomatoes, cilantro, avocado, and a squeeze of fresh lime juice.
Notes
If cheese isn’t melting evenly, use a blend of cheeses with different melt points like sharp cheddar and Monterey Jack. Don’t overcrowd the baking sheet to ensure perfect crispiness. Flip tacos halfway through baking for even crisping. For gluten-free, use corn tortillas but watch carefully as they can be fragile. Leftovers can be stored in the fridge for up to 2 days and reheated in the oven to maintain crispness.
Nutrition
- Serving Size: 2 tacos
- Calories: 400
- Fat: 20
- Carbohydrates: 25
- Protein: 25
Keywords: crispy tacos, oven-baked tacos, cheesy tacos, family dinner, easy taco recipe, baked tacos, ground beef tacos


