
It all started on a lazy Saturday afternoon, when I realized I had invited way more friends over than I had planned snacks for. Honestly, I was staring down a near-empty pantry and a fridge that was more sad than stocked. I needed something big, bold, and easy—and fast. That’s when the idea of Flavorful Trash Can Nachos for a Crowd hit me like a bolt of lightning. The name might sound a little wild, but trust me, it’s actually a genius hack for feeding a hungry bunch without a ton of fuss.
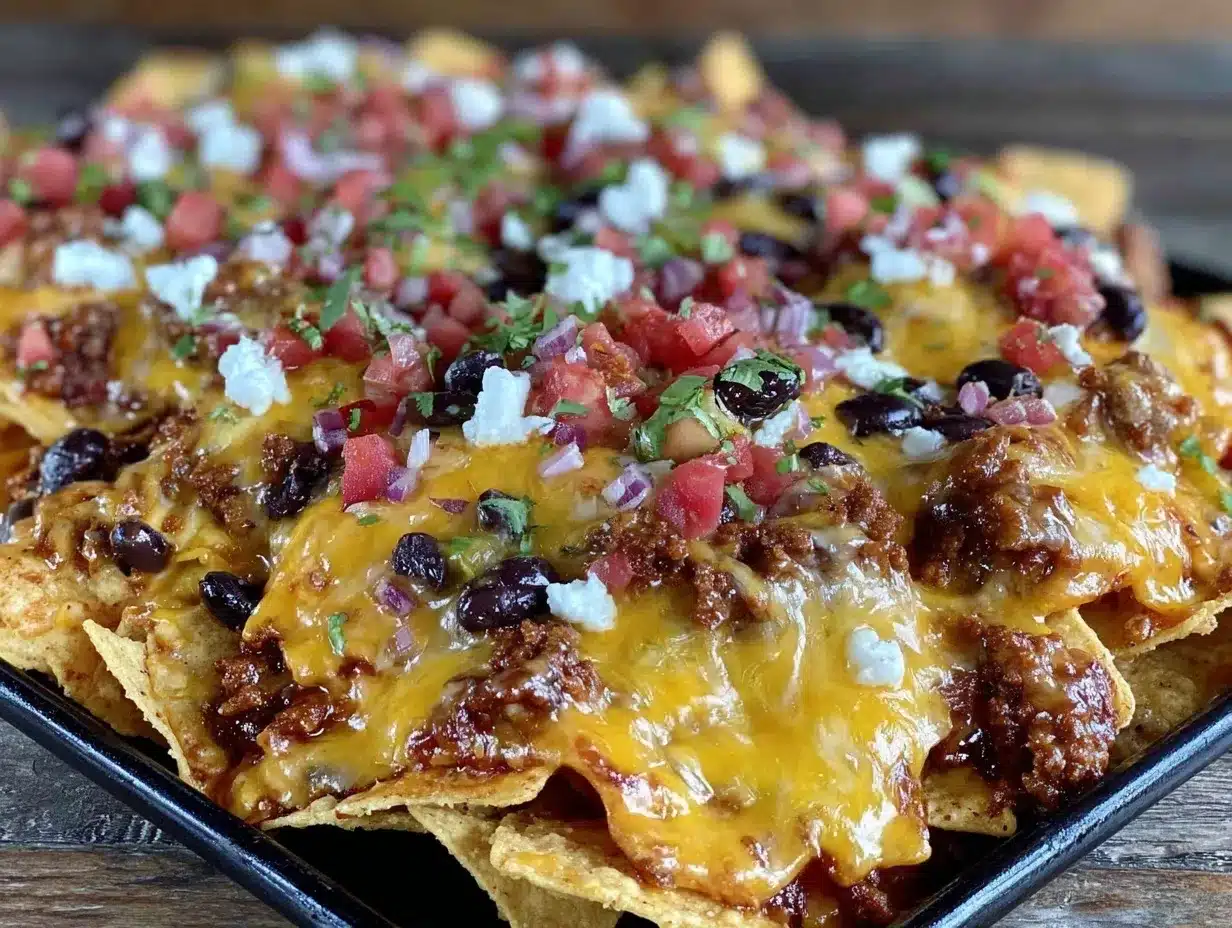
So, picture this: a big, messy pile of tortilla chips smothered in layers of melty cheese, seasoned beef, beans, fresh salsa, and all the toppings you can shake a stick at. I wasn’t sure at first—would it be too chaotic? Too heavy? But as soon as everyone started digging in, the skepticism vanished. The mix of textures, flavors, and colors was insane in the best way.
What really got me was how effortlessly this recipe came together, even with the chaos of hosting a crowd. No endless trays or complicated steps—just a big pan, great ingredients, and a little love. It quickly became my go-to for game days, casual hangouts, or whenever I needed something that feels like a celebration without the stress.
Looking back, that first night taught me that sometimes, the best dishes are the ones you throw together without overthinking. This recipe stuck because it’s honest, satisfying, and honestly, a little bit addictive. If you’re ready to feed a crowd without breaking a sweat, this might just become your new secret weapon.
Why You’ll Love This Recipe
- Quick & Easy: Comes together in under 30 minutes, perfect for last-minute gatherings or busy nights when you want a crowd-pleaser on the table fast.
- Simple Ingredients: Uses pantry staples and fresh toppings you probably already have around—no special trips to the store needed.
- Perfect for Any Occasion: Whether it’s a casual party, family game night, or an impromptu get-together, these nachos bring everyone together.
- Crowd-Pleaser: Kids, adults, picky eaters—everyone loves the layers of flavors and the satisfying crunch.
- Unbelievably Delicious: The combination of seasoned beef, gooey cheese, and fresh salsa creates a harmony of textures and tastes that’s tough to beat.
- What Makes This Recipe Different: Instead of layering nachos in a traditional baking dish, this “trash can” style stacks everything high in a large, deep pan for maximum flavor mingling and easy serving. Plus, a secret blend of spices gives the beef a kick that’s just right—not too spicy, but never boring.
Honestly, this recipe isn’t just another nacho platter. It’s the kind of dish that makes you pause mid-bite because the flavors hit just right and you can’t wait to take another. It’s comfort food without the fuss, a real crowd magnet that feels like a warm, satisfying hug on a plate.
What Ingredients You Will Need
This recipe uses simple, wholesome ingredients to deliver bold flavor and satisfying texture without the fuss. Most items are pantry staples or easy to find at your local grocery store, and you can swap out a few to suit your taste or dietary needs.
- For the Beef and Seasoning:
- 1 pound (450 g) ground beef (I prefer 85% lean for the best balance of flavor and fat)
- 1 tablespoon chili powder (adds depth and warmth)
- 1 teaspoon cumin (essential for that classic nacho flavor)
- 1 teaspoon smoked paprika (for a subtle smoky note)
- 1/2 teaspoon garlic powder
- 1/2 teaspoon onion powder
- Salt and pepper to taste
- For the Base:
- 1 large bag (about 12 oz / 340 g) sturdy tortilla chips (look for thick-cut ones that won’t get soggy quickly)
- 1 can (15 oz / 425 g) black beans, rinsed and drained (adds protein and texture)
- For the Cheese Layer:
- 2 cups (200 g) shredded sharp cheddar cheese
- 1 cup (100 g) shredded Monterey Jack cheese (melts beautifully)
- Fresh Toppings:
- 1 cup (150 g) fresh salsa or pico de gallo (adds brightness and freshness)
- 1/2 cup (120 g) sour cream or Greek yogurt (for creaminess)
- 1/4 cup (15 g) sliced black olives (optional but adds a nice briny touch)
- 2 green onions, thinly sliced
- 1 jalapeño, finely chopped (optional, for extra heat)
- Fresh cilantro leaves for garnish
- Optional Extras:
- 1 avocado, diced (for creaminess and healthy fats)
- Hot sauce or salsa verde for serving
For a gluten-free option, just make sure your tortilla chips are labeled gluten-free. And if you want a vegetarian twist, swap the beef for seasoned sautéed mushrooms or a plant-based ground meat alternative—I’ve tried both, and they work surprisingly well!
Equipment Needed
- Large oven-safe skillet or a deep baking dish (at least 12 inches / 30 cm diameter) — a cast iron skillet works wonders here for even heat distribution.
- Mixing bowls for seasoning the beef and preparing toppings.
- Cheese grater (unless you’re buying pre-shredded).
- Spatula or wooden spoon for cooking the beef.
- Sharp knife and cutting board for chopping toppings.
- Optional: Aluminum foil for covering if you need to hold the nachos warm before serving.
I’ve tried making these nachos in different pans, but a cast iron skillet really adds a nice crispy edge to the chips. If you don’t have one, a deep glass or ceramic baking dish will do just fine. For budget-friendly kitchens, you can even assemble on a rimmed baking sheet, but watch the layers carefully so the chips don’t get overwhelmed.
Preparation Method
- Preheat your oven to 375°F (190°C). This temperature is perfect for melting cheese without burning the chips.
- Cook the beef: Heat a large skillet over medium heat. Add the ground beef and cook for 5–7 minutes, breaking it up with a spatula. Once it’s mostly browned, drain excess fat if needed. Stir in chili powder, cumin, smoked paprika, garlic powder, onion powder, salt, and pepper. Cook for another 2 minutes until fragrant and well combined. Set aside.
- Layer the nachos: In your large oven-safe skillet or baking dish, spread a generous layer of tortilla chips evenly across the bottom (about half the bag). Sprinkle half of the black beans over the chips, then scatter half of the cooked beef on top. Add a layer of shredded cheddar and Monterey Jack cheeses, using about half of each. Repeat with the remaining chips, beans, beef, and cheese to build a tall, “trash can” style pile.
- Bake the nachos: Place the skillet or dish in the preheated oven for 10–12 minutes, or until the cheese is melted and bubbly. Keep an eye on it—cheese should be gooey but not browned or crispy.
- Add fresh toppings and serve: Remove from oven, then top immediately with fresh salsa, sour cream or Greek yogurt, sliced olives, jalapeños, green onions, and cilantro. Serve warm, encouraging everyone to dig in quickly for the best crunch and flavor balance.
Tip: If you want to save time, you can prepare the seasoned beef a day ahead and reheat it gently before assembling. Also, layering the chips just right helps prevent sogginess—don’t overload with wet toppings until after baking.
Cooking Tips & Techniques
One thing I learned the hard way is that not all chips are created equal. Thin, flimsy chips just don’t hold up under all that weight and moisture. Thick, sturdy tortilla chips are the way to go if you want that satisfying crunch in every bite.
When cooking the beef, don’t rush the browning process. Letting it brown properly adds layers of flavor that simple seasoning alone can’t match. Also, draining excess fat keeps the nachos from getting greasy.
Layering is key here—think of it like building a flavor skyscraper. Spreading out the ingredients ensures every chip gets a bit of everything. Avoid piling too high in one spot, or you risk soggy bottoms.
Timing is crucial. Baking just until the cheese melts keeps the chips crisp. If you leave it too long, the chips start to soften, and you lose that addictive crunch.
Finally, add fresh toppings after baking. If you put salsa or sour cream in before baking, you’ll get a soggy mess instead of the fresh, vibrant contrast that makes this dish sing.
Variations & Adaptations
- Vegetarian Version: Swap the beef for seasoned sautéed mushrooms, lentils, or a plant-based ground meat substitute. Add extra beans or roasted veggies like bell peppers and corn for more texture.
- Seasonal Twist: In summer, toss in fresh corn kernels and diced tomatoes instead of canned beans, and finish with a squeeze of lime for brightness.
- Spice Level: Adjust the heat by adding chopped fresh jalapeños or a pinch of cayenne pepper to the beef mixture. For a milder version, skip the jalapeños and use mild salsa.
- Gluten-Free: Use certified gluten-free tortilla chips and double-check your seasoning blends for hidden gluten.
- Cheese Variations: Try pepper jack for a bit of kick or add crumbled queso fresco on top after baking for a creamy finish.
Once, I tried mixing in some chipotle peppers in adobo sauce into the beef for a smoky heat that knocked everyone’s socks off. It’s a personal favorite when I want to impress without extra effort.
Serving & Storage Suggestions
These nachos are best served piping hot right out of the oven. The contrast between the crisp chips, melted cheese, and cool fresh toppings is unbeatable. I like to serve them family-style in the skillet so everyone can dig in.
Pair with classic sides like guacamole, extra salsa, or a crisp green salad to balance the richness. For beverages, a cold beer or a tangy margarita always hits the spot.
If you have leftovers (and sometimes you won’t), store them in an airtight container in the fridge for up to 2 days. Reheat gently in the oven at 325°F (160°C) for 10 minutes to revive the cheese and crispness. Avoid the microwave if you want to keep chips from getting soggy.
Fun fact: the flavors actually deepen a bit after resting, so sometimes I make these ahead for a late-night snack and find them even better the next day.
Nutritional Information & Benefits
Per serving (based on 8 servings), these trash can nachos offer approximately:
| Calories | 450-500 kcal |
|---|---|
| Protein | 25-30 g |
| Fat | 25-30 g |
| Carbohydrates | 35-40 g |
| Fiber | 6-8 g |
Key ingredients like black beans provide fiber and plant-based protein, while lean ground beef adds iron and B vitamins. The cheese brings calcium and protein but keep in mind the fat content. Using Greek yogurt instead of sour cream adds protein and probiotics.
This recipe can fit well into a balanced diet when enjoyed in moderation. For gluten-free or vegetarian diets, simple swaps make it accessible without losing its satisfying character.
Conclusion
Flavorful Trash Can Nachos for a Crowd is a recipe that’s stayed with me because it’s honest, easy, and just plain fun to eat. It’s not about perfection—it’s about sharing something that tastes great without the stress. You can tweak it to suit your crowd, add your favorite toppings, or keep it simple and classic.
Whenever I make these nachos, I remember that chaotic first party, the laughter, and how a simple dish brought everyone together. That’s the kind of recipe that earns a spot in your regular rotation.
So, if you’re looking for a crowd-pleasing, flavorful, and downright satisfying dish, give this one a try. And hey, I’d love to hear how you put your own spin on it—drop a comment or share your tweaks!
Here’s to good food, good company, and plenty of cheesy, crunchy bites.
FAQs
Can I make these nachos ahead of time?
You can prepare the seasoned beef and toppings a day ahead, but it’s best to assemble and bake the nachos just before serving to keep chips crisp.
What can I use instead of ground beef?
Try sautéed mushrooms, lentils, or plant-based crumbles for a vegetarian alternative that still delivers flavor and texture.
How do I keep the chips from getting soggy?
Layer chips with dry ingredients first, bake until cheese melts, then add wet toppings like salsa and sour cream after baking.
Can I freeze leftover nachos?
Nachos don’t freeze well because chips get soggy upon thawing. It’s better to refrigerate leftovers and reheat in the oven.
What’s the best cheese for melting on nachos?
A blend of sharp cheddar and Monterey Jack melts well and offers a nice flavor balance. You can also try pepper jack for a spicy twist.
Pin This Recipe!

Flavorful Trash Can Nachos Recipe

A quick and easy nacho recipe perfect for feeding a crowd with layers of seasoned beef, beans, melty cheese, and fresh toppings served in a large skillet or deep pan.
- Prep Time: 10 minutes
- Cook Time: 15 minutes
- Total Time: 25 minutes
- Yield: 8 servings 1x
- Category: Main Course
- Cuisine: Mexican
Ingredients
- 1 pound ground beef (85% lean preferred)
- 1 tablespoon chili powder
- 1 teaspoon cumin
- 1 teaspoon smoked paprika
- 1/2 teaspoon garlic powder
- 1/2 teaspoon onion powder
- Salt and pepper to taste
- 1 large bag (about 12 oz) sturdy tortilla chips
- 1 can (15 oz) black beans, rinsed and drained
- 2 cups shredded sharp cheddar cheese
- 1 cup shredded Monterey Jack cheese
- 1 cup fresh salsa or pico de gallo
- 1/2 cup sour cream or Greek yogurt
- 1/4 cup sliced black olives (optional)
- 2 green onions, thinly sliced
- 1 jalapeño, finely chopped (optional)
- Fresh cilantro leaves for garnish
- Optional extras: 1 avocado, diced; hot sauce or salsa verde for serving
Instructions
- Preheat your oven to 375°F (190°C).
- Cook the beef: Heat a large skillet over medium heat. Add the ground beef and cook for 5–7 minutes, breaking it up with a spatula. Drain excess fat if needed. Stir in chili powder, cumin, smoked paprika, garlic powder, onion powder, salt, and pepper. Cook for another 2 minutes until fragrant and well combined. Set aside.
- Layer the nachos: In a large oven-safe skillet or baking dish, spread half the tortilla chips evenly across the bottom. Sprinkle half of the black beans over the chips, then scatter half of the cooked beef on top. Add half of the shredded cheddar and Monterey Jack cheeses. Repeat with remaining chips, beans, beef, and cheese to build a tall pile.
- Bake the nachos: Place the skillet or dish in the preheated oven for 10–12 minutes, or until the cheese is melted and bubbly but not browned.
- Add fresh toppings and serve: Remove from oven and immediately top with fresh salsa, sour cream or Greek yogurt, sliced olives, jalapeños, green onions, and cilantro. Serve warm.
Notes
Use thick, sturdy tortilla chips to prevent sogginess. Prepare seasoned beef a day ahead to save time. Add fresh toppings after baking to keep chips crisp. Reheat leftovers gently in the oven to maintain texture. For vegetarian version, substitute beef with sautéed mushrooms, lentils, or plant-based ground meat.
Nutrition
- Serving Size: Approximately 1/8th
- Calories: 475
- Sugar: 3
- Sodium: 600
- Fat: 27.5
- Saturated Fat: 12
- Carbohydrates: 37.5
- Fiber: 7
- Protein: 27.5
Keywords: nachos, trash can nachos, crowd-pleaser, easy nachos, cheesy nachos, party food, game day snacks


