Introduction
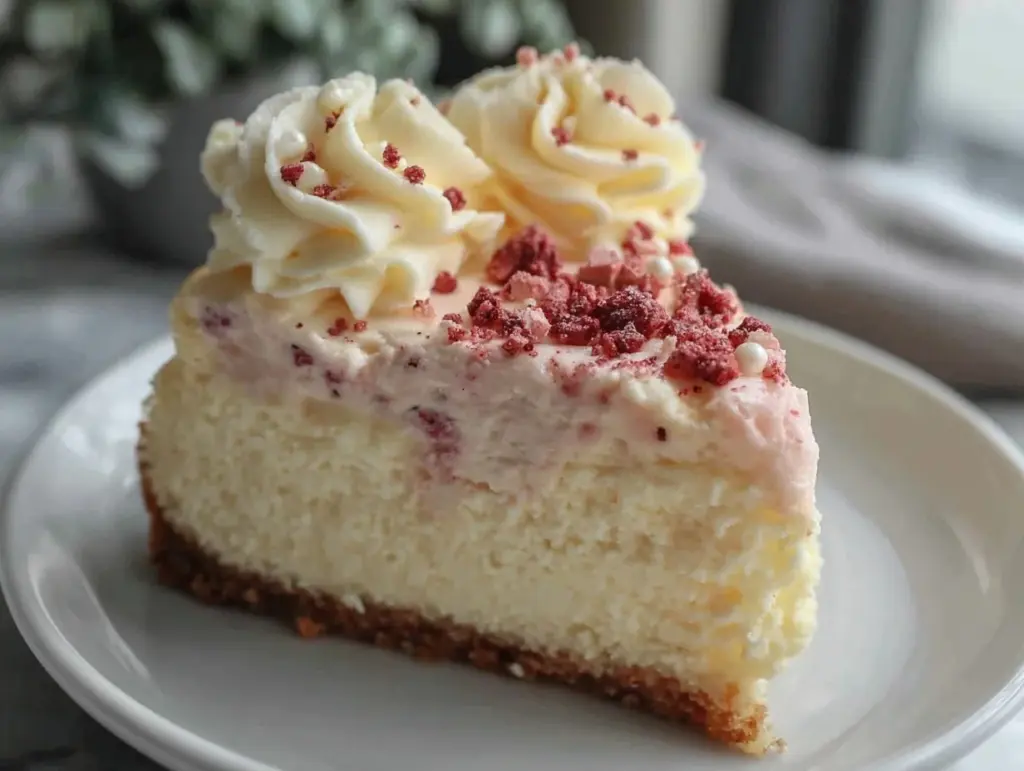
One late evening, I found myself staring at a forgotten tub of cream cheese in the fridge and a half-used bottle of pink food coloring. Honestly, it was just one of those nights where I wasn’t in the mood for anything complicated—just something sweet and comforting. I figured, why not try mixing them up into something fun? The idea of a classic cheesecake felt too serious, so I added the pink hue on a whim. What started as a playful experiment turned into this dreamy, creamy pink velvet cheesecake with velvety frosting that honestly surprised me. The texture was smooth, almost like silk, and the frosting? So soft it practically melted the moment it touched your tongue.
It’s funny how the best recipes sometimes come from the least expected moments, right? This cheesecake quickly became my go-to for those evenings when I just want a slice of something that feels indulgent but not fussy. There’s a quiet comfort in its simplicity, yet it still manages to impress anyone who tries it. I love that it’s pink — not too bright, just the right amount of blush that makes every bite feel special without screaming “look at me.”
So, if you ever find yourself with a little bit of cream cheese and a craving for something soft and sweet, this recipe might just become your new favorite. It’s easy enough to whip up without a fuss, but still feels like a treat that deserves a moment on your dessert plate. The way the frosting wraps around the cheesecake like a gentle cloud is honestly the kind of detail that sticks with you.
Why You’ll Love This Recipe
After making this creamy pink velvet cheesecake with velvety frosting several times (yes, I admit, sometimes more than once a week), I can confidently say it’s a winner for many reasons:
- Quick & Easy: The whole cheesecake comes together in about an hour, including baking and cooling—perfect when you want a treat without a full-day commitment.
- Simple Ingredients: No fancy or hard-to-find stuff here. You likely have cream cheese, eggs, sugar, and a few baking basics sitting in your pantry or fridge.
- Perfect for Celebrations: Whether it’s a birthday, a casual brunch, or just a cozy night in, this cheesecake’s subtle pink color and smooth texture make it feel extra special.
- Crowd-Pleaser: Kids love the color, adults love the creamy texture, and everyone appreciates that it’s not overly sweet or heavy.
- Unbelievably Delicious: The balance between the rich, creamy filling and the soft, velvety frosting is just right—comfort food with a delicate touch.
This recipe stands apart because I blend the cream cheese gently to keep it ultra smooth (no lumps allowed!) and I add a splash of vanilla with just the right amount of pink coloring to keep it natural-looking. The frosting is whipped until it’s fluffy but still dense enough to hold its shape, which is honestly a little trick I picked up after a few too many failed attempts with runny frostings. It’s not just another cheesecake; it’s the cheesecake that feels like a soft hug on a plate.
What Ingredients You Will Need
This creamy pink velvet cheesecake relies on simple, wholesome ingredients that combine for bold flavor and a satisfyingly smooth texture without any fuss. Most of these are pantry staples, but a few tips might help you get the best results:
- Cream Cheese, softened (I prefer Philadelphia for its consistent texture)
- Granulated Sugar (regular white sugar works best to keep the filling smooth)
- Large Eggs, room temperature (helps with a smooth batter)
- Heavy Cream or whipping cream (adds creaminess and richness)
- Vanilla Extract (pure vanilla for the best flavor)
- All-Purpose Flour (just a bit to help set the cheesecake)
- Pink Food Coloring (use gel-based if you want a more natural, less watery color)
- Butter, melted (for the crust)
- Graham Cracker Crumbs or digestive biscuits (for the base – you can also try almond flour for a gluten-free twist)
- Powdered Sugar (for the velvety frosting)
- Milk or cream (to help adjust frosting consistency)
If you’re feeling adventurous, you can swap the graham cracker crumbs for crushed pink lady cookies to amp up the pink theme. For dairy-free options, almond cream cheese alternatives can work, though the texture will shift a bit. When selecting cream cheese, avoid the low-fat versions if possible; the full-fat ones give you that signature creamy texture.
Equipment Needed
- Springform Pan (9-inch recommended for easy release; a loose-bottom tart pan can work but might be trickier)
- Electric Mixer (stand or handheld; essential for achieving that smooth batter and fluffy frosting)
- Mixing Bowls (medium and large sizes for ingredients separation)
- Measuring Cups and Spoons (accuracy is key with baking)
- Rubber Spatula (for scraping down the bowl and folding ingredients gently)
- Fine Mesh Sieve (optional but helpful to sift powdered sugar for the frosting)
If you don’t have a springform pan, a regular cake pan lined with parchment paper can work, but just be extra gentle when removing the cheesecake to prevent cracking. For whipping cream or frosting, a chilled bowl helps speed things up and get that fluffy texture quicker. I once tried making this without an electric mixer, and let’s just say, it took forever and was a serious workout.
Preparation Method
- Prepare the Crust (10-15 minutes): Combine 1 ½ cups (150g) graham cracker crumbs with 6 tablespoons (85g) melted butter. Press the mixture firmly into the bottom of your springform pan. Use the back of a spoon or a flat-bottom glass to pack it evenly. Chill in the fridge while you make the filling.
- Make the Cheesecake Filling (15-20 minutes): In a large mixing bowl, beat 24 oz (680g) softened cream cheese until smooth and creamy, about 3-4 minutes on medium speed. Gradually add 1 cup (200g) granulated sugar and beat until fully incorporated.
- Add 3 large eggs, one at a time, mixing on low speed just until blended after each addition. Avoid overbeating to keep the cheesecake from cracking.
- Mix in 1 teaspoon pure vanilla extract and 2 tablespoons (16g) all-purpose flour. Then, pour in ½ cup (120ml) heavy cream and mix gently until smooth.
- Add 1-2 teaspoons of gel pink food coloring, depending on your preferred shade. Stir just enough to swirl the color evenly but don’t overmix—you want that subtle velvet effect.
- Bake the Cheesecake (50-60 minutes): Pour the filling over the chilled crust. Place the pan in a water bath (wrap the bottom with foil to prevent leaks) and bake at 325°F (160°C) until the edges are set but the center still jiggles slightly—about 50-60 minutes.
- Turn off the oven and leave the cheesecake inside with the door slightly open for 1 hour to prevent cracks. Then, transfer to the fridge to chill for at least 4 hours, preferably overnight.
- Prepare the Velvety Frosting (10-15 minutes): Beat 1 cup (240ml) heavy cream with 1 ½ cups (180g) powdered sugar and 1 teaspoon vanilla extract on high speed until stiff peaks form. Taste and adjust sweetness as needed.
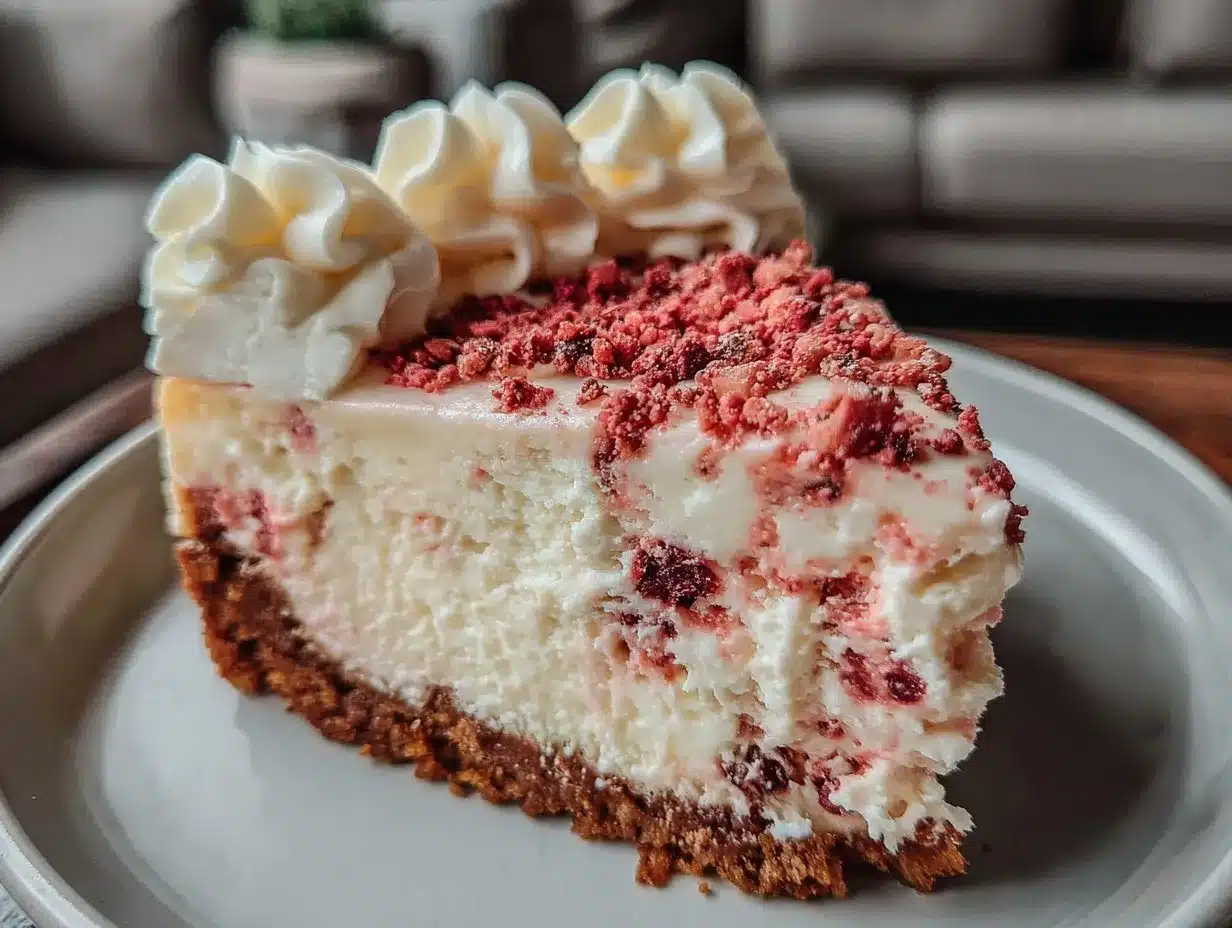
- Frost and Decorate: Spread the frosting evenly over the chilled cheesecake. You can add a few fresh raspberries or edible flowers for a pretty finish if you like.
Pro tip: If your cream cheese is too cold, you’ll end up with lumps. Let it sit at room temperature for at least 30 minutes before starting. Also, keep an eye on the baking—overbaking dries out the cheesecake, but underbaking leaves it too loose. That gentle jiggle in the center is your green light.
Cooking Tips & Techniques
Cheesecake can be finicky, but a few tricks make this creamy pink velvet cheesecake truly foolproof:
- Room Temperature Ingredients: This is key. Cold eggs or cream cheese turn the batter lumpy or uneven. Plan ahead and let everything soften on the counter.
- Water Bath Baking: Wrapping the pan in foil and placing it in a hot water bath keeps the cheesecake moist and helps prevent cracks. I learned this the hard way after one too many dry edges.
- Don’t Overmix: When adding eggs, mix just enough to combine. Overmixing incorporates too much air, which leads to cracks and a less creamy texture.
- Chilling Time: Patience pays off here. The cheesecake needs time to set properly in the fridge—rushing this step can ruin the texture.
- Frosting Consistency: Whip the cream to stiff peaks but not beyond, or it’ll turn grainy and start to separate. I find that chilling both the cream and bowl beforehand helps immensely.
- Crust Variations: Press the crust firmly and evenly; a crumbly crust means the base falls apart when slicing.
One time, I skipped the water bath because I was running late. The cheesecake cracked badly, and the texture was dry around the edges. Lesson learned: never skip the bath! This cheesecake is forgiving if you respect these basics.
Variations & Adaptations
Changing up this creamy pink velvet cheesecake is easier than you might think. Here are some ways to make it your own:
- Flavor Twists: Add a tablespoon of raspberry or strawberry puree to the batter for a fruity note that complements the pink color beautifully.
- Gluten-Free Version: Swap the graham cracker crust with almond flour mixed with butter and a touch of sugar. It adds a lovely nutty flavor and keeps it gluten-free.
- Vegan Adaptation: Use vegan cream cheese and coconut cream for the filling, and almond or oat milk-based whipping cream alternatives for the frosting. Baking times may vary, so keep an eye on it.
- Seasonal Touch: In spring or summer, top with fresh berries or edible flowers to brighten the presentation and add fresh bursts of flavor.
- Personal Tried Variation: I once added a hint of rose water (about ½ teaspoon) to the frosting for a delicate floral aroma that made the cheesecake feel extra fancy without being overpowering.
Serving & Storage Suggestions
This creamy pink velvet cheesecake is best served chilled, straight from the fridge. The frosting holds its shape nicely, so you can slice clean pieces without worrying about it melting too fast. I like to serve it on simple white plates to let the soft pink color stand out.
Pair it with a cup of Earl Grey tea or a light sparkling rosé for a delightful afternoon or evening treat. If you’re serving it at a gathering, fresh raspberries or mint leaves on top add a lovely pop.
For storage, keep the cheesecake tightly covered in the fridge—it stays good for up to 4 days. If you need longer, you can freeze it without frosting for up to 2 months; thaw overnight in the fridge before frosting and serving. Reheat isn’t really recommended for cheesecake, but letting it sit out 10 minutes before slicing helps soften it just enough.
Over time, the flavors meld together beautifully, so if you make it a day ahead, you might find it tastes even better the next day.
Nutritional Information & Benefits
One slice (1/12 of the cheesecake) roughly contains:
| Calories | 350 kcal |
|---|---|
| Fat | 28g |
| Carbohydrates | 18g |
| Protein | 6g |
This cheesecake packs protein from cream cheese and eggs, and healthy fats from cream and butter. While it’s definitely an indulgence, using real ingredients (no artificial thickeners or preservatives) keeps it wholesome. The pink food coloring is best kept natural or gel-based to minimize additives.
For those watching carbs, swapping the crust for almond flour and reducing sugar slightly can make this more keto-friendly. Just note that the texture and flavor will shift a bit.
Personally, I appreciate how this dessert feels like a treat that doesn’t overcomplicate things or ask me to compromise on taste or quality.
Conclusion
This creamy pink velvet cheesecake with velvety frosting is one of those recipes that quietly won me over with its simple elegance and comforting texture. It’s not flashy or over the top, but it has just enough personality to make you smile with every bite. Whether you’re making it for a special occasion or just because you found some cream cheese and wanted to try something different, it’s a reliable recipe that rarely disappoints.
Feel free to tweak the colors, flavors, or crust to fit your mood or pantry. That’s the beauty of this cheesecake—it’s a soft canvas for your creativity without losing its soul. I hope it finds a spot in your rotation like it did in mine.
Try it out, share it with friends, and let me know how you make it your own. There’s something pretty special about a dessert that feels both easy and a little luxurious at the same time.
FAQs
Can I make this cheesecake without a water bath?
Technically, yes, but the water bath helps keep the cheesecake moist and crack-free. If you skip it, watch the baking time closely and be ready for some cracking or dryness around the edges.
How do I get the frosting to be perfectly fluffy?
Chill your mixing bowl and cream before whipping, and stop whipping once stiff peaks form. Overwhipping can cause the cream to separate and turn grainy.
Can I use natural food coloring or beet juice instead of artificial pink coloring?
Absolutely! Natural options like beet juice work well but might add a slight flavor. Adjust quantity to get your preferred shade.
How long can I store this cheesecake in the fridge?
Stored tightly covered, it lasts up to 4 days. For longer storage, freeze without frosting and thaw overnight before frosting.
Is it possible to make this cheesecake ahead of time?
Yes! In fact, it tastes even better after sitting overnight in the fridge as the flavors meld and the texture firms up nicely.
Pin This Recipe!
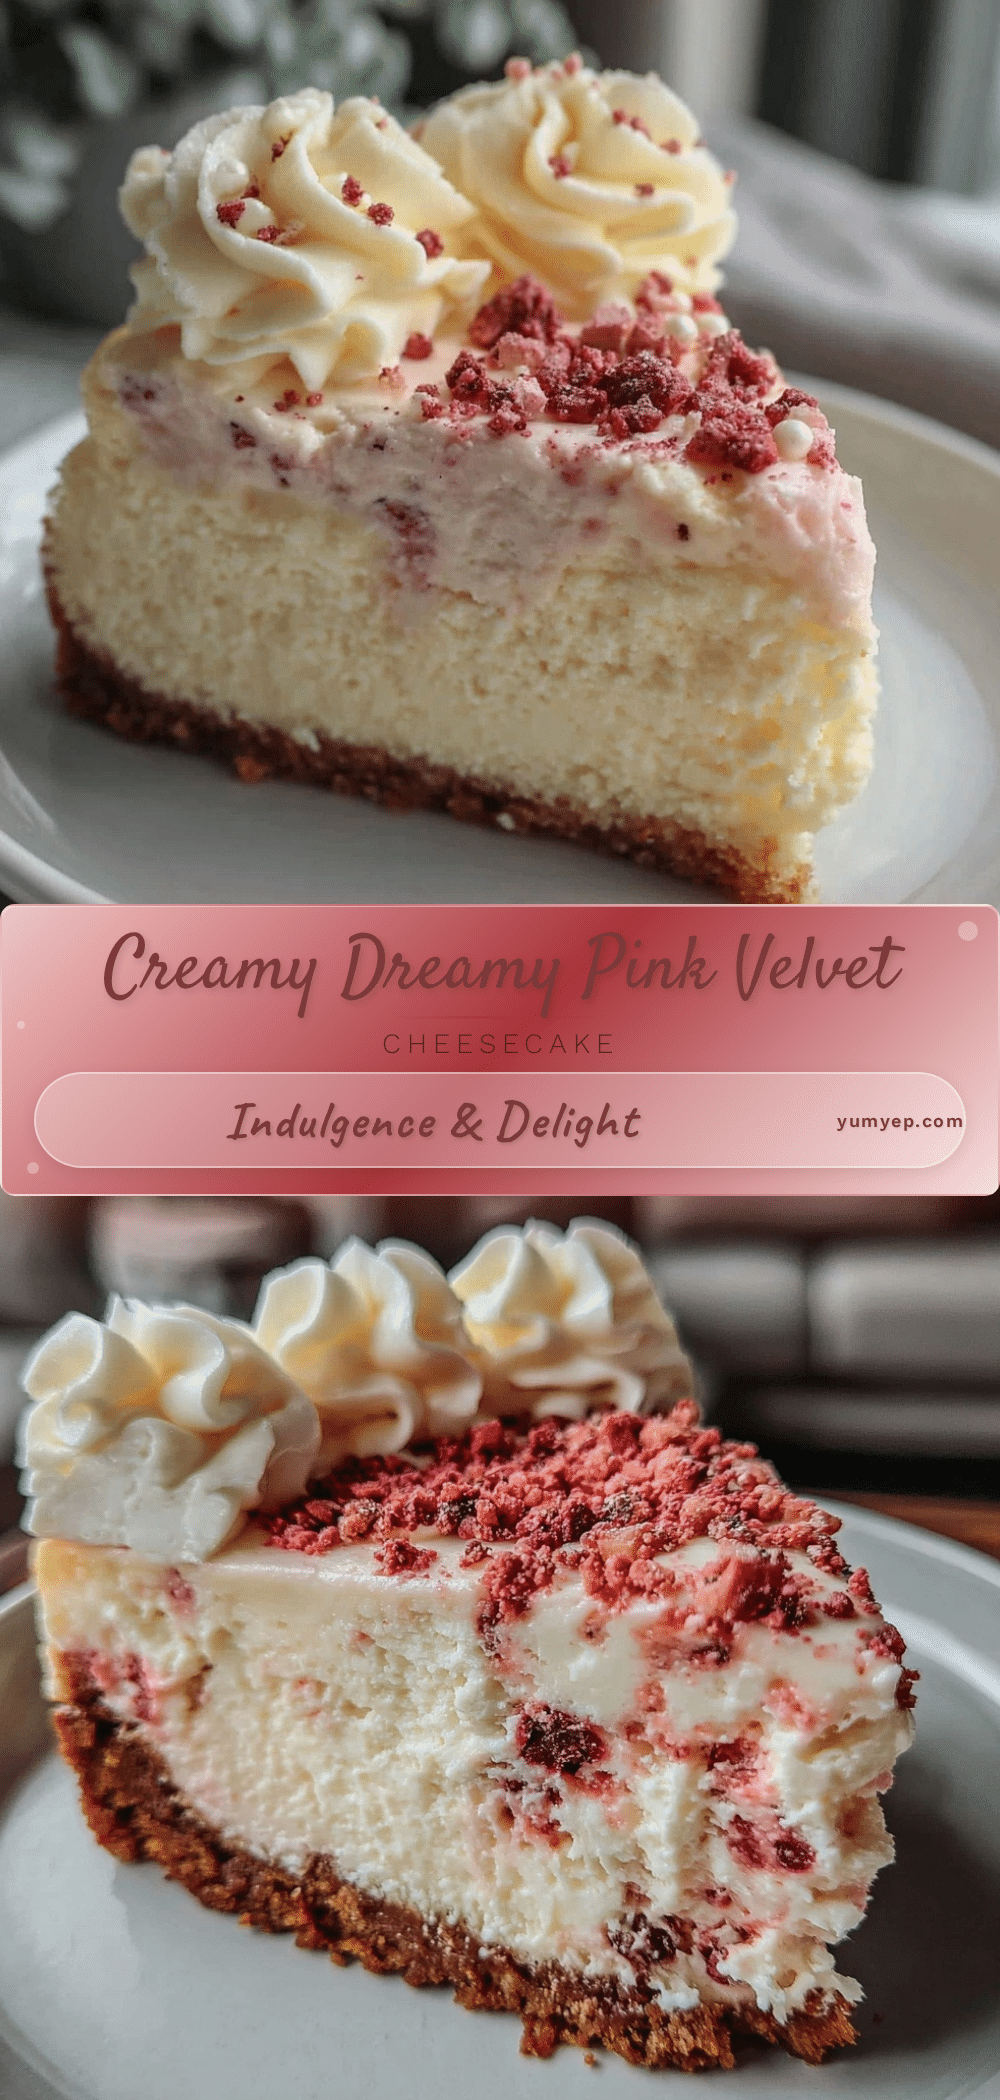
Creamy Pink Velvet Cheesecake

A dreamy, creamy pink velvet cheesecake with velvety frosting that is smooth, soft, and indulgent yet easy to make. Perfect for celebrations or cozy nights in.
- Prep Time: 25 minutes
- Cook Time: 1 hour
- Total Time: 5 hours 25 minutes
- Yield: 12 servings 1x
- Category: Dessert
- Cuisine: American
Ingredients
- 1 ½ cups graham cracker crumbs
- 6 tablespoons melted butter
- 24 oz softened cream cheese
- 1 cup granulated sugar
- 3 large eggs, room temperature
- 1 teaspoon pure vanilla extract
- 2 tablespoons all-purpose flour
- ½ cup heavy cream
- 1–2 teaspoons gel pink food coloring
- 1 cup heavy cream (for frosting)
- 1 ½ cups powdered sugar
- 1 teaspoon vanilla extract (for frosting)
- Optional: fresh raspberries or edible flowers for decoration
Instructions
- Prepare the crust: Combine graham cracker crumbs with melted butter and press firmly into the bottom of a 9-inch springform pan. Chill in the fridge.
- Make the cheesecake filling: Beat softened cream cheese until smooth. Gradually add sugar and beat until incorporated.
- Add eggs one at a time, mixing on low speed just until blended after each addition.
- Mix in vanilla extract and flour, then gently mix in heavy cream until smooth.
- Add pink food coloring and stir just enough to swirl the color evenly without overmixing.
- Pour filling over chilled crust. Place pan in a water bath and bake at 325°F for 50-60 minutes until edges are set and center jiggles slightly.
- Turn off oven and leave cheesecake inside with door slightly open for 1 hour. Then chill in fridge for at least 4 hours or overnight.
- Prepare frosting: Beat heavy cream, powdered sugar, and vanilla extract on high speed until stiff peaks form.
- Spread frosting evenly over chilled cheesecake and decorate as desired.
Notes
Use room temperature cream cheese and eggs to avoid lumps. Bake in a water bath to prevent cracks and keep cheesecake moist. Chill frosting bowl and cream before whipping for best results. Do not overmix eggs to avoid cracking. Let cheesecake chill overnight for best texture and flavor. For gluten-free crust, substitute graham cracker crumbs with almond flour.
Nutrition
- Serving Size: 1 slice (1/12 of che
- Calories: 350
- Fat: 28
- Carbohydrates: 18
- Protein: 6
Keywords: pink velvet cheesecake, creamy cheesecake, easy cheesecake recipe, homemade frosting, dessert, celebration cake


