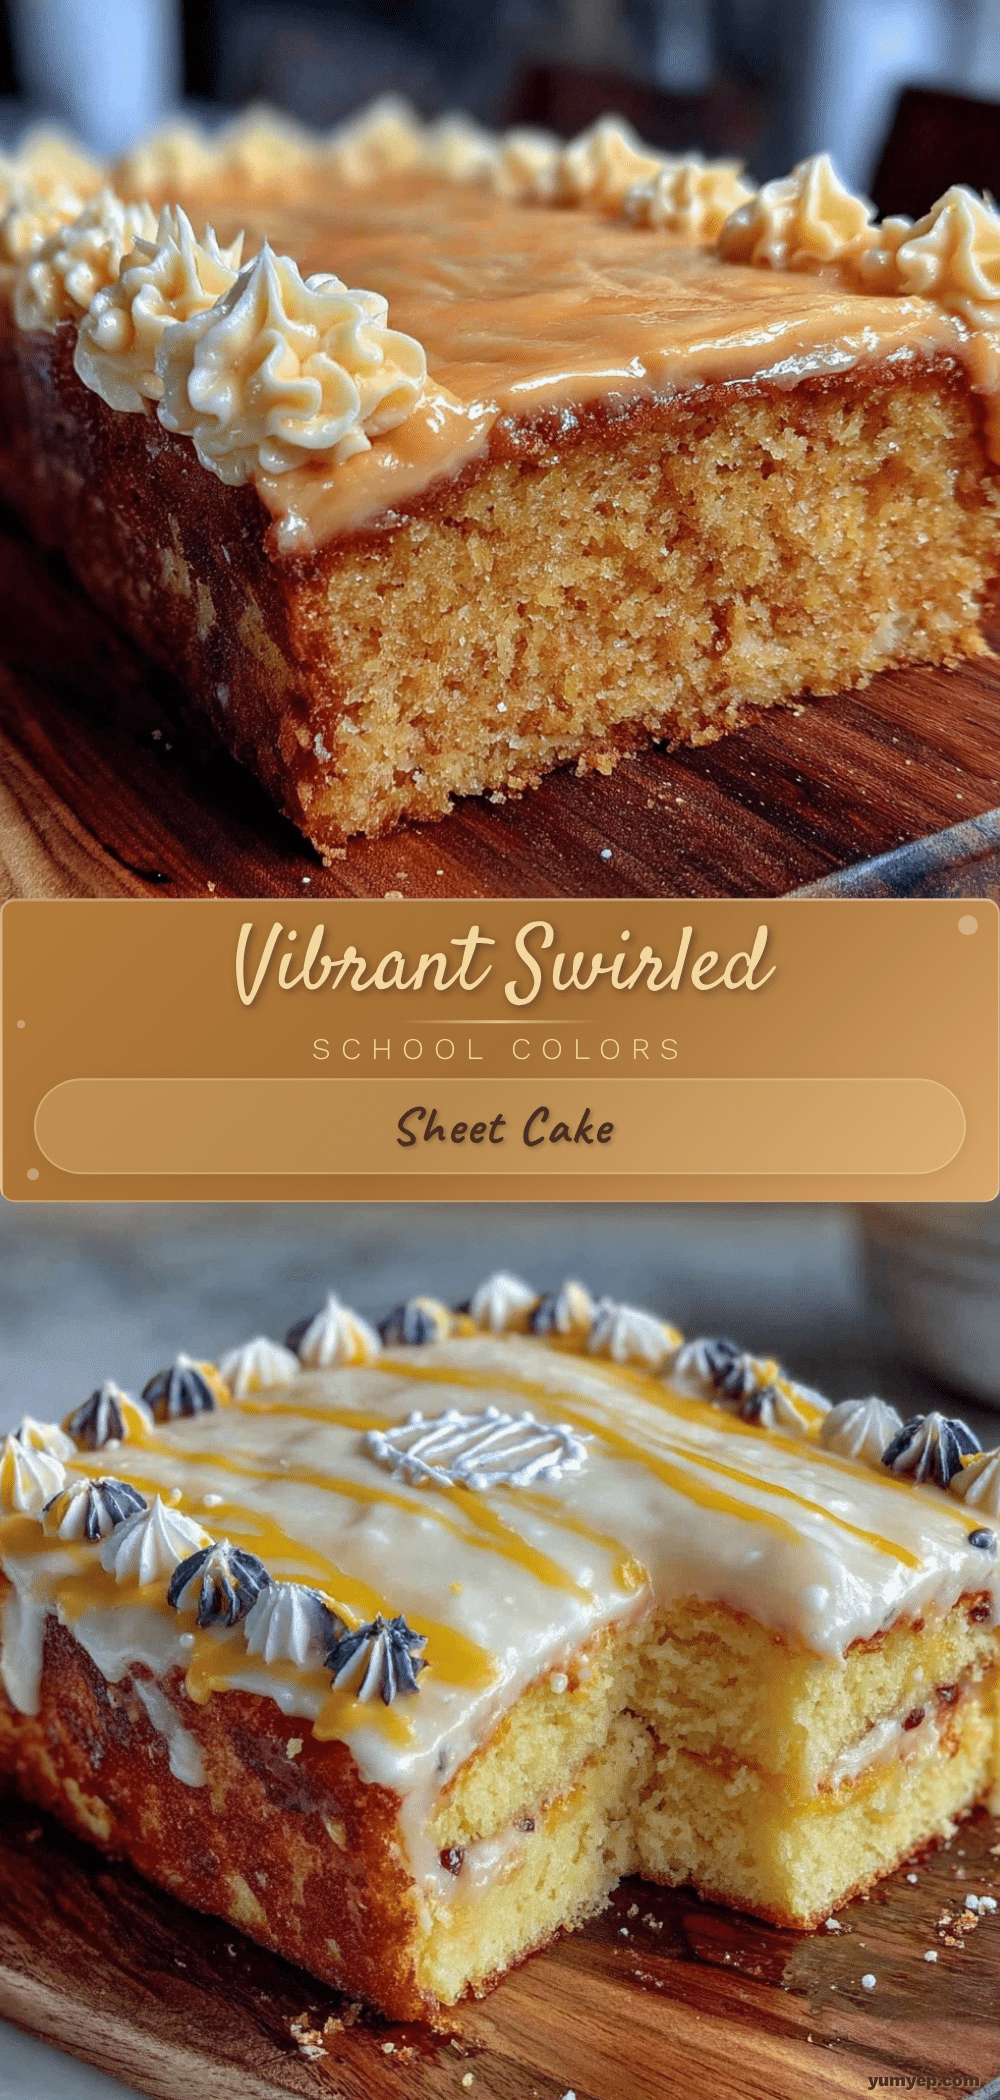
It all started one chilly November afternoon when my phone buzzed with a group chat message from my kid’s soccer coach. “Can someone bring a dessert for Saturday’s big game? School colors, please!” Honestly, I was half-expecting the usual cupcakes or cookies, but then I remembered that trusty recipe I’d been fine-tuning for a while: a perfect sheet cake that’s as simple as it is impressive. I was skeptical at first—how do you make a big, bold cake that actually looks good in school colors without turning it into a frosting mess? But as I mixed the batter and layered on the colored frosting stripes, something clicked. The cake wasn’t just a dessert; it became the centerpiece, the unofficial team spirit booster. Seeing the kids’ faces light up when they saw their team colors shining on that golden sheet cake made me realize this recipe was more than just a quick fix. It was a little tradition in the making—easy, cheerful, and undeniably festive.
Since then, this sheet cake with school colors has popped up at every game day and celebration. It’s surprisingly forgiving, which is a blessing when you’re juggling a million things. Plus, the way the bright frosting contrasts with the moist crumb never fails to pull in compliments (and a few requests for the recipe). There’s just something about that combination of simple ingredients and eye-catching colors that feels like a small party on a plate—no fuss, just pure joy.
So, if you’re hunting for a dessert that’s quick to whip up, crowd-friendly, and screams team pride without the stress, this perfect sheet cake with school colors might just be your new go-to. It’s honest, reliable, and honestly, kind of fun to make when you want to celebrate with a little extra flair.
Why You’ll Love This Recipe
After testing this recipe countless times, I can vouch for its ease and crowd-pleasing qualities. Here’s why it stands out:
- Quick & Easy: The batter comes together in under 15 minutes, and the cake bakes in about 30 minutes — perfect for last-minute celebrations or busy weekends.
- Simple Ingredients: No need for specialty stores; most are pantry staples like flour, sugar, and eggs.
- Perfect for Celebrations: Whether it’s a school game, spirit day, or pep rally, the colorful frosting makes it festive and fun.
- Crowd-Pleaser: Kids and adults alike rave about the balance of moist cake and creamy frosting — it’s never too sweet, just right.
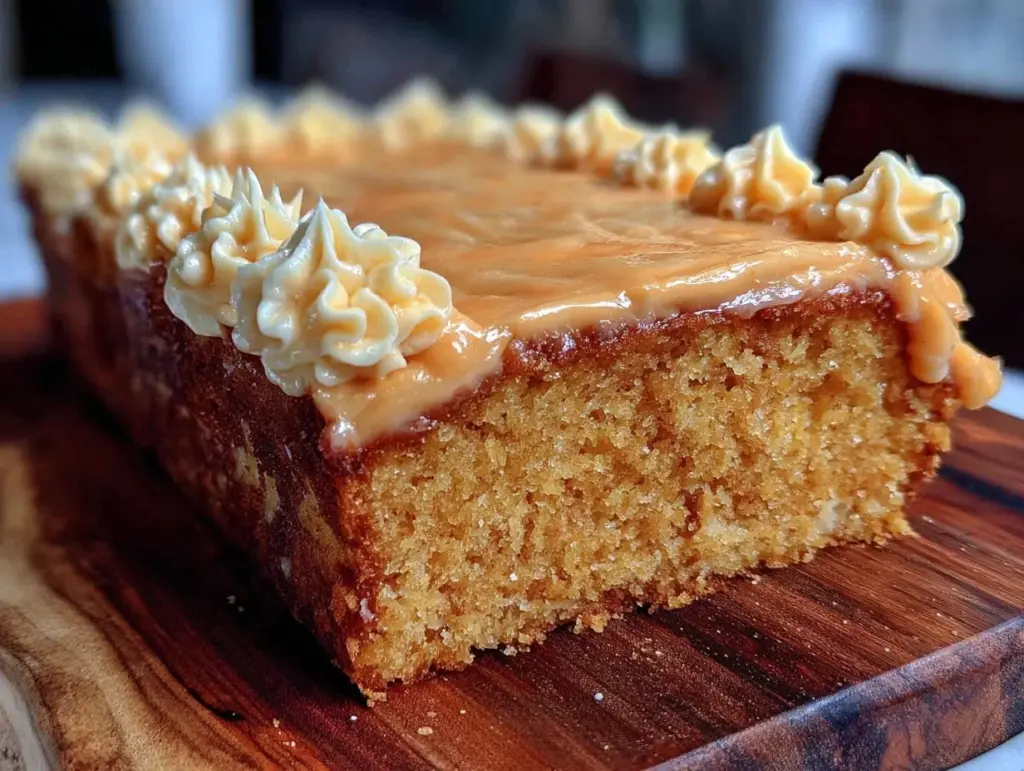
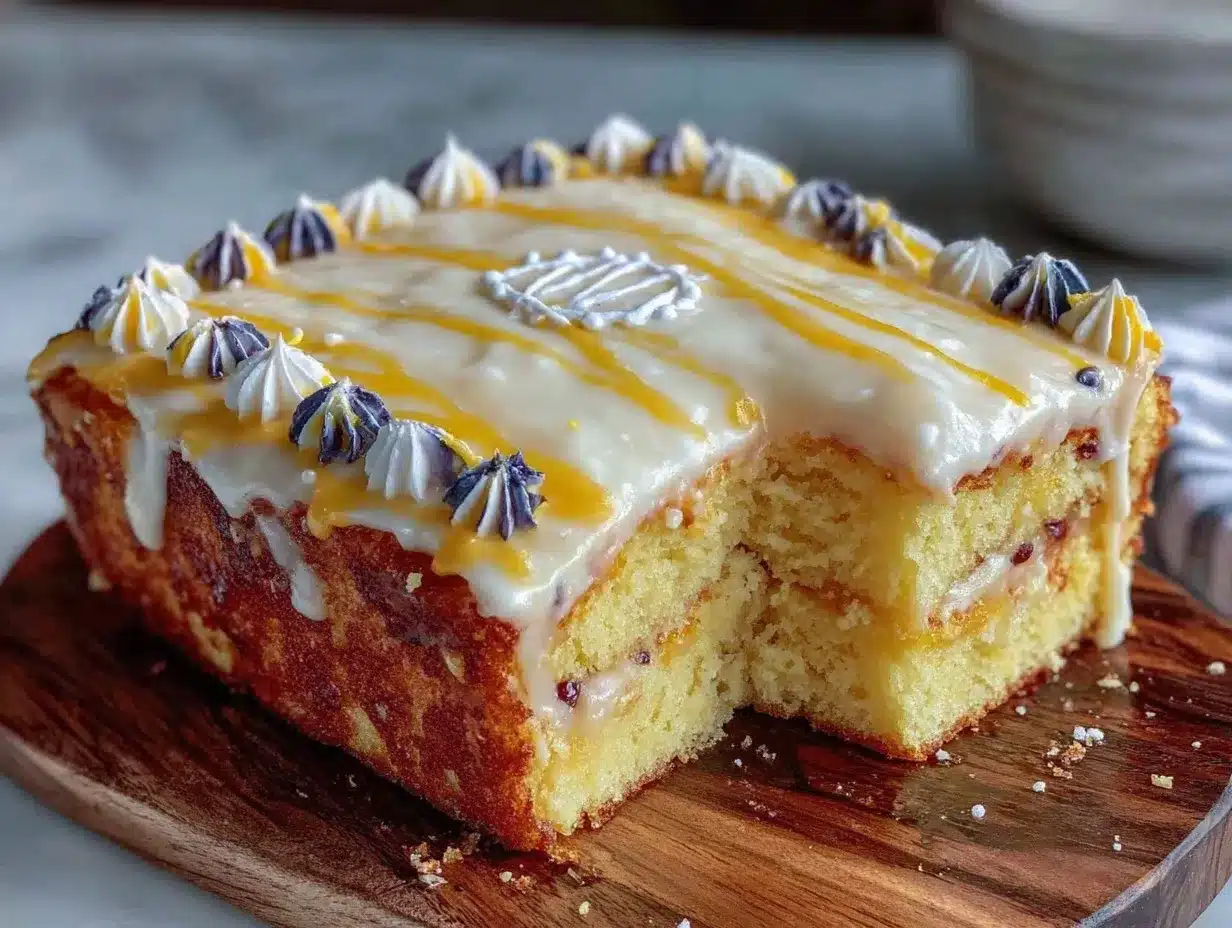
- Unique Twist: The trick to this recipe is the frosting technique — smooth layers of tinted buttercream that hold their shape well and don’t melt into the cake, making your school colors pop perfectly.
What really makes this recipe different is its forgiving nature. I’ve made it after a long day when I wasn’t feeling particularly “baking-savvy,” and it still turned out beautifully. That balance of simplicity and show-stopping look is what keeps me coming back to it, especially when I want to make a statement without the stress.
What Ingredients You Will Need
This recipe uses simple, wholesome ingredients to deliver bold flavor and a satisfying texture without the fuss. Most of these are pantry basics, with a couple of items to help achieve that perfect moist crumb and bright frosting.
- For the Cake Batter:
- All-purpose flour – 2 ½ cups (300 g), sifted for a light texture
- Granulated sugar – 2 cups (400 g), for sweetness and moisture
- Baking powder – 2 ½ teaspoons, to ensure a perfect rise
- Baking soda – ½ teaspoon, helps with the crumb structure
- Salt – ½ teaspoon, balances the sweetness
- Unsalted butter – ¾ cup (170 g), softened (I prefer Kerrygold for richness)
- Large eggs – 3, room temperature to help with emulsification
- Whole milk – 1 cup (240 ml), adds tenderness (can swap for almond milk if needed)
- Vanilla extract – 2 teaspoons, for flavor depth
- For the Buttercream Frosting:
- Unsalted butter – 1 cup (225 g), softened (the base for smooth frosting)
- Powdered sugar – 4 cups (480 g), sifted to avoid lumps
- Heavy cream – 2-3 tablespoons (30-45 ml), to adjust consistency
- Vanilla extract – 1 teaspoon
- Gel food coloring – your school colors (I recommend AmeriColor gels for vivid hues)
You can swap the butter for a dairy-free spread if you need a vegan version, and almond or oat milk works well in place of dairy milk. For the frosting colors, gel food coloring is essential—it gives that bright, saturated look without thinning the buttercream like liquid colors do.
Equipment Needed
- 9×13-inch (23×33 cm) rimmed baking sheet or pan – standard size for sheet cakes
- Mixing bowls – one large for batter, one medium for frosting
- Electric mixer or stand mixer – makes frosting silky smooth and batter well combined
- Rubber spatula – for scraping the bowl and smoothing the batter
- Offset spatula or butter knife – perfect for spreading and layering frosting colors
- Measuring cups and spoons – for precise ingredient quantities
- Cooling rack – helps the cake cool evenly and prevents sogginess
If you don’t have an electric mixer, a sturdy whisk and some elbow grease will do in a pinch, though be prepared to work your arms a bit. I’ve found that an offset spatula really makes frosting this cake easier, especially when you’re trying to keep those color layers neat and defined.
Preparation Method
- Preheat your oven to 350°F (175°C). Grease your 9×13-inch pan generously and line it with parchment paper for easy removal.
- Combine the dry ingredients. In a large bowl, whisk together the sifted flour, granulated sugar, baking powder, baking soda, and salt until evenly mixed. This helps distribute the leaveners so your cake rises evenly.
- Cream the butter and eggs. In a separate bowl, using an electric mixer, beat the softened butter until smooth and creamy (about 2-3 minutes). Add the eggs one at a time, mixing well after each addition to build a smooth batter.
- Alternate adding dry ingredients and milk. Gradually add the dry mixture into the butter and eggs, alternating with the milk. Start and end with the dry ingredients. Beat on medium speed just until combined—overmixing can lead to a dense cake.
- Stir in vanilla extract. Give the batter one last gentle mix to incorporate the flavor.
- Pour the batter into the prepared pan. Use a spatula to smooth out the surface evenly. It should look thick but spreadable.
- Bake for 30-35 minutes. Check doneness by inserting a toothpick into the center; it should come out clean or with a few moist crumbs. Oven temps vary, so start checking at 30 minutes.
- Cool the cake completely on a rack. This step is crucial before frosting, or you’ll end up with melting buttercream.
- Prepare the buttercream frosting. Beat the softened butter until fluffy, then gradually add powdered sugar. Add vanilla and 2 tablespoons of heavy cream. Adjust consistency with more cream as needed—frosting should be thick but spreadable.
- Divide and color the frosting. Split your frosting into separate bowls for each school color. Add gel food coloring a little at a time until you reach the desired vibrancy.
- Frost the cake in layers. Using an offset spatula, spread the first color in a smooth, even layer. Chill the cake for 10 minutes to set before adding the next color. Repeat until all colors are applied in neat stripes or patterns.
- Final chill and serve. Let the cake chill for another 20 minutes to firm up the frosting before slicing. Serve at room temperature for the best texture.
Pro tip: If your frosting starts to get too soft while coloring, pop it in the fridge for a few minutes to firm up before spreading. Also, don’t be afraid to use a damp paper towel to clean the edges between colors for a sharper look.
Cooking Tips & Techniques
Making a perfect sheet cake with school colors can be surprisingly straightforward if you keep a few things in mind. First, the key to that moist crumb is not overmixing the batter—mix until just combined. I’ve learned the hard way that vigorous mixing leads to a tough cake, which nobody wants.
When it comes to frosting, gel colors are a game-changer. Regular liquid colors water down your buttercream, making it runny and difficult to work with. Also, tint your frosting gradually—sometimes just a small drop is enough to get a bold shade.
Another trick is chilling the cake between frosting layers. This little pause lets each color set, preventing them from bleeding into each other. If you skip this, you risk ending up with a messy swirl rather than crisp stripes.
Lastly, use an offset spatula or even a bench scraper for smooth edges. I once tried frosting with a butter knife, and let’s just say it looked more “abstract art” than school spirit.
Variations & Adaptations
Not everyone needs a classic vanilla sheet cake, so here are some ways to switch things up:
- Chocolate Version: Swap ½ cup (60 g) of flour for unsweetened cocoa powder. The rich chocolate flavor pairs beautifully with colorful frosting.
- Gluten-Free: Use a 1:1 gluten-free flour blend instead of all-purpose flour. Just be mindful that the texture may be a bit denser.
- Vegan Adaptation: Replace butter with a vegan margarine, milk with almond or oat milk, and eggs with flax eggs (1 tablespoon ground flaxseed + 3 tablespoons water per egg).
- Seasonal Twist: For fall games, add warm spices like cinnamon and nutmeg to the batter for a cozy flavor.
- Frosting Flair: Try piping the frosting in rosettes or dots instead of stripes for a different look that still honors your school colors.
Personally, I once made the chocolate version for a basketball game and added a sprinkle of edible glitter on top—talk about making the cake pop!
Serving & Storage Suggestions
This sheet cake is best served at room temperature, about 20-30 minutes after taking it out of the fridge. The frosting softens slightly and the cake feels tender and moist. I like to cut the cake into generous squares and serve it with a side of fresh berries or a cold glass of milk to balance the sweetness.
Leftovers store beautifully in an airtight container in the fridge for up to 4 days. To keep the frosting intact, I recommend covering the cake loosely with plastic wrap. For longer storage, you can freeze the cake (unfrosted or frosted) for up to 2 months—just thaw overnight in the fridge before serving.
Reheating isn’t usually necessary, but if you prefer a warmer slice, microwave a piece for 10-15 seconds. The frosting might soften further, so handle gently.
One of my favorite things about this cake is how the flavors settle and deepen after a day, making leftovers even more enjoyable.
Nutritional Information & Benefits
Each serving (about 1/12th of the cake) contains approximately:
| Calories | 350 |
|---|---|
| Fat | 18g |
| Carbohydrates | 45g |
| Protein | 4g |
While this cake is a treat, the use of real butter and whole eggs provides some nutritional value beyond typical boxed cakes. If you want a lighter version, you can reduce sugar slightly or swap half the butter for unsweetened applesauce (though it will change texture). For those with dietary restrictions, the gluten-free and vegan adaptations ensure everyone can enjoy a slice.
Overall, it’s a fun, festive way to celebrate with a treat that feels homemade and thoughtfully put together.
Conclusion
This perfect sheet cake with school colors has become my go-to for celebrations when I want to impress without the stress. It manages to be both simple and special, offering that satisfying homemade vibe with a playful pop of color that makes any event feel more festive. I love how adaptable it is—whether it’s a quick game day dessert or a big school event, it fits right in.
Give it a try, and don’t be afraid to tweak the colors or flavors to match your own taste and team spirit. It’s a recipe that invites creativity and celebration in equal measure. If you end up making it, I’d love to hear how you customized it or what special occasion you served it for. Happy baking and go team!
FAQs
Can I make this sheet cake ahead of time?
Yes! You can bake the cake a day in advance and keep it tightly wrapped at room temperature. Frost it the next day for the freshest taste and best frosting texture.
What’s the best way to store leftover frosted cake?
Store it in an airtight container in the fridge for up to 4 days. Let it come to room temperature before serving for the best flavor.
Can I use liquid food coloring instead of gel?
Gel food coloring is recommended because it doesn’t thin the frosting. Using liquid color can make the frosting too runny and harder to spread.
Is this recipe suitable for beginners?
Absolutely! The steps are straightforward, and the frosting technique is forgiving. Just follow the chilling steps between layers to keep colors clean.
Can I double this recipe for a larger crowd?
Yes, just double the ingredients and bake in two pans or a larger pan. Adjust baking time accordingly, checking for doneness with a toothpick.
Pin This Recipe!
Perfect Sheet Cake Recipe Easy School Colors Celebration Dessert Ideas

A simple, moist sheet cake decorated with vibrant buttercream frosting in school colors, perfect for celebrations and game days. This easy recipe is forgiving and crowd-pleasing, making it a festive centerpiece.
- Prep Time: 15 minutes
- Cook Time: 30-35 minutes
- Total Time: 45-50 minutes
- Yield: 12 servings 1x
- Category: Dessert
- Cuisine: American
Ingredients
- 2 ½ cups (300 g) all-purpose flour, sifted
- 2 cups (400 g) granulated sugar
- 2 ½ teaspoons baking powder
- ½ teaspoon baking soda
- ½ teaspoon salt
- ¾ cup (170 g) unsalted butter, softened
- 3 large eggs, room temperature
- 1 cup (240 ml) whole milk (or almond milk)
- 2 teaspoons vanilla extract
- For the Buttercream Frosting:
- 1 cup (225 g) unsalted butter, softened
- 4 cups (480 g) powdered sugar, sifted
- 2–3 tablespoons (30–45 ml) heavy cream
- 1 teaspoon vanilla extract
- Gel food coloring in desired school colors
Instructions
- Preheat oven to 350°F (175°C). Grease a 9×13-inch pan and line with parchment paper.
- In a large bowl, whisk together sifted flour, granulated sugar, baking powder, baking soda, and salt.
- In a separate bowl, beat softened butter with an electric mixer until smooth and creamy (2-3 minutes). Add eggs one at a time, mixing well after each.
- Gradually add dry ingredients alternated with milk to the butter and eggs mixture, starting and ending with dry ingredients. Mix on medium speed until just combined.
- Stir in vanilla extract gently.
- Pour batter into prepared pan and smooth the surface with a spatula.
- Bake for 30-35 minutes, checking doneness with a toothpick inserted in the center; it should come out clean or with a few moist crumbs.
- Cool cake completely on a rack before frosting.
- For frosting, beat softened butter until fluffy. Gradually add powdered sugar, then vanilla and 2 tablespoons heavy cream. Adjust consistency with more cream if needed.
- Divide frosting into bowls and tint each with gel food coloring to desired vibrancy.
- Frost cake in layers using an offset spatula, chilling for 10 minutes between colors to set each layer.
- After all colors are applied, chill cake for 20 minutes to firm frosting before slicing and serving at room temperature.
Notes
Do not overmix the batter to keep the cake moist and tender. Use gel food coloring for vibrant frosting without thinning it. Chill the cake between frosting layers to prevent colors from bleeding. An offset spatula helps achieve smooth, neat frosting layers. For vegan or gluten-free adaptations, substitute ingredients as noted in the recipe.
Nutrition
- Serving Size: 1/12th of the cake (
- Calories: 350
- Fat: 18
- Carbohydrates: 45
- Protein: 4
Keywords: sheet cake, school colors cake, celebration dessert, buttercream frosting, easy cake recipe, crowd-pleaser, game day dessert


