
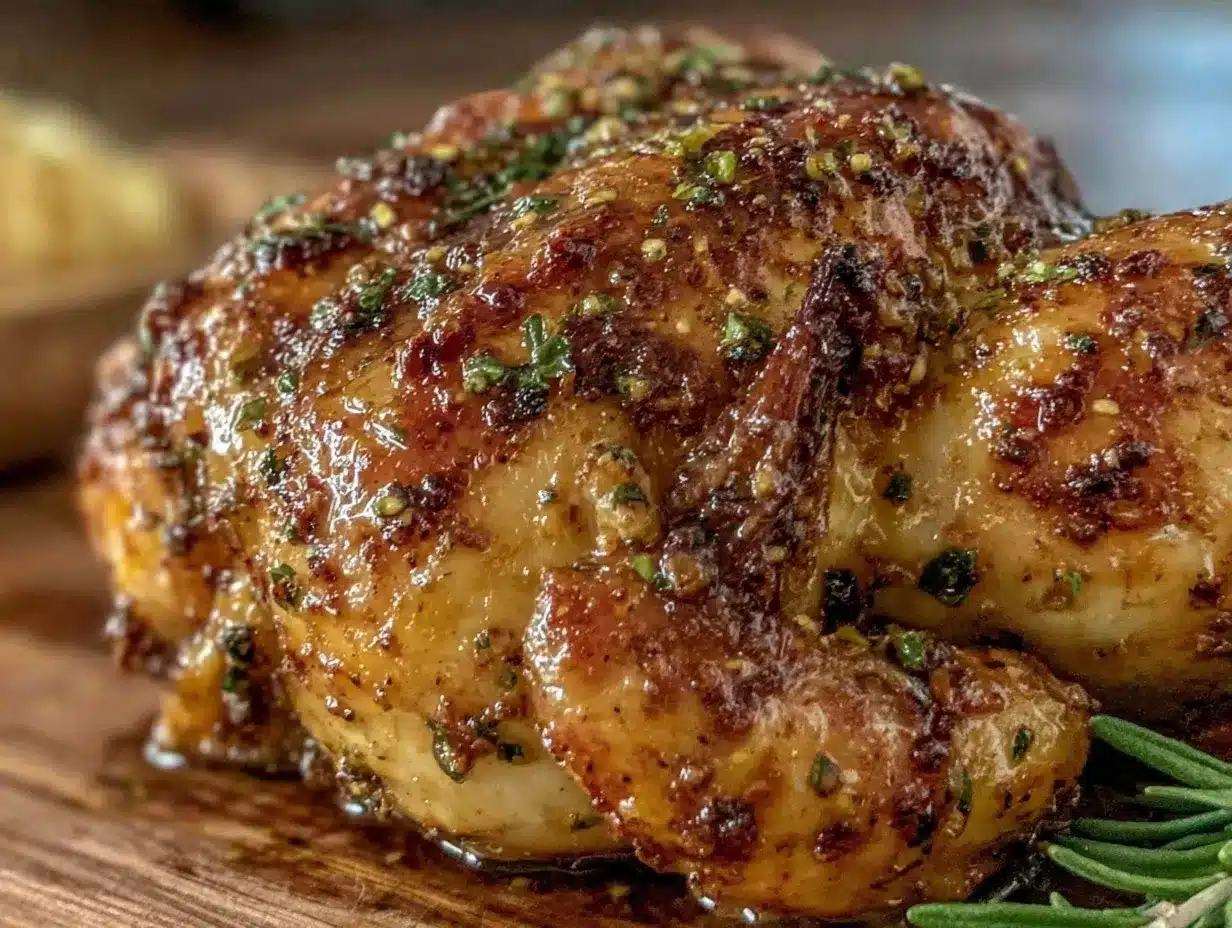
“Hey, have you ever tried cooking a chicken perched on a can of beer?” my neighbor chuckled over the fence last summer. I had to admit, the idea sounded like a backyard BBQ gimmick at first—mostly smoke, a little mess, and a few laughs. But then, when I finally gave this crispy beer can chicken with savory dry rub seasoning a shot, it turned into one of those accidental wins that quietly stole the show at every family gathering since. Honestly, I wasn’t expecting much beyond the novelty, but the skin crackled just right, the chicken stayed juicy, and the seasoning—oh, the seasoning—was like a secret handshake between smoky and spicy.
That afternoon, with the sun low and the grill warming, the smell of the dry rub mingled with the faint hiss of beer steaming inside the can. Something about the way that aroma curled through the backyard brought a strange comfort, like a promise that dinner was going to be worth the wait. Plus, I’ve never been one for fussy recipes, so the straightforward prep and the relaxed cooking style felt like a rare win for a busy evening cook like me.
Since then, I found myself making this crispy beer can chicken several times a month, tweaking the dry rub here and there but always sticking to the core technique. It’s the kind of recipe that makes you pause between bites, quietly appreciating how simple ingredients and a little patience can deliver such a show-stopping meal. So, if you’re ready to try something that’s equal parts fun and flavorful, let’s get into this crispy beer can chicken with savory dry rub seasoning. I promise, it’s a winner you’ll want to keep in your backyard rotation.
Why You’ll Love This Crispy Beer Can Chicken Recipe
After countless backyard cookouts and family dinners, this crispy beer can chicken recipe has become a personal favorite—and for good reason. Here’s what makes it stand out:
- Quick & Easy: The prep takes about 15 minutes, and then it just roasts itself on the grill or in the oven for roughly 1 hour and 15 minutes. Perfect for those evenings when you want hands-off cooking but impressive results.
- Simple Ingredients: You don’t need exotic spices or special equipment (beyond a standard grill or oven). Most of the spices in the dry rub are pantry staples, and the beer can? Just grab your favorite lager or pale ale from the fridge.
- Perfect for Gatherings: Whether it’s a weekend BBQ, a casual family dinner, or impressing friends with something a little different, this recipe always draws compliments and second helpings.
- Crowd-Pleaser: Kids and adults alike love the crispy skin and juicy meat combo. It’s a safe bet that’ll keep everyone happy at the table.
- Unbelievably Delicious: The dry rub is carefully balanced with smoky paprika, garlic, and a hint of cayenne, giving the chicken a savory kick that pairs perfectly with the subtle beer steam flavor.
- Unique Cooking Method: Using the beer can inside the chicken isn’t just for show—it keeps the bird moist from the inside out, making this recipe different from your usual roast chicken.
Honestly, this isn’t just another grilled chicken recipe. It’s that rare dish that makes you want to close your eyes after the first bite and savor the mix of crispy, juicy, and perfectly seasoned all in one go. It’s a recipe that’s as much about the experience as the food—relaxed, fun, and reliably delicious. If you’ve ever enjoyed the crispy skin on a crispy garlic chicken, this will hit all those satisfying notes on a whole new level.
What Ingredients You Will Need
This crispy beer can chicken recipe uses simple, wholesome ingredients to deliver bold flavor and satisfying texture without the fuss. Most are easy to find, and you can swap a few to suit your pantry or preferences.
- Whole chicken (about 4 to 5 pounds / 1.8 to 2.3 kg) – preferably fresh or fully thawed
- Beer (one 12-ounce / 355 ml can) – lager or pale ale works best; avoid overly bitter IPAs
- Olive oil (2 tablespoons) – helps the dry rub stick and crisps the skin
- Brown sugar (1 tablespoon) – adds a touch of sweetness to balance spices
- Smoked paprika (2 tablespoons) – the star of the dry rub, bringing smoky depth
- Garlic powder (1 tablespoon) – rich, savory flavor
- Onion powder (1 tablespoon) – rounds out the seasoning
- Dried thyme (1 teaspoon) – herbaceous note
- Cayenne pepper (½ teaspoon) – adds just a hint of heat; adjust to taste
- Salt (1½ teaspoons) – enhances all flavors
- Black pepper (1 teaspoon) – freshly ground preferred
- Lemon (optional, quartered) – to stuff inside the chicken for fresh aroma
For best results, I recommend using a quality olive oil like California Olive Ranch and a beer you enjoy drinking—this impacts the aroma subtly. If you’re gluten-free, opt for a gluten-free beer or substitute with sparkling water infused with lemon and herbs.
Equipment Needed
- Grill or oven: A charcoal or gas grill works great for that authentic outdoor flavor, but your oven can do the job just fine if weather isn’t cooperating.
- Beer can chicken holder (optional): These stand-ups keep the chicken stable on the grill, but you can also improvise with a sturdy can and a rimmed baking sheet.
- Meat thermometer: Crucial for checking doneness without cutting into the bird—aim for 165°F (74°C) in the thickest part of the thigh.
- Mixing bowl: For combining your dry rub spices.
- Tongs and heat-resistant gloves: For safely handling the hot chicken and can.
I’ve tried cooking this with and without a dedicated holder. The holder definitely makes things easier and safer, especially when you’re juggling a few things on the grill. If you’re on a budget, a sturdy metal can and a disposable foil pan work just fine. Just be sure the can is clean and the pan is deep enough to catch drippings.
Preparation Method
- Prep the chicken (10 minutes): Remove the giblets and pat the chicken dry with paper towels. This step is key for getting that crispy skin you crave.
- Make the dry rub (5 minutes): In a bowl, combine 2 tablespoons smoked paprika, 1 tablespoon garlic powder, 1 tablespoon onion powder, 1 tablespoon brown sugar, 1½ teaspoons salt, 1 teaspoon black pepper, 1 teaspoon dried thyme, and ½ teaspoon cayenne pepper. Mix until even.
- Coat the chicken (5 minutes): Rub 2 tablespoons olive oil all over the chicken, then generously apply the dry rub, making sure to cover every nook, including under the skin where you can gently loosen it.
- Prepare the beer can (2 minutes): Open the 12-ounce (355 ml) beer can and pour out (or drink!) about half. Optionally, add a few lemon quarters or fresh herbs inside the can for extra aroma.
- Mount the chicken (3 minutes): Carefully place the chicken cavity over the beer can so it sits upright. If using a holder, set it securely.
- Cook on the grill or oven (75 to 90 minutes): Place the chicken upright on the grill over indirect heat or in a preheated oven at 375°F (190°C). Close the lid or door and cook until the internal temperature reaches 165°F (74°C). Rotate if necessary for even cooking. Expect about 1 hour 15 minutes to 1 hour 30 minutes depending on size.
- Rest the chicken (10 minutes): Carefully remove the chicken from the can and let it rest on a cutting board. This lets the juices redistribute for juicy meat.
- Carve and serve: Slice off the crispy skin first (trust me, it’s a highlight), then carve the meat. Serve with your favorite sides.
Keep an eye on the grill temperature; if you notice flare-ups, move the chicken away from direct flames to avoid burning the rub. The smell of the spices toasting and the beer steam infusing the bird is a good hint you’re on the right track. Also, I’ve found that letting the chicken sit at room temperature for 20 minutes before cooking helps it cook more evenly.
Cooking Tips & Techniques
Cooking beer can chicken is part art, part science. Here are some tips I’ve learned over multiple attempts:
- Pat the chicken dry: Moisture is the enemy of crispiness. The drier the skin before seasoning, the better the crackle.
- Don’t rush the rub: Letting the seasoned chicken rest in the fridge for an hour or overnight amps the flavor, but if you’re pressed for time, rub and cook right away.
- Maintain consistent heat: Whether using a grill or oven, keep it steady around 375°F (190°C). Too hot, and the skin might burn before the inside is cooked; too low, and the skin won’t crisp up.
- Use a meat thermometer: This is your best friend. Insert it into the thickest part of the thigh without touching bone for an accurate read.
- Handling the beer can: Be super careful removing the chicken from the can after cooking—it’ll be hot and heavy. Use tongs or heat-resistant gloves.
Once, I tried skipping the beer can and just roasting the bird flat. The flavor was still good, but it lacked the juicy punch and that irresistible crisp that comes from the steam inside. Also, don’t be tempted to poke holes in the can; the sealed environment is what makes this method special.
Variations & Adaptations
This recipe is versatile and can bend to your flavor whims or dietary needs:
- Spice it up: Add chili powder or smoked chipotle powder to the rub for a bolder smoky heat.
- Herb-forward: Swap dried thyme for rosemary and sage for a more fragrant profile—great for cooler months.
- Gluten-free option: Ensure your beer is gluten-free or replace it with a lemon-herb sparkling water can to keep the moisture.
- Oven-only: If you don’t have a grill, this recipe works beautifully in the oven at 375°F (190°C). Just use a rimmed baking pan to catch drips and roast standing up on the beer can.
- Personal twist: I’ve tried adding a splash of maple syrup to the rub for a sweet-savory combo that gets rave reviews—especially when paired with roasted root vegetables.
Feel free to experiment with the dry rub spices to match your pantry or mood. Just remember the balance of sweet, salty, smoky, and spicy is key to the signature flavor.
Serving & Storage Suggestions
This crispy beer can chicken shines best served hot, right off the grill or oven. The skin is at its crispiest, and the meat is juicy and tender.
Serve it with simple sides like grilled corn, a fresh green salad, or creamy mashed potatoes that soak up the flavorful drippings. For more cozy dinner inspiration, pairing it with creamy mashed potatoes with roasted garlic is an unbeatable combo.
To store, wrap leftover chicken tightly with foil or place in an airtight container. Refrigerate for up to 3 days or freeze portions for up to 2 months. When reheating, use an oven set to 350°F (175°C) and cover loosely with foil to warm through without drying out. Re-crisp the skin under the broiler for a minute or two if you want that fresh-out-of-the-oven crunch.
Keep in mind flavors often deepen after a day, so leftovers taste even better the next day when you reheat them gently.
Nutritional Information & Benefits
This crispy beer can chicken is a relatively lean protein source with plenty of flavor and minimal added fat beyond the olive oil. A 4-ounce (113 g) serving of skin-on chicken provides about 250 calories, 20 grams of protein, and moderate sodium depending on the rub’s salt content.
The dry rub’s smoked paprika supplies antioxidants, while garlic powder adds immune-supportive compounds. Cooking the chicken whole helps retain moisture and nutrients better than some other methods.
For those mindful of carbs, this recipe is naturally low-carb and gluten-free (if you choose your beer or substitute carefully). Just watch the salt if you’re on a restricted diet.
Conclusion
Making this crispy beer can chicken with savory dry rub seasoning has become one of those rare cooking wins that feels effortless but tastes like a celebration. The combination of crispy skin, juicy meat, and that smoky, spicy rub is something I keep coming back to whenever I want a meal that’s both comforting and a little special.
Don’t hesitate to tweak the spices or cooking method to suit your taste or schedule—this recipe is friendly to experimentation and always forgiving. It’s a dish that brings people together around the table, with plenty of room for personal flair.
If you try this recipe, I’d love to hear how it went or what twists you added. And if you enjoy the bold flavors, you might also appreciate the sweet and spicy crunch of crispy candied pecans as a snack or salad topper alongside.
Here’s to many crispy, juicy dinners ahead!
Frequently Asked Questions
Can I use a different type of beer or substitute it?
Yes! A mild lager or pale ale is best for subtle flavor. For gluten-free diets, use a gluten-free beer or substitute with sparkling water infused with lemon and herbs to keep moisture.
How do I know when the chicken is fully cooked?
Use a meat thermometer to check the thickest part of the thigh. When it reaches 165°F (74°C), it’s safe to eat.
Can I make the dry rub ahead of time?
Absolutely. The dry rub can be mixed and stored in an airtight container for up to a month, making prep even faster on cooking day.
Is it necessary to use a beer can chicken holder?
Not necessary but helpful. You can use a clean beer can and place the chicken on a rimmed baking sheet. Holders provide stability and safety, especially on a grill.
What sides go well with crispy beer can chicken?
Simple grilled vegetables, creamy mashed potatoes, fresh salads, or even a loaf of cranberry orange bread for a touch of sweetness make great companions.
Pin This Recipe!
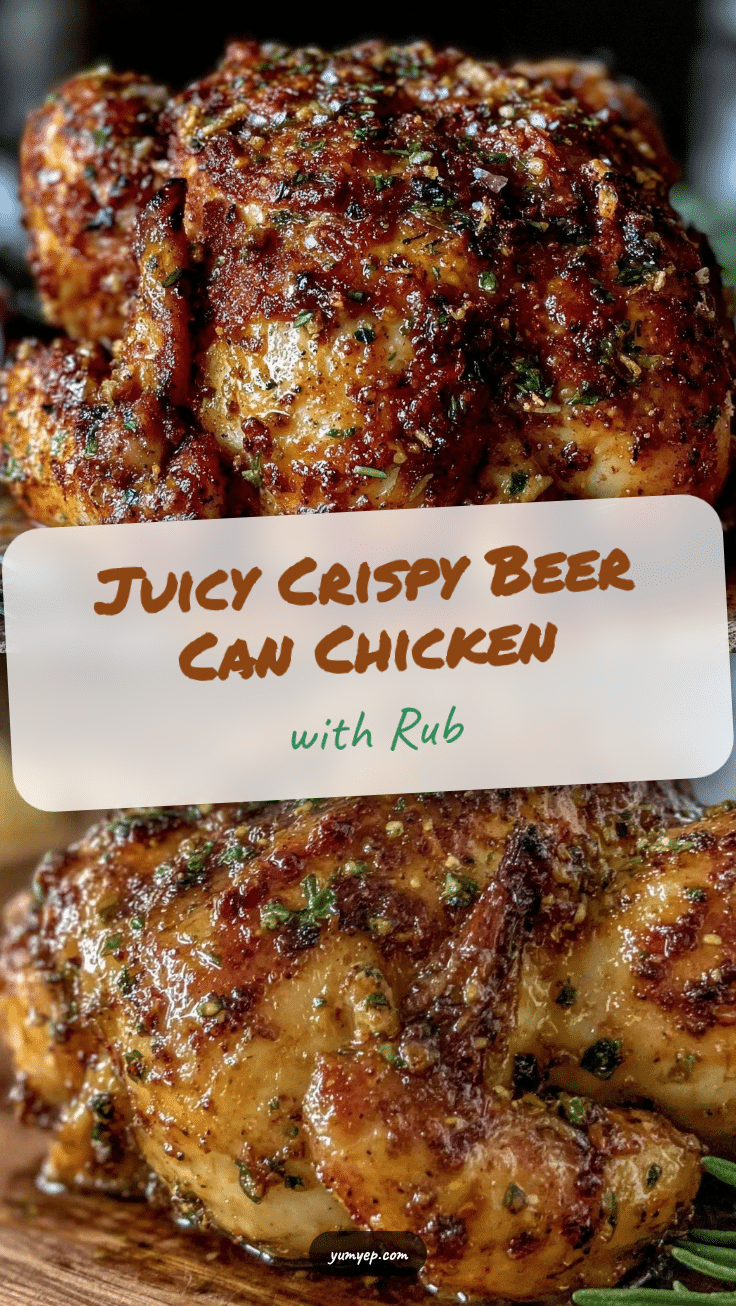
Crispy Beer Can Chicken Recipe with Easy Savory Dry Rub Seasoning
A flavorful and juicy beer can chicken with a crispy skin and a savory dry rub seasoning, perfect for backyard BBQs and family dinners.
- Prep Time: 15 minutes
- Cook Time: 1 hour 15 minutes
- Total Time: 1 hour 30 minutes
- Yield: 4 to 6 servings 1x
- Category: Main Course
- Cuisine: American
Ingredients
- 1 whole chicken (4 to 5 pounds)
- 1 (12-ounce) can beer (lager or pale ale)
- 2 tablespoons olive oil
- 1 tablespoon brown sugar
- 2 tablespoons smoked paprika
- 1 tablespoon garlic powder
- 1 tablespoon onion powder
- 1 teaspoon dried thyme
- ½ teaspoon cayenne pepper
- 1½ teaspoons salt
- 1 teaspoon black pepper
- Optional: 1 lemon, quartered
Instructions
- Remove the giblets and pat the chicken dry with paper towels.
- In a bowl, combine smoked paprika, garlic powder, onion powder, brown sugar, salt, black pepper, dried thyme, and cayenne pepper to make the dry rub.
- Rub olive oil all over the chicken, then generously apply the dry rub, including under the skin.
- Open the beer can and pour out or drink about half. Optionally add lemon quarters or fresh herbs inside the can.
- Place the chicken cavity over the beer can so it sits upright. Use a holder if available.
- Cook the chicken upright on a grill over indirect heat or in a preheated oven at 375°F for 75 to 90 minutes until the internal temperature reaches 165°F.
- Remove the chicken from the can and let it rest for 10 minutes.
- Carve the chicken, starting with the crispy skin, and serve.
Notes
Pat the chicken dry for crispier skin. Let the seasoned chicken rest in the fridge for deeper flavor if time allows. Maintain steady heat around 375°F. Use a meat thermometer to ensure doneness. Be careful when removing the hot chicken from the beer can. Do not poke holes in the can to preserve moisture.
Nutrition
- Serving Size: 4-ounce (113 g) skin
- Calories: 250
- Protein: 20
Keywords: beer can chicken, crispy chicken, dry rub chicken, backyard BBQ, grilled chicken, savory chicken, easy chicken recipe


