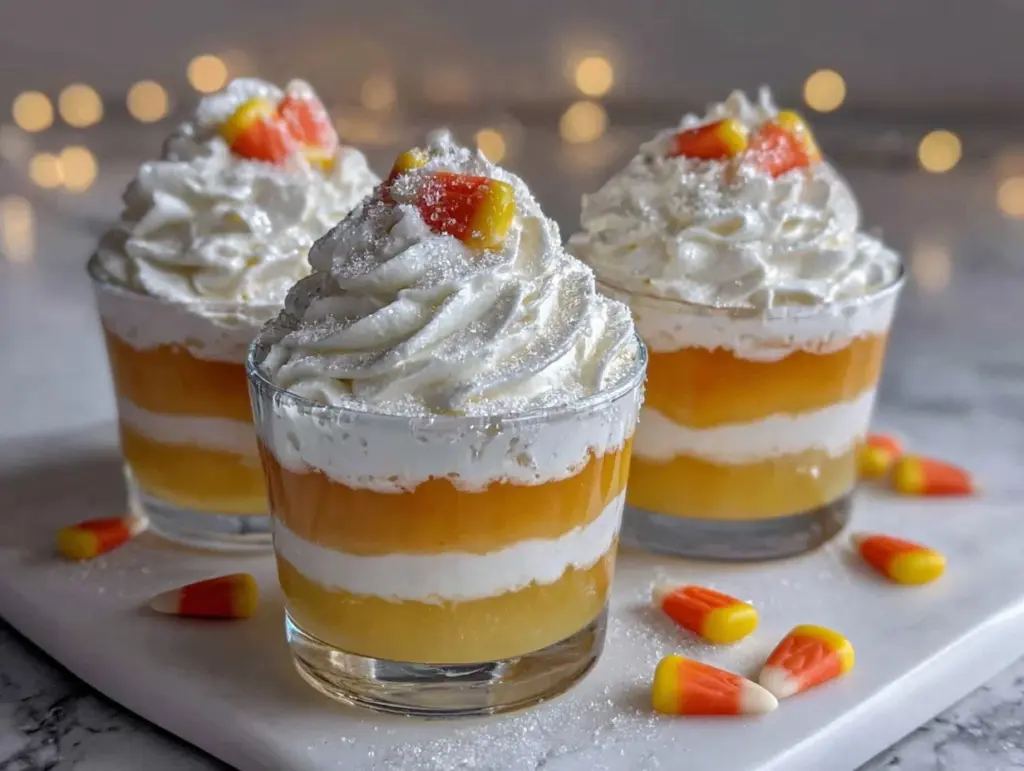
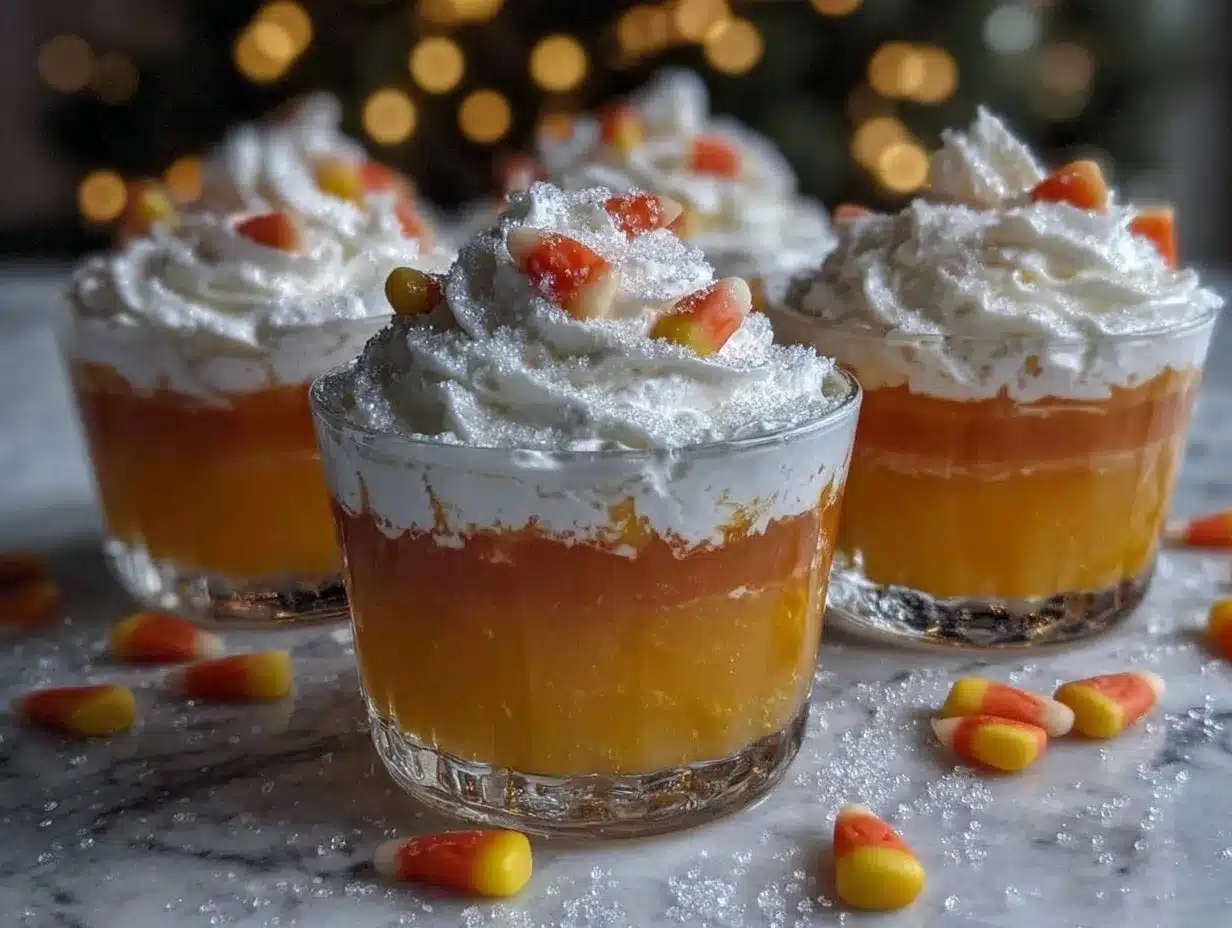
There’s something downright magical that happens when you walk into a kitchen and the air is thick with the sweet, fruity scent of jello setting up. It’s like a little carnival right in your own home. Picture it: layers of golden yellow, bright orange, and pillowy whipped cream—like the most cheerful candy corn, but with a jiggly twist. The first time I made these Candy Corn Jello Cups, I was looking for a fun fall dessert for my kids’ Halloween party. Let’s just say, the colors alone got the whole house buzzing with excitement.
I still remember standing over the counter, carefully pouring each layer, holding my breath (and okay, maybe sticking my finger in for a little taste test). The kitchen was filled with that anticipation—like waiting for the curtain to rise at a school play. And when those cups finally set and I plopped a dollop of whipped cream on top, it was the kind of moment where you pause, take a deep breath, and just smile because you know you’ve got a winner.
Growing up, candy corn was always the badge of fall. My grandma kept a little bowl on her coffee table from September through November. These Candy Corn Jello Cups bring back that nostalgia, but they’re honestly so much better (and less sticky on the teeth). They’re dangerously easy and perfect for little helpers—my kids adore layering the colors and sneaking extra whipped cream when they think I’m not looking. Every time I put these out, the cups vanish faster than you can say “trick or treat.” My husband claims he’s “testing for quality,” but I’m onto him.
These festive treats are not just for Halloween—they’re a bright spot at any fall gathering, a sweet surprise for kids’ lunchboxes, or even a colorful addition to your Pinterest-worthy dessert table. I’ve made these so many times “for research,” and honestly, they’ve become a staple for class parties, neighbor gifts, and family get-togethers. They feel like a warm autumn hug in dessert form. You’re going to want to bookmark this one, trust me!
Why You’ll Love This Recipe
Let’s face it, there are a million ways to bring a little Halloween charm to your table, but these Candy Corn Jello Cups? They’re the real party MVPs. I’ve tested these with kids and adults, at cozy family dinners and raucous Halloween bashes, and I can tell you—they never disappoint. Here’s why you’ll be hooked:
- Quick & Easy: These come together with less than 30 minutes of hands-on time (plus chilling). Perfect for last-minute party prep or a spontaneous after-school treat.
- Simple Ingredients: You probably already have everything you need: just three boxes of jello, some water, and whipped cream. No hunting for weird specialty items.
- Perfect for Parties: These are made for sharing—think fall potlucks, Halloween dessert tables, or even Thanksgiving feasts where you want something a little unexpected.
- Crowd-Pleaser: I’ve yet to meet a kid (or grown-up) who didn’t get a huge grin from these wobbly, colorful treats. Their bright layers just scream “fun!”
- Unbelievably Delicious: They may look playful, but the combo of fruity jello and creamy topping is pure comfort. That first spoonful—tart, sweet, and fluffy—makes you close your eyes for a second and just enjoy.
What sets my Candy Corn Jello Cups apart? It’s all about the clean lines and vibrant layers. I chill each color fully before adding the next, so you get those picture-perfect stripes (my secret: a steady hand and a little patience). I’ve also experimented with mixing in yogurt or pudding for a creamier middle layer—so good! And if you want to swap in sugar-free jello or dairy-free whipped cream, you absolutely can. These are meant to be fuss-free and forgiving. Honestly, this recipe isn’t just about taste—it’s about making memories, showing off a little creativity, and giving everyone at your table a reason to smile. That’s why I keep coming back to it, year after year.
What Ingredients You Will Need
This Candy Corn Jello Cups recipe keeps things simple, but the results are bold and eye-catching. You probably have most of these ingredients in your pantry already, and if not, they’re easy to grab at any grocery store. Here’s what you’ll need for each beautiful layer:
- For the Yellow Layer:
- 1 box (3 oz/85g) lemon jello (for that classic golden bottom)
- 1 cup (240ml) boiling water
- 1/2 cup (120ml) cold water
- For the Orange Layer:
- 1 box (3 oz/85g) orange jello (for the bright middle stripe)
- 1 cup (240ml) boiling water
- 1/2 cup (120ml) cold water
- For the White Layer:
- 1 cup (240ml) whipped topping (like Cool Whip or homemade whipped cream—use coconut whipped cream for dairy-free)
- Optional Garnish:
- Candy corn pieces (for that on-the-nose finishing touch!)
- Halloween sprinkles (totally optional, but the more festive, the better)
Ingredient Notes & Tips:
- Lemon Jello: I prefer Jell-O brand for its bright flavor and color, but store brands work too.
- Orange Jello: If you can’t find orange, tangerine jello is a good swap.
- Whipped Topping: Store-bought is easy, but homemade whipped cream gives a rich, fresh flavor. For vegan, use coconut or almond-based alternatives.
- Cold Water Ratio: Using a little less water than the box calls for makes the layers firmer and easier to handle.
- Candy Corn: Not everyone loves eating it, but it sure looks cute on top!
- Dietary Options: You can use sugar-free jello and light whipped topping for a lower-sugar version. For gluten-free, check your jello and topping labels to be sure.
In the summer, swap the orange jello for peach, or try pineapple jello for the yellow. If you want to make a big batch, just double or triple the ingredients—the process stays the same. Getting the most vivid colors is mostly about sticking with the classic jello brands, in my experience.
Equipment Needed
- Clear Plastic or Glass Cups (8-oz/240ml): The see-through sides show off the candy corn stripes. I use disposable for big parties, but glass is lovely for small gatherings.
- Measuring Cups: For both the water and the whipped topping. A good set makes layering easier.
- Medium Mixing Bowls: One for each jello flavor. If you don’t have three, just wash between uses.
- Small Whisk or Spoon: For stirring the jello—just don’t whisk too hard, or you’ll get bubbles (ask me how I know…)
- Kettle or Saucepan: For boiling water. I use an electric kettle; you can use the microwave in a pinch.
- Refrigerator Space: You’ll need enough room for your cups to chill flat. I once tried to stack them—bad idea! They slid everywhere.
- Piping Bag or Zip-Top Bag (optional): Snip the tip for neater whipped cream swirls, but a spoon works just fine.
If you’re just starting out or cooking with kids, don’t sweat the fancy gear. I’ve made these in thrift-store glassware and even small mason jars. For clean-up, give your bowls a good soak right after—jello can get sticky when it dries on. And if you want to invest in sturdy clear cups, I love the ones from IKEA or Target (they wash up nicely for reuse).
How to Make Candy Corn Jello Cups
-
Prepare the Yellow Layer:
- In a medium bowl, pour 1 cup (240ml) boiling water over the lemon jello powder. Stir until completely dissolved—about 2 minutes (make sure there are no gritty bits left!).
- Add 1/2 cup (120ml) cold water and stir again.
- Divide the lemon jello evenly among your cups—about 1/3 full per cup. (I use a ladle or measuring cup for less mess.)
- Chill in the refrigerator for at least 45 minutes, or until firmly set. (Don’t rush! If it’s not fully set, the next layer will bleed and you’ll lose those candy corn stripes.)
-
Prepare the Orange Layer:
- In a clean bowl, combine 1 cup (240ml) boiling water with the orange jello powder. Stir until dissolved—again, about 2 minutes.
- Add 1/2 cup (120ml) cold water and mix well.
- Once the yellow layer is set, gently pour or spoon the orange jello over the top, filling cups to about 2/3 full. (Pour slowly against the side of the cup for crisp layers. If you’re worried, use the back of a spoon to soften the pour.)
- Return to the refrigerator and chill for at least 45 minutes, or until completely set.
-
Add the White Layer:
- Once the orange layer is firm, top each cup with a generous swirl or spoonful of whipped topping. Go for about 1/2 inch (1cm) thick, or more if you love whipped cream!
- Smooth with the back of a spoon or pipe on for a fancy look.
- Optional: Garnish each with a candy corn piece, sprinkles, or a cute Halloween pick.
-
Final Chill:
- Pop the finished cups back in the fridge for 10-15 minutes to firm up the whipped topping and keep them nice and cold.
Troubleshooting Tips:
- If your layers are bleeding, chill longer between colors. I learned the hard way (impatient kids make for blurry stripes!).
- For extra-fast chilling, set cups in the freezer for 10 minutes before adding the next layer—but don’t forget them, or they’ll freeze solid.
- If you see bubbles in your jello, skim with a spoon before chilling for a perfectly clear layer.
Personal Notes: I often set up a little assembly line with my kids. One pours, one stirs, and one sneaks extra whipped cream. It’s messy, but so much fun—and the results are always worth it!
Cooking Tips & Techniques
- Layering Patience Pays Off: Let each jello layer chill completely before adding the next. If you rush, the colors blend and you lose that classic candy corn look. I’ve tried to speed things up, and the results are always messy. Use the fridge timer on your phone to keep everyone honest!
- Pouring Like a Pro: For super-crisp lines, pour the jello slowly down the inside of the cup. If you’re working with kids, let them use a spoon—less splash, fewer disasters.
- Whipped Topping Tricks: If you want fancy swirls, chill your piping bag and use a star tip. No bag? A zip-top bag with the corner snipped works almost as well. Or just dollop—it’s all good.
- Batch Prep: These are perfect for making ahead. I usually prep the jello layers the day before and add whipped cream right before serving for the freshest look.
- Consistency is Key: If you want firmer jello that holds up for a buffet, use slightly less water than the box calls for (as in the recipe). The layers will be sturdy and less likely to slide around during transport.
- Mess Management: Wipe the rims of your cups before adding whipped cream—jello drips can be sticky and make the finished dessert look less tidy.
I’ve definitely had a few fails—like the time I poured hot jello over the first layer that wasn’t set, and ended up with a swirling orange-yellow mess. It still tasted good, but if you want those Pinterest-worthy stripes, patience and gentle hands are your best friends. Timing your steps and making room in the fridge ahead of time really helps, too.
Variations & Adaptations
- Dietary Swaps: For a sugar-free version, use sugar-free jello and light or zero-sugar whipped topping. For dairy-free, coconut whipped cream is a game-changer—creamy, fluffy, and a little tropical.
- Seasonal Twists: Try using peach or mango jello for the orange layer, or pineapple for yellow. I once made a “Christmas corn” cup with green (lime) and red (cherry) layers—just as festive!
- Flavor Fun: Mix plain Greek yogurt into the cooled jello before adding as a middle layer for a creamy, mousse-like texture. You can also add a little vanilla extract to the whipped cream for extra flavor.
- Allergen-Friendly: Always check your jello and whipped topping for gluten or dairy if serving to guests with allergies. Most mainstream brands are gluten-free, but best to double-check.
- Personal Favorite: I sometimes add a splash of orange juice to the orange jello for a more natural flavor. It’s a small tweak, but really brightens things up.
Don’t be afraid to get creative! You can even let kids layer in gummy worms or gummy spiders for a “spooky” Halloween touch. The possibilities are endless, and half the fun is seeing what new combos you can come up with each fall.
Serving & Storage Suggestions
- Serving: These are best served chilled, straight from the fridge. I like to put them out on a big platter with extra candy corn scattered around for decoration. Add a little Halloween pick or mini spoon for extra flair.
- Pairings: Serve alongside hot apple cider, pumpkin muffins, or even a plate of simple sugar cookies for the ultimate fall dessert spread.
- Storage: Store jello cups (without whipped topping) in the fridge, covered with plastic wrap, for up to 4 days. Add whipped cream and garnish just before serving for the best look and texture.
- Freezing: I don’t recommend freezing jello cups—the texture gets weird and icy. But you can chill them well in advance.
- Flavor Development: The jello layers actually get a little more flavorful if they sit overnight. Just don’t add the whipped topping until the day of your party for the freshest results.
I’ve packed these in lunchboxes (with a cold pack) and brought them to school parties—they hold up surprisingly well! For large batches, keep them in a cooler until ready to serve to keep the whipped cream from melting.
Nutritional Information & Benefits
Each Candy Corn Jello Cup (about 8 oz/240ml, including whipped topping) has approximately:
- Calories: 120
- Total Fat: 2g
- Carbohydrates: 25g
- Sugar: 22g
- Protein: 1g
Jello cups are naturally gluten-free (just check your whipped topping), and you can make them dairy-free with coconut or almond whipped cream. They’re lower in fat and calories than many classic fall desserts—plus, they’re portion-controlled, so it’s easy to enjoy just one. If you want to cut down on sugar, use sugar-free jello and light whipped topping.
Honestly, sometimes you just want a treat that’s fun and playful—these jello cups deliver all the fall vibes without the heaviness of pie or cake. And hey, they make me feel like a kid again, which is a wellness win in my book.
Conclusion
So, why should you try these Candy Corn Jello Cups for your next fall party or Halloween bash? They’re cheerful, nostalgic, and ridiculously easy to pull off. Plus, they’re the kind of dessert that makes people smile before they even take a bite. Whether you stick to the classic layers or try your own twist, these cups are all about fun and flavor. I love making them because they bring everyone together—kids, adults, even the “I’m not a dessert person” folks can’t resist.
Don’t be afraid to experiment with flavors, colors, or toppings. Make them your own! And if you do, I’d love to hear about it—leave a comment below, share your photos on Pinterest, or let me know your favorite Halloween party variations. Most of all, enjoy every sweet, jiggly spoonful. Happy haunting and happy snacking!
Frequently Asked Questions
Can I make Candy Corn Jello Cups a day ahead?
Absolutely! Prepare the jello layers up to two days in advance. Add the whipped topping and any garnishes right before serving for the freshest look.
What size cups work best for these jello desserts?
8-ounce (240ml) clear plastic or glass cups work perfectly—they show off the layers and are just the right portion for a party treat.
How do I keep the jello layers from mixing together?
Make sure each layer is fully set before adding the next—usually about 45 minutes in the fridge. Pour the new layer slowly down the side for crisp lines.
Can I use homemade whipped cream instead of store-bought?
You sure can! Fresh whipped cream adds extra richness and flavor. Just whip heavy cream with a little sugar and vanilla until soft peaks form.
Are Candy Corn Jello Cups gluten-free and allergy-friendly?
Most jello brands and whipped toppings are gluten-free, but always check labels. For dairy-free, use coconut-based whipped cream. And for sugar-free, choose sugar-free jello and light topping.
Pin This Recipe!
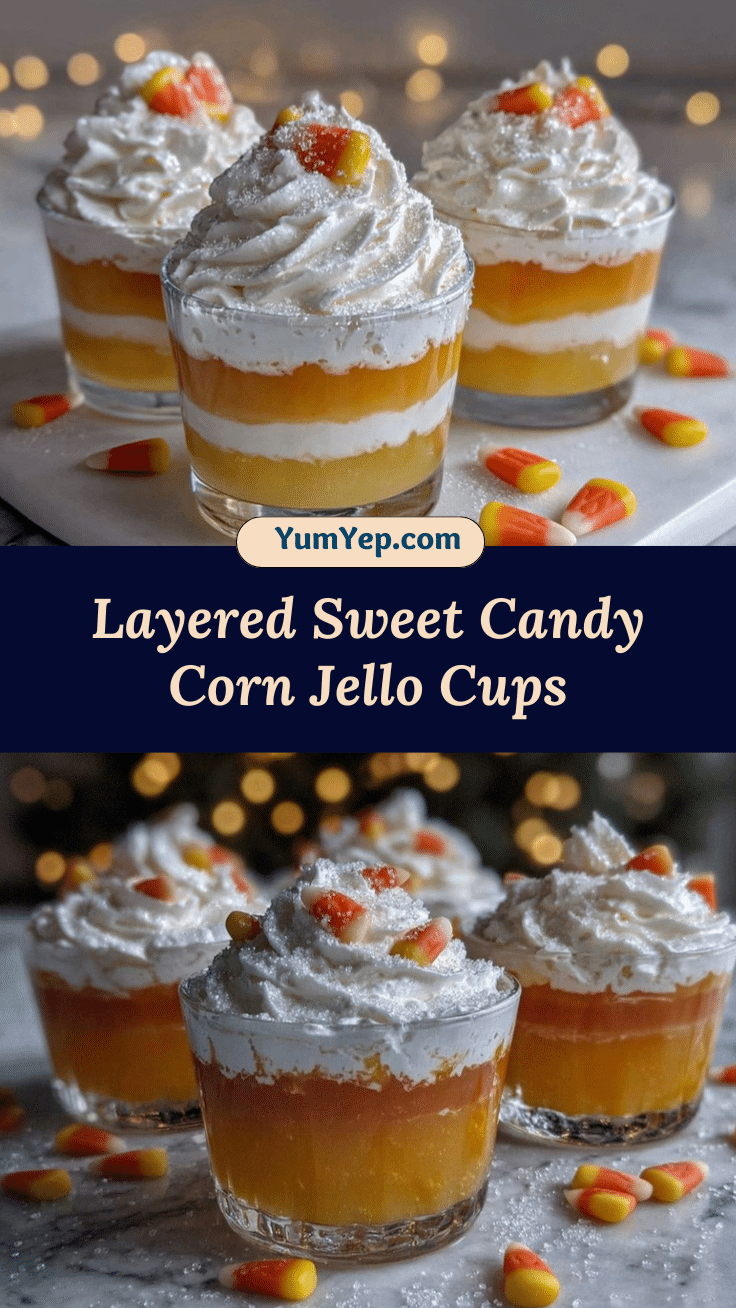
Candy Corn Jello Cups Recipe Easy Halloween Party Dessert
These festive Candy Corn Jello Cups feature vibrant layers of lemon and orange jello topped with pillowy whipped cream, making them a cheerful, nostalgic treat perfect for Halloween parties or any fall gathering. Quick to prepare and fun for kids, they’re a crowd-pleasing dessert that brings playful color and flavor to your table.
- Prep Time: 15 minutes
- Cook Time: 0 minutes
- Total Time: 2 hours
- Yield: 6 servings 1x
- Category: Dessert
- Cuisine: American
Ingredients
- 1 box (3 oz/85g) lemon jello
- 1 cup (240ml) boiling water
- 1/2 cup (120ml) cold water
- 1 box (3 oz/85g) orange jello
- 1 cup (240ml) boiling water
- 1/2 cup (120ml) cold water
- 1 cup (240ml) whipped topping (Cool Whip or homemade whipped cream, coconut whipped cream for dairy-free)
- Candy corn pieces (optional garnish)
- Halloween sprinkles (optional garnish)
Instructions
- In a medium bowl, pour 1 cup boiling water over the lemon jello powder. Stir until completely dissolved (about 2 minutes).
- Add 1/2 cup cold water and stir again.
- Divide the lemon jello evenly among clear cups, filling about 1/3 full per cup.
- Chill in the refrigerator for at least 45 minutes, or until firmly set.
- In a clean bowl, combine 1 cup boiling water with the orange jello powder. Stir until dissolved (about 2 minutes).
- Add 1/2 cup cold water and mix well.
- Once the yellow layer is set, gently pour or spoon the orange jello over the top, filling cups to about 2/3 full. Pour slowly against the side of the cup for crisp layers.
- Return to the refrigerator and chill for at least 45 minutes, or until completely set.
- Once the orange layer is firm, top each cup with a generous swirl or spoonful of whipped topping (about 1/2 inch thick). Smooth with the back of a spoon or pipe on for a fancy look.
- Optional: Garnish each with a candy corn piece, sprinkles, or a cute Halloween pick.
- Pop the finished cups back in the fridge for 10-15 minutes to firm up the whipped topping and keep them cold.
- Serve chilled.
Notes
For crisp layers, chill each jello color fully before adding the next. Use sugar-free jello and light or coconut whipped topping for dietary adaptations. Pour jello slowly down the inside of the cup for clean lines. Prep jello layers a day ahead and add whipped cream just before serving. Wipe cup rims before topping for a tidy look.
Nutrition
- Serving Size: 1 cup (8 oz/240ml)
- Calories: 120
- Sugar: 22
- Sodium: 80
- Fat: 2
- Saturated Fat: 1.5
- Carbohydrates: 25
- Protein: 1
Keywords: Halloween, jello cups, candy corn, party dessert, fall treats, kid-friendly, gluten-free, easy dessert, layered jello, whipped cream


