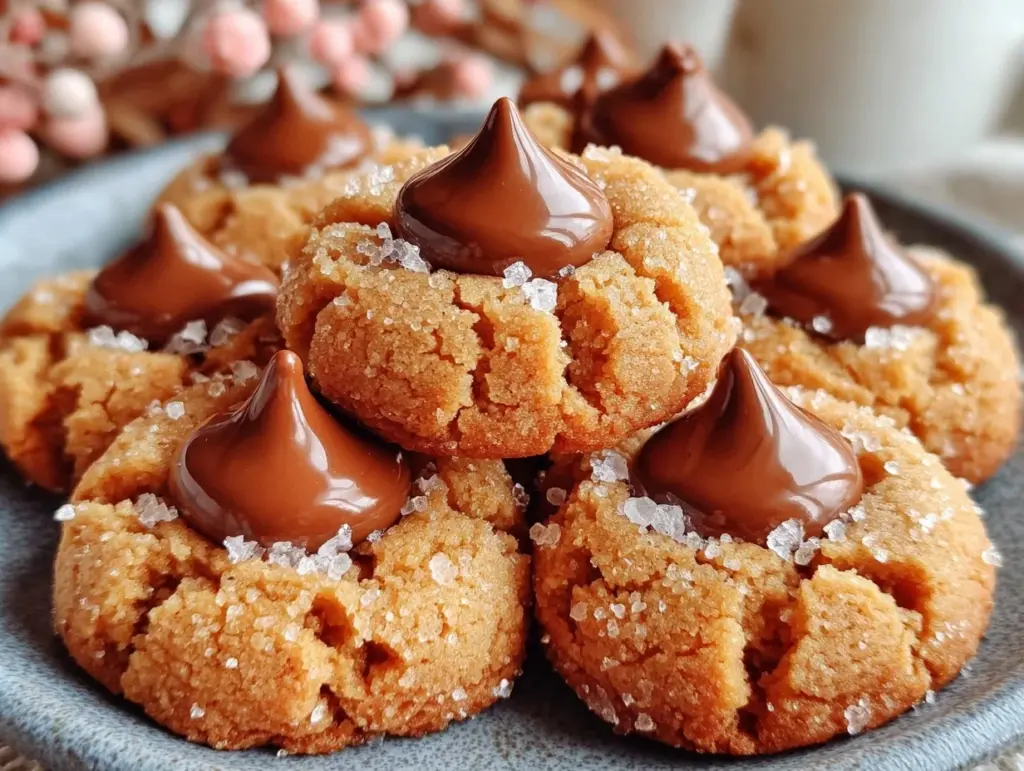
Let me tell you, the smell of warm peanut butter wafting from my oven while these Classic Peanut Butter Blossoms bake is pure magic. The kind that sends everyone scurrying into the kitchen—even folks who swear they’re “just not a cookie person.” The moment those Hershey Kisses start to melt ever-so-slightly into the soft, golden cookies, it’s a sight (and scent) that makes you want to grab a glass of milk and dive right in.
The first time I baked these easy Hershey Kiss cookies, I was knee-high to a grasshopper, perched on a wobbly kitchen stool next to my grandma. She’d hand me the mixing spoon and say, “Don’t you dare eat all the dough!” (Of course, I snuck a taste anyway. Who wouldn’t?) That first batch was a revelation—sweet, salty, chewy, and topped with that iconic chocolate kiss right in the middle. It was the kind of moment where you pause, take a deep breath, and just smile because you know you’re onto something truly special. Honestly, I wish I’d discovered the secret to making them this perfect years ago.
Ever since, these peanut butter blossoms have become a staple in my kitchen for every occasion: holidays, bake sales, or just a Tuesday pick-me-up. My family can’t stop sneaking them off the cooling rack (and, honestly, neither can I). There’s something dangerously easy about this recipe—it brings pure, nostalgic comfort with every bite. Whether you’re looking to brighten up your Pinterest cookie board or searching for the perfect sweet treat for your kids, this classic peanut butter blossoms recipe delivers every single time.
I’ve tested this recipe more times than I can count (in the name of research, of course). It’s now my go-to for gifting, potlucks, and cozy evenings. Each batch feels like a warm hug, and you’re going to want to bookmark this one—trust me.
Why You’ll Love This Recipe
You know what? Over the years, I’ve baked more cookies than I care to admit, but these Classic Peanut Butter Blossoms with Hershey Kisses never disappoint. Here’s why you’ll fall head over heels for them:
- Quick & Easy: These cookies come together in under 30 minutes, making them perfect for last-minute cravings or busy weeknights when you need something sweet (but don’t want to fuss around for hours).
- Simple Ingredients: No fancy stuff here—just pantry staples you probably already have. Peanut butter, sugar, and those irresistible Hershey Kisses!
- Perfect for Any Occasion: Whether it’s a holiday cookie exchange, a birthday party, or a rainy weekend, these blossoms fit the bill. They look stunning on a Pinterest board and even better on your dessert table.
- Crowd-Pleaser: Kids and adults alike go wild for that chocolate-peanut butter combo. I’ve never brought home leftovers from an event—these cookies vanish fast.
- Unbelievably Delicious: The texture is spot-on: soft and chewy with just the right amount of crisp on the edges. The kiss of chocolate in the center? Next-level comfort food.
What sets this recipe apart? For starters, I always chill the dough for just a bit—this keeps the cookies from spreading too much and guarantees the perfect tender bite every time. Plus, I use a blend of creamy and chunky peanut butter (trust me, it makes a difference). There’s a balance of sweet and salty that other recipes often miss.
This isn’t just another peanut butter blossom—it’s the best version I’ve found after years of tweaking and taste-testing. It’s comfort food that’s a little healthier, a little faster, and a whole lot more memorable. Whether you’re impressing guests (without any stress) or turning a simple Tuesday into a celebration, these cookies deliver that soul-soothing satisfaction everyone craves.
What Ingredients You Will Need
This classic peanut butter blossoms recipe uses simple, wholesome ingredients to deliver bold flavor and that signature chewy texture—no complicated shopping list required. Most of these are pantry staples, and I’ve got a few tips for substitutions and sourcing along the way.
- For the Cookie Dough:
- 1/2 cup (115g) unsalted butter, softened (adds richness and helps with texture)
- 1/2 cup (120g) creamy peanut butter (I like Jif or Skippy for their smooth consistency)
- 1/2 cup (100g) granulated sugar
- 1/2 cup (110g) packed light brown sugar (adds moisture and a hint of caramel flavor)
- 1 large egg, room temperature
- 1 1/2 cups (190g) all-purpose flour (you can use a 1:1 gluten-free blend if needed)
- 3/4 teaspoon baking soda
- 1/2 teaspoon baking powder
- 1/4 teaspoon salt (balances the sweetness)
- For Rolling:
- 1/4 cup (50g) granulated sugar (for rolling the dough balls)
- For the Topping:
- About 36 Hershey Kisses, unwrapped (classic milk chocolate, but feel free to experiment with dark or almond versions)
Ingredient tips: If you want a bit of crunch, swap in chunky peanut butter for half the amount. For a dairy-free version, use plant-based butter—Earth Balance is reliable. If you’re out of brown sugar, add a teaspoon of molasses to white sugar for a similar effect.
In summer, these cookies are fun with raspberry or strawberry-filled Hershey Kisses for a fruity twist. During the holidays, swap in peppermint Kisses or use natural peanut butter for a less sweet option (just add a pinch more salt).
For gluten-free baking, Bob’s Red Mill 1-to-1 flour works perfectly. And if allergies are a concern, use sunflower seed butter instead of peanut butter—it’s surprisingly good!
Equipment Needed
You don’t need a fancy kitchen to whip up these classic peanut butter blossoms, but the right tools can make things a whole lot easier (and cleaner).
- Large mixing bowl: For combining all your dough ingredients. If you have a stand mixer, it’s a lifesaver, but a sturdy hand mixer or even a wooden spoon works just fine.
- Measuring cups and spoons: Accuracy makes all the difference—especially with baking.
- Baking sheet: Go for a heavy-duty, rimmed sheet for even browning. Parchment paper or a silicone baking mat helps the cookies release easily and keeps cleanup quick.
- Wire cooling rack: This keeps cookies from getting soggy bottoms (a rookie mistake I learned the hard way!).
- Small cookie scoop or tablespoon: For uniform cookies, which bake evenly and look Pinterest-perfect. If you don’t have one, just use a regular spoon and eyeball it—no stress.
If you’re on a budget, most tools are available at discount stores. My trusty old cookie scoop has survived dozens of batches, and the silicone mats? They just need a quick rinse and are good as new.
Pro tip: Clean your wire rack with a little baking soda paste if it gets sticky from melted chocolate. And always dry your equipment thoroughly before storing—nothing’s worse than rusty baking pans!
Preparation Method
Ready to make the best classic peanut butter blossoms? Here’s how it all comes together—step by step, with plenty of tips so you get perfect cookies every time.
-
Preheat the Oven: Set your oven to 375°F (190°C). Line a baking sheet with parchment paper or a silicone baking mat for easy cleanup.
Prep tip: If you forget to preheat, your cookies may spread too much. Get that oven going early! -
Cream Butter and Sugars: In a large mixing bowl, beat together 1/2 cup (115g) unsalted butter, 1/2 cup (120g) creamy peanut butter, 1/2 cup (100g) granulated sugar, and 1/2 cup (110g) brown sugar until light and fluffy. This takes about 2-3 minutes with a stand mixer on medium speed.
How it should look: The mixture will be pale and creamy, almost mousse-like. -
Add Egg: Crack in 1 large egg and mix well until fully incorporated. Scrape down the sides of the bowl so everything blends evenly.
Warning: Don’t rush this step—an under-mixed dough can cause cookies to bake unevenly! -
Combine Dry Ingredients: In a separate bowl, whisk together 1 1/2 cups (190g) all-purpose flour, 3/4 tsp baking soda, 1/2 tsp baking powder, and 1/4 tsp salt.
Prep tip: Sifting is optional but helps prevent lumps. -
Mix Dough: Gradually add the dry ingredients to the butter mixture, mixing on low speed just until combined. The dough should be soft but not sticky—it’ll hold its shape when rolled.
Troubleshooting: If dough seems dry, add a tablespoon of milk. If it’s too sticky, chill for 10-15 minutes. -
Shape & Roll: Scoop out tablespoon-sized balls of dough (about 20g each). Roll each ball in 1/4 cup (50g) granulated sugar so they’re evenly coated.
Efficiency tip: Use a cookie scoop for uniform size—this helps them bake evenly. -
Bake: Arrange dough balls on the prepared baking sheet, spacing about 2 inches (5cm) apart. Bake for 8-10 minutes, until edges are set and tops crack slightly. Cookies will still look soft in the center.
Sensory cue: The kitchen will smell like roasted peanuts and caramel—pure bliss! -
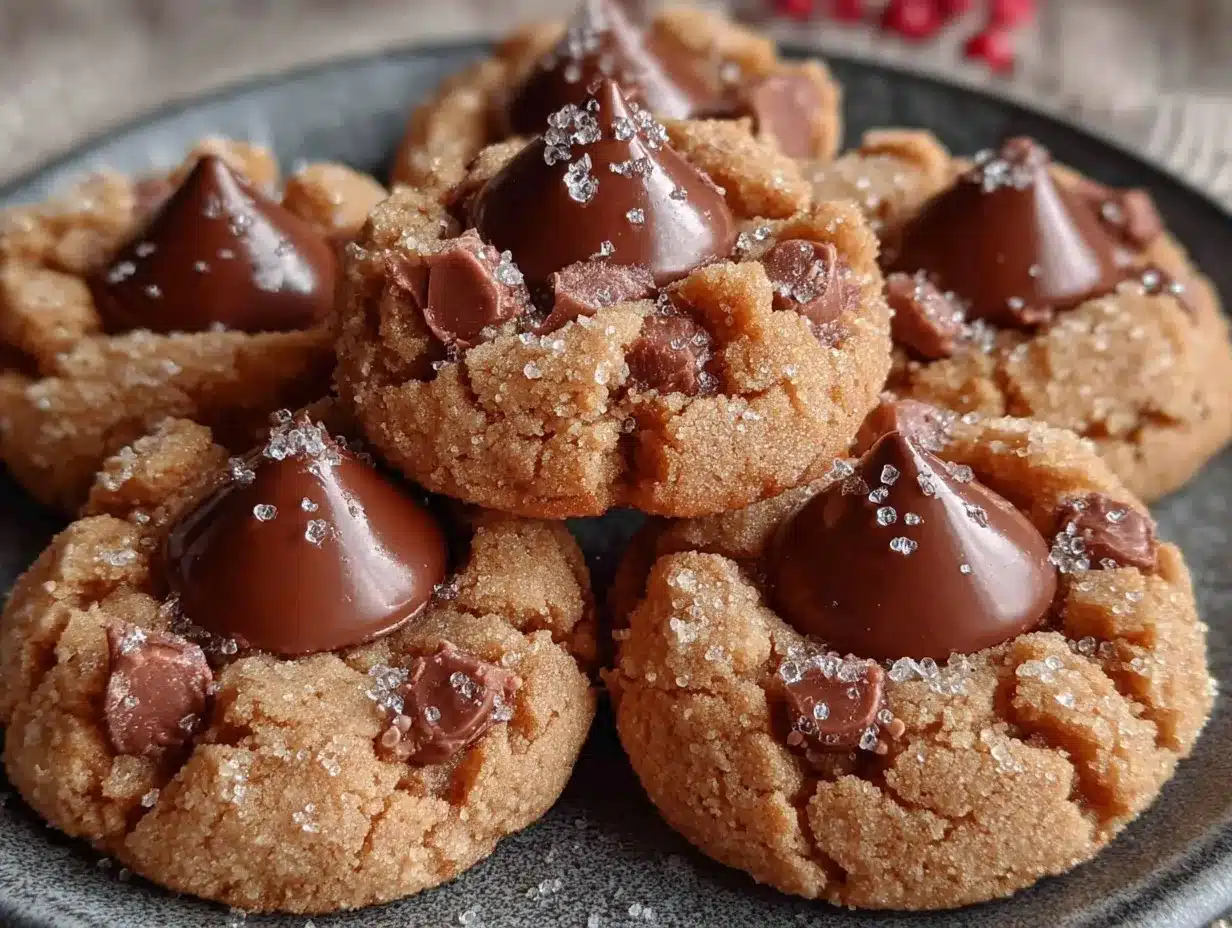
Add Hershey Kisses: Immediately after removing cookies from the oven, gently press a Hershey Kiss into the center of each. The cookies will crack a bit around the edges (that’s how you know you did it right).
Warning: Don’t wait too long or the cookies will be too firm for the Kiss to stick! -
Cool: Transfer cookies to a wire rack. Let them cool completely before storing or stacking—this helps the chocolate set and prevents smudges.
Patience pays: If you move them too soon, the Kisses may collapse (learned this one the hard way).
If you want to freeze the dough, shape and roll it in sugar first, then freeze on a tray before transferring to a bag. Bake straight from frozen, just add an extra minute or two. For best results, use fresh baking soda and powder—old leaveners can leave you with flat cookies.
Cooking Tips & Techniques
Now, here’s where experience really pays off. These tips will help you get those perfectly chewy peanut butter blossoms every single time.
- Chill the Dough (if needed): If your kitchen runs warm or you’re using natural peanut butter, chill the dough for 15-20 minutes before baking. This prevents spreading and keeps the cookies thick.
- Don’t Overbake: The cookies should look a little underdone when you pull them out. They finish setting as they cool. Overbaking leads to dry, crumbly cookies (I’ve made that mistake a few times—ouch).
- Uniform Size: Use a cookie scoop or weigh each dough ball for consistency. Even baking means every cookie gets that perfect crackle and soft center.
- Press Kisses Quickly: Add the Hershey Kisses as soon as the cookies come out of the oven. If you wait, the surface will harden and the Kiss won’t bond well.
- Multitasking: While one tray bakes, prep the next batch of dough balls and unwrap your Kisses. It keeps the flow going and saves time.
- Common Errors: If cookies flatten too much, check your oven temp (an oven thermometer helps). Dough too crumbly? A splash of milk works wonders.
- Lessons Learned: Once, I swapped in natural peanut butter and forgot to add a pinch of extra salt—resulted in bland cookies. Always taste your dough!
Consistency is key. Fresh ingredients, proper measurements, and a little patience make all the difference. And hey, even if a few cookies come out wonky, they still taste amazing!
Variations & Adaptations
One of the best things about classic peanut butter blossoms is how customizable they are. Here are some favorite twists you can try:
- Gluten-Free Version: Use a 1-to-1 gluten-free flour blend in place of all-purpose flour. The cookies come out just as soft and chewy—no one will know the difference!
- Nut-Free Adaptation: Swap the peanut butter for sunflower seed butter or soy nut butter if allergies are a concern. Hershey Kisses are nut-free, so you’re good to go.
- Seasonal Flavors: Try peppermint or caramel-filled Hershey Kisses during the holidays, or raspberry Kisses in the summer. Mix in a pinch of cinnamon for a warm twist.
- Low-Sugar Option: Use a sugar substitute like monk fruit or coconut sugar for rolling. The cookies will be a little less sweet, but still totally satisfying.
- Vegan Adaptation: Use plant-based butter and a flax egg (1 tbsp flaxseed meal + 3 tbsp water) instead of the regular egg. Hershey Kisses aren’t vegan, but you could top with a dairy-free chocolate chunk.
Personally, I love swapping half the peanut butter for almond butter—gives a nutty twist that’s absolutely delicious. You can also bake the dough as thumbprint cookies and fill the center with jam for a PB&J vibe.
No matter the variation, the basic method stays the same. Just remember to check the consistency of your dough and adjust with a splash of milk or extra flour if needed.
Serving & Storage Suggestions
These classic peanut butter blossoms taste best served fresh and slightly warm, when the Hershey Kiss is still a little soft. Arrange them on a pretty platter, sprinkle with a little extra sugar for sparkle, and pair with cold milk or hot cocoa—total comfort.
For parties, pile them up in a cookie jar or stack on tiered stands for a Pinterest-worthy display. They make fantastic gifts—just pop a dozen into a festive tin for neighbors or teachers.
Storage: Let cookies cool completely, then store in an airtight container at room temperature for up to 5 days. If you want to keep them longer, freeze in layers separated by parchment paper for up to 3 months. Thaw at room temp or pop a few in the microwave for 10 seconds to revive that fresh-baked feel.
Reheating: Place cookies on a plate and microwave for 8-10 seconds—just enough to soften the chocolate Kiss. (Careful, it gets hot fast!)
Pro tip: The flavor deepens a bit after a day or two, so they’re just as good (maybe better) the next day. If you’re storing for the holidays, tuck a slice of bread in the container to keep cookies soft.
Nutritional Information & Benefits
Each classic peanut butter blossom (based on a batch of 36) has about 110 calories, 6g fat, 13g carbohydrates, 2g protein, and 7g sugar.
Health benefits: Peanut butter provides healthy fats and a little protein, which helps keep you satisfied. If you use a natural or reduced-sugar peanut butter, you can cut back on processed sugars.
These cookies can be adapted for gluten-free diets with a simple flour swap. They’re naturally nutty and rich, but if allergies are a concern, sunflower seed butter works well.
Allergens: Contains peanuts, egg, dairy (unless you make vegan swaps), and wheat (unless gluten-free flour is used).
From a wellness perspective, I love enjoying these cookies in moderation with a cup of tea—satisfying that sweet tooth without going overboard!
Conclusion
Classic peanut butter blossoms with Hershey Kisses are the kind of cookie that never goes out of style. They’re easy, reliable, and always a hit—whether you’re baking for your family, friends, or just yourself.
Don’t be afraid to tweak the recipe to suit your own tastes. Try chunky peanut butter, mix up the Kisses, or swap in gluten-free flour. That’s the fun part!
I keep coming back to this recipe because it feels like home. There’s something about the combination of soft peanut butter cookie and rich chocolate that’s just… perfect. If you give these a try, leave a comment below or share your own twist on the recipe—I’d love to hear what you come up with!
Happy baking—and I hope your kitchen is filled with smiles, laughter, and maybe a few sneaky cookie thieves!
Frequently Asked Questions
Can I make peanut butter blossoms ahead of time?
Absolutely! You can bake the cookies up to 2 days in advance and store them in an airtight container. They also freeze beautifully—just thaw before serving.
What’s the best peanut butter for this recipe?
Creamy, shelf-stable peanut butter like Jif or Skippy works best for classic peanut butter blossoms. Natural peanut butter can be used, but chill the dough first for best results.
Can I use different types of Hershey Kisses?
Yes! Milk chocolate is traditional, but dark chocolate, almond, caramel, or even seasonal flavored Kisses are a fun twist.
Are these cookies gluten-free?
Not by default, but you can use a 1-to-1 gluten-free flour blend without changing anything else. They turn out just as delicious.
How do I keep peanut butter blossoms soft?
Store cookies in an airtight container with a slice of bread (it keeps moisture in). Avoid overbaking, and always let them cool completely before storing.
Pin This Recipe!

Classic Peanut Butter Blossoms Recipe Easy Hershey Kiss Cookies

These classic peanut butter blossoms feature soft, chewy peanut butter cookies rolled in sugar and topped with a Hershey Kiss. Quick, easy, and always a crowd-pleaser for holidays, bake sales, or everyday treats.
- Prep Time: 15 minutes
- Cook Time: 10 minutes
- Total Time: 25 minutes
- Yield: 36 cookies 1x
- Category: Dessert
- Cuisine: American
Ingredients
- 1/2 cup (115g) unsalted butter, softened
- 1/2 cup (120g) creamy peanut butter
- 1/2 cup (100g) granulated sugar
- 1/2 cup (110g) packed light brown sugar
- 1 large egg, room temperature
- 1 1/2 cups (190g) all-purpose flour
- 3/4 teaspoon baking soda
- 1/2 teaspoon baking powder
- 1/4 teaspoon salt
- 1/4 cup (50g) granulated sugar (for rolling)
- About 36 Hershey Kisses, unwrapped
Instructions
- Preheat oven to 375°F (190°C). Line a baking sheet with parchment paper or a silicone baking mat.
- In a large mixing bowl, beat together butter, peanut butter, granulated sugar, and brown sugar until light and fluffy (about 2-3 minutes).
- Add the egg and mix well until fully incorporated. Scrape down the sides of the bowl.
- In a separate bowl, whisk together flour, baking soda, baking powder, and salt.
- Gradually add the dry ingredients to the butter mixture, mixing on low speed just until combined. Dough should be soft but not sticky.
- Scoop tablespoon-sized balls of dough (about 20g each) and roll each ball in granulated sugar to coat.
- Arrange dough balls on the prepared baking sheet, spacing about 2 inches apart.
- Bake for 8-10 minutes, until edges are set and tops crack slightly. Cookies will still look soft in the center.
- Immediately after removing cookies from the oven, gently press a Hershey Kiss into the center of each cookie.
- Transfer cookies to a wire rack and let cool completely before storing or stacking.
Notes
Chill dough for 15-20 minutes if using natural peanut butter or if your kitchen is warm. For gluten-free, use a 1-to-1 gluten-free flour blend. Press Hershey Kisses into cookies immediately after baking for best results. Store cookies in an airtight container with a slice of bread to keep them soft. Freeze dough balls for future baking.
Nutrition
- Serving Size: 1 cookie
- Calories: 110
- Sugar: 7
- Sodium: 60
- Fat: 6
- Saturated Fat: 2.5
- Carbohydrates: 13
- Fiber: 0.5
- Protein: 2
Keywords: peanut butter blossoms, Hershey Kiss cookies, classic cookies, easy cookie recipe, holiday cookies, peanut butter cookies, chocolate cookies


