Let me just say, when the aroma of cinnamon-kissed apples and golden, buttery crust starts drifting from my oven, the whole house seems to pause. It’s the kind of mouthwatering fragrance that makes my kids abandon their screens and my husband “just happen” to wander through the kitchen (always with a fork in hand). The first time I baked this cozy apple slab pie, I was knee-high to a grasshopper, helping my grandma press dough into her well-worn baking sheet. There was flour everywhere, laughter bouncing off the walls, and that moment where you look at a bubbling pie and know you’ve made something truly special.
This apple slab pie recipe brings back all those nostalgic memories, but with a twist: it’s designed for busy kitchens and hungry crowds. I stumbled onto the slab pie concept when I needed a dessert big enough for a neighborhood potluck but quick enough for a rainy Sunday afternoon. Honestly, it’s the kind of dessert you wish you’d known about years ago—dangerously easy, crazy comforting, and perfect for sharing.
The reactions in my family are always the same: sneaky forks grabbing warm slices before I can even plate them, kids fighting over the corner pieces (crust lovers unite!), and my mom asking for the recipe again, “just in case.” It’s been tested and retested (all in the name of research, of course), becoming a staple at family gatherings, bake sales, and those days when you just need a little extra coziness. This apple slab pie feels like a warm hug—a dessert that’s equal parts flaky, tender, and bursting with sweet-tart apples. You’re going to want to bookmark this one, especially if you love desserts that shine on a Pinterest board and bring real comfort to your table.
Why You’ll Love This Recipe
If you crave desserts that blend simplicity with soul-soothing flavor, this apple slab pie recipe will become your new favorite. I’ve baked dozens of pies in my years as a recipe developer, and honestly, nothing matches the crowd-pleasing magic of a slab pie. After countless taste tests and tweaking the crust to perfection, I can confidently say this is the one I reach for when I want happy faces around my table. Here’s why you’ll love it:
- Quick & Easy: Comes together in under 90 minutes, so it’s perfect for last-minute dessert emergencies or cozy weeknight cravings.
- Simple Ingredients: No need to hunt for fancy stuff at the store—you probably have everything you need right in your kitchen.
- Perfect for Gatherings: The slab shape means you can serve a crowd without fussing over multiple pies or tiny slices. Ideal for potlucks, holiday dinners, and birthday parties.
- Crowd-Pleaser: Every time I make it, both kids and adults go wild for the crisp crust and gooey apple filling. It’s the kind of dessert that disappears before you can blink.
- Unbelievably Delicious: That flaky pie crust and tender, cinnamon apples create a next-level comfort food experience. One bite, and you’ll see why it’s always a hit.
What makes this apple slab pie recipe different? The crust is extra flaky thanks to a simple trick (more on that in the tips section), and the filling uses a perfect mix of tart and sweet apples for balance. No soggy bottoms, no overly-sweet mush—just pure, nostalgic comfort in every bite. If you want a dessert that’s both impressive and stress-free, this is the one to try. It’s not just good—it’s the kind that makes you close your eyes and savor every forkful. Whether you’re feeding a crowd or just looking for a treat to brighten a rainy day, this apple slab pie recipe is your ticket to smiles all around.
Ingredients Needed
This apple slab pie recipe uses wholesome, everyday ingredients to deliver bold flavor and satisfying texture—no need for anything fancy. Most of these are pantry staples, and you can tweak them based on what you have on hand or your family’s preferences. Here’s what you’ll need:
- For the Flaky Pie Crust:
- 2 1/2 cups (315g) all-purpose flour (King Arthur is my usual go-to for consistent results)
- 1 cup (225g) unsalted butter, cold and cubed (makes the crust extra flaky!)
- 2 tablespoons (25g) granulated sugar
- 1 teaspoon (5g) salt
- 1/2 cup (120ml) ice water (add more, tablespoon by tablespoon, if needed)
- Optional: 1 teaspoon apple cider vinegar (helps tenderize the crust)
- For the Apple Filling:
- 6 cups (about 900g) apples, peeled, cored, and thinly sliced (I use a mix of Granny Smith and Honeycrisp for balance)
- 2/3 cup (140g) granulated sugar (adjust to taste if your apples are very sweet)
- 1/4 cup (30g) brown sugar (adds depth and that caramel flavor)
- 2 tablespoons (15g) all-purpose flour (helps thicken the juices)
- 1 tablespoon (8g) ground cinnamon
- 1/4 teaspoon (1g) ground nutmeg (optional, but it brings a cozy flavor)
- Pinch of salt
- 2 tablespoons (28g) unsalted butter, diced (dot over the filling for extra richness)
- Juice of 1/2 lemon (about 1 tablespoon, keeps the apples bright)
- For the Topping:
- 1 egg, beaten (for brushing the crust)
- 1 tablespoon (12g) coarse sugar (like Turbinado, optional; adds sparkle and crunch)
Ingredient Tips & Substitutions:
- If you’re gluten-free, swap the all-purpose flour for your favorite 1:1 gluten-free baking blend (Bob’s Red Mill works well).
- For dairy-free, use vegan butter and plant-based milk for the crust.
- No fresh apples? Frozen sliced apples work in a pinch, just thaw and drain first.
- Want more spice? Add a dash of ground ginger or cloves to the filling.
- If your apples are super tart, increase the sugar slightly. If they’re sweet, cut it back a bit.
Honestly, this recipe is forgiving—use what you’ve got and don’t sweat the details. The goal is a flaky pie crust and apples that bake up tender and juicy. That’s the magic of a good apple slab pie recipe!
Equipment Needed
Here’s the kitchen gear you’ll need to make your apple slab pie recipe a breeze. Don’t worry, most of these tools are probably already in your cupboards. If not, I’ve got some budget-friendly swaps and tips too.
- Half-sheet pan (13×18-inch / 33x46cm): The classic slab pie size. If you don’t have one, a rimmed baking sheet or two smaller pans will work. Just adjust baking time if the pan is smaller.
- Mixing bowls: At least two—one for the crust, one for the apple filling. I love glass for easy cleanup.
- Pastry cutter or food processor: For blending the butter into the flour. (If you don’t have these, two forks or even your hands work in a pinch!)
- Rolling pin: Essential for spreading out that big slab of dough evenly. (A clean wine bottle does the job if you’re stuck.)
- Peeler and corer: For prepping apples fast. If you don’t have an apple corer, just slice around the core with a paring knife.
- Sharp knife: For slicing apples thin and trimming dough edges.
- Parchment paper: Makes transferring and lifting the pie easy—plus less mess.
- Pastry brush: For egg-washing the crust. (A clean paintbrush from the art drawer works too!)
I’ve made this pie with everything from high-end gadgets to thrift store finds. My tip: keep your rolling pin and mixing bowls dry and cool for the flakiest crust. And if your sheet pan is a little warped, just rotate it halfway through baking for an even finish. Simple tools, big results!
Preparation Method

Ready to bake your apple slab pie? Here’s the step-by-step method—tested and tweaked for foolproof results. Each step includes time estimates, troubleshooting notes, and those sensory cues that let you know you’re on track.
- Make the Pie Crust (15 minutes prep, 30 minutes chill):
- In a large bowl, whisk together 2 1/2 cups (315g) flour, 2 tablespoons (25g) sugar, and 1 teaspoon (5g) salt.
- Add 1 cup (225g) cold, cubed butter. Using a pastry cutter, food processor, or your fingers, work the butter into the flour until pea-sized crumbs form. (It should look like coarse, sandy gravel—don’t overmix!)
- Drizzle in 1/2 cup (120ml) ice water and optional 1 teaspoon vinegar. Stir gently until dough just comes together. If it’s too dry, add more water, a tablespoon at a time.
- Divide dough in half. Flatten each half into a rectangle, wrap in plastic, and chill for at least 30 minutes (up to 2 hours for extra flakiness).
- Prepare the Apple Filling (10 minutes):
- In a large bowl, toss 6 cups (900g) sliced apples with 2/3 cup (140g) sugar, 1/4 cup (30g) brown sugar, 2 tablespoons (15g) flour, 1 tablespoon (8g) cinnamon, 1/4 teaspoon (1g) nutmeg, pinch of salt, and juice of 1/2 lemon.
- Set aside. The apples will start to release juice—this is good!
- Roll Out the Dough (10 minutes):
- On a lightly floured surface, roll one dough piece into a rectangle just larger than your half-sheet pan (about 15×10 inches / 38x25cm). It should be about 1/8-inch (3mm) thick.
- Gently transfer to your pan (parchment helps here). Press dough into corners, letting excess hang over edges.
- Assemble the Pie (5 minutes):
- Pour apple mixture onto crust, spreading evenly. Dot with 2 tablespoons (28g) diced butter—this melts into the apples for extra richness.
- Roll out the second dough piece to fit over the apples. Place on top, trim excess, and pinch edges together to seal. Cut a few slits for steam to escape (your pie will thank you).
- Egg Wash and Sugar (2 minutes):
- Brush crust with beaten egg for a glossy finish. Sprinkle 1 tablespoon (12g) coarse sugar for sparkle and crunch.
- Bake (40-50 minutes):
- Preheat oven to 375°F (190°C). Bake for 40-50 minutes, until crust is deep golden and juices bubble through slits. (Rotate pan halfway if browning unevenly.)
- If crust browns too fast, tent loosely with foil for the last 10 minutes.
- Cool and Serve (at least 20 minutes):
- Let pie cool in pan for at least 20 minutes before slicing. (If you cut too soon, the filling will be runny—but if you’re impatient, I totally get it!)
- Slice into squares and serve warm or at room temperature.
Troubleshooting: If your dough cracks, just patch it with scraps—this pie is rustic and forgiving. If apples look dry, sprinkle a splash of water before topping with the second crust. Want crispier edges? Bake an extra 5 minutes until you see deep golden corners. My tip: make this pie a few times and you’ll find your groove. The more you bake, the better it gets!
Cooking Tips & Techniques
Years of pie baking taught me a thing or two, and I want you to get that perfect flaky crust and tender apple filling every single time. Here are my top tips, plus a few “learned the hard way” lessons so you don’t repeat my mistakes!
- Keep Ingredients Cold: Cold butter is the secret to a flaky pie crust. If your kitchen’s warm, chill your mixing bowl or freeze your butter for 10 minutes before starting.
- Don’t Overwork the Dough: Mix just until the dough comes together—overmixing makes it tough. You want those little pockets of butter for flakiness.
- Apple Choice Matters: Use a blend of tart and sweet apples for best flavor and texture. Granny Smiths hold their shape, while Honeycrisp or Fuji add sweetness.
- Slice Apples Evenly: Thin, even slices cook uniformly and prevent mushy spots. (I learned this after biting into a pie with half-raw chunks—yikes!)
- Steam Vents Are Key: Cut enough slits in the top crust to let steam escape. Otherwise, your filling can get watery or bubble over.
- Rotate the Pan: Ovens have hot spots. Rotating halfway ensures an evenly golden crust—no pale patches or burnt edges.
- Egg Wash for Shine: Brushing the crust with beaten egg makes it extra glossy and helps coarse sugar stick. (I’ve skipped this step before, and the pie was still tasty—just less pretty for those Pinterest snaps!)
- Let It Cool: It’s tempting to dig in right away, but give your pie at least 20 minutes to set up. Otherwise, the filling runs and you lose that lovely slice shape.
I once tried baking a slab pie at midnight and forgot the steam vents—let’s just say the smoky kitchen and bubbling over mess taught me not to skip that step. Take it slow, and this apple slab pie recipe will reward you every time!
Variations & Adaptations
This apple slab pie recipe is a true kitchen chameleon—easy to adapt for seasons, dietary needs, and flavor preferences. I’ve tinkered with it countless ways, and each version brings something new to the table. Here are some of my favorite twists:
- Gluten-Free Slab Pie: Swap the all-purpose flour for a 1:1 gluten-free baking blend. Add an extra tablespoon of water if dough feels crumbly. The crust stays tender, and nobody ever guesses it’s gluten-free!
- Fall Spice Variation: Mix in 1/2 teaspoon ground ginger and 1/4 teaspoon cloves with the cinnamon. Top with a maple glaze after baking (just whisk powdered sugar with maple syrup and drizzle on). This version is perfect for autumn gatherings!
- Berry-Apple Slab Pie: Add 2 cups (300g) of fresh or frozen berries (like blueberries or raspberries) to the apple filling. The extra juice makes for a jammy, vibrant pie—watch for bubbling and add a touch more flour to thicken.
- Vegan Adaptation: Use vegan butter, swap the egg wash for coconut milk, and ensure your sugar is vegan-friendly. The pie stays flaky and delicious, even without dairy or eggs.
- Nut-Free Option: This recipe is naturally nut-free, but if you love crunch, sprinkle sunflower seeds or pumpkin seeds on top for texture.
- Personal Twist: I once added a handful of dried cranberries and a splash of vanilla extract to the filling—total hit at Thanksgiving!
Feel free to experiment—this apple slab pie recipe is forgiving and fun. Whether you’re working around allergies, swapping fruits, or just jazzing up the flavor, you’ll end up with something that feels homemade and heartfelt.
Serving & Storage Suggestions
Serving this apple slab pie is half the fun—there’s something about slicing big squares and watching the steam rise that makes any day feel special. Here’s how I like to serve and store this cozy dessert:
- Serving Temperature: Best served slightly warm or at room temperature. For extra indulgence, add a scoop of vanilla ice cream or dollop of whipped cream. (My kids swear by caramel drizzle, too!)
- Presentation Tips: Slice the pie into generous squares and arrange on a platter. Sprinkle with powdered sugar for a pretty finish. This pie looks gorgeous on a rustic wooden board—perfect for those Pinterest photos.
- Pairings: Serve with strong coffee, chai tea, or hot apple cider. It also pairs well with savory dishes like roast chicken or a fresh green salad for balance.
- Storage Instructions: Store leftovers covered in the fridge for up to 4 days. For longer storage, wrap tightly and freeze slices for up to 2 months. Thaw overnight and reheat in the oven at 325°F (165°C) for 10-15 minutes until warmed through.
- Flavor Note: The spices and apple flavor deepen overnight, so leftovers taste even better the next day. Sometimes I make the pie a day ahead for parties—less stress, more flavor!
If you’re gifting the pie, wrap squares in parchment and stack in a bakery box for a homespun touch. (Trust me, friends love this!) And if you end up with soggy crust after storing, just pop it in a hot oven for a few minutes—it crisps right up.
Nutritional Information & Benefits
Here’s a quick look at the nutritional side of this apple slab pie recipe. Keep in mind, these are estimates and can vary based on ingredient brands and portion size:
- Calories: About 260 per serving (based on 18 squares)
- Carbs: Roughly 38g
- Fat: About 11g
- Protein: 2g
- Fiber: 2g
Health Benefits: Apples are loaded with fiber, vitamin C, and potassium. Using a blend of tart and sweet apples means fewer added sugars. Homemade pie crust lets you control the ingredients—no preservatives or artificial stuff. If you use whole wheat flour or add berries, you bump up the nutrition even more.
This recipe is naturally nut-free and easily made gluten-free or dairy-free with simple swaps. Allergens to watch for: wheat, dairy, eggs. From a wellness perspective, I love that this dessert is fruit-forward, full of real ingredients, and satisfying without being heavy. It’s comfort food you can feel good about sharing.
Conclusion
If you’re searching for a dessert that’s both comforting and crowd-pleasing, this apple slab pie recipe is the answer. It brings together flaky pie crust and tender apples in a way that feels homemade, heartfelt, and just a little bit magical. Honestly, every time I bake it, I’m reminded why it’s my go-to for family gatherings, potlucks, and cozy nights in.
Don’t be afraid to tweak the spices, swap the apples, or play with different toppings—this recipe loves a little personalization. My favorite part is sharing it with friends and seeing their faces light up after the first bite. If you give it a try, I’d love to hear how you make it your own!
Drop a comment below, share your pictures, or tag me on Pinterest with your apple slab pie creations. Here’s to warm kitchens, flaky crusts, and plenty of sweet moments around the table!
FAQs
What’s the best apple variety for slab pie?
I like to use a mix of Granny Smith and Honeycrisp—they hold up well and balance tart with sweet. You can use any firm apple that bakes nicely.
Can I make this apple slab pie recipe ahead of time?
Absolutely! Bake the pie a day in advance, cool completely, cover, and store at room temperature. The flavors deepen overnight.
How do I keep the crust from getting soggy?
Make sure to bake until the crust is deep golden and bubbling. If storing leftovers, reheat in a hot oven to crisp up the crust again.
Is this recipe easy to make gluten-free?
Yes! Use a 1:1 gluten-free flour blend in place of all-purpose flour. Add a bit more water if needed for the dough to come together.
Can I freeze apple slab pie?
Definitely. Slice the cooled pie, wrap pieces tightly, and freeze for up to 2 months. Thaw and reheat in the oven for best texture.
Pin This Recipe!

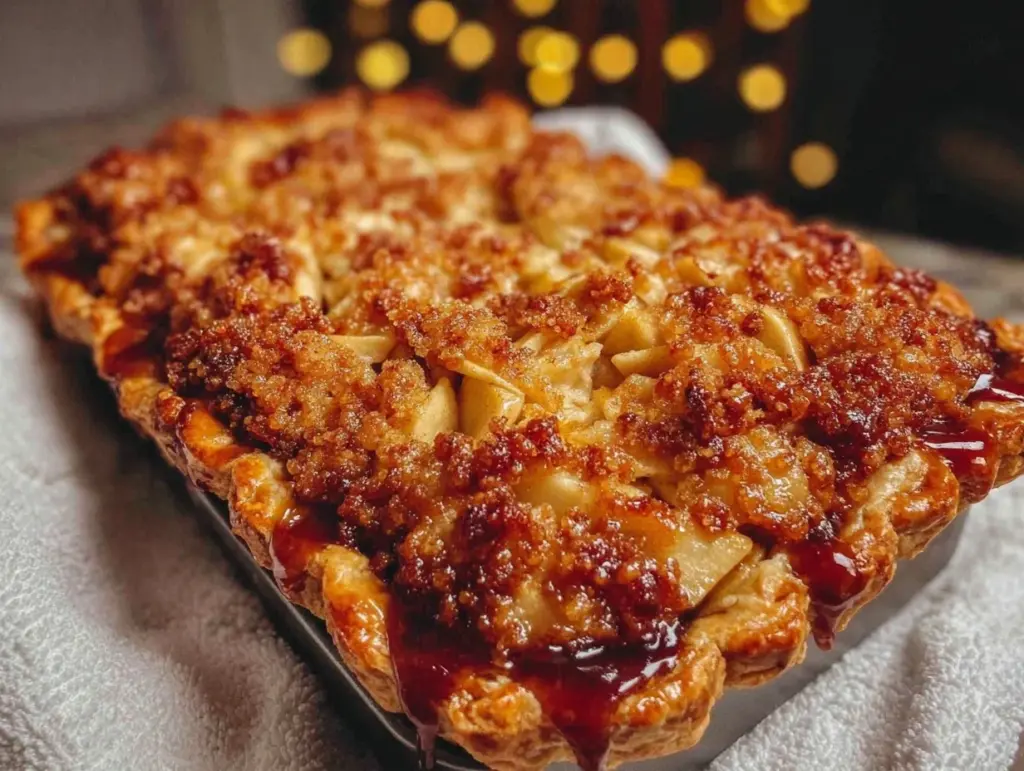
Apple Slab Pie Recipe: Easy Homemade Dessert with Flaky Crust

This apple slab pie features a flaky homemade crust and a sweet-tart apple filling, perfect for feeding a crowd. It’s easy to make, comforting, and ideal for potlucks, family gatherings, or cozy nights in.
- Prep Time: 35 minutes
- Cook Time: 40-50 minutes
- Total Time: 1 hour 30 minutes
- Yield: 18 servings 1x
- Category: Dessert
- Cuisine: American
Ingredients
- 2 1/2 cups all-purpose flour
- 1 cup unsalted butter, cold and cubed
- 2 tablespoons granulated sugar
- 1 teaspoon salt
- 1/2 cup ice water (add more, tablespoon by tablespoon, if needed)
- Optional: 1 teaspoon apple cider vinegar
- 6 cups apples, peeled, cored, and thinly sliced (Granny Smith and Honeycrisp recommended)
- 2/3 cup granulated sugar
- 1/4 cup brown sugar
- 2 tablespoons all-purpose flour
- 1 tablespoon ground cinnamon
- 1/4 teaspoon ground nutmeg (optional)
- Pinch of salt
- 2 tablespoons unsalted butter, diced
- Juice of 1/2 lemon (about 1 tablespoon)
- 1 egg, beaten (for brushing the crust)
- 1 tablespoon coarse sugar (optional, for topping)
Instructions
- In a large bowl, whisk together flour, sugar, and salt for the crust.
- Add cold, cubed butter and blend with a pastry cutter, food processor, or fingers until pea-sized crumbs form.
- Drizzle in ice water and optional vinegar, stirring gently until dough just comes together. Add more water if needed.
- Divide dough in half, flatten into rectangles, wrap in plastic, and chill for at least 30 minutes (up to 2 hours for extra flakiness).
- In a separate bowl, toss sliced apples with granulated sugar, brown sugar, flour, cinnamon, nutmeg, salt, and lemon juice. Set aside.
- On a lightly floured surface, roll one dough piece into a rectangle slightly larger than your half-sheet pan (about 15×10 inches, 1/8-inch thick).
- Transfer dough to pan, pressing into corners and letting excess hang over edges.
- Pour apple mixture onto crust, spreading evenly. Dot with diced butter.
- Roll out second dough piece to fit over apples. Place on top, trim excess, and pinch edges to seal. Cut slits for steam.
- Brush crust with beaten egg and sprinkle with coarse sugar.
- Preheat oven to 375°F. Bake for 40-50 minutes, until crust is deep golden and juices bubble through slits. Rotate pan halfway if needed.
- If crust browns too fast, tent loosely with foil for the last 10 minutes.
- Let pie cool in pan for at least 20 minutes before slicing. Serve warm or at room temperature.
Notes
For best results, use a mix of tart and sweet apples. Keep butter and ingredients cold for a flaky crust. If making gluten-free, use a 1:1 gluten-free flour blend and add extra water if needed. Let pie cool before slicing for clean pieces. Leftovers taste even better the next day as flavors deepen.
Nutrition
- Serving Size: 1 square (1/18th of
- Calories: 260
- Sugar: 22
- Sodium: 160
- Fat: 11
- Saturated Fat: 7
- Carbohydrates: 38
- Fiber: 2
- Protein: 2
Keywords: apple slab pie, easy apple pie, homemade dessert, flaky pie crust, crowd-pleasing dessert, potluck dessert, comfort food, fall baking, family recipe, apple dessert


