Picture this: the sweet aroma of buttery caramel bubbling away on the stove, mingling with the crisp scent of fresh apples—honestly, there’s nothing quite like it. The first time I made these caramel apple slices with toppings, my kitchen felt like a carnival (but without the chaos and sticky fingers). I remember standing there, spoon in hand, watching the caramel cascade over each juicy apple slice, and thinking, “Yep, this is the kind of moment where you pause, take a deep breath, and just smile because you know you’re onto something truly special.”
My love affair with caramel apples started years ago when I was knee-high to a grasshopper, sneaking bites at fall fairs. But let’s face it, whole caramel apples are a bit much—sticky, hard to eat, and a struggle for little ones. That’s why these caramel apple slices with toppings are game-changers: you get all the nostalgia with none of the mess. I stumbled across this idea on a rainy weekend, trying to whip up a party treat that everyone could grab and customize. Truth be told, I wish I’d figured this out ages ago!
Every time I make these for family gatherings or birthday bashes, the plates are cleared before I can blink. My kids hover around the counter, plotting which topping to pile on next (and yes, my husband totally sneaks extra slices when he thinks I’m not looking). There’s something about the combination of crisp apple, gooey caramel, and fun toppings that just brings out pure, giddy joy. Honestly, these have become a staple for our parties, gifting, and even cozy movie nights. I’ve tested dozens of topping combos (in the name of research, of course), and every single time, it feels like a warm hug. If you need a Pinterest-worthy treat that’s dangerously easy and guaranteed to make folks smile, you’re going to want to bookmark this one—these caramel apple slices are pure comfort and a total crowd-pleaser!
Why You’ll Love This Recipe
You know what? After testing this caramel apple slices recipe countless times (with plenty of sticky fingers to prove it), I can say with confidence: this is the party treat you’ll turn to again and again. There’s something genuinely magical about the crunchy apple, silky caramel, and endless topping possibilities. Here’s why this recipe stands out from the rest:
- Quick & Easy: You’ll have a tray of caramel apple slices ready in under 30 minutes. No waiting for caramel to set, no wrestling with whole apples—just slice, dip, and decorate.
- Simple Ingredients: No need to hunt down fancy candies or obscure caramel—everything you need is probably already in your pantry. Just apples, caramel, and toppings (the more creative, the better!).
- Perfect for Parties: These slices are bite-sized, easy to grab, and totally customizable. Great for birthday parties, holiday gatherings, or any event where you want guests to mingle and munch.
- Crowd-Pleaser: Kids love choosing their toppings, adults appreciate the nostalgia and convenience, and picky eaters can build their dream slice.
- Unbelievably Delicious: The crisp apple and rich caramel are a classic combo, but add crunchy nuts, colorful sprinkles, or a drizzle of chocolate, and you’ve got next-level flavor and texture.
What makes this recipe different? For starters, slicing the apples means every bite is balanced—no more caramel overload or apples that are too hard to bite. The caramel stays put, and you get more surface area for toppings (win-win!). I use a simple stovetop caramel that’s foolproof, and my topping suggestions are tested favorites—think salty pretzels, crushed cookies, and mini marshmallows. It’s the kind of treat that makes you close your eyes after the first bite and smile. Comfort food, but easy and modern—perfect for impressing guests without breaking a sweat. Whether you’re hosting a big bash or just craving something sweet, these caramel apple slices will steal the show!
What Ingredients You Will Need
This caramel apple slices recipe relies on simple, wholesome ingredients to deliver bold flavor and party-ready fun. Honestly, most of these are pantry staples, and you can swap or tweak them depending on what’s on hand or what your guests love. Here’s what you’ll need:
- For the Apple Slices:
- 4 large Granny Smith apples (or Honeycrisp; crisp, tart apples hold up best)
- 1 tablespoon lemon juice (to keep slices from browning)
- For the Caramel:
- 1 cup (200g) granulated sugar
- 6 tablespoons (85g) unsalted butter, cut into cubes
- ½ cup (120ml) heavy cream
- ¼ teaspoon sea salt (optional, for salted caramel)
- 1 teaspoon vanilla extract (adds depth; use pure vanilla if possible)
- For the Toppings (Choose 5-7 from below):
- Chopped peanuts or pecans (for crunch)
- Mini chocolate chips
- Colorful sprinkles
- Crushed pretzels (salty-sweet magic)
- Mini marshmallows
- Toffee bits
- Coconut flakes
- Drizzled dark chocolate (melt ¼ cup/40g for drizzling)
- Crushed cookies (Oreo or graham cracker)
- Dried cranberries
- Substitution Notes:
- Use dairy-free butter and coconut cream for a vegan caramel.
- Swap nuts for sunflower seeds if you need a nut-free option.
- Try almond flour for gluten-free cookie topping.
- In summer, fresh berries can make a fun topping instead of dried fruit.
I personally love Granny Smith apples for their tartness, which balances the sweet caramel. Sometimes I’ll mix in Honeycrisp for extra crunch (trust me, those slices disappear first!). For caramel, I’ve found that using a good-quality butter makes all the difference—Land O’Lakes or Kerrygold are my go-tos. As for toppings, don’t be shy! Let your guests mix and match, and you’ll end up with a plate that looks as good as it tastes.
Equipment Needed
Getting these caramel apple slices ready doesn’t take much—no fancy gadgets required. Here’s what you’ll want to have on hand:
- Sharp chef’s knife (for clean, even apple slices)
- Cutting board (preferably non-slip for safety)
- Medium saucepan (for making caramel)
- Wooden spoon or heat-resistant spatula (for stirring caramel)
- Baking sheet or large platter (for assembling and cooling slices)
- Parchment paper (keeps caramel from sticking and makes cleanup a breeze)
- Small bowls (for toppings—makes it easy for guests to grab and sprinkle)
- Toothpicks or skewers (optional, for serving)
If you don’t have a heavy-bottomed saucepan, any regular pot will do—just watch the heat more closely. I’ve tried making caramel in a nonstick pan, but a stainless steel pot gives you better control. For slicing apples, a basic chef’s knife works best, but a mandoline can make quick work if you’re prepping for a big crowd (just mind your fingers). Toothpicks are optional but make serving easier, especially for little hands. Budget tip: parchment paper is worth every penny—no stuck caramel messes!
Preparation Method
-
Prep the Apples: Wash and dry 4 large apples. Slice each apple vertically into 8 wedges (about 1 cm thick). Remove the core and seeds from each slice. Toss the slices in a bowl with 1 tablespoon lemon juice to help prevent browning. Set aside on a parchment-lined baking sheet.
Tip: If you notice apples browning quickly, pop slices in ice water with lemon for a few minutes, then pat dry. -
Make the Caramel: In a medium saucepan over medium heat, add 1 cup (200g) granulated sugar. Stir frequently until sugar melts and turns a golden amber color (about 5-7 minutes). Add 6 tablespoons (85g) unsalted butter and whisk until melted and combined. Slowly pour in ½ cup (120ml) heavy cream and stir. The mixture will bubble—don’t panic! Keep whisking until smooth. Add ¼ teaspoon sea salt (if using) and 1 teaspoon vanilla extract. Let caramel cook for 2-3 more minutes, then remove from heat.
Warning: Caramel is HOT! Don’t touch or taste until it cools slightly. -
Dip the Apple Slices: Working quickly, dip each apple slice halfway into the warm caramel. Let excess caramel drip off, then place back on parchment paper. If caramel thickens, return to low heat for 1-2 minutes.
Note: If caramel slides off, the apples may be too wet—pat dry again before dipping. -
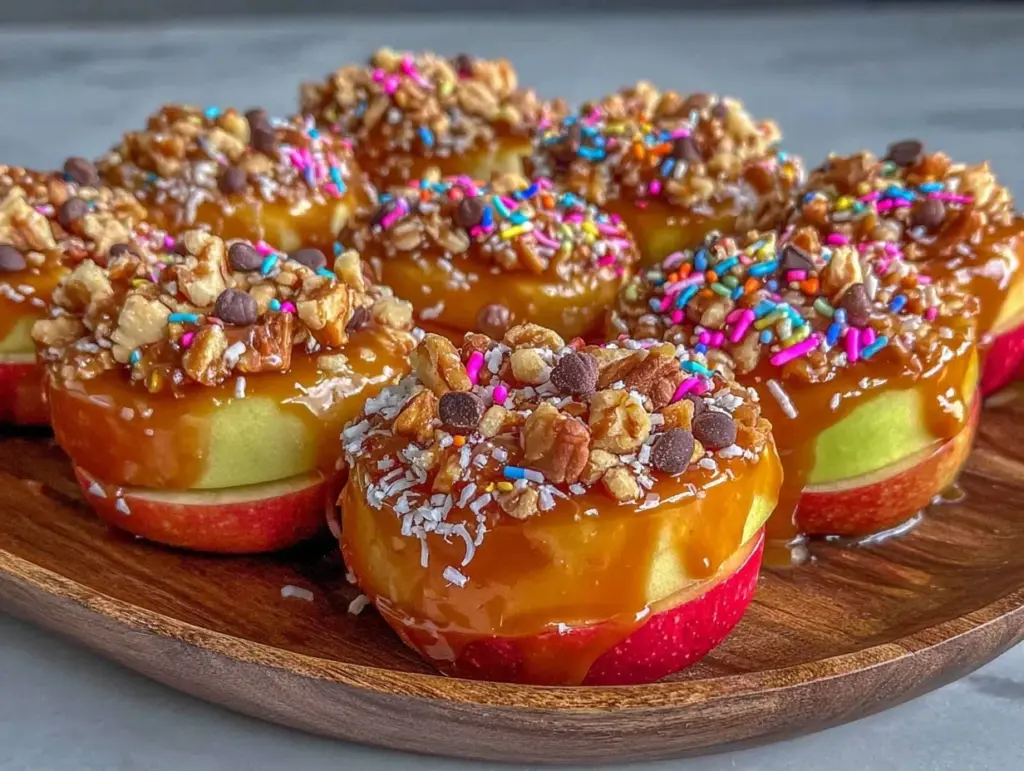
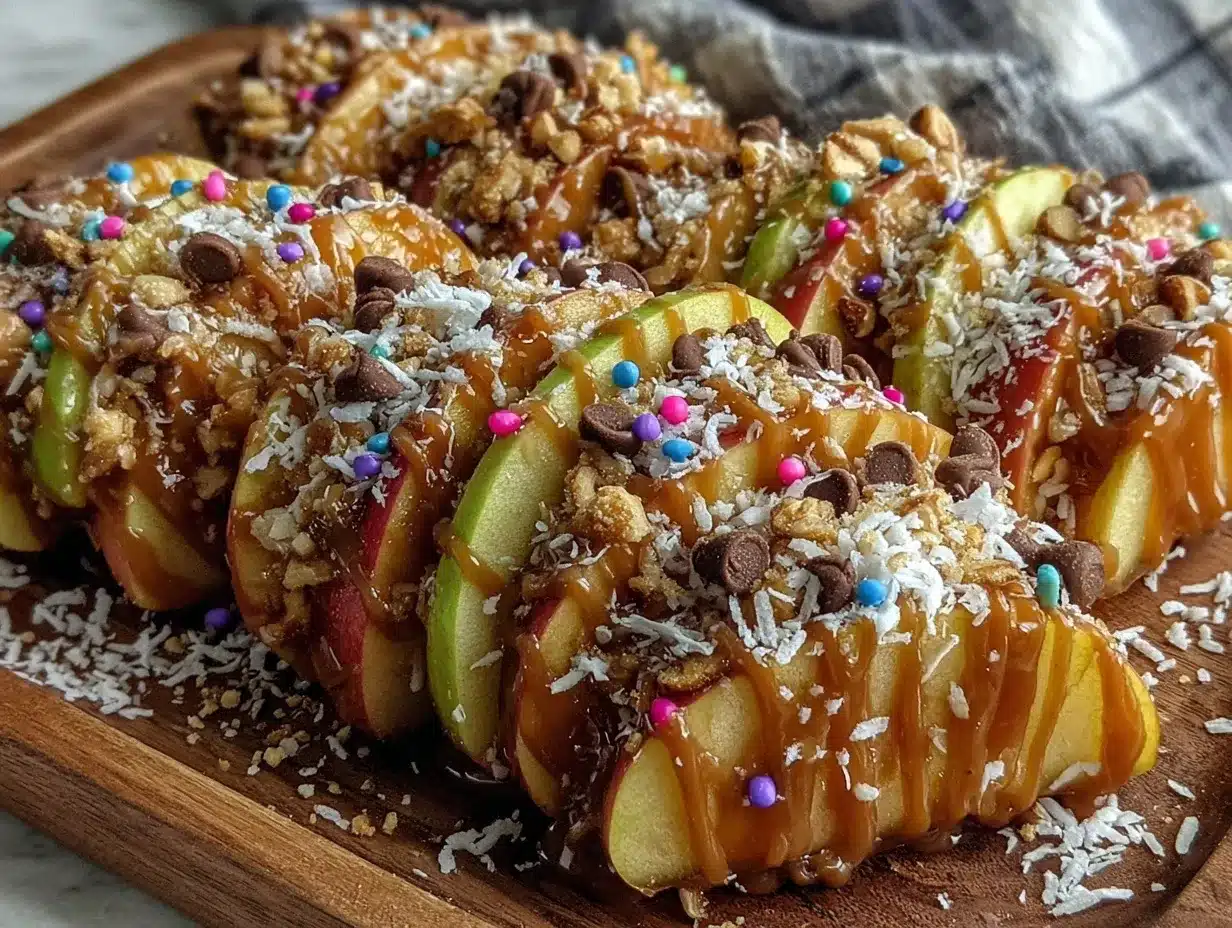
Add Toppings: Immediately sprinkle or press chosen toppings onto the caramel side of each slice. Try chopped nuts, chocolate chips, sprinkles, pretzel bits, mini marshmallows, toffee bits, coconut flakes, drizzled chocolate, crushed cookies, or dried cranberries (or any creative combo!).
Tip: Have toppings in small bowls for easy sprinkling and faster assembly. -
Cool & Serve: Let the caramel apple slices rest for 10-15 minutes, or until caramel sets. Slide toothpicks or skewers into each slice for easy serving, if desired.
Tip: If prepping ahead, store in a single layer in the fridge (see storage notes below).
If you run into trouble (like caramel that’s too thick or apples that won’t hold toppings), don’t stress. Add a splash more cream to thin caramel, and always dry apple slices before dipping. Efficiency tip: work assembly-line style—dip all the slices, then add toppings so caramel doesn’t harden before you’re done. The best part? You don’t need perfection—these look rustic, and that’s just part of their charm!
Cooking Tips & Techniques
Let’s talk about the tricks and lessons I’ve picked up after a few caramel disasters and topping experiments. Getting these caramel apple slices to party-perfect status isn’t hard, but a little know-how goes a long way.
- Caramel Consistency: The biggest mistake is letting caramel get too thick or cool too quickly. If it’s not spreading easily or seems grainy, just reheat gently and add a splash of cream to loosen. Don’t walk away from caramel on the stove—it can burn fast!
- Apple Prep: Dry apples are key. Water makes caramel slide right off, so after slicing, really pat them dry (paper towels work best). If you’re prepping ahead, toss in lemon juice and keep covered in the fridge.
- Topping Timing: Add toppings immediately after dipping; otherwise, the caramel sets and nothing sticks. I set up a “topping station” with small bowls so everyone can customize quickly.
- Assembly Line: Multitasking helps—get a friend or family member involved! One dips, one sprinkles, and you’ll be done in no time.
- Serving Style: Toothpicks or skewers make these easy to grab, especially for kids. If you’re fancy, arrange slices in a fan on a platter for a Pinterest-ready look.
- Personal Failures: I’ve burned caramel more than once (it turns bitter and unusable). If it smells burnt, start over—there’s no saving it. I’ve also tried skipping parchment paper… trust me, cleanup is a nightmare without it.
Consistency comes from practice, but honestly, this recipe is forgiving. As long as you follow the caramel cues (color, smoothness, bubbling), you’ll get beautiful, sticky results every time. Don’t worry if a few slices look messy—people love the homemade vibe!
Variations & Adaptations
Here’s where this recipe gets fun—there are so many ways to switch it up! Whether you’re dealing with allergies, seasonal fruit, or just craving something new, you can make these caramel apple slices your own:
- Dietary Variations: For vegan caramel, use coconut cream and dairy-free butter. Nut-free? Try sunflower seeds, crushed graham crackers, or allergy-friendly chocolate chips for crunch.
- Seasonal Twists: Use pears or peaches in summer for a lighter, fruitier version. In fall, sprinkle pumpkin spice or cinnamon sugar over the caramel for extra warmth.
- Flavor Boosts: Add a sprinkle of flaky sea salt to the caramel before dipping for salted caramel apple slices. Drizzle with melted white chocolate or dark chocolate for a double-dip effect.
- Cooking Methods: No stovetop? Microwave caramel using soft caramel candies and a splash of cream in 30-second bursts (stir between each). Works surprisingly well in a pinch!
- Texture Customization: For a chewier bite, let caramel cool a bit longer before dipping. For softer caramel, dip while it’s still warm and runny.
- Personal Favorite: My kids swear by the “s’mores” variation—drizzle with chocolate, top with mini marshmallows and crushed graham crackers. It’s a party favorite every time.
Don’t be afraid to mix and match—every party ends up with new favorites, and sometimes the wildest combos are the biggest hits! If you’ve got a creative topping idea, go for it.
Serving & Storage Suggestions
Serve these caramel apple slices chilled or at room temperature, arranged artfully on a platter or tiered tray (makes for a Pinterest-worthy presentation!). Toothpicks or skewers keep hands clean and make these easy for guests to grab. Pair with hot cider, coffee, or even a scoop of vanilla ice cream for a decadent treat.
If you’re making ahead, store slices in a single layer in an airtight container, separated by parchment paper. They’ll keep in the fridge for up to 24 hours—after that, the apples can soften and caramel may get sticky. For longer storage, freeze the slices on a tray, then transfer to a freezer-safe bag. Thaw in the fridge before serving.
Reheating isn’t usually necessary, but if caramel gets too hard, let slices sit at room temp for 10-15 minutes. The flavors actually deepen overnight, so leftovers (if you have any!) taste even richer the next day. Just don’t forget to hide a few for yourself!
Nutritional Information & Benefits
Each caramel apple slice (with toppings) averages about 80-120 calories, depending on the toppings you choose. Apples are high in fiber and vitamin C, making this treat a little less guilty than most party sweets. Homemade caramel means you control the sugar content, and using nuts or seeds adds healthy fats and protein.
For gluten-free diets, stick to nut, seed, or gluten-free cookie toppings. Vegan adaptations are easy with dairy-free caramel. The major allergens here are nuts, dairy, and some candy toppings—always double-check if you’re serving a crowd. From my own wellness perspective, these slices satisfy a sweet tooth without going overboard, and the apple’s crunch keeps portion sizes in check. It’s comfort food with a little extra goodness!
Conclusion
If you’re looking for a party treat that’s easy, fun, and totally irresistible, these caramel apple slices with toppings are a must-try. Whether you’re hosting a bash or just craving something sweet, this recipe brings everyone together—kids love to decorate, adults love to munch, and the flavor is pure nostalgia. I love how customizable these are; you can swap ingredients, add your favorite toppings, and make them fit any occasion.
Honestly, this caramel apple slices recipe is my go-to for celebrations, gifting, and cozy nights in. If you try it, let me know your favorite topping combos in the comments! Tag me on social if you make a Pinterest-worthy platter—I can’t wait to see your creations. Don’t be shy about making this your own. Wishing you sticky fingers and happy memories—now go grab those apples and start dipping!
FAQs About Caramel Apple Slices
How do I keep apple slices from turning brown?
Toss the slices in a little lemon juice right after cutting. You can also soak them briefly in ice water with lemon for extra assurance.
Can I use store-bought caramel for this recipe?
Absolutely! Melt soft caramel candies with a splash of cream in the microwave for a quick shortcut. Homemade caramel tastes richer, but store-bought works in a pinch.
What apples work best for caramel apple slices?
Granny Smith and Honeycrisp are my favorites—they’re crisp, tart, and hold up well to the caramel and toppings.
How far ahead can I make these for a party?
You can prep the slices and caramel up to 4 hours ahead. Store in the fridge in a single layer, separated by parchment paper. Add toppings right before serving for best results.
Can I make this recipe nut-free?
Yes! Skip nuts and use seeds, crushed cookies, or allergy-friendly chocolate chips for the toppings. Always check labels if you’re serving guests with allergies.
Pin This Recipe!

Caramel Apple Slices Easy Party Treats with 7 Best Toppings

These caramel apple slices are a quick, easy, and customizable party treat featuring crisp apples dipped in homemade caramel and topped with your favorite toppings. Perfect for gatherings, gifting, or cozy nights in, they deliver all the nostalgia of caramel apples without the mess.
- Prep Time: 15 minutes
- Cook Time: 10 minutes
- Total Time: 25 minutes
- Yield: 8 servings 1x
- Category: Dessert
- Cuisine: American
Ingredients
- 4 large Granny Smith apples (or Honeycrisp)
- 1 tablespoon lemon juice
- 1 cup granulated sugar
- 6 tablespoons unsalted butter, cut into cubes
- 1/2 cup heavy cream
- 1/4 teaspoon sea salt (optional)
- 1 teaspoon vanilla extract
- Chopped peanuts or pecans
- Mini chocolate chips
- Colorful sprinkles
- Crushed pretzels
- Mini marshmallows
- Toffee bits
- Coconut flakes
- Drizzled dark chocolate (melt 1/4 cup for drizzling)
- Crushed cookies (Oreo or graham cracker)
- Dried cranberries
Instructions
- Wash and dry 4 large apples. Slice each apple vertically into 8 wedges (about 1 cm thick). Remove the core and seeds from each slice. Toss the slices in a bowl with 1 tablespoon lemon juice to help prevent browning. Set aside on a parchment-lined baking sheet.
- In a medium saucepan over medium heat, add 1 cup granulated sugar. Stir frequently until sugar melts and turns a golden amber color (about 5-7 minutes). Add 6 tablespoons unsalted butter and whisk until melted and combined. Slowly pour in 1/2 cup heavy cream and stir. The mixture will bubble; keep whisking until smooth. Add 1/4 teaspoon sea salt (if using) and 1 teaspoon vanilla extract. Let caramel cook for 2-3 more minutes, then remove from heat.
- Working quickly, dip each apple slice halfway into the warm caramel. Let excess caramel drip off, then place back on parchment paper. If caramel thickens, return to low heat for 1-2 minutes.
- Immediately sprinkle or press chosen toppings onto the caramel side of each slice. Try chopped nuts, chocolate chips, sprinkles, pretzel bits, mini marshmallows, toffee bits, coconut flakes, drizzled chocolate, crushed cookies, or dried cranberries.
- Let the caramel apple slices rest for 10-15 minutes, or until caramel sets. Slide toothpicks or skewers into each slice for easy serving, if desired.
Notes
Dry apple slices thoroughly before dipping to help caramel stick. Add toppings immediately after dipping for best adhesion. For vegan caramel, use coconut cream and dairy-free butter. Nut-free and gluten-free options are available by swapping toppings. Store slices in a single layer in the fridge for up to 24 hours, separated by parchment paper. If caramel thickens, add a splash of cream and reheat gently.
Nutrition
- Serving Size: 1 caramel apple slic
- Calories: 100
- Sugar: 12
- Sodium: 40
- Fat: 5
- Saturated Fat: 3
- Carbohydrates: 15
- Fiber: 2
- Protein: 1
Keywords: caramel apple slices, party treats, easy dessert, caramel apples, apple snacks, kid-friendly, fall recipes, customizable toppings


