Let me tell you—there’s nothing quite like the sweet, nutty aroma of melted peanut butter swirling together with crushed Butterfinger bars in my kitchen. The first time I made this creamy Butterfinger pie, it was a rainy Saturday afternoon and I was hunting for a dessert that felt like a big hug (you know, the kind that makes you stop and just breathe in the smell). I remember sitting at the table, spoon in hand, staring at those glorious layers—chocolate, peanut butter, and that unmistakable Butterfinger crunch—thinking, “Why didn’t I discover this pie years ago?”
This recipe goes way back for me. My grandma used to stash Butterfinger bars in her candy dish, and I’d sneak into the kitchen whenever her back was turned. Years later, after experimenting with peanut butter pies for every family holiday, I stumbled on this combination at a bake sale and—honestly—was instantly hooked. It’s the kind of dessert you want to bring to every potluck, brighten up your Pinterest board, or surprise your kids with after school.
My family couldn’t stop sneaking slices off the cooling rack (and I can’t really blame them). Even my most dessert-skeptical cousin found herself hovering near the fridge for “just one more bite.” You know what? This creamy Butterfinger pie with peanut butter isn’t just dangerously easy—it’s pure, nostalgic comfort layered with irresistible crunch. I’ve tested it over and over (in the name of research, of course), and it’s become a staple for gatherings, gifting, or honestly, just treating myself. If you’re craving something that feels like a warm hug with every bite, you’re going to want to bookmark this one. It’s a creamy Butterfinger pie recipe you’ll make on repeat.
Why You’ll Love This Creamy Butterfinger Pie with Peanut Butter
- Quick & Easy: Comes together in under 30 minutes (plus chill time), perfect for last-minute celebrations or cravings.
- Simple Ingredients: No fancy grocery trips needed—most of these are pantry staples. You probably already have peanut butter, cream cheese, and a few Butterfinger bars hiding somewhere.
- Perfect for All Occasions: It’s a hit for potlucks, summer barbecues, weeknight desserts, or even holiday mornings when you need something sweet and show-stopping.
- Crowd-Pleaser: Adults rave about the creamy layers; kids go wild for the crunchy Butterfinger topping. It’s one of those rare desserts that never has leftovers.
- Unbelievably Delicious: The creamy peanut butter filling meets a chocolatey crust, all topped with a Butterfinger crunch—just thinking about it makes my mouth water.
What sets this creamy Butterfinger pie recipe apart? For starters, blending creamy peanut butter with tangy cream cheese gives it that extra-smooth texture (not too heavy, not too sweet). I use a touch of whipped cream to lighten the filling, and real Butterfinger pieces for the crunch you crave. Some recipes skip the peanut butter or use pudding mixes, but this one’s got layers that sing with flavor—no shortcuts.
Honestly, it’s the kind of dessert that makes you close your eyes after the first bite. It’s comfort food at its best—fast, fun, and absolutely soul-soothing. Whether you’re impressing guests (without breaking a sweat), treating your family, or just sneaking a late-night slice, this pie will turn a simple moment into something memorable. Trust me, you’ll want to save this recipe for every “just because” occasion.
What Ingredients You Will Need
This creamy Butterfinger pie recipe uses simple, wholesome ingredients to deliver bold flavor and a satisfying texture—no fuss, just pure deliciousness! Most of these items are pantry staples, and you can swap or substitute as needed to suit your tastes (or your grocery stash).
- For the crust:
- 20 chocolate sandwich cookies (such as Oreo), crushed (about 210g)
- 5 tablespoons unsalted butter, melted (70g)
- For the creamy peanut butter filling:
- 8 oz cream cheese, softened (226g)
- 1 cup creamy peanut butter (250g) (I recommend Jif or Skippy for best texture)
- 1 cup powdered sugar (120g)
- 1 teaspoon pure vanilla extract (5ml)
- 1 1/2 cups heavy whipping cream (360ml), cold
- For the Butterfinger crunch:
- 6 regular-size Butterfinger bars, chopped (about 300g total)
- 1/2 cup roasted peanuts, chopped (optional, adds extra crunch)
- For the topping:
- 1 cup whipped cream, homemade or store-bought (240ml)
- Extra Butterfinger crumbs for garnish
- Chocolate syrup or caramel drizzle (optional, but highly recommended!)
Ingredient notes & substitutions:
- Chocolate sandwich cookies: Use gluten-free cookies for a GF crust. Graham crackers work if you prefer a lighter base.
- Peanut butter: Creamy works best for a silky filling, but chunky adds texture if you like a surprise crunch.
- Cream cheese: Full-fat is best for richness, but reduced-fat works too.
- Butterfinger bars: Mini bars are fine—just adjust the quantity to total about 300g.
- Heavy cream: You can swap in dairy-free whipping cream if needed for allergies.
- Optional toppings: Chocolate syrup, caramel, and extra peanuts make this pie look extra Pinterest-worthy.
I’ve tried a few brands for the crust, and honestly, Double Stuf Oreos give the richest flavor. For peanut butter, Jif is my go-to (it’s perfectly smooth). If you’re making this pie in summer, adding fresh strawberries on top gives it a fun twist!
Equipment Needed
- 9-inch pie dish (glass or ceramic both work—metal chills faster for a firmer crust)
- Food processor or blender (for crushing cookies—if you don’t have one, a zip-top bag and rolling pin do the trick!)
- Mixing bowls (at least two; one for the crust, one for the filling)
- Electric mixer or stand mixer (makes whipping the cream a breeze, but you can use a sturdy whisk and some elbow grease in a pinch)
- Spatula (silicone is great for scraping every last bit of filling)
- Measuring cups and spoons
- Sharp knife (for chopping Butterfinger bars)
- Plastic wrap or pie lid (for storing leftovers—because you’ll want to save every crumb!)
If you’re working with a budget, a simple glass pie dish and a hand mixer are totally fine. I’ve made this recipe with a whisk more times than I can count, and honestly, it just adds to the fun (and maybe a mini arm workout). If you use a food processor for the crust, make sure to pulse gently—over-processing makes the crumbs too fine. For cleaning up sticky peanut butter, a little hot water and dish soap works wonders!
Preparation Method
- Make the crust:
- Crush 20 chocolate sandwich cookies in a food processor or place in a zip-top bag and bash with a rolling pin until fine crumbs.
- Pour crumbs into a mixing bowl and stir in 5 tablespoons melted butter until the mixture resembles wet sand.
- Press mixture firmly into the bottom and up the sides of a 9-inch pie dish.
- Chill in the refrigerator for at least 15 minutes while you prep the filling. (Tip: If you want a firmer crust, bake at 350°F/175°C for 8 minutes, then cool.)
- Prepare the creamy peanut butter filling:
- In a large bowl, beat 8 oz softened cream cheese with an electric mixer until smooth and fluffy (about 1 minute).
- Add 1 cup creamy peanut butter, 1 cup powdered sugar, and 1 teaspoon vanilla. Mix until everything’s smooth and well combined. (If it looks lumpy, keep mixing—sometimes peanut butter clings to the bowl!)
- In a separate bowl, whip 1 1/2 cups cold heavy cream until stiff peaks form (about 2-3 minutes). If using a stand mixer, start slow then ramp up speed.
- Fold whipped cream gently into peanut butter mixture using a spatula. (Go slow—overmixing will deflate the filling.)
- Add Butterfinger crunch:
- Chop 6 Butterfinger bars into bite-size pieces—don’t worry about perfection, a few crumbly bits are ideal!
- Fold half the chopped Butterfinger bars and 1/2 cup chopped peanuts (if using) into the filling. Save the rest for the top.
- Assemble the pie:
- Spoon the creamy peanut butter filling into the chilled crust, smoothing the top with a spatula.
- Sprinkle the remaining Butterfinger pieces evenly over the filling.
- Top with 1 cup whipped cream (spread or pipe for a fancy look) and extra Butterfinger crumbs.
- Drizzle chocolate syrup or caramel if desired.
- Chill and serve:
- Cover the pie with plastic wrap and refrigerate at least 4 hours, or overnight for best results. (This lets the flavors meld and makes the slices hold together perfectly.)
- To serve, slice with a sharp knife—run under hot water for cleaner cuts between slices.
Troubleshooting Tips: If the filling looks runny, check if the whipped cream was stiff enough. If crust crumbles, add a bit more melted butter. For extra crunch, freeze for 30 minutes before serving. Honestly, don’t stress—this pie is pretty forgiving!
Cooking Tips & Techniques
Here’s where experience really pays off! After making this creamy Butterfinger pie with peanut butter at least a dozen times (hey, it’s research, right?), I’ve picked up some tricks worth sharing:
- Chill the crust: Even if you’re tempted to skip this step, chilling (or briefly baking) the crust keeps it sturdy and prevents sogginess.
- Whip cream until stiff peaks: Soft peaks make a runny filling—look for peaks that stand straight up when you lift the beaters.
- Fold gently: Overmixing will deflate the whipped cream, making your pie less airy. Use a spatula and slow, sweeping motions.
- Chop Butterfingers coarsely: Big chunks add dramatic crunch and flavor bursts. Don’t pulverize—embrace those uneven bits!
- Layer for presentation: Reserve some Butterfinger and peanut bits for the top. It makes each slice look fancy and Pinterest-ready.
Common mistakes? I’ve made them all. Once, I forgot to chill the pie, and the slices fell apart—lesson learned! Another time, I used low-fat cream cheese and the filling tasted flat. Stick to full-fat for richness. For multitasking, I crush cookies and chop Butterfingers while the cream whips. Always taste the filling before assembling—sometimes a pinch of salt brings out the peanut butter magic.
If you want consistency every time, use a kitchen scale for measurements. And don’t fret about perfection; a little mess makes it more fun. Trust me, your creamy Butterfinger pie recipe will shine with these little tricks!
Variations & Adaptations
One of the best things about this creamy Butterfinger pie recipe is how versatile it is. You can tweak it for dietary needs, swap flavors, or just get creative on a whim.
- Gluten-Free Version: Use gluten-free chocolate sandwich cookies for the crust. The filling and topping are naturally gluten-free!
- Dairy-Free Adaptation: Swap cream cheese with dairy-free cream cheese and use coconut-based whipping cream. Even the Butterfingers have dairy-free options now (check specialty stores).
- Flavor Twist: Not a peanut butter fan? Try almond butter or cashew butter for a new flavor. Or mix in Nutella for a chocolate-hazelnut vibe!
- Seasonal Customization: In summer, top with fresh strawberries or blueberries. Fall calls for a sprinkle of sea salt and chopped pecans.
- Cooking Method: For a frozen pie, assemble as directed and freeze for 2-3 hours—so refreshing on a hot day.
- Allergen Substitutions: Use sunflower seed butter for a nut-free version. Omit peanuts and check Butterfinger labels for allergy info.
Honestly, my favorite twist is swapping peanut butter for almond butter and adding a layer of raspberry jam under the filling—a little sweet, a little tart, and totally addictive. Don’t be afraid to experiment; that’s half the fun of baking!
Serving & Storage Suggestions
This creamy Butterfinger pie with peanut butter is best served chilled, straight from the fridge. Slice with a sharp knife and wipe between cuts for those picture-perfect layers (you know, the kind that make your Pinterest followers swoon). Serve on colorful plates or with a drizzle of chocolate syrup for extra flair.
- Temperature: Always serve cold for the creamiest texture. If frozen, let thaw for 10 minutes before slicing.
- Pairings: Great with cold milk, iced coffee, or even a scoop of vanilla ice cream. Fresh berries or whipped cream on the side never hurt!
- Storage: Cover tightly with plastic wrap or a pie lid. Store in the refrigerator for up to 4 days—though it rarely lasts that long in my house.
- Freezer-friendly: Wrap slices individually and freeze for up to 2 months. Thaw overnight in the fridge before serving.
- Reheating: You don’t need to reheat, but if you like a slightly softer filling, leave at room temp for 15 minutes before eating.
- Flavor development: The Butterfinger flavor intensifies after a day in the fridge—honestly, leftovers are even better!
If you’re gifting, wrap in a fancy box or pie carrier. I’ve brought this pie to office parties and watched it disappear in minutes. It’s a sure-fire hit for any crowd!
Nutritional Information & Benefits
Here’s the scoop on what’s inside this creamy Butterfinger pie recipe (per slice, based on 10 servings):
- Calories: approximately 480
- Fat: 30g
- Carbohydrates: 45g
- Protein: 7g
- Sugar: 34g
Key benefits: Peanut butter adds healthy fats and protein, making each slice more satisfying. Real cream cheese and heavy cream give you calcium and a dose of comfort. Butterfinger bars bring joy and crunch, with a little childhood nostalgia mixed in.
This pie is naturally gluten-free if you use GF cookies, and can be made dairy-free with simple swaps. Watch for peanuts and dairy if you have allergies. Personally, I love knowing it’s balanced enough for a treat but still feels indulgent. Dessert shouldn’t just be fun—it should be worth every bite!
Conclusion
If you’re searching for a dessert that’s easy, creamy, and guaranteed to bring smiles, this creamy Butterfinger pie with peanut butter is it. Each slice delivers nostalgic crunch and dreamy layers—honestly, it’s my go-to for family gatherings and lazy weekends alike.
Feel free to make it your own! Swap nut butters, try new toppings, or add a layer of fruit for a twist. The best recipes are the ones you tweak to your tastes.
I love this pie because it always brings people together (and gets rave reviews, even from picky eaters). Go ahead—give it a try, leave a comment if you do, and share your personal adaptations. There’s nothing better than creating new traditions with a dessert this good.
Bookmark this creamy Butterfinger pie recipe, and let your kitchen be the place where sweet memories are made. Happy baking!
FAQs: Creamy Butterfinger Pie with Peanut Butter
Can I make creamy Butterfinger pie ahead of time?
Absolutely! Prepare and assemble the pie up to 24 hours in advance, cover tightly, and refrigerate. The flavors only get better as they meld overnight.
What’s the best way to crush Butterfinger bars?
Chop them coarsely with a sharp knife for big crunchy pieces. You can also pulse briefly in a food processor, but don’t overdo it—chunks give the best texture.
Can I use chunky peanut butter in this recipe?
Yes! Chunky peanut butter adds extra texture, but the filling won’t be quite as smooth. If you love little peanut bits, go for it.
How do I make this pie gluten-free?
Just swap in gluten-free chocolate cookies for the crust. All other ingredients are naturally gluten-free (check Butterfinger labels to be sure).
Can I freeze creamy Butterfinger pie?
Yes, you can! Wrap slices or the whole pie tightly and freeze for up to 2 months. Thaw in the fridge overnight before serving for the best texture.
Pin This Recipe!

Creamy Butterfinger Pie Recipe: Easy Peanut Butter Layers for the Best Crunch

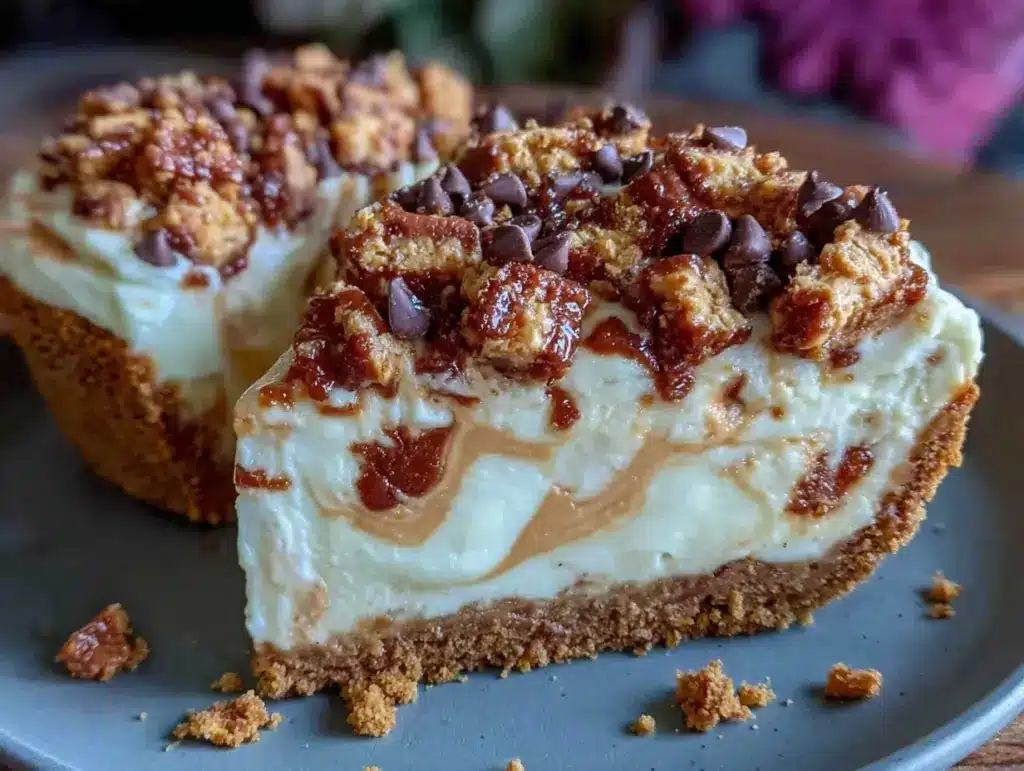
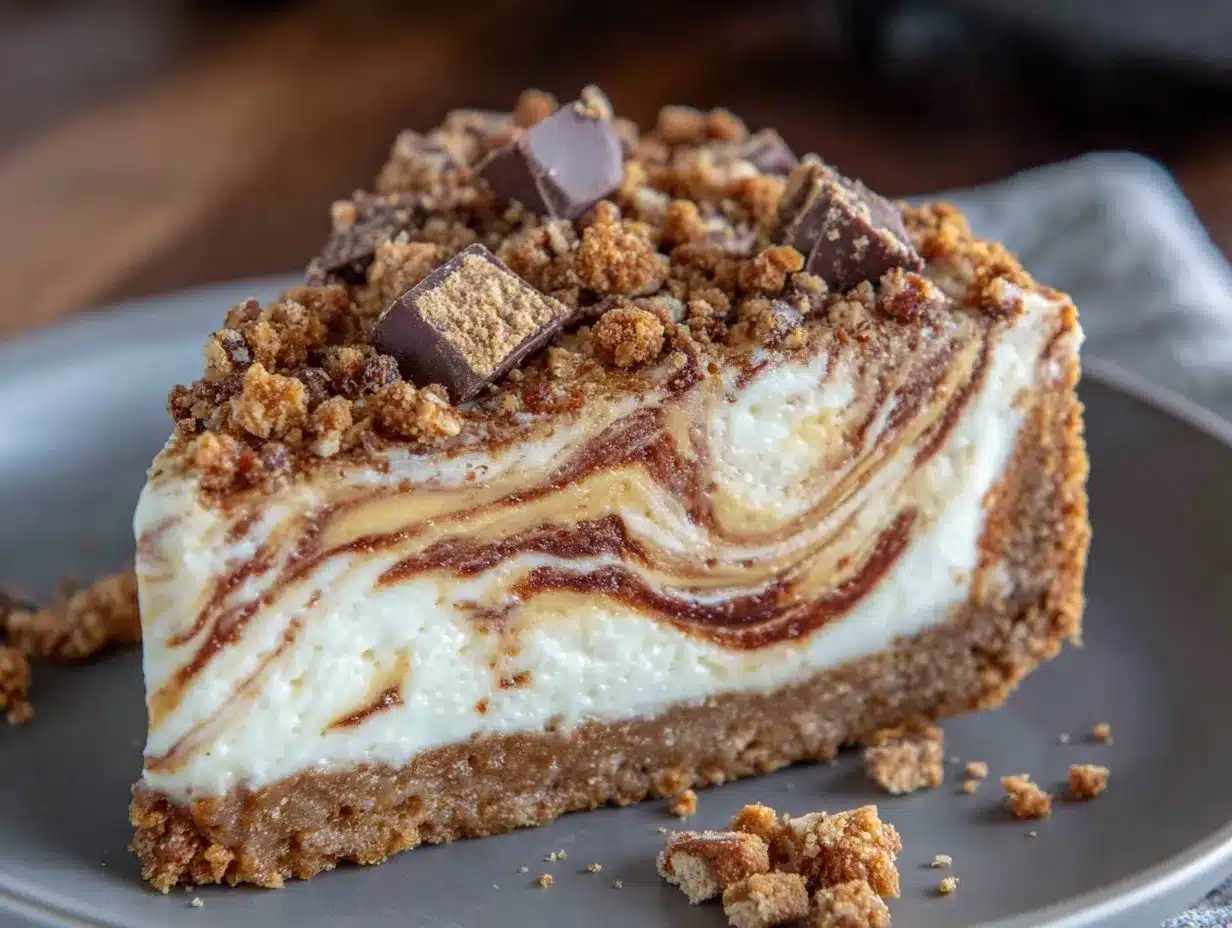
This creamy Butterfinger pie features a chocolate cookie crust, a silky peanut butter and cream cheese filling, and layers of crunchy Butterfinger bars. It’s an easy, nostalgic dessert perfect for gatherings, potlucks, or a comforting treat at home.
- Prep Time: 20 minutes
- Cook Time: 8 minutes (optional for crust)
- Total Time: 4 hours 30 minutes (includes chilling)
- Yield: 10 servings 1x
- Category: Dessert
- Cuisine: American
Ingredients
- 20 chocolate sandwich cookies (such as Oreo), crushed (about 210g)
- 5 tablespoons unsalted butter, melted (70g)
- 8 oz cream cheese, softened (226g)
- 1 cup creamy peanut butter (250g)
- 1 cup powdered sugar (120g)
- 1 teaspoon pure vanilla extract (5ml)
- 1 1/2 cups heavy whipping cream (360ml), cold
- 6 regular-size Butterfinger bars, chopped (about 300g total)
- 1/2 cup roasted peanuts, chopped (optional)
- 1 cup whipped cream, homemade or store-bought (240ml)
- Extra Butterfinger crumbs for garnish
- Chocolate syrup or caramel drizzle (optional)
Instructions
- Crush 20 chocolate sandwich cookies in a food processor or place in a zip-top bag and bash with a rolling pin until fine crumbs.
- Pour crumbs into a mixing bowl and stir in 5 tablespoons melted butter until the mixture resembles wet sand.
- Press mixture firmly into the bottom and up the sides of a 9-inch pie dish.
- Chill in the refrigerator for at least 15 minutes while you prep the filling. (Optional: Bake at 350°F for 8 minutes for a firmer crust, then cool.)
- In a large bowl, beat 8 oz softened cream cheese with an electric mixer until smooth and fluffy (about 1 minute).
- Add 1 cup creamy peanut butter, 1 cup powdered sugar, and 1 teaspoon vanilla. Mix until smooth and well combined.
- In a separate bowl, whip 1 1/2 cups cold heavy cream until stiff peaks form (about 2-3 minutes).
- Fold whipped cream gently into peanut butter mixture using a spatula.
- Chop 6 Butterfinger bars into bite-size pieces.
- Fold half the chopped Butterfinger bars and 1/2 cup chopped peanuts (if using) into the filling. Save the rest for the top.
- Spoon the creamy peanut butter filling into the chilled crust, smoothing the top with a spatula.
- Sprinkle the remaining Butterfinger pieces evenly over the filling.
- Top with 1 cup whipped cream and extra Butterfinger crumbs.
- Drizzle chocolate syrup or caramel if desired.
- Cover the pie with plastic wrap and refrigerate at least 4 hours, or overnight for best results.
- To serve, slice with a sharp knife—run under hot water for cleaner cuts between slices.
Notes
For a gluten-free version, use gluten-free chocolate sandwich cookies. Chill the crust for best results, and whip cream until stiff peaks for a stable filling. You can freeze the pie for a firmer texture or add fresh berries for a seasonal twist. If using chunky peanut butter, expect a more textured filling. The pie is freezer-friendly and tastes even better after a day in the fridge.
Nutrition
- Serving Size: 1 slice (1/10 of pie
- Calories: 480
- Sugar: 34
- Fat: 30
- Carbohydrates: 45
- Protein: 7
Keywords: Butterfinger pie, peanut butter pie, creamy pie, easy dessert, no bake pie, chocolate crust, potluck dessert, comfort food, nostalgic dessert, candy bar pie


