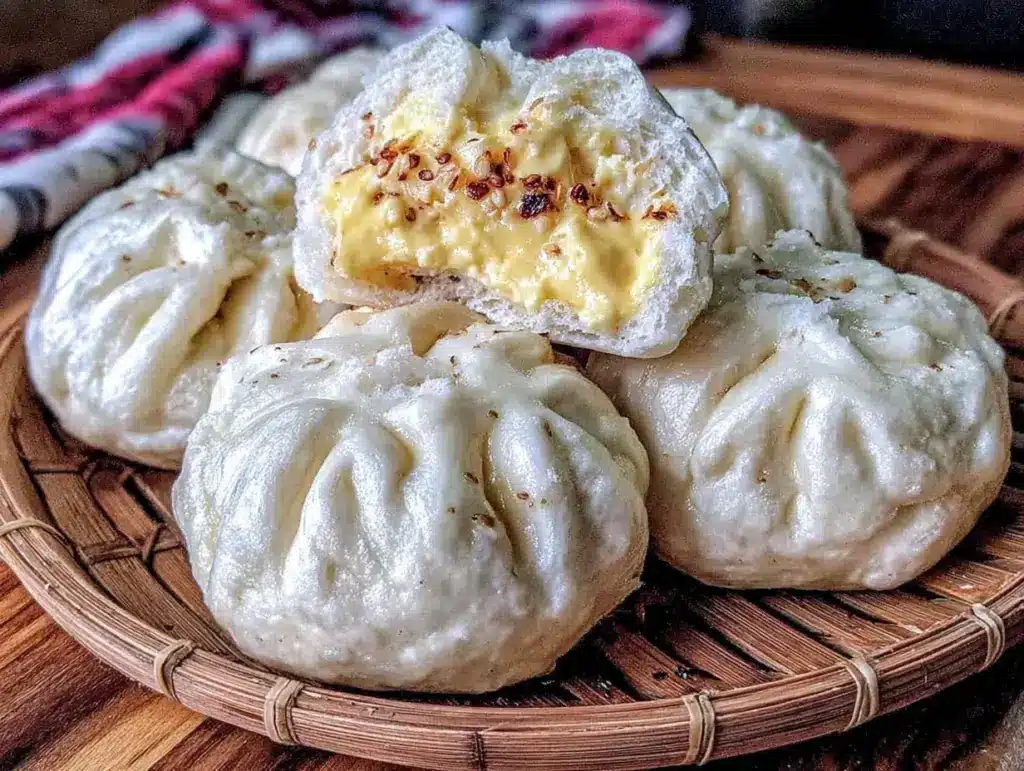
Let me tell you, the scent of warm, freshly baked custard buns wafting through the kitchen is enough to make anyone’s mouth water. The delicate aroma of vanilla mingles with the soft, pillowy dough that’s just begging to be torn apart and savored. The first time I baked these creamy custard buns with soft, fluffy dough, I was instantly hooked—the kind of moment where you pause, take a deep breath, and just smile because you know you’re onto something truly special.
Years ago, when I was knee-high to a grasshopper, my grandma used to make something similar, but nothing quite like these buns. I stumbled upon the recipe on a rainy weekend, trying to recreate that nostalgic comfort with a modern twist. Honestly, I wish I had discovered this creamy custard buns recipe earlier—it has since become a staple for family gatherings and weekend treats alike. My family couldn’t stop sneaking them off the cooling rack (and I can’t really blame them), proving that this recipe hits all the right notes.
These buns are dangerously easy to make, offering pure, nostalgic comfort perfect for a lazy afternoon tea, a sweet treat for your kids, or to brighten up your Pinterest cookie board. After testing the recipe multiple times in the name of research, of course, I can say with confidence that these creamy custard buns with soft, fluffy dough are going to be your new favorite indulgence. You’re definitely going to want to bookmark this one!
Why You’ll Love This Creamy Custard Buns Recipe
Honestly, this creamy custard buns recipe isn’t just good—it’s the kind that makes you close your eyes after the first bite. I’ve tried plenty of custard buns in my day, but this one stands out for a few reasons that I’m happy to share:
- Quick & Easy: Comes together in under 2 hours, including rising time, making it perfect for busy weeknights or last-minute cravings.
- Simple Ingredients: No fancy grocery trips needed; likely, you already have everything in your kitchen.
- Perfect for Brunch or Snack Time: These buns are a crowd-pleaser at potlucks, family breakfasts, or just as a comforting snack.
- Crowd-Pleaser: Kids and adults alike rave about the soft dough paired with smooth, creamy custard filling.
- Unbelievably Delicious: The texture and flavor combo is next-level comfort food, with the custard’s silky richness balanced by the dough’s airy fluffiness.
What makes this recipe different from the rest? It’s all in the dough and custard balance. The dough is tender and soft but sturdy enough to hold the luscious custard without getting soggy. The custard itself is homemade, creamy, and just sweet enough—not overpowering. Plus, the technique of folding and shaping the buns ensures each bite has that perfect custard center. It’s comfort food reimagined—faster, easier, but with the same soul-soothing satisfaction.
Whether you want to impress guests without stress or simply treat yourself to a little everyday luxury, these creamy custard buns with soft, fluffy dough will deliver every single time.
What Ingredients You Will Need
This recipe uses simple, wholesome ingredients to deliver bold flavor and satisfying texture without the fuss. Most of these are pantry staples, and substitutions are easy if needed.
- For the Dough:
- All-purpose flour – 3 ½ cups (440g), sifted (I prefer King Arthur for consistent texture)
- Active dry yeast – 2 ¼ teaspoons (one packet)
- Granulated sugar – ¼ cup (50g)
- Whole milk – 1 cup (240ml), warm (about 110°F/43°C)
- Unsalted butter – 4 tablespoons (55g), softened
- Large eggs – 2, room temperature
- Salt – ½ teaspoon
- For the Custard Filling:
- Whole milk – 1 ½ cups (360ml)
- Granulated sugar – ½ cup (100g)
- Egg yolks – 4 large
- Cornstarch – 3 tablespoons (24g) (for a smooth, thick custard)
- Unsalted butter – 2 tablespoons (28g), softened
- Pure vanilla extract – 1 teaspoon
Ingredient Tips: Look for fresh eggs and whole milk for the creamiest results. If dairy is a concern, you can swap whole milk for a full-fat coconut milk, and butter for coconut oil, but the flavor will subtly change. For gluten-free options, almond or oat flour won’t work the same here—stick with all-purpose or bread flour for the dough’s fluffiness.
Equipment Needed
- Mixing bowls – a large one for dough and a medium one for custard
- Stand mixer with dough hook (optional but makes kneading easier; otherwise, hand kneading works too)
- Whisk and spatula for custard preparation
- Measuring cups and spoons – for accuracy
- Small saucepan – to cook the custard gently
- Baking sheet lined with parchment paper
- Clean kitchen towel or plastic wrap – to cover dough while rising
If you don’t have a stand mixer, no worries! I’ve made these buns by hand plenty of times. Kneading by hand gives you a chance to feel the dough’s perfect softness and elasticity—just be patient. A silicone spatula works great for scraping the custard off the sides of the pan, and parchment paper keeps cleanup easy. Budget-friendly tip: a simple digital thermometer helps check milk temperature for yeast activation and custard cooking, but you can also test by feel.
Preparation Method
- Activate the Yeast (10 minutes): Warm 1 cup (240ml) of whole milk to about 110°F (43°C). Stir in 1 teaspoon sugar and sprinkle the 2 ¼ teaspoons of active dry yeast on top. Let it sit for 5-10 minutes until frothy and bubbly. This shows the yeast is alive and ready to work.
- Make the Dough (15 minutes): In a large mixing bowl or stand mixer, combine 3 ½ cups (440g) of sifted all-purpose flour, ¼ cup (50g) sugar, and ½ teaspoon salt. Add the activated yeast mixture, 2 large eggs, and 4 tablespoons (55g) softened unsalted butter. Mix until the dough starts to come together.
- Knead the Dough (10 minutes): Knead by hand on a floured surface or with a dough hook on medium speed for about 8-10 minutes. The dough should be smooth, elastic, and slightly tacky but not sticky. If it’s too sticky, add flour a tablespoon at a time. This step develops the gluten, giving the buns their signature fluffiness.
- First Rise (1 hour): Place the dough in a lightly greased bowl, cover with a clean towel or plastic wrap, and let it rise in a warm spot until doubled in size, about 1 hour. The dough will feel airy and soft when ready.
- Prepare the Custard Filling (20 minutes): While the dough is rising, whisk together 4 large egg yolks, ½ cup (100g) sugar, and 3 tablespoons (24g) cornstarch in a bowl until smooth. Heat 1 ½ cups (360ml) whole milk in a saucepan until just simmering. Slowly pour the hot milk into the egg mixture, whisking constantly to temper the eggs.
- Cook the Custard (5-8 minutes): Return the mixture to the saucepan and cook over medium-low heat, stirring constantly until it thickens and coats the back of a spoon. Remove from heat, stir in 2 tablespoons (28g) softened butter and 1 teaspoon vanilla extract. Transfer to a bowl, cover with plastic wrap directly on the surface to prevent skin, and chill until cool.
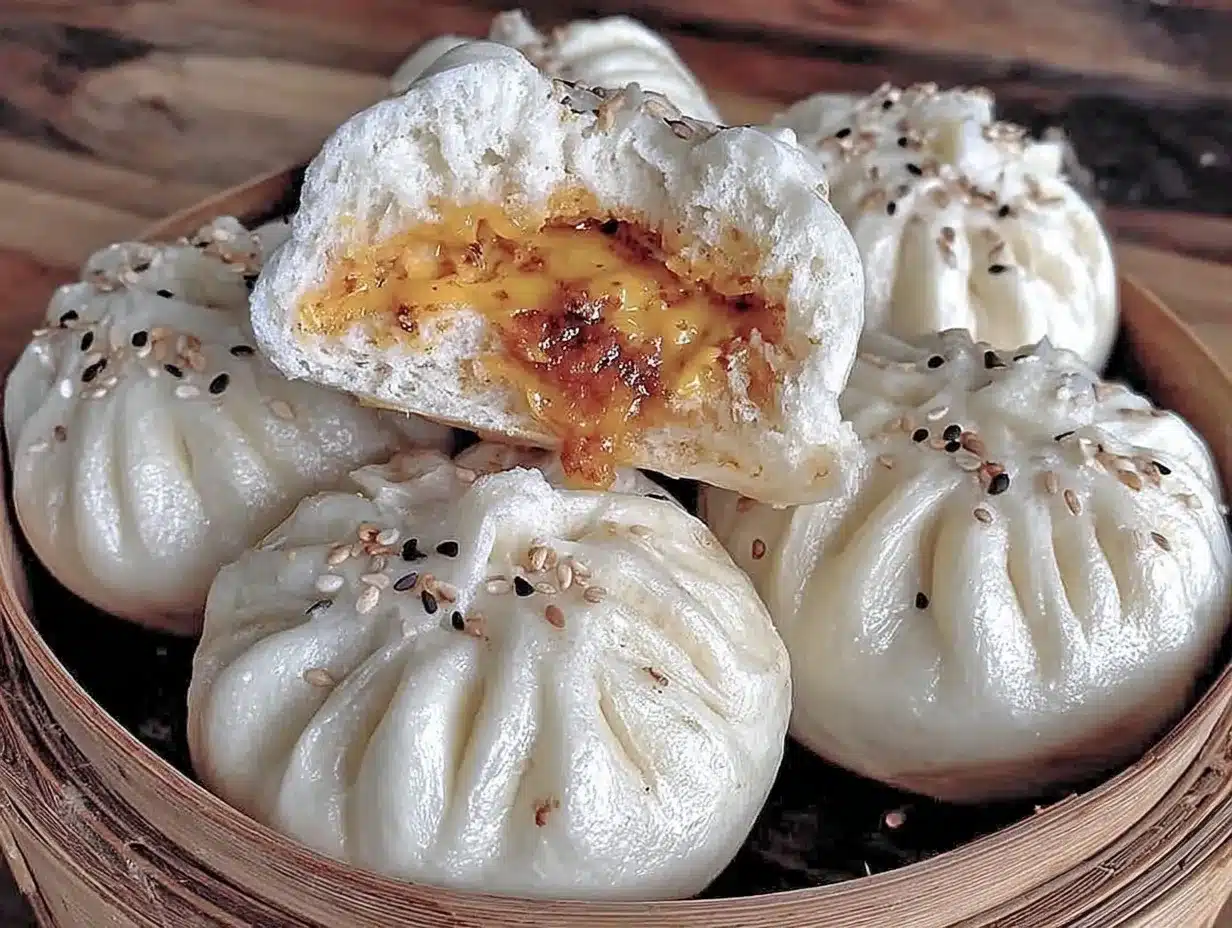
- Shape the Buns (15-20 minutes): Punch down the risen dough and divide into 12 equal pieces (about 70g each). Flatten each piece gently with your hands or rolling pin, place about 1 tablespoon of chilled custard in the center, then pinch the edges to seal the custard inside. Shape into smooth balls and place on a parchment-lined baking sheet, seam side down.
- Second Rise (30-40 minutes): Cover the shaped buns with a towel and let rise until puffy, about 30-40 minutes. Preheat your oven to 350°F (175°C) during the last 10 minutes of rising.
- Bake (15-18 minutes): Bake the buns at 350°F (175°C) until golden brown on top and cooked through. They should feel soft but slightly springy when pressed. Avoid over-baking to keep them tender.
- Cool and Serve: Let the buns cool for 10 minutes on a wire rack before eating. These buns are best enjoyed warm, when the custard filling is silky and the dough is at its fluffiest.
Pro Tip: Be gentle when sealing the buns; if the custard leaks, it can burn on the baking sheet. Also, chilling the custard well before filling helps it hold shape better inside the dough.
Cooking Tips & Techniques
Getting these creamy custard buns just right involves a few tricks I’ve learned after many kitchen experiments. One biggie: the temperature of your milk when activating yeast. Too hot, and you kill the yeast; too cold, and it won’t activate properly. Aim for about 110°F (43°C), warm to the touch like a cozy bath.
When kneading, don’t rush. The dough’s texture is your best friend here—it should stretch without tearing, a sign of good gluten development. If you’re hand-kneading, a little patience and elbow grease will pay off with a perfect rise.
For the custard, constant stirring is key to avoid lumps or scorching. Using a whisk helps keep things smooth. If lumps form, strain the custard before chilling. Also, covering the custard’s surface with plastic wrap while cooling prevents that annoying skin from forming.
Another tip: don’t skip the second rise after shaping the buns. That extra puff makes a huge difference in softness and fluffiness. And when baking, keep an eye on your oven—every oven runs a bit differently, so start checking around 15 minutes.
Finally, resist the urge to cut into the buns immediately after baking. Let them rest a bit to let the custard settle, making every bite creamy and dreamy.
Variations & Adaptations
You can easily tweak this creamy custard buns recipe to suit different preferences or dietary needs. Here are some ideas I’ve tried and loved:
- Dairy-Free Version: Use coconut milk or almond milk for the custard and swap butter for coconut oil. The custard texture is a bit different but still delightfully creamy.
- Chocolate Custard: Add 2 tablespoons of cocoa powder to the custard mixture before cooking. This gives a luscious chocolate surprise inside the soft bun.
- Fruit-Filled Buns: Mix in small diced fresh fruits like mango or berries into the custard before filling. In summer, this adds a fresh, tangy twist that’s irresistible.
- Gluten-Free Option: While tricky with this dough, using a gluten-free all-purpose blend designed for yeast breads can work. Just note the texture will be slightly different—less fluffy but still tasty.
- Overnight Rise: After the first knead, let the dough rise slowly overnight in the fridge. This deepens flavor and can fit better into a busy schedule.
One of my favorite personal twists is swirling in a little cinnamon into the dough before shaping. It adds a warm spice note that complements the vanilla custard beautifully. Feel free to experiment—you know your taste buds best!
Serving & Storage Suggestions
These creamy custard buns are best served slightly warm, fresh from the oven or gently reheated. They pair wonderfully with a cup of tea or coffee, making them a perfect breakfast or afternoon snack. For a little extra indulgence, dust them lightly with powdered sugar or brush with melted butter right after baking.
To store, keep the buns in an airtight container at room temperature for up to 2 days. For longer storage, freeze them individually wrapped for up to 1 month. When ready to enjoy, thaw at room temperature and warm in the oven at 300°F (150°C) for 5-7 minutes to bring back that soft, fluffy texture.
Flavors actually improve a bit after resting overnight, as the custard melds deeper into the dough. Just don’t forget to warm them gently before serving to bring out that dreamy creaminess again.
Nutritional Information & Benefits
Each creamy custard bun (based on 12 servings) contains approximately 230 calories, 6g fat, 35g carbohydrates, and 5g protein. The recipe balances indulgence with some nutritional value thanks to the eggs and milk, which provide protein, calcium, and essential vitamins.
The use of homemade custard means less processed sugar and no artificial additives compared to store-bought fillings. Plus, the high-quality ingredients like real butter and fresh eggs add wholesome goodness. While these buns are a treat, they fit well into a balanced diet when enjoyed in moderation.
For those watching carbs, the recipe isn’t low-carb, but you could experiment with low-carb flour blends for the dough if you’re adventurous. Just keep in mind the texture will differ.
Conclusion
There you have it—creamy custard buns with soft, fluffy dough that bring a little slice of bakery magic into your kitchen. This recipe is worth trying because it’s approachable, satisfying, and has that nostalgic comfort that keeps people coming back for more. Customize it with your favorite flavors or keep it classic—the result is always delicious.
I love these buns because they remind me of family, cozy weekends, and the simple joy of sharing a homemade treat. Now it’s your turn to make this recipe your own. Go ahead, give it a whirl, and don’t forget to share your thoughts or any tasty twists you try in the comments. Happy baking!
FAQs About Creamy Custard Buns with Soft, Fluffy Dough
How can I tell if the dough has risen enough?
The dough should double in size and feel airy to the touch. Press lightly with your finger—if the indentation stays, it’s ready for the next step.
Can I use instant yeast instead of active dry yeast?
Yes! Use about 25% less instant yeast and mix it directly with the flour. Adjust rising times as instant yeast works faster.
What if my custard is lumpy?
Strain the custard through a fine mesh sieve to remove lumps. Whisk well while cooking next time to prevent lumps from forming.
Can these buns be made ahead of time?
Absolutely. You can shape and freeze the buns before the second rise. When ready, thaw and let them rise before baking.
How do I keep the buns soft after baking?
Store in an airtight container once cooled. Reheat gently in the oven or microwave wrapped in a damp paper towel to restore softness.
Pin This Recipe!
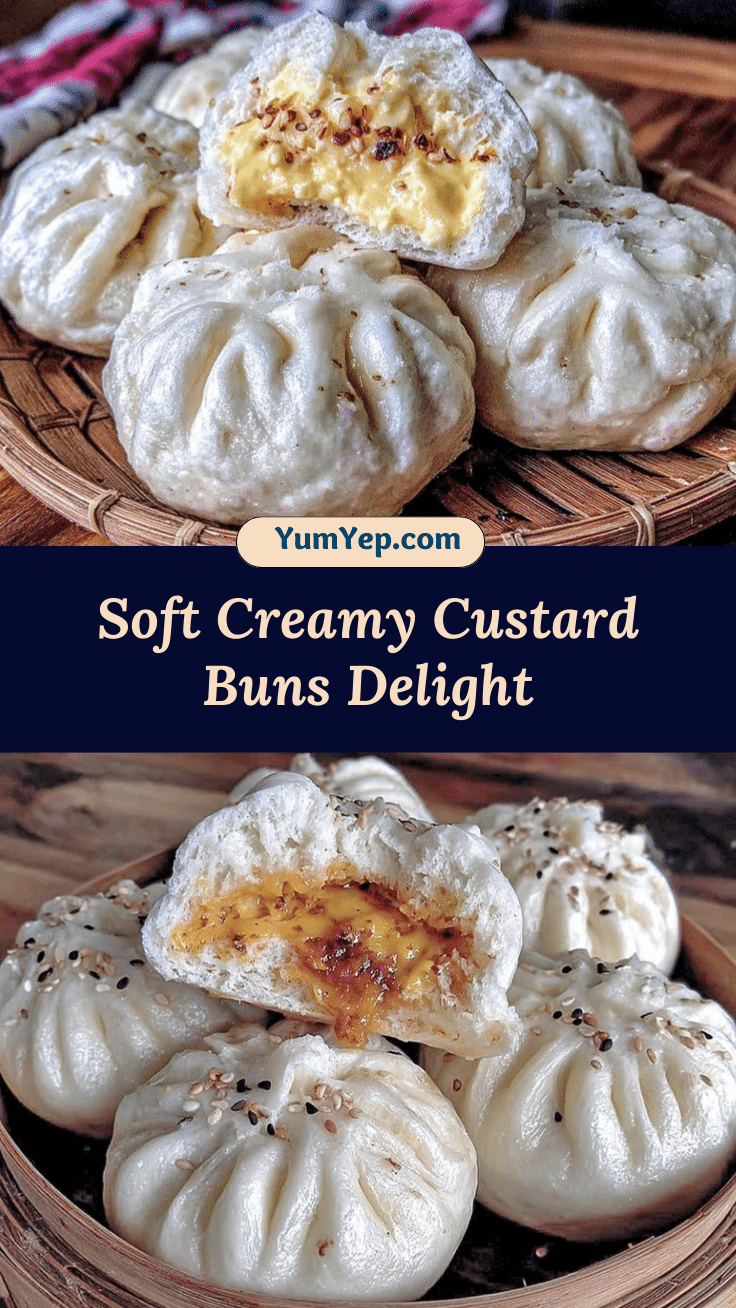
Creamy Custard Buns Recipe Easy Soft Fluffy Dough Tutorial

Soft, fluffy buns filled with smooth, creamy homemade custard. Perfect for brunch, snacks, or a comforting treat with a nostalgic twist.
- Prep Time: 35 minutes
- Cook Time: 18 minutes
- Total Time: 1 hour 53 minutes
- Yield: 12 servings 1x
- Category: Snack
- Cuisine: Asian-inspired Bakery
Ingredients
- 3 ½ cups (440g) all-purpose flour, sifted
- 2 ¼ teaspoons active dry yeast (one packet)
- ¼ cup (50g) granulated sugar
- 1 cup (240ml) whole milk, warm (about 110°F/43°C)
- 4 tablespoons (55g) unsalted butter, softened
- 2 large eggs, room temperature
- ½ teaspoon salt
- 1 ½ cups (360ml) whole milk (for custard)
- ½ cup (100g) granulated sugar (for custard)
- 4 large egg yolks
- 3 tablespoons (24g) cornstarch
- 2 tablespoons (28g) unsalted butter, softened (for custard)
- 1 teaspoon pure vanilla extract
Instructions
- Activate the yeast: Warm 1 cup (240ml) whole milk to about 110°F (43°C). Stir in 1 teaspoon sugar and sprinkle 2 ¼ teaspoons active dry yeast on top. Let sit 5-10 minutes until frothy.
- Make the dough: In a large bowl or stand mixer, combine 3 ½ cups sifted flour, ¼ cup sugar, and ½ teaspoon salt. Add activated yeast mixture, 2 eggs, and 4 tablespoons softened butter. Mix until dough forms.
- Knead the dough: Knead by hand or with dough hook for 8-10 minutes until smooth, elastic, and slightly tacky but not sticky. Add flour if too sticky.
- First rise: Place dough in greased bowl, cover, and let rise in warm spot until doubled, about 1 hour.
- Prepare custard filling: Whisk 4 egg yolks, ½ cup sugar, and 3 tablespoons cornstarch until smooth. Heat 1 ½ cups milk until simmering. Slowly pour hot milk into egg mixture, whisking constantly to temper eggs.
- Cook custard: Return mixture to saucepan, cook over medium-low heat stirring constantly until thickened. Remove from heat, stir in 2 tablespoons butter and 1 teaspoon vanilla. Cover surface with plastic wrap and chill until cool.
- Shape buns: Punch down dough, divide into 12 pieces (~70g each). Flatten each piece, place 1 tablespoon chilled custard in center, pinch edges to seal, shape into balls. Place seam side down on parchment-lined baking sheet.
- Second rise: Cover buns and let rise until puffy, 30-40 minutes. Preheat oven to 350°F (175°C) during last 10 minutes.
- Bake: Bake buns at 350°F (175°C) for 15-18 minutes until golden and cooked through. Avoid over-baking.
- Cool and serve: Cool buns on wire rack for 10 minutes. Serve warm for best custard texture.
Notes
Use fresh eggs and whole milk for creamiest custard. Chilling custard before filling helps it hold shape. Be gentle sealing buns to avoid custard leaks. Let buns rest after baking for best texture. Milk temperature for yeast activation should be about 110°F (43°C).
Nutrition
- Serving Size: 1 bun
- Calories: 230
- Fat: 6
- Carbohydrates: 35
- Protein: 5
Keywords: custard buns, creamy custard, soft buns, fluffy dough, homemade custard, easy baking, sweet buns, snack recipe


