Let me set the scene for you: the scent of rich chocolate pudding and sweet vanilla wafting through my kitchen, Oreo crumbs dusting my countertops, and tiny cookie “tombstones” standing tall in their creamy, chocolatey graveyard. The first time I made these Creamy Graveyard Dirt Pudding Cups for Halloween, the anticipation was downright magical. You know that feeling when you’re mixing up something so fun and nostalgic, you can’t help but grin? That was me, spooning in layers, sneaking tastes (in the name of research, of course), and watching my kids’ eyes grow wide as the spooky scene came together.
Honestly, I was instantly hooked by how easy these pudding cups are to put together. Years ago, when I was knee-high to a grasshopper, my grandma used to bring “dirt cake” to potlucks, but these single-serve graveyard cups are even more fun to decorate—and way less mess at serving time. The kind of moment where you pause, take a deep breath, and just smile because you know you’re onto something truly special. My family couldn’t stop sneaking them off the tray before the party started (and I can’t really blame them!). The playful tombstone cookies, the gummy worms peeking out of the “soil,” and that velvety pudding base—pure, nostalgic comfort.
Let’s face it, these Creamy Graveyard Dirt Pudding Cups are dangerously easy and always a hit at Halloween gatherings. They’re perfect for potlucks, classroom parties, or just to brighten up your Pinterest board with a spooky treat. I wish I’d stumbled on this idea years ago—it’s now a staple for family get-togethers, gifting, and the occasional midnight snack. Every batch feels like a warm hug with a mischievous wink, and you’re going to want to bookmark this one (trust me) for Halloween seasons to come!
Why You’ll Love These Creamy Graveyard Dirt Pudding Cups
I’ve made dozens of Halloween desserts over the years, but these pudding cups are the one recipe everyone asks about. Here’s why you’ll love making—and eating—them:
- Quick & Easy: Comes together in under 30 minutes. Perfect for busy parents or last-minute party prep.
- Simple Ingredients: No specialty shopping needed. Most items are pantry or grocery store staples.
- Perfect for Halloween Parties: Looks spooky and festive, but isn’t complicated. Kids love decorating their own cups!
- Crowd-Pleaser: Adults are just as obsessed as the little ones. Expect rave reviews and requests for seconds.
- Unbelievably Delicious: Creamy pudding, crunchy cookie “dirt,” and fun toppings make a texture and flavor combo that’s next-level comfort food.
What sets this recipe apart is the layering technique—by blending cream cheese and whipped topping into the pudding, you get a luscious, mousse-like texture (not just ordinary pudding). Plus, the Oreo crumb “soil” stays crunchy and creates the perfect backdrop for all your spooky decorations. I’ve tried a bunch of variations, but this one nails the balance of rich chocolate with a hint of vanilla creaminess.
Honestly, these pudding cups are more than just good—they’re the kind that make you close your eyes after the first bite. There’s something so satisfying about the contrast of creamy pudding and cookie crunch, with a playful gummy worm or candy pumpkin for good measure. Whether you’re impressing guests without stress, or turning a simple weeknight into something memorable, these Creamy Graveyard Dirt Pudding Cups have your back. Comfort food reimagined for Halloween, but with all the soul-soothing nostalgia that keeps you coming back for more!
What Ingredients You Will Need
This recipe uses simple, wholesome ingredients to deliver bold flavor and spooky, satisfying texture—without any fuss. Most are pantry staples (so you’re likely halfway there already!), and you can swap in a few goodies for dietary needs or extra flair.
- For the Pudding Layers:
- Chocolate instant pudding mix (5.1 oz box, or 145g)
- Cold whole milk (3 cups, 710ml—makes pudding extra creamy)
- Cream cheese (8 oz, 226g, softened—adds richness and tang)
- Powdered sugar (1/2 cup, 60g—for a hint of sweetness)
- Vanilla extract (1 tsp, 5ml—for depth of flavor)
- Whipped topping (Cool Whip, 8 oz tub, 226g, thawed—feel free to use homemade whipped cream!)
- For the “Dirt” Layer:
- Oreo cookies (20 cookies, roughly 200g, crushed—double-stuffed works best for extra “soil” texture)
- For Decoration:
- Gummy worms (about 8-12, depending on cup size)
- Milano cookies or graham cracker “tombstones” (8-12, for gravestone effect)
- Black decorating gel or melted chocolate (for writing “RIP” on tombstones)
- Candy pumpkins or bone-shaped sprinkles (optional, for extra Halloween flair)
Ingredient Tips: If you want gluten-free dirt pudding cups, swap Oreos for gluten-free chocolate sandwich cookies. For dairy-free pudding, use coconut milk and non-dairy cream cheese. I recommend Philadelphia cream cheese for the smoothest texture and Ghirardelli cocoa powder (if you want to boost the chocolate flavor by adding a tablespoon to the pudding mix—trust me, I’ve tried it!).
In the summer, you can trade the gummy worms for fresh berries for a “haunted garden” vibe. If you’re making these for a classroom party, stick to nut-free candies and toppings. Honestly, the fun is in mixing and matching—so don’t stress if you need to substitute here or there!
Equipment Needed
- Medium mixing bowls (at least 2—one for pudding, one for cream cheese mixture)
- Electric hand mixer or stand mixer (makes blending cream cheese a breeze; a whisk works in a pinch)
- Measuring cups and spoons (for accuracy)
- Rubber spatula (for folding in whipped topping and scraping down the bowl)
- Zip-top bag or food processor (to crush Oreo cookies—rolling pin works too!)
- 8-12 clear plastic or glass cups (6-8 oz, 180-240ml, for serving)
- Small spoons (for layering and serving)
If you don’t have a hand mixer, just let the cream cheese soften a bit longer and beat it with a sturdy whisk—it’ll take some elbow grease, but it works. I’ve used regular drinking glasses for serving, but clear cups make the layers pop for Pinterest photos. Food processors make Oreo crushing easy, but a zip-top bag and rolling pin do the job (and are less hassle to clean).
Tip: If you’re making a big batch, use a piping bag for the pudding layers—it’s faster and less messy. I love my budget-friendly hand mixer for jobs like this; just wipe the beaters clean right after so the cream cheese doesn’t stick.
Preparation Method
- Make the Chocolate Pudding: In a large mixing bowl, whisk together 5.1 oz (145g) chocolate pudding mix and 3 cups (710ml) cold whole milk. Whisk for 2 minutes until thickened. Set aside to let it set (about 5 minutes).
- Prepare the Cream Cheese Layer: In another bowl, beat 8 oz (226g) softened cream cheese with 1/2 cup (60g) powdered sugar and 1 tsp (5ml) vanilla extract using an electric mixer. Mix until smooth—no lumps! If you see stubborn chunks, let the cream cheese sit at room temperature a bit longer.
- Fold in Whipped Topping: Gently fold in 8 oz (226g) whipped topping into the cream cheese mixture. Use a rubber spatula and go slow—overmixing makes it runny. The mixture should be light and fluffy.
- Combine Layers: Add half the chocolate pudding to the cream cheese mixture, folding gently until just combined. Then fold in the remaining pudding. You want a mousse-like consistency; if it looks too thin, chill for 10 minutes.
- Crush Oreo Cookies: Place 20 Oreo cookies (200g) in a zip-top bag and crush with a rolling pin until you have fine crumbs. (Or pulse in a food processor.) A few chunky bits are fine—they add texture.
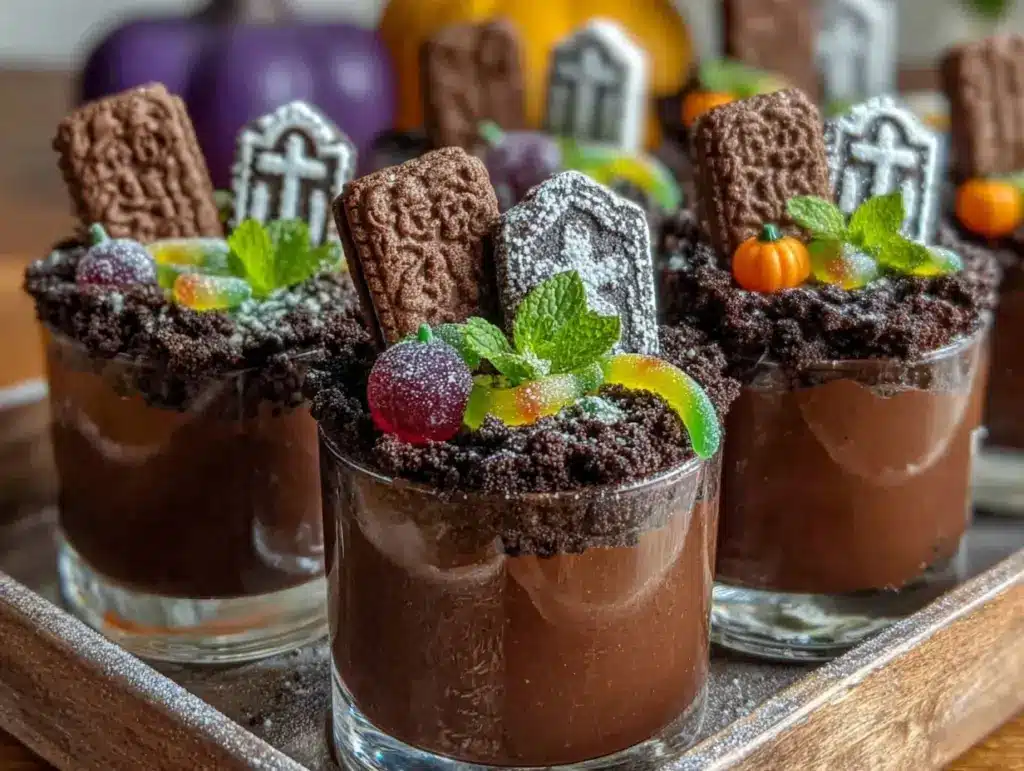
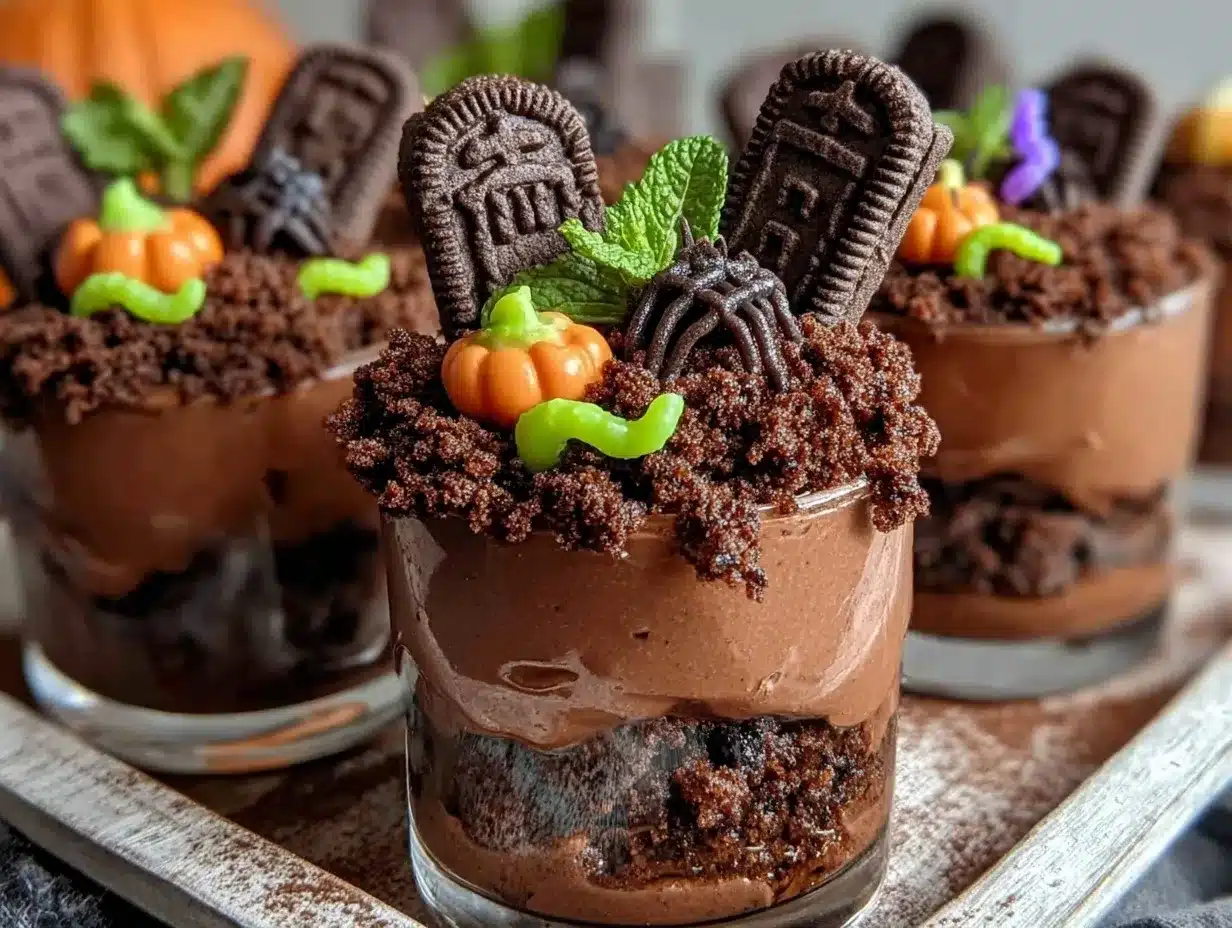
- Layer the Cups: Spoon 2 tablespoons (~25g) of Oreo crumbs into the bottom of each cup. Add a generous layer of pudding mixture (about 1/2 cup, 120ml). Top with another layer of Oreo crumbs (about 1 tablespoon, 12g). Repeat layers if your cups are tall—finish with Oreo “dirt” on top.
- Decorate: Stick a Milano or graham cracker “tombstone” upright into each cup. Write “RIP” on each with black gel or melted chocolate (let your creativity shine—spooky faces, bats, or names!). Add 1-2 gummy worms and candy pumpkins for a playful graveyard look.
- Chill Before Serving: Refrigerate cups for at least 1 hour to set layers and let flavors meld. If making ahead, cover loosely with plastic wrap.
Notes and Troubleshooting: If your cream cheese mixture is lumpy, keep mixing until smooth. If pudding is too runny, chill longer or add a bit less milk next time. For extra spooky effect, tint whipped topping with a drop of green gel food coloring—it’s a fun trick for Halloween parties! And don’t sweat if your layers aren’t perfect; a little messiness adds to the graveyard charm.
Pro tip: Work assembly-line style—line up cups, layer crumbs and pudding, then decorate together. I always let my kids help with toppings; their “creative chaos” is half the fun!
Cooking Tips & Techniques
- Blend for Creaminess: Make sure your cream cheese is truly softened before beating—cold cream cheese leads to lumps, and nobody wants a lumpy graveyard.
- Cookie Crushing: Don’t pulverize the Oreos too much; a little chunkiness adds texture. I learned the hard way after turning cookies into powder—less is more.
- Avoid Overmixing: Fold whipped topping gently so you don’t lose the fluff. If you rush, the pudding mixture can get soupy (been there, done that).
- Layering Efficiency: Use a piping bag or zip-top bag with the corner snipped to layer pudding; it’s faster and less messy than spoons, especially with little helpers around.
- Decoration Tips: Write on the tombstone cookies before sticking them in the pudding—if you do it after, the gel can smudge. I once made a batch where every “RIP” turned into a runny mess! Let writing set for a minute, then assemble.
- Timing: Assemble cups up to 24 hours ahead, but decorate right before serving for best texture. Gummies can get soggy if left overnight.
Common mistakes? Using warm pudding (makes the whipped topping melt) or packing layers too tightly (looks less graveyard-like). If your pudding cups look “muddy,” sprinkle extra Oreo crumbs on top—it covers a multitude of decorating sins.
Multitasking tip: While pudding sets, prep toppings and crush cookies. Get all the parts ready, then layer assembly-line style. The more you make these, the quicker it goes!
Variations & Adaptations
- Gluten-Free Version: Swap regular Oreos for gluten-free chocolate sandwich cookies. Use gluten-free graham crackers for tombstones.
- Dairy-Free Adaptation: Use non-dairy pudding mix, coconut milk, plant-based cream cheese, and coconut whipped topping. Gummy worms are usually dairy-free, but check labels for allergens.
- Flavor Twist: Try vanilla pudding instead of chocolate for a “ghostly graveyard” look. Add a layer of strawberry jam for “bloody” effect (kids love it!).
- Seasonal Swap: Mix in fresh raspberries or blueberries for a haunted garden vibe. In winter, sprinkle crushed peppermint candy on top!
- Low-Sugar Option: Use sugar-free pudding and light whipped topping. Substitute Oreo Thins or sugar-free cookies for the dirt layer.
If you want to use a different cooking method, make a large “graveyard dirt cake” in a casserole dish and scoop into cups for serving. For adults, add a splash of coffee liqueur to the pudding for a grown-up Halloween treat (just keep those out of reach of the kiddos!).
Personal note: Once, I swapped the gummy worms for little chocolate frogs—my kids thought it was the best “graveyard invasion” ever. Get creative with toppings; there are no rules in spooky dessert land!
Serving & Storage Suggestions
Serve these Creamy Graveyard Dirt Pudding Cups chilled for best texture. I love presenting them on a dark tray lined with cobweb decorations—really amps up the Halloween vibe. Add a few candy bones or pumpkins for color, and pair with apple cider or hot cocoa for a cozy treat.
If you’re prepping ahead, cover cups loosely with plastic wrap and refrigerate for up to 2 days. For classroom parties, assemble and chill the cups, then add toppings right before serving. They can also be frozen (without decorations) for up to 2 weeks—just thaw overnight in the fridge.
Reheating isn’t needed (these are best cold), but if you want a warmer treat, let cups sit at room temperature for 15-20 minutes. Flavors deepen as the pudding chills, and the cookie “dirt” softens a bit, so leftovers are still delicious the next day. Honestly, I think they taste even better after a night in the fridge!
Nutritional Information & Benefits
Each Creamy Graveyard Dirt Pudding Cup serves up approximately:
- Calories: 280-320 (varies with toppings)
- Fat: 11g
- Carbohydrates: 42g
- Protein: 4g
- Sugar: 30g
Chocolate pudding and cream cheese provide a calcium boost, and the recipe can be adapted for gluten-free or dairy-free diets with simple swaps. Watch out for allergens in cookies and gummies (gluten and dairy most common). If you’re making these for a group, check ingredient labels for nuts or soy.
From a personal wellness perspective, these pudding cups are a treat—meant to be enjoyed for special occasions. A little portion control goes a long way, and the joy they bring is worth every spoonful (especially when shared with friends and family)!
Conclusion
If you’re searching for an easy, crowd-pleasing Halloween dessert, these Creamy Graveyard Dirt Pudding Cups are the answer. They’re fun to make, even more fun to decorate, and deliver the nostalgic comfort of classic dirt pudding with a spooky twist. Go wild with toppings, swap in ingredients you love, and make these your own—there’s no wrong way to build a graveyard!
Honestly, this is one of my favorite recipes because it brings everyone together—kids, adults, you name it. The smiles (and sticky fingers) are proof enough. Don’t forget to leave a comment below if you try these, share your decorating ideas, or tag me with your Pinterest-ready creations. Wishing you a Halloween full of laughs, chills, and creamy, chocolatey goodness!
FAQs
Can I make Creamy Graveyard Dirt Pudding Cups ahead of time?
Absolutely! Make them up to 2 days ahead, but add gummy worms and candy toppings right before serving for best texture.
Can I use homemade pudding instead of instant?
Yes, homemade pudding works great. Just make sure it’s fully chilled and thick before layering to avoid runny cups.
Are these safe for nut allergies?
Most ingredients are nut-free, but always check labels on cookies and candies. Swap for nut-free brands if needed for classroom parties.
Can I make these gluten-free?
Definitely! Use gluten-free chocolate sandwich cookies and gluten-free graham crackers for decoration. All other ingredients are naturally gluten-free.
What’s the best way to crush Oreo cookies?
Place them in a zip-top bag and crush with a rolling pin, or pulse briefly in a food processor. Leave a few chunky bits for texture—perfection isn’t required!
Pin This Recipe!
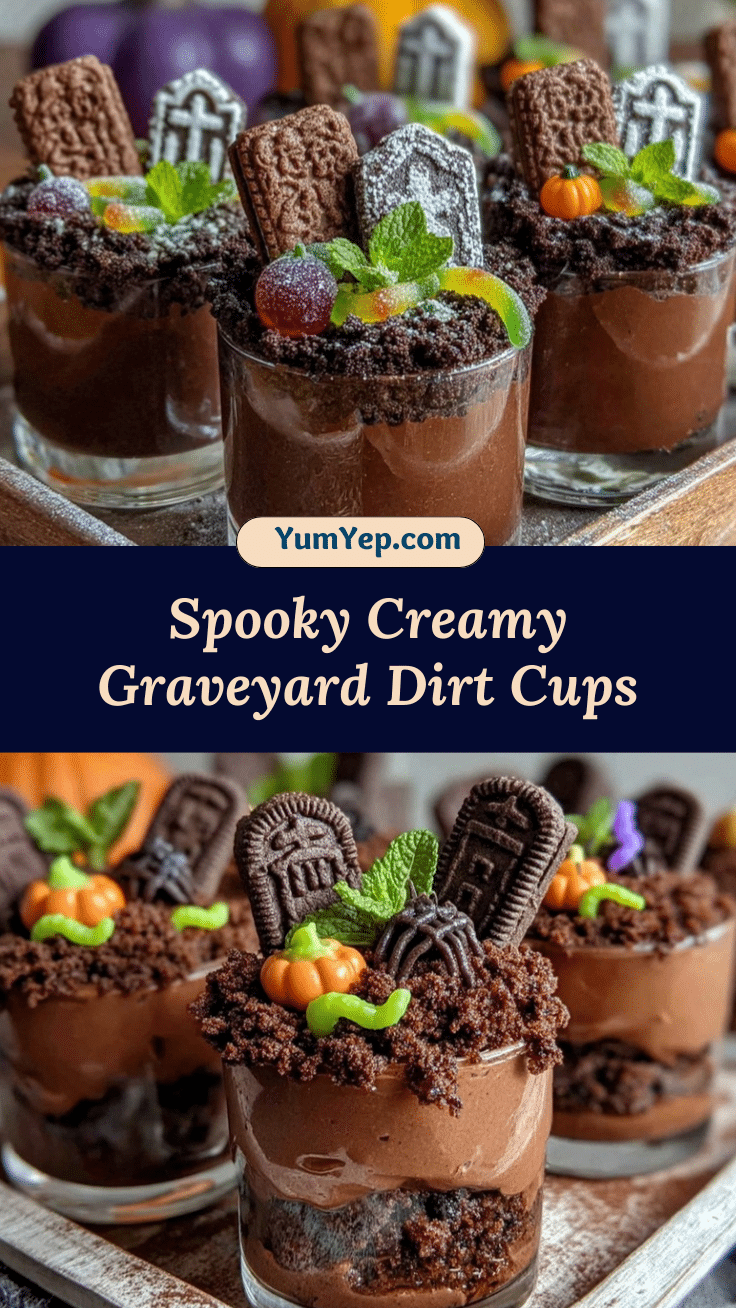
Creamy Graveyard Dirt Pudding Cups

These easy Halloween pudding cups feature creamy chocolate pudding, crunchy Oreo ‘dirt,’ and playful decorations like gummy worms and cookie tombstones. Perfect for parties, potlucks, or a spooky family treat, they’re quick to assemble and always a crowd-pleaser.
- Prep Time: 15 minutes
- Cook Time: 0 minutes
- Total Time: 1 hour 15 minutes
- Yield: 8-12 servings 1x
- Category: Dessert
- Cuisine: American
Ingredients
- 1 (5.1 oz) box chocolate instant pudding mix
- 3 cups cold whole milk
- 8 oz cream cheese, softened
- 1/2 cup powdered sugar
- 1 tsp vanilla extract
- 8 oz whipped topping (Cool Whip), thawed
- 20 Oreo cookies, crushed
- 8–12 gummy worms
- 8–12 Milano cookies or graham crackers (for tombstones)
- Black decorating gel or melted chocolate (for writing ‘RIP’)
- Candy pumpkins or bone-shaped sprinkles (optional)
Instructions
- In a large mixing bowl, whisk together chocolate pudding mix and cold milk for 2 minutes until thickened. Set aside for 5 minutes to set.
- In another bowl, beat softened cream cheese with powdered sugar and vanilla extract using an electric mixer until smooth and lump-free.
- Gently fold whipped topping into the cream cheese mixture with a rubber spatula until light and fluffy.
- Add half the chocolate pudding to the cream cheese mixture, folding gently until just combined. Fold in the remaining pudding for a mousse-like consistency. Chill for 10 minutes if too thin.
- Crush Oreo cookies in a zip-top bag with a rolling pin or pulse in a food processor until you have fine crumbs (some chunky bits are fine).
- Spoon about 2 tablespoons of Oreo crumbs into the bottom of each cup. Add a generous layer of pudding mixture (about 1/2 cup). Top with another layer of Oreo crumbs (about 1 tablespoon). Repeat layers if cups are tall, finishing with Oreo ‘dirt’ on top.
- Decorate each cup with a Milano or graham cracker tombstone, writing ‘RIP’ with black gel or melted chocolate. Add 1-2 gummy worms and candy pumpkins for a graveyard look.
- Refrigerate cups for at least 1 hour to set layers and meld flavors. If making ahead, cover loosely with plastic wrap.
Notes
For gluten-free cups, use gluten-free chocolate sandwich cookies and graham crackers. For dairy-free, substitute coconut milk, plant-based cream cheese, and coconut whipped topping. Chill pudding cups for best texture and decorate just before serving to keep toppings fresh. Use a piping bag for easy layering. Let kids help with decorating for extra fun.
Nutrition
- Serving Size: 1 pudding cup (about
- Calories: 300
- Sugar: 30
- Sodium: 220
- Fat: 11
- Saturated Fat: 6
- Carbohydrates: 42
- Fiber: 2
- Protein: 4
Keywords: Halloween dessert, dirt pudding cups, graveyard pudding, easy Halloween treat, Oreo pudding cups, spooky dessert, kid-friendly Halloween recipe


