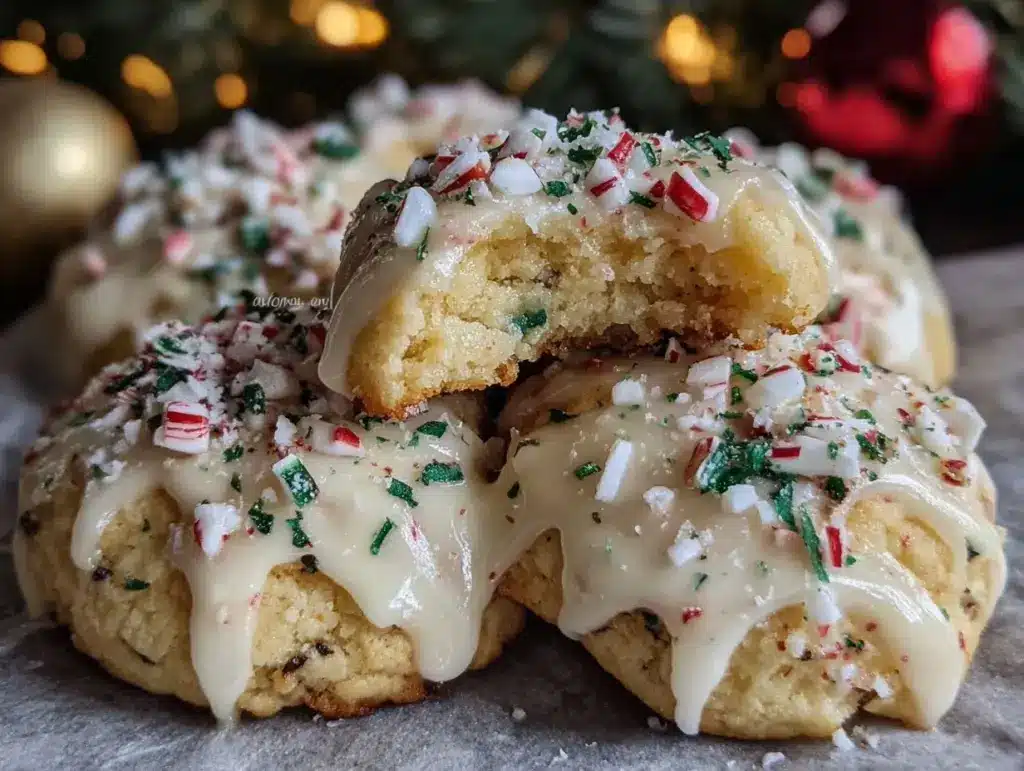
Picture this: the gentle crackle of the oven, a chill in the air, and a scent swirling through the kitchen that’s pure holiday magic. Creamy peppermint meltaways send out a whisper of cool mint and sweet vanilla, mingling with buttery goodness – a fragrance that instantly puts me in the festive mood. The first time I baked these cookies, I was knee-high to a grasshopper, standing beside my grandma as she pressed delicate pink dough into perfect rounds. I remember the awe of watching them puff just a little – their tops dusted with snowy powdered sugar and flecked with peppermint bits. It was the kind of moment where you pause, take a deep breath, and just smile because you know you’re onto something truly special.
Honestly, I’d give anything to relive those kitchen moments. My family couldn’t stop sneaking them off the cooling rack (and now, decades later, the tradition stands – I can barely keep a batch around long enough for the glaze to set). These peppermint meltaways have become a staple for holiday gatherings, cookie exchanges, and homemade gifts. They’re dangerously easy, ridiculously soft, and deliver pure, nostalgic comfort in every bite. If you’re searching for the perfect sweet treat to brighten up your Pinterest cookie board or add a little sparkle to your holiday spread, you know what? You’re going to want to bookmark this one. I’ve tested, tweaked, and taste-tested these beauties more times than I can count – in the name of research, of course – and they never fail to bring out smiles and second helpings. It feels like a warm hug wrapped in peppermint joy, and I kind of wish I’d discovered this recipe years ago.
Why You’ll Love This Recipe
Let’s face it – not all holiday cookies are created equal. These creamy peppermint meltaways stand out for so many reasons, and I’m not just saying that because I’ve made about a hundred batches over the years. My experience as a recipe developer (and a cookie enthusiast!) has taught me what works and what just looks good on Pinterest. Here’s why these meltaways deserve a spot in your holiday baking lineup:
- Quick & Easy: You can whip up a batch in under 30 minutes, start to finish. Perfect for last-minute cravings or if you need a festive treat in a pinch.
- Simple Ingredients: No fancy shopping trips—everything you need is likely already in your pantry or fridge.
- Perfect for Gatherings: These cookies are a hit at cookie swaps, potlucks, and holiday parties. They look beautiful on a tray and disappear fast.
- Crowd-Pleaser: Kids love the sweet, creamy flavor, and adults can’t resist that melt-in-your-mouth texture. They’re universally adored.
- Unbelievably Delicious: The combo of cool peppermint and rich butter makes each bite pure comfort. It’s the kind of cookie that makes you close your eyes and sigh with happiness.
What sets my creamy peppermint meltaways apart? The secret is in the technique—softened butter whipped with powdered sugar for extra creamy texture, plus just the right amount of cornstarch for that delicate, crumbly bite. I use crushed peppermint candies both in the dough and sprinkled on top, which gives a festive crunch and pop of color. No complicated chilling or rolling, just scoop, bake, and enjoy.
This recipe is more than just a holiday cookie—it’s a way to make memories, share joy, and treat yourself without fuss. Whether you’re impressing guests, satisfying a sweet tooth late at night, or making edible gifts, these meltaways deliver every time. That first bite? It’s holiday cheer, reimagined for real life—fast, easy, and soul-soothing. Trust me, your cookie jar (and your heart) will thank you.
What Ingredients You Will Need
This recipe uses simple, wholesome ingredients to deliver bold flavor and that signature melt-in-your-mouth texture without the fuss. I love that most of these are pantry staples, and you can easily swap a few things if needed. Here’s what you’ll need for creamy peppermint meltaways:
- For the Cookie Dough:
- Unsalted butter, softened (1 cup / 227 g) – essential for that creamy, tender crumb
- Powdered sugar (1/2 cup / 60 g) – gives the cookies their delicate texture and sweetness
- Cornstarch (1/2 cup / 60 g) – helps create the signature meltaway effect
- All-purpose flour (1 cup / 120 g) – forms the base of the dough
- Pure vanilla extract (1 tsp / 5 ml) – adds warmth and depth to the flavor
- Crushed peppermint candies (1/4 cup / 30 g) – for festive color and a pop of flavor
- Salt (1/4 tsp / 1.5 g) – just enough to balance the sweetness
- For the Glaze:
- Powdered sugar (3/4 cup / 90 g) – for a smooth, sweet finish
- Milk (2–3 tbsp / 30–45 ml, any kind) – use dairy or non-dairy depending on your needs
- Pure peppermint extract (1/4 tsp / 1.25 ml) – just a hint for that cool, fresh flavor
- For Decorating:
- Additional crushed peppermint candies (2 tbsp / 15 g) – sprinkled on top for extra crunch and color
Ingredient Notes & Substitutions:
- If you’re out of cornstarch, swap in arrowroot powder for a similar texture.
- Gluten-free? Use a 1:1 gluten-free flour blend (I’ve had great luck with Bob’s Red Mill).
- Need dairy-free? Substitute vegan butter and plant-based milk—Earth Balance works well for both taste and texture.
- If you prefer a deeper peppermint flavor, add a touch more extract to the glaze (but go easy—it’s strong!).
- For a festive twist, use red and green peppermint candies; just make sure they’re crushed fine so they melt nicely into the cookies.
Honestly, the best part of this recipe is how forgiving it is. You can use whatever brand of butter you love, and the cookies still turn out soft and flavorful. I always recommend splurging on a good vanilla—Rodelle or Nielsen-Massey, if you’re feeling fancy. If you’re making these in the summer (hey, Christmas in July!), swap in lemon extract and yellow candies for a bright spin. The basics are all here, but don’t be afraid to put your own twist on this holiday classic.
Equipment Needed
You don’t need a fancy kitchen to make creamy peppermint meltaways—just a few basics and a bit of holiday spirit. Here’s what you’ll want on hand:
- Mixing bowls (medium and large) – for combining dough and glaze
- Hand mixer or stand mixer – makes creaming the butter a breeze; you can use a sturdy whisk if you don’t have one (just a bit more arm workout!)
- Measuring cups and spoons – accuracy matters for that perfect crumb
- Spatula – a silicone one helps scrape every last bit of dough
- Baking sheet – lined with parchment paper for easy cleanup and even baking
- Cookie scoop or teaspoon – for portioning out uniform dough balls (honestly, a regular spoon works fine in a pinch)
- Wire cooling rack – helps cookies cool fast without getting soggy bottoms
- Small bowl – for mixing the glaze
If you don’t have a stand mixer, don’t worry—hand mixers work perfectly. I started out with a basic $20 hand mixer and it’s still going strong after years of holiday baking. For parchment paper, wax paper will do if you’re desperate (just don’t bake on it, only for cooling). And if your cookie scoop goes missing (happens every December!), two spoons will get the job done. Maintenance tip: give your mixer beaters a good soak in warm soapy water after working with sticky dough—the glaze can really gunk things up if you wait too long. No need for expensive gadgets; just keep it simple, and you’ll be baking these meltaways in no time.
Preparation Method
- Prep Your Baking Sheet: Line a baking sheet with parchment paper (or a silicone baking mat). Preheat your oven to 350°F (175°C). This step keeps cookies from sticking and makes cleanup a breeze. If you’re using an older oven, double-check with an oven thermometer – accuracy matters for these delicate cookies.
- Cream the Butter and Sugar: In a large bowl, beat 1 cup (227 g) unsalted butter with 1/2 cup (60 g) powdered sugar until light and fluffy (about 2–3 minutes). The butter should be pale yellow and super creamy. If it looks grainy, keep mixing—it’ll smooth out.
- Add Vanilla and Salt: Mix in 1 tsp (5 ml) vanilla extract and 1/4 tsp (1.5 g) salt. Scrape down the sides of the bowl to make sure everything blends evenly.
- Combine Dry Ingredients: In a separate bowl, whisk together 1/2 cup (60 g) cornstarch and 1 cup (120 g) all-purpose flour. Sift if you want extra-light cookies (optional, but Grandma swore by it).
- Mix the Dough: Gradually add the dry ingredients to the butter mixture, beating on low speed. Add 1/4 cup (30 g) crushed peppermint candies. The dough will be soft and a little sticky—that’s perfect.
- Shape the Cookies: Scoop out tablespoon-sized portions (about 15–18 g) and roll gently into balls. Place on the prepared baking sheet, spacing about 2 inches (5 cm) apart. If the dough sticks to your hands, dust lightly with powdered sugar.
- Bake: Bake in preheated oven for 9–11 minutes, until the edges are barely golden and the tops look dry. Don’t overbake—these cookies should stay pale and soft! If your oven runs hot, check at 8 minutes.
- Cool: Let cookies cool on the sheet for 5 minutes, then transfer to a wire rack. They’re fragile when warm, so use a thin spatula and gentle hands.
- Make the Glaze: In a small bowl, whisk together 3/4 cup (90 g) powdered sugar, 2–3 tbsp (30–45 ml) milk, and 1/4 tsp (1.25 ml) peppermint extract. The glaze should be thick but pourable—add milk a teaspoon at a time until you reach the right consistency.
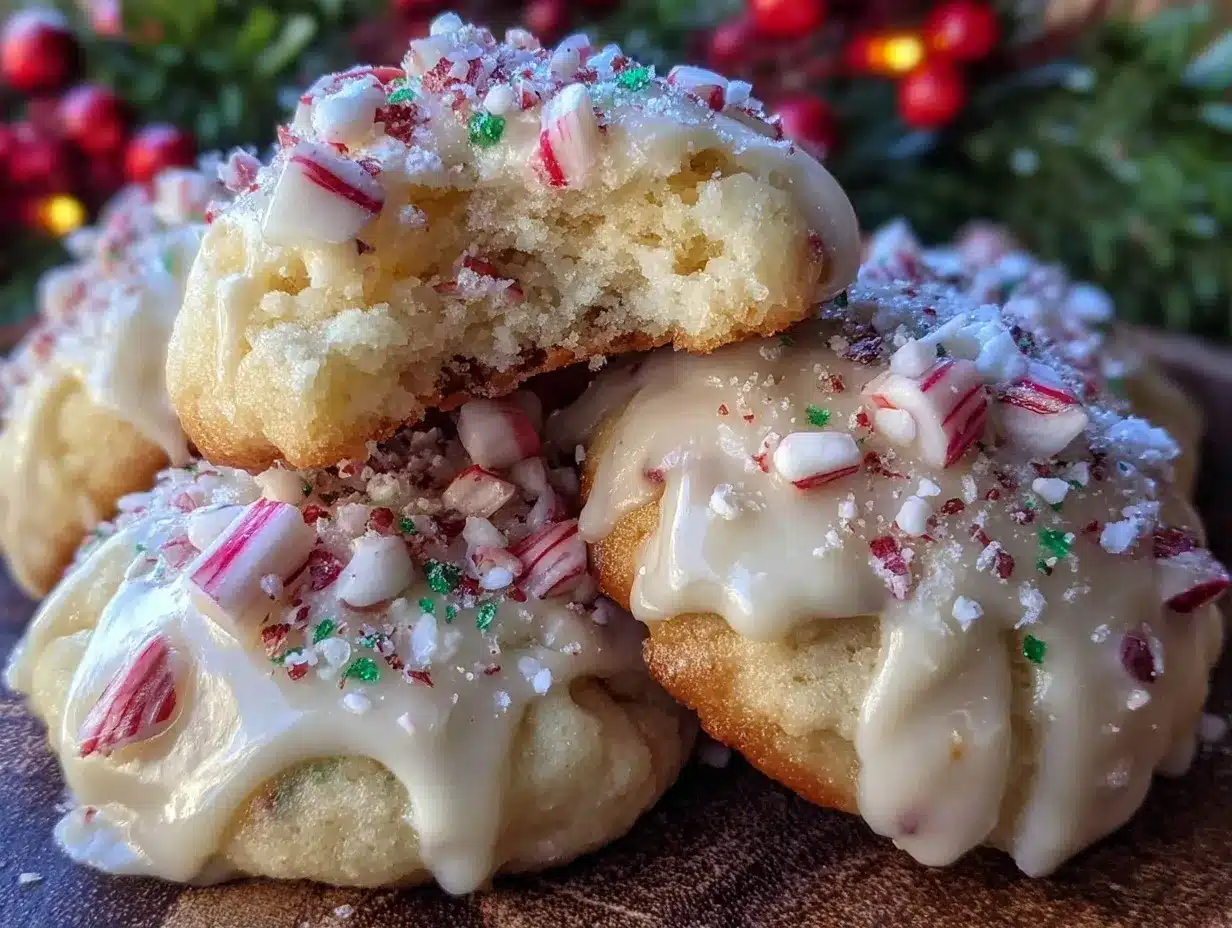
- Glaze and Decorate: Once cookies are completely cool, drizzle glaze over each cookie or dip tops for a thicker layer. Immediately sprinkle with extra crushed peppermint candies (2 tbsp / 15 g) before the glaze sets. Let dry for at least 30 minutes before stacking or serving.
Personal Tips & Troubleshooting:
- If your dough seems too soft, refrigerate for 10 minutes before shaping—it’ll firm up nicely.
- Glaze too runny? Add a bit more powdered sugar; too thick, a splash more milk.
- For super-smooth glaze, sift your powdered sugar—it makes a difference!
- Efficiency tip: Crush your peppermint candies ahead of time and store in an airtight container—they tend to get sticky quickly.
Sensory cues to watch for: the cookies should smell buttery and minty, feel tender to the touch, and have a creamy, almost shortbread-like crumb. If you see tiny cracks on top, that’s perfect! These meltaways are all about delicate texture and festive flavor.
Cooking Tips & Techniques
Over the years, I’ve picked up a few tricks (and made plenty of mistakes!) when baking creamy peppermint meltaways. Let me save you some trial and error:
- Room Temperature Matters: Always use softened (not melted) butter for that fluffy, creamy dough. If you forget to take it out, microwave on low in 5-second bursts—just watch it closely.
- Don’t Overmix: Once you add the flour and cornstarch, mix just until combined. Overmixing makes cookies tough, not tender.
- Uniform Size: Use a cookie scoop for evenly sized cookies—this keeps baking time consistent (trust me, uneven cookies bake unevenly and look wonky on your Pinterest board).
- Crushing Peppermint: Place candies in a zip-top bag and crush with a rolling pin or meat mallet. Don’t use a food processor—they get powdery instead of chunky.
- Watch the Oven: Peppermint meltaways bake quickly and can go from perfect to crunchy in a minute. Set a timer and check early if it’s your first batch.
- Glaze Timing: Only glaze cooled cookies—if they’re warm, the glaze melts and slides off. If you’re impatient (guilty!), pop the cookies in the fridge for 10 minutes to speed up cooling.
Common mistakes? Once I accidentally used salted butter and skipped the extra salt—wow, did those cookies taste flat. Lesson learned: stick to unsalted and add salt separately. Another time, I tried doubling the extract for “extra peppermint” and it turned out way too strong (think toothpaste, not dessert). Less is more with mint!
If you’re multitasking, set up a little assembly line—scoop, bake, cool, glaze. And don’t forget to clean as you go; peppermint bits love to stick to every surface. Consistency tip: Weigh your ingredients if you can, especially the flour and cornstarch. It makes a real difference in texture. These small steps add up to perfect, festive cookies every time.
Variations & Adaptations
The beauty of creamy peppermint meltaways is how easily you can make them your own. Here are some of my favorite twists:
- Gluten-Free Version: Swap all-purpose flour for a 1:1 gluten-free blend. I’ve tried King Arthur and Bob’s Red Mill and both work beautifully.
- Chocolate Peppermint: Mix 2 tbsp (15 g) cocoa powder into the dough for a chocolatey spin. Top with mini chocolate chips and crushed mint for extra fun.
- Citrus Mint: Skip the peppermint glaze and replace with 1/2 tsp (2.5 ml) orange or lemon zest in the dough. Use citrus extract in the glaze for a fresh, zesty flavor.
- Dairy-Free Adaptation: Use vegan butter and almond or oat milk. The cookies stay just as soft and creamy.
- Nut-Free Option: These cookies are naturally nut-free, but if you’re baking for allergies, double-check your peppermint candies for cross-contamination.
Different cooking methods? You can bake these in a toaster oven (just reduce the baking time by a minute or two) or even on a pizza stone for extra crispy bottoms. For those who love variety, try adding a drop of food coloring to the glaze—pink, green, or blue for a winter wonderland look.
Personal twist: Last year, I added a sprinkle of freeze-dried raspberries on top instead of peppermint. It gave a tart contrast and made the cookies look stunning on my holiday platter. If you love experimenting, use this recipe as a base and let your creativity run wild!
Serving & Storage Suggestions
Creamy peppermint meltaways are best served at room temperature, arranged on a pretty platter or stacked in festive tins. If you want to wow your guests, sprinkle a little extra powdered sugar just before serving—it looks like fresh snow and adds sweetness.
Pair these cookies with hot cocoa, creamy lattes, or a mug of peppermint tea. They also complement rich desserts like chocolate mousse or cheesecake at holiday parties. For cookie swaps, I love to pack them in cellophane bags tied with ribbon—they make adorable edible gifts!
Storage is easy: keep cookies in an airtight container at room temperature for up to 5 days. If you want to freeze them, layer with wax paper in a freezer-safe container for up to 2 months. Thaw at room temperature before serving. To refresh day-old cookies, microwave for 5–10 seconds (just enough to bring back that soft texture). The flavors actually deepen after a day or two as the peppermint infuses the dough. These cookies stay tender and delicious, so you can bake ahead and enjoy throughout the season.
Nutritional Information & Benefits
Each creamy peppermint meltaway contains approximately 90 calories, 5 g fat, 12 g carbohydrates, and 1 g protein (based on a batch yielding 24 cookies). They’re naturally nut-free and can easily be made gluten-free or dairy-free with simple swaps.
Key ingredients like butter and cornstarch contribute to a tender, melt-in-your-mouth texture, while peppermint candies offer a bit of Vitamin C and a refreshing flavor. If you’re watching your sugar intake, you can reduce the glaze or use a lower-sugar alternative—just expect a slightly different texture.
Potential allergens: dairy (butter, milk), gluten (flour), and peppermint (for those with sensitivities). Always check ingredient labels, especially with candies. From a wellness perspective, these cookies are a treat best enjoyed in moderation—perfect for sharing joy and a little sweetness during the holidays. I love that they can be adapted for various dietary needs, so everyone gets a bite of holiday cheer.
Conclusion
If you’re searching for the ultimate festive cookie to light up your holiday table or Pinterest board, creamy peppermint meltaways are absolutely worth trying. They’re soft, creamy, and bursting with cool peppermint flavor—just the thing to bring everyone together and sweeten up any occasion.
Don’t be afraid to tweak this recipe to suit your preferences—add a little chocolate, swap the glaze, or go dairy-free if needed. The magic is in the memories you’ll make and the smiles you’ll share. For me, these cookies are a taste of childhood, family, and holiday happiness all wrapped up in one bite. I hope you love them as much as we do.
Give these a whirl, and let me know how your batch turns out—share your twists, tag me on Pinterest, or drop a comment below. Happy baking, and may your holidays be as sweet and creamy as these peppermint meltaways!
FAQs
Can I make creamy peppermint meltaways ahead of time?
Absolutely! Bake and glaze the cookies, then store in an airtight container for up to 5 days. They freeze well too—just thaw before serving.
What’s the best way to crush peppermint candies?
Place candies in a zip-top bag and smash with a rolling pin or mallet. Avoid food processors—they turn the candies to dust instead of chunky bits.
Can I use peppermint extract in the dough instead of vanilla?
You can, but go easy—peppermint extract is strong. Try half vanilla, half peppermint for a balanced flavor.
How do I make these cookies gluten-free?
Swap all-purpose flour for a 1:1 gluten-free blend. The cookies will stay soft and delicious with no extra adjustments.
Why did my cookies spread too much?
This usually happens if the butter was too soft or melted. Chill the dough for 10 minutes before baking to help the cookies hold their shape.
Pin This Recipe!
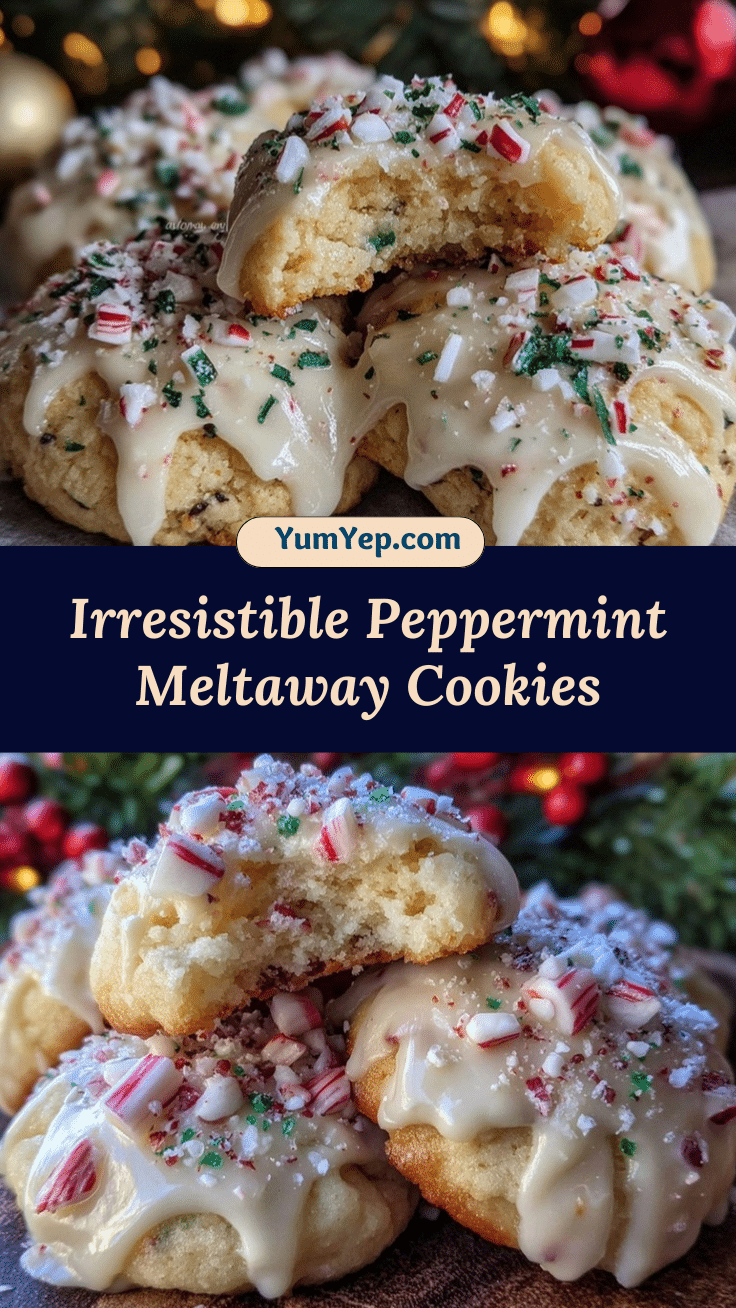
Creamy Peppermint Meltaways

These festive holiday cookies are soft, creamy, and bursting with cool peppermint flavor. Easy to make and perfect for gatherings, cookie swaps, or edible gifts, they deliver nostalgic comfort in every bite.
- Prep Time: 15 minutes
- Cook Time: 11 minutes
- Total Time: 26 minutes
- Yield: 24 cookies 1x
- Category: Dessert
- Cuisine: American
Ingredients
- 1 cup unsalted butter, softened
- 1/2 cup powdered sugar
- 1/2 cup cornstarch
- 1 cup all-purpose flour
- 1 teaspoon pure vanilla extract
- 1/4 cup crushed peppermint candies
- 1/4 teaspoon salt
- 3/4 cup powdered sugar (for glaze)
- 2–3 tablespoons milk (any kind)
- 1/4 teaspoon pure peppermint extract
- 2 tablespoons additional crushed peppermint candies (for decorating)
Instructions
- Line a baking sheet with parchment paper or a silicone baking mat. Preheat oven to 350°F (175°C).
- In a large bowl, beat unsalted butter with powdered sugar until light and fluffy (about 2–3 minutes).
- Mix in vanilla extract and salt. Scrape down the sides of the bowl to blend evenly.
- In a separate bowl, whisk together cornstarch and all-purpose flour. (Optional: sift for extra-light cookies.)
- Gradually add dry ingredients to the butter mixture, beating on low speed. Add crushed peppermint candies. Dough will be soft and slightly sticky.
- Scoop tablespoon-sized portions and roll gently into balls. Place on prepared baking sheet, spacing about 2 inches apart.
- Bake for 9–11 minutes, until edges are barely golden and tops look dry. Do not overbake.
- Let cookies cool on the sheet for 5 minutes, then transfer to a wire rack.
- In a small bowl, whisk together powdered sugar, milk, and peppermint extract for the glaze. Adjust consistency as needed.
- Once cookies are completely cool, drizzle or dip tops in glaze. Immediately sprinkle with extra crushed peppermint candies. Let dry for at least 30 minutes before stacking or serving.
Notes
For gluten-free, use a 1:1 gluten-free flour blend. For dairy-free, substitute vegan butter and plant-based milk. Refrigerate dough for 10 minutes if too soft. Sift powdered sugar for a smoother glaze. Crush peppermint candies in a zip-top bag with a rolling pin for best texture. Cookies are fragile when warm; handle gently.
Nutrition
- Serving Size: 1 cookie
- Calories: 90
- Sugar: 7
- Sodium: 35
- Fat: 5
- Saturated Fat: 3
- Carbohydrates: 12
- Protein: 1
Keywords: peppermint cookies, holiday cookies, meltaways, Christmas cookies, easy dessert, festive baking, edible gifts, cookie exchange


