Introduction
Let me just say, the aroma that fills my kitchen when these creamy layered pumpkin dessert bars are baking is pretty much fall in a pan. You get that sweet, spicy pumpkin scent wafting through the air, mingling with hints of cinnamon and nutmeg—honestly, it’s the kind of thing that makes you slow down, close your eyes, and savor the moment. The first time I made these pumpkin dessert bars, it was a blustery October afternoon, and I’d just stumbled on a tattered family recipe card tucked inside my grandma’s old cookbook. I was instantly hooked (and, you know, a little nostalgic). It’s that kind of moment where you pause, take a deep breath, and just smile because you know you’re onto something truly special.
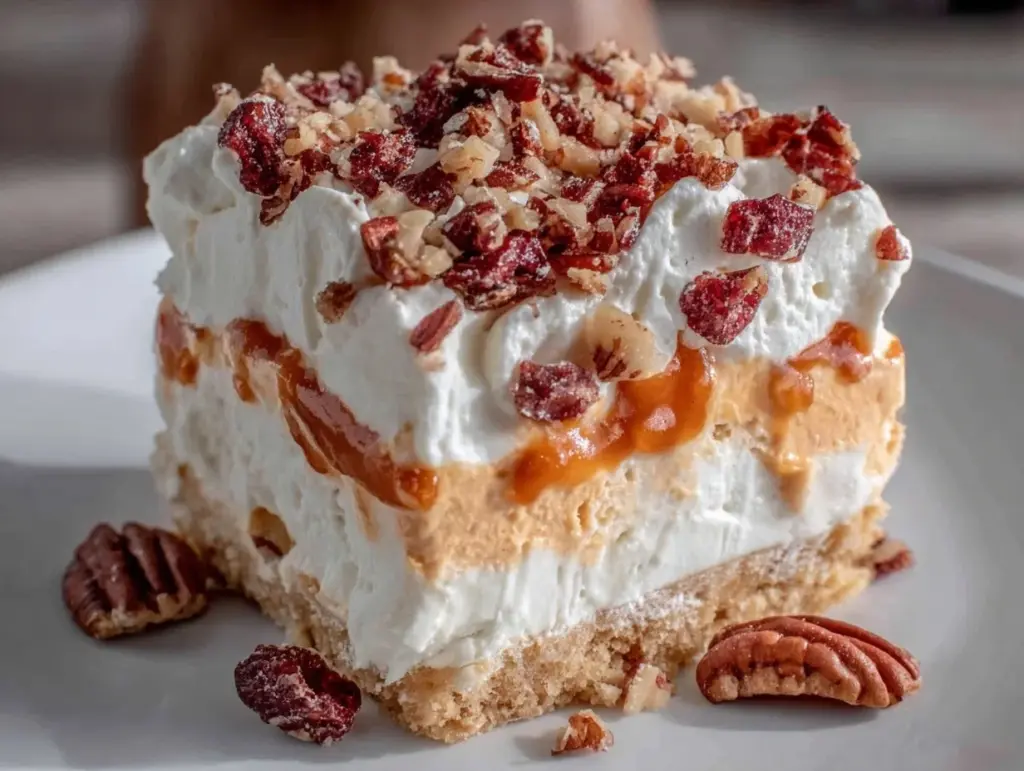
Back when I was knee-high to a grasshopper, my grandma would whip up pumpkin treats every fall—bars, pies, you name it. But these creamy pumpkin dessert bars? They’re different. There’s a buttery base, a smooth pumpkin layer, and a dreamy whipped topping that’s dangerously easy to fall in love with. My family couldn’t stop sneaking them off the cooling rack (and I can’t really blame them). Even the neighbor kids came knocking—word got out fast!
Honestly, these bars are pure, nostalgic comfort. They’re perfect for potlucks, school bake sales, or just when you need something sweet to brighten up your Pinterest board. I wish I’d discovered this exact method years ago—it saves so much fuss, and the layers turn out gorgeous every time. After testing (and retesting, in the name of research, of course), these creamy pumpkin dessert bars are now a staple for family gatherings and easy gifting. They feel like a warm hug in dessert form, and trust me, you’re going to want to bookmark this one for every fall season!
Why You’ll Love This Creamy Pumpkin Dessert Bars Recipe
There’s something undeniably special about these creamy pumpkin dessert bars with whipped topping. I’ve made them more times than I can count, tweaking and perfecting every layer until they hit that sweet spot. Here’s why you’ll fall head-over-heels for them—whether you’re a pumpkin lover or not:
- Quick & Easy: Comes together in under 45 minutes—perfect for busy weeknights or spontaneous get-togethers.
- Simple Ingredients: No fancy grocery trips needed. You probably have most things in your pantry (think canned pumpkin, cream cheese, and classic spices).
- Perfect for All Occasions: These bars shine at holiday parties, cozy family dinners, and even casual brunches. You’ll be the hero at any gathering.
- Crowd-Pleaser: Kids gobble them up, adults sneak seconds—always gets rave reviews. My picky eater nephew asked for thirds!
- Unbelievably Delicious: The texture is rich and creamy, the pumpkin flavor is spot-on, and the whipped topping adds that cloud-like finish. It’s comfort food at its finest.
What sets this creamy pumpkin dessert bars recipe apart? The secret’s in the layering. I blend the cream cheese until ultra-smooth before folding in pumpkin puree, which gives the filling a custardy finish without any graininess. The base is buttery but sturdy, so you get neat squares (no crumbs everywhere). And the whipped topping—light, sweet, and perfectly balanced—makes each bite feel extra indulgent.
This isn’t just another pumpkin bar recipe, you know. It’s my best version, born from lots of trial, error, and taste-testing. You get all the classic fall flavors but with a creamy twist that surprises people (in the best way). Whether you’re impressing guests or craving something comforting after a long day, these bars deliver every time. They’re quick to make, easy to adapt, and always a hit. You’ll want to close your eyes after that first bite—promise!
What Ingredients You Will Need
This creamy pumpkin dessert bars recipe uses simple, wholesome ingredients to deliver bold flavor and that signature layered texture—no complicated steps or specialty items required. Most are pantry staples, and there’s plenty of room for easy substitutions if you need them.
- For the base:
- 1 cup (120g) all-purpose flour (can swap with gluten-free blend)
- 1/2 cup (115g) unsalted butter, melted (adds richness and helps bind the base)
- 1/4 cup (50g) granulated sugar (just enough sweetness for balance)
- 1/2 teaspoon salt (optional, but helps round out the flavors)
- 1/2 teaspoon ground cinnamon (for a hint of warmth)
- For the creamy pumpkin layer:
- 8 oz (225g) cream cheese, softened (full-fat works best, but light is okay)
- 1 cup (245g) canned pumpkin puree (not pumpkin pie filling!)
- 2/3 cup (135g) brown sugar, packed (adds depth and caramel notes)
- 2 large eggs, room temperature
- 1/2 teaspoon vanilla extract (I always use pure vanilla for best flavor)
- 1 teaspoon ground cinnamon
- 1/2 teaspoon ground nutmeg
- 1/4 teaspoon ground ginger (optional, but adds a subtle kick)
- For the whipped topping:
- 1 cup (240ml) heavy whipping cream, chilled
- 2 tablespoons (15g) powdered sugar (adjust to taste)
- 1/2 teaspoon vanilla extract
- OR 1 tub (8 oz/225g) store-bought whipped topping for a shortcut
- Optional garnishes:
- Ground cinnamon or pumpkin pie spice for dusting
- Chopped toasted pecans or walnuts (for crunch)
- Mini chocolate chips (my kids’ favorite!)
If you’re dairy-free, swap cream cheese for plant-based alternative and use coconut cream for the topping. For gluten-free, I recommend King Arthur’s gluten-free flour blend. In summer, I’ve even swapped pumpkin for mashed sweet potato—surprisingly tasty! Choose brands you trust for canned pumpkin; I like Libby’s because it’s always smooth. Honestly, this recipe is forgiving, so don’t sweat the small stuff. Just make sure your cream cheese is softened and your spices are fresh for the best flavor.
Equipment Needed
- 9×9-inch (23x23cm) baking pan: Glass or metal both work. If you don’t have one, an 8×8 will do—just watch the baking time.
- Mixing bowls: At least two—one for the base and one for the filling. I use sturdy glass bowls (easy to clean).
- Electric mixer or stand mixer: Makes blending the cream cheese and pumpkin layer a breeze. You can use a whisk and some elbow grease, but the mixer saves time.
- Spatula: For scraping every last bit of filling. Silicone works best!
- Measuring cups and spoons: Accuracy matters in baking, so don’t eyeball it.
- Parchment paper: Optional, but lining your pan means easier clean-up and neater bars.
- Offset spatula or butter knife: For smoothing layers (trust me, it helps).
- Whisk: For whipping cream if going homemade.
- Cooling rack: I skip this sometimes, but it helps bars set evenly.
If you’re low on gadgets, don’t stress. I’ve made these with just a fork and a bowl in a pinch. For budget-friendly options, basic glass pans and hand mixers from Target or Walmart work fine (I’ve had mine for years). Just keep your mixer blades clean and dry for fluffy whipped cream. If you use a nonstick pan, check it for scratches—mine’s seen a lot of action over the years!
Preparation Method
- Preheat and prep: Preheat your oven to 350°F (175°C). Line a 9×9-inch pan with parchment paper, leaving some overhang for easy removal. (If using a metal pan, grease lightly.)
- Make the base: In a mixing bowl, combine 1 cup (120g) flour, 1/2 cup (115g) melted butter, 1/4 cup (50g) sugar, 1/2 teaspoon salt, and 1/2 teaspoon cinnamon. Stir until crumbly. Press evenly into the pan—use the back of a spoon for a flat surface. (It’ll look a bit sandy, that’s perfect.) Bake for 10-12 minutes until just set, not browned. Cool slightly.
- Prepare creamy pumpkin layer: While the base bakes, beat 8 oz (225g) cream cheese until smooth in a separate bowl. Add 1 cup (245g) canned pumpkin, 2/3 cup (135g) brown sugar, 2 eggs, 1/2 teaspoon vanilla, 1 teaspoon cinnamon, 1/2 teaspoon nutmeg, and 1/4 teaspoon ginger. Mix until silky and lump-free—scrape the bowl sides often. (If you see streaks of cream cheese, keep mixing!)
- Layer and bake: Pour the pumpkin mixture over the cooled base. Smooth the top with an offset spatula. Bake for 22-26 minutes until the edges are set and the center only jiggles slightly. (Don’t overbake—bars firm up as they cool.)
- Cool completely: Let bars cool in the pan on a rack. This takes 1 hour minimum, but I usually pop them in the fridge after 30 minutes. Chilling overnight gives the layers time to meld and slice neatly.
- Make whipped topping: If using homemade, whip 1 cup (240ml) heavy cream with 2 tablespoons (15g) powdered sugar and 1/2 teaspoon vanilla until soft peaks form. (Cold bowl = fluffier cream.) If using store-bought, just spread evenly.
- Layer whipped topping: Once bars are cool, spread the whipped topping over the pumpkin layer. Use a butter knife to create swoops or keep it smooth for a clean look.
- Optional garnishes: Dust with cinnamon, sprinkle nuts or chocolate chips if you like. (Kids love this part!)
- Slice and serve: Lift bars out using parchment overhang. Cut into squares—wipe your knife between cuts for sharp edges. Serve chilled or at room temp.
Troubleshooting: If your filling cracks, it’s probably overbaked—still delicious, just a little rustic. If the base feels greasy, reduce butter by a tablespoon next time. Bars too soft? Chill longer before slicing. I always make these a day ahead for best texture; the flavors deepen overnight. And hey, don’t worry if your layers aren’t perfectly even—homemade charm is part of the fun!
Cooking Tips & Techniques
- Blend for smoothness: Use room temperature cream cheese and eggs—that way your pumpkin layer turns out silky, not lumpy. I learned this the hard way when I rushed once and ended up with bits of cream cheese throughout.
- Don’t overbake: Watch the bars at the 22-minute mark. The center should still jiggle a little—think cheesecake. Overbaking leads to dry bars and cracked tops (been there, done that!).
- Whip it right: Cold cream whips faster and fluffier. Chill your bowl and beaters if you can. Overwhipped cream gets grainy, so stop at soft peaks.
- Layering matters: Smooth each layer gently. If you rush or dump everything in, the base can break or the filling won’t set. I use an offset spatula for control.
- Multitasking help: Mix the filling while the base bakes—saves time and keeps things moving. Clean as you go so you’re not left with a mountain of dishes.
- Consistency for success: Use fresh spices, real vanilla, and good-quality canned pumpkin. I’ve tried off-brands, and the texture isn’t quite the same.
- Personal lesson: My first batch was a little bland—don’t be shy with the cinnamon and nutmeg. Taste your filling before baking and adjust if needed.
Honestly, the biggest mistake is rushing the cooling process. Let the bars chill fully so the layers set and slice cleanly. If you’re in a hurry, pop the pan in the fridge (but not the freezer, or the base gets soggy). A little patience pays off every time!
Variations & Adaptations
- Gluten-Free: Swap all-purpose flour for a gluten-free blend. I’ve used King Arthur’s and Bob’s Red Mill—both work well and don’t compromise texture.
- Dairy-Free: Use plant-based cream cheese and coconut cream for the topping. My cousin tried this, and it was a hit with her lactose-intolerant family.
- Flavor twists: Add 1/4 cup (30g) mini chocolate chips to the pumpkin layer for a mocha vibe, or swirl in a tablespoon of maple syrup for extra sweetness.
- Seasonal swaps: Swap pumpkin for mashed sweet potato or butternut squash in spring and summer. The bars turn out just as creamy!
- Different cooking methods: Make mini bars in muffin tins for individual servings. Reduce baking time to 16-18 minutes.
- Nut-free option: Skip nut garnishes and check your cream cheese brand for cross-contamination warnings.
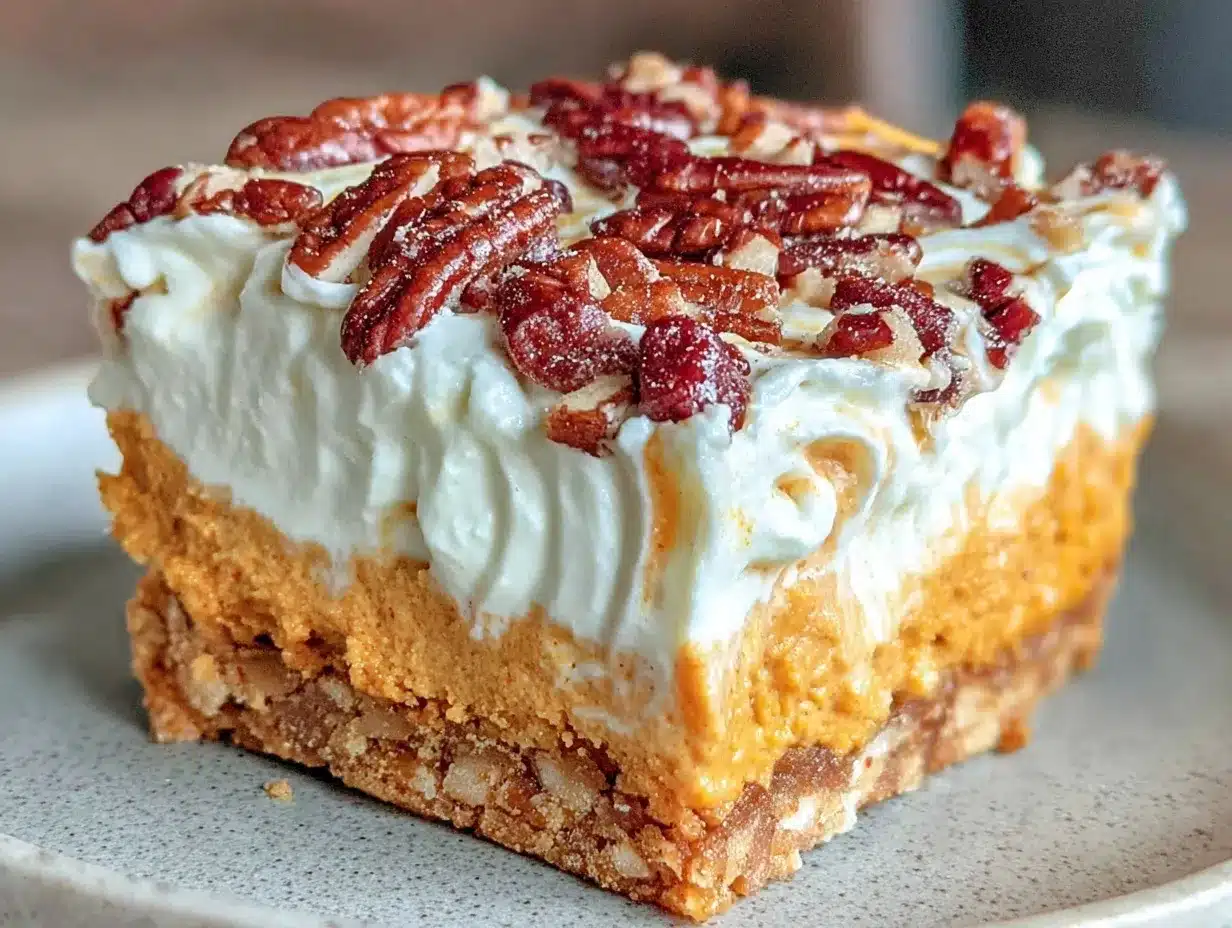
My personal favorite adaptation? Adding toasted pecans to the base for crunch. It gives a little Southern twist and pairs perfectly with the creamy pumpkin layer. Don’t be afraid to play with spices—cloves or cardamom are fun for holiday batches!
Serving & Storage Suggestions
These creamy pumpkin dessert bars are best served chilled for that ultra-creamy texture—straight from the fridge or at room temp if you prefer a softer bite (I like them cold, myself). Cut into neat squares and arrange on a pretty platter for parties or stack in a lunchbox for a sweet treat on the go. They look gorgeous with a sprinkle of cinnamon or a dollop of extra whipped topping.
Pair with hot coffee, chai, or a mug of spiced cider for a cozy fall vibe. If you’re serving a crowd, these bars play well alongside savory dishes like quiche or roasted veggies—makes a lovely brunch spread!
Store leftovers covered in the fridge for up to 4 days. The flavors deepen and meld together—so honestly, they taste even better on day two. For longer storage, freeze bars without whipped topping in an airtight container for up to 2 months. Thaw in the fridge and add fresh whipped topping before serving. To reheat, just let them sit at room temp for 10-15 minutes—no microwave needed. If bars get a little soft, a quick chill firms them up again. Don’t worry if you have extras—they disappear fast!
Nutritional Information & Benefits
Each bar (based on a 9×9 pan cut into 16 squares) has roughly 180 calories, 10g fat, 20g carbs, and 3g protein. Using light cream cheese and homemade whipped topping can shave off a few calories. Pumpkin is naturally rich in vitamin A, fiber, and antioxidants, so you get a little nutrition boost in every bite.
This creamy pumpkin dessert bars recipe is easy to adapt for gluten-free or dairy-free diets. Just check your ingredient labels—especially cream cheese and whipped topping—for potential allergens like milk and nuts. From a wellness perspective, I love that these bars offer pumpkin flavor without being heavy or overly sweet. They’re a treat, but not a sugar bomb, so you can enjoy a piece with your afternoon coffee and not feel weighed down.
Conclusion
These creamy layered pumpkin dessert bars with whipped topping are the kind of fall treat you’ll crave year after year. They’re easy to make, endlessly customizable, and guaranteed to bring smiles (and requests for seconds!) at any gathering. I love how the layers come together—each bite is smooth, flavorful, and comfort-filled.
Don’t hesitate to tweak the spices, swap out the base, or add your favorite toppings. That’s the beauty of homemade recipes—they reflect your personal taste and creativity. These bars have become a family favorite, and I hope they’ll find a spot in your autumn baking rotation, too.
If you try this creamy pumpkin dessert bars recipe, let me know how it turns out! Leave a comment below, share your photos, or tag me with your creative twists. There’s nothing better than seeing these bars bring a little joy (and a lot of pumpkin goodness) to your kitchen. Happy baking, friends!
Frequently Asked Questions
Can I use fresh pumpkin instead of canned?
Absolutely! Just roast, mash, and strain your pumpkin to remove extra moisture. You’ll need about 1 cup (245g) for the filling.
Can I make these bars ahead of time?
Yes, and they actually taste better after a night in the fridge. Make them a day ahead and add whipped topping just before serving.
What if my bars turn out too soft?
This usually happens if they’re not baked long enough or not chilled fully. Let them cool completely, then refrigerate for at least 1 hour before slicing.
How do I make this recipe gluten-free?
Swap the all-purpose flour for a gluten-free baking blend. The texture stays creamy and the base holds together well.
Can I freeze these pumpkin dessert bars?
Yes! Freeze bars without whipped topping in an airtight container for up to 2 months. Thaw overnight in the fridge, then add whipped topping and serve.
Pin This Recipe!
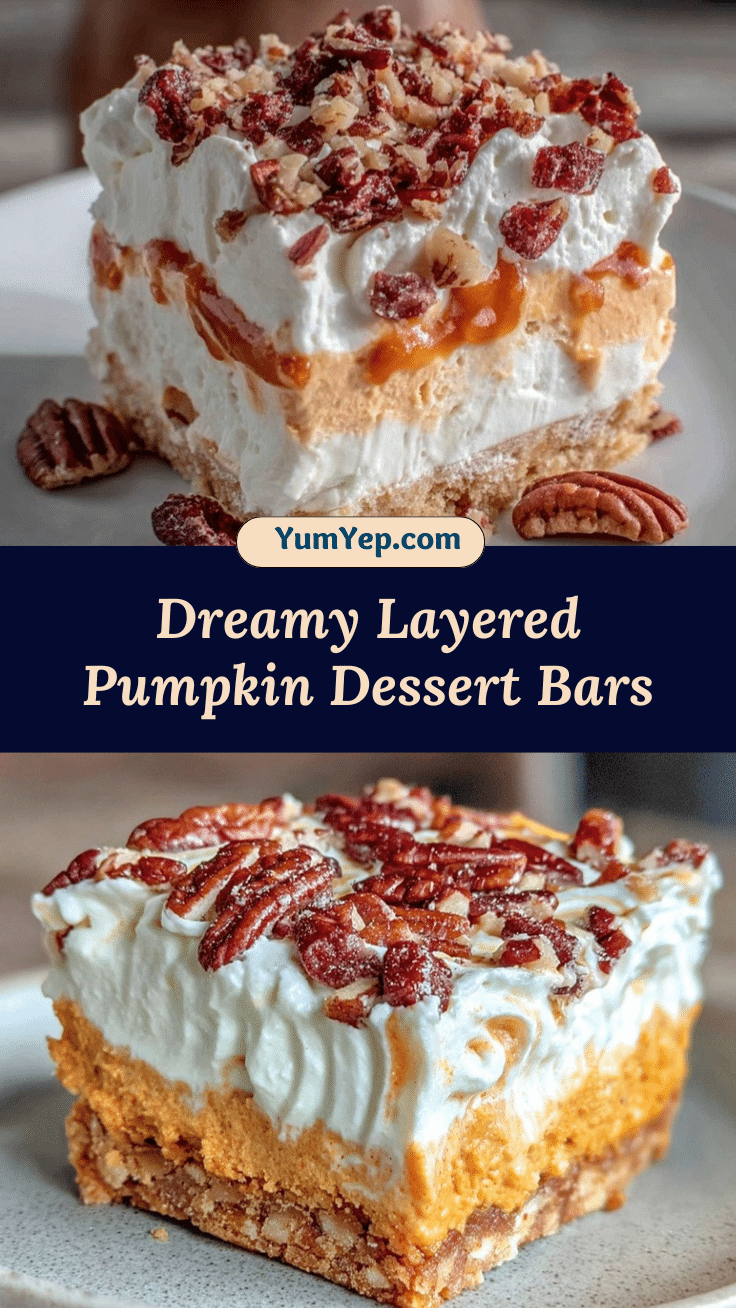
Creamy Pumpkin Dessert Bars

These creamy layered pumpkin dessert bars feature a buttery base, a smooth pumpkin filling, and a dreamy whipped topping. Perfect for fall gatherings, potlucks, or cozy family treats, they deliver classic pumpkin spice flavor with a rich, custardy twist.
- Prep Time: 15 minutes
- Cook Time: 35 minutes
- Total Time: 1 hour 15 minutes
- Yield: 16 bars 1x
- Category: Dessert
- Cuisine: American
Ingredients
- 1 cup all-purpose flour
- 1/2 cup unsalted butter, melted
- 1/4 cup granulated sugar
- 1/2 teaspoon salt
- 1/2 teaspoon ground cinnamon
- 8 oz cream cheese, softened
- 1 cup canned pumpkin puree
- 2/3 cup brown sugar, packed
- 2 large eggs, room temperature
- 1/2 teaspoon vanilla extract
- 1 teaspoon ground cinnamon
- 1/2 teaspoon ground nutmeg
- 1/4 teaspoon ground ginger
- 1 cup heavy whipping cream, chilled (or 1 tub 8 oz store-bought whipped topping)
- 2 tablespoons powdered sugar
- 1/2 teaspoon vanilla extract
- Optional: ground cinnamon or pumpkin pie spice for dusting
- Optional: chopped toasted pecans or walnuts
- Optional: mini chocolate chips
Instructions
- Preheat oven to 350°F (175°C). Line a 9×9-inch pan with parchment paper, leaving overhang for easy removal. Grease lightly if using a metal pan.
- In a mixing bowl, combine flour, melted butter, granulated sugar, salt, and cinnamon. Stir until crumbly. Press evenly into the pan and bake for 10-12 minutes until just set. Cool slightly.
- While the base bakes, beat cream cheese until smooth. Add pumpkin puree, brown sugar, eggs, vanilla extract, cinnamon, nutmeg, and ginger. Mix until silky and lump-free.
- Pour pumpkin mixture over cooled base. Smooth the top. Bake for 22-26 minutes until edges are set and center jiggles slightly. Do not overbake.
- Let bars cool in the pan on a rack for at least 1 hour, or chill in the fridge after 30 minutes. Chilling overnight is best for neat slices.
- For homemade whipped topping, whip heavy cream with powdered sugar and vanilla until soft peaks form. (Use a cold bowl for best results.) If using store-bought, spread evenly.
- Spread whipped topping over cooled bars. Use a butter knife or offset spatula to smooth or create swoops.
- Add optional garnishes: dust with cinnamon, sprinkle nuts or chocolate chips.
- Lift bars out using parchment overhang. Cut into squares, wiping knife between cuts for clean edges. Serve chilled or at room temperature.
Notes
Use room temperature cream cheese and eggs for a silky filling. Don’t overbake—the center should jiggle slightly. Chill bars fully before slicing for neat layers. Adapt for gluten-free or dairy-free diets by swapping flour and cream cheese/topping. Bars taste even better after a night in the fridge.
Nutrition
- Serving Size: 1 bar (1/16 of 9x9-i
- Calories: 180
- Sugar: 13
- Sodium: 120
- Fat: 10
- Saturated Fat: 6
- Carbohydrates: 20
- Fiber: 1
- Protein: 3
Keywords: pumpkin bars, creamy pumpkin dessert, fall baking, whipped topping, easy pumpkin recipe, layered dessert, potluck dessert, autumn treat


