
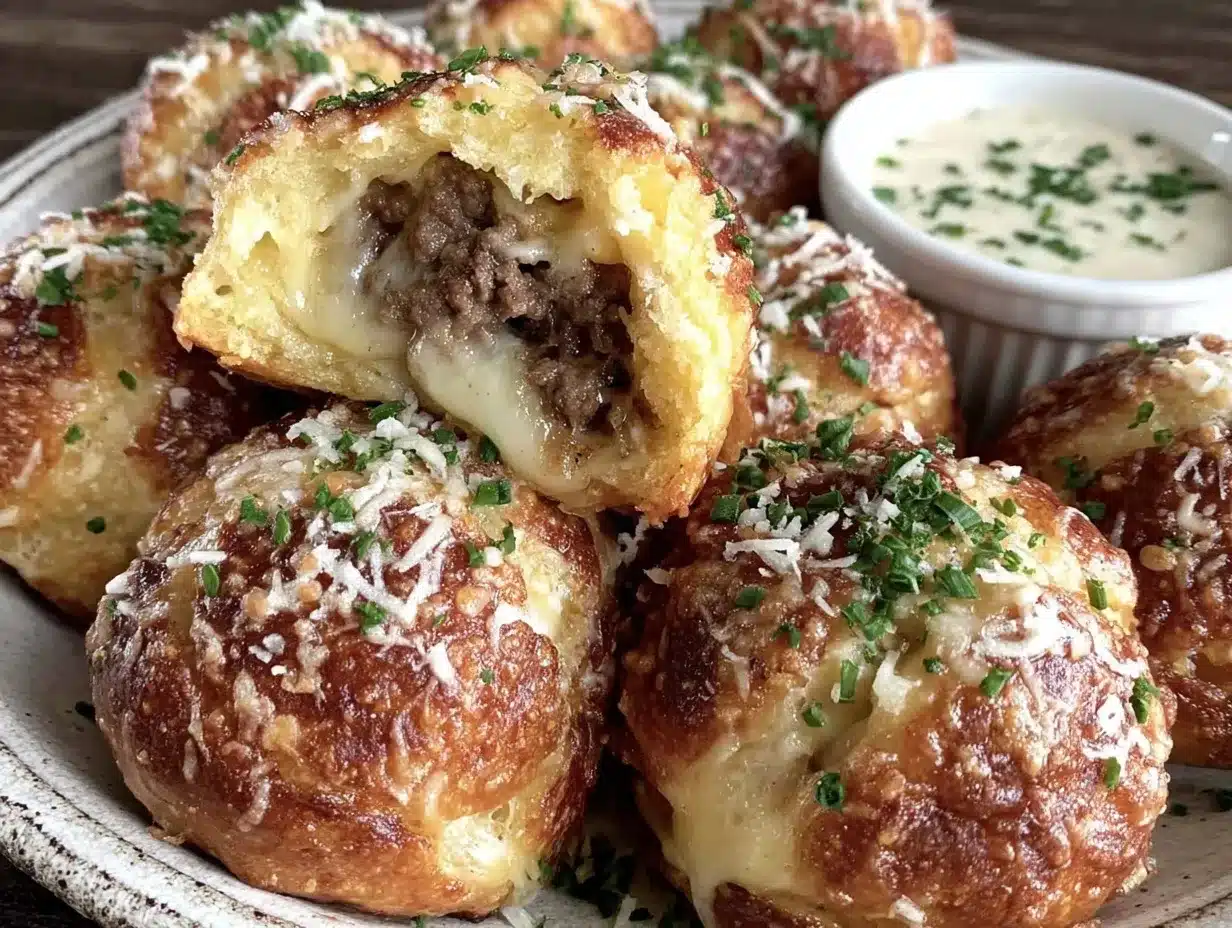
Let me tell you, the scent of sizzling garlic mingling with melted parmesan and juicy cheeseburger filling wafting from my oven is enough to make anyone’s mouth water before the first bite even lands. The first time I baked these Crispy Garlic Parmesan Cheeseburger Bombs, I was instantly hooked—the kind of moment where you pause, take a deep breath, and just smile because you know you’re onto something truly special. It was during a chilly Sunday football game a few years back, and my kitchen smelled like pure comfort and excitement all rolled into one.
When I was knee-high to a grasshopper, my grandma used to make these overstuffed savory bites that everyone would fight over, but they’ve always been a little tricky to get just right. Years ago, I stumbled upon this version while trying to recreate that nostalgic feeling without the fuss. Honestly, my family couldn’t stop sneaking them off the cooling rack (and I can’t really blame them).
Let’s face it—these bombs are dangerously easy to make and pack such a punch of flavor, they’ve become a staple for not only our game day gatherings but also for quick weeknight snacks and even casual parties. Whether you’re looking to brighten up your Pinterest snack board or just want a sweet treat for your kids that’s a little more grown-up, these cheeseburger bombs fit the bill like a glove. I’ve tested this recipe more times than I can count—in the name of research, of course—and every time, it delivers pure, nostalgic comfort wrapped in a crispy, garlicky package you’re going to want to bookmark.
Why You’ll Love This Recipe
After countless trials, tweaks, and taste tests, these Crispy Garlic Parmesan Cheeseburger Bombs have earned a top spot in my recipe repertoire. This isn’t just another finger food—it’s a game day MVP that’s quick, tasty, and crowd-approved.
- Quick & Easy: Comes together in under 30 minutes, perfect for last-minute cravings or busy days when you want something tasty without the hassle.
- Simple Ingredients: No fancy grocery trips needed; you likely have all the essentials in your pantry and fridge already.
- Perfect for Game Day & Parties: These bombs are ideal for sharing, and they disappear fast at any gathering.
- Crowd-Pleaser: Kids and adults alike rave about the irresistible crispy crust and gooey cheeseburger center.
- Unbelievably Delicious: The combo of garlic, parmesan, and melty cheddar with juicy ground beef hits every comfort food note you want.
What makes this recipe stand out? It’s the crispy garlic-parmesan crust that gives these bombs a golden, crunchy shell that’s anything but ordinary. Plus, the cheeseburger filling is seasoned just right—no overpowering spices, just good, honest flavor with a little tang from mustard and a hint of sweetness from caramelized onions. I’ve swapped in panko breadcrumbs to keep it light yet crispy, and tossed everything together with fresh garlic for that authentic punch. Honestly, it’s the kind of recipe that makes you close your eyes after the first bite and say, “Yep, this is a winner.”
It’s comfort food reimagined—fast, flavorful, and with just enough flair to impress your friends without breaking a sweat. So if you want to wow your crowd with minimal stress, this recipe’s your new best friend.
What Ingredients You Will Need
This recipe uses simple, wholesome ingredients to deliver bold flavor and satisfying texture without the fuss. Most are pantry staples and easy to find year-round, but I’ve included some handy swap tips just in case.
- For the cheeseburger filling:
- 1 lb (450g) ground beef (80/20 blend recommended for juiciness)
- 1 small onion, finely chopped (adds sweetness and depth)
- 2 cloves garlic, minced (fresh is best for that punch)
- 1 tsp Worcestershire sauce (optional but adds umami)
- 1 tbsp yellow mustard (classic cheeseburger tang)
- Salt and freshly ground black pepper, to taste
- 1 cup (100g) shredded sharp cheddar cheese (gooey, melty goodness)
- For the dough & coating:
- 1 package refrigerated pizza dough (about 13.8 oz / 390g; I like Pillsbury for consistency)
- 1 cup (60g) grated Parmesan cheese (for that crispy, nutty crust)
- 1 cup (100g) panko breadcrumbs (for extra crunch)
- 2 cloves garlic, minced (mixed into the coating for flavor explosions)
- 2 tbsp unsalted butter, melted (helps the crust crisp and golden)
- Fresh parsley, chopped (for garnish and a fresh pop)
Ingredient Tips & Substitutions: For a gluten-free twist, swap the pizza dough with your favorite gluten-free dough or even puff pastry. If you want to skip beef, ground turkey or plant-based crumbles also work well here. For dairy-free, try a vegan shredded cheese and omit the butter or use a plant-based alternative. And if fresh garlic is on backorder, garlic powder works in a pinch but fresh garlic really makes this recipe sing.
Equipment Needed
- Baking sheet (preferably rimmed to catch any drips)
- Parchment paper or silicone baking mat (to keep things from sticking and ease cleanup)
- Mixing bowls (one for the filling, one for the coating)
- Skillet or frying pan (for cooking the beef filling)
- Measuring cups and spoons (precision counts for balance)
- Pastry brush (to brush melted butter on the bombs)
- Sharp knife or pizza cutter (for portioning the dough)
If you don’t have a pastry brush, no worries—just use a spoon to drizzle butter evenly. For the skillet, a non-stick pan helps prevent the beef from sticking or burning, but any sturdy pan will do. Parchment paper is a game changer here, trust me—it saves cleanup headaches and keeps the bottoms perfectly crispy.
Preparation Method
- Preheat your oven to 400°F (200°C). Line a baking sheet with parchment paper or a silicone mat.
- Cook the cheeseburger filling: Heat a skillet over medium-high heat. Add the ground beef, breaking it up with a spatula. Cook for about 5-7 minutes until browned and cooked through. Drain excess fat if necessary.
- Add onion and garlic: Stir in the finely chopped onion and minced garlic. Cook for another 3-4 minutes until the onion softens and becomes translucent.
- Season the filling: Stir in Worcestershire sauce, yellow mustard, salt, and pepper. Cook an additional minute. Remove from heat and let it cool slightly.
- Mix in the cheddar cheese: Fold the shredded cheddar into the warm beef mixture so it starts to melt but doesn’t become too liquidy.
- Prepare the coating mixture: In a bowl, combine the panko breadcrumbs, grated Parmesan, and minced garlic.
- Roll out the dough: On a lightly floured surface, roll the pizza dough into a large rectangle about ¼ inch (6 mm) thick.
- Cut and fill the dough: Slice the dough into 12 equal squares (about 3×3 inches / 7.5×7.5 cm). Place a generous spoonful (about 2 tablespoons) of the cheeseburger filling in the center of each square.
- Seal the bombs: Fold each square over the filling to form a triangle or pouch. Pinch the edges tightly to seal, making sure no filling escapes.
- Coat the bombs: Brush each sealed bomb generously with melted butter, then roll or press into the breadcrumb-Parmesan mixture until fully coated.
- Arrange on baking sheet: Place the bombs seam-side down on the prepared baking sheet, spacing them about 1 inch (2.5 cm) apart.
- Bake: Bake in the preheated oven for 15-18 minutes, or until golden brown and crispy. Keep an eye on them—the garlic and parmesan crust should be nicely toasted but not burnt.
- Garnish and serve: Remove from oven and sprinkle with fresh chopped parsley for a pop of color and freshness. Let cool for a few minutes before serving.
Pro Tip: If your dough feels sticky, chill it for 10 minutes before rolling. And to avoid soggy bottoms, the parchment paper is your best friend here. If your oven runs hot, start checking at 14 minutes to prevent burning.
Cooking Tips & Techniques
The magic of these cheeseburger bombs lies in balancing crispiness with juicy filling, which can get tricky if you’re not careful. One big mistake is overfilling the dough pockets—honestly, tempting as it is, too much filling leads to leaks and a messy bake. Stick to a modest spoonful, and pinch those edges tight!
Another tip: don’t skip the butter brush before coating with breadcrumbs and parmesan. That fat is what helps create the golden, crispy crust you’re craving. I’ve tried oil spraying before, but butter wins every time with flavor and texture.
When cooking the beef, drain excess fat, or your bombs might get greasy. Also, be patient letting the filling cool slightly before stuffing the dough—warm filling can make the dough soggy and harder to seal.
Timing is key on game day. You can prep the filling and coating earlier and assemble bombs just before baking to save time. While the bombs bake, clean up your prep area and set out dipping sauces or drinks.
Finally, multitasking is your friend. While the filling simmers, get your dough ready. This keeps the process smooth and cuts down on waiting around.
Variations & Adaptations
- Spicy Kick: Add a teaspoon of chili flakes or diced jalapeños to the beef mixture for a fiery twist.
- Vegetarian Version: Replace ground beef with cooked lentils or finely chopped mushrooms sautéed with onion and garlic. Use a plant-based cheese to keep it dairy-free.
- Seasonal Flavors: In fall, toss in some finely diced roasted butternut squash or swap cheddar for smoked gouda for a cozy vibe.
- Different Cooking Methods: Try air frying the bombs at 375°F (190°C) for about 12 minutes for an ultra-crispy finish with less oil.
- Allergen-Friendly: Swap pizza dough with gluten-free dough and use dairy-free cheese alternatives to accommodate allergies.
Personally, I once tried mixing in some caramelized mushrooms with the beef and swapped the cheddar for mozzarella. The result was a melty, earthy bomb that disappeared faster than I could plate them!
Serving & Storage Suggestions
These Crispy Garlic Parmesan Cheeseburger Bombs are best served warm, fresh out of the oven, when the cheese is perfectly gooey and the crust crackles with each bite. Serve them on a big platter garnished with fresh parsley and offer dipping sauces like ketchup, spicy mayo, or a tangy ranch dressing.
They pair wonderfully with a crisp green salad or crunchy veggie sticks to balance the richness. For beverages, cold beer or sparkling water with lemon complements the savory flavors nicely.
To store, let any leftovers cool completely, then place them in an airtight container in the refrigerator for up to 3 days. For longer storage, freeze them on a baking sheet first, then transfer to a freezer bag for up to 2 months.
Reheat in the oven at 350°F (175°C) for about 10 minutes to bring back the crispiness—microwaving tends to make the crust soggy, so I avoid that. Flavors actually deepen after a day, so if you can resist, these bombs taste even better the next day!
Nutritional Information & Benefits
Each serving of these cheeseburger bombs (about 2 bombs) clocks in at approximately 350-400 calories, depending on the cheese and dough brands you use. They provide a solid protein punch from the ground beef and cheese, along with calcium from the parmesan.
Using fresh garlic adds antioxidants and potential immune-boosting benefits. Choosing leaner beef or turkey can reduce saturated fat, and swapping in whole wheat or gluten-free dough can add fiber or cater to dietary needs.
Just a heads up—these contain gluten, dairy, and beef, so they’re not suitable for all diets without some adjustments. But with simple swaps, you can make them fit vegetarian, gluten-free, or dairy-free lifestyles.
From a wellness standpoint, this recipe satisfies that craving for comfort food without feeling heavy or overly processed, making it a treat you can enjoy guilt-free when balanced with wholesome sides.
Conclusion
In case you haven’t guessed, these Crispy Garlic Parmesan Cheeseburger Bombs are a winner in my book—and I think you’ll agree once you try them. They’re quick, packed with familiar, crave-worthy flavors, and just plain fun to eat. The crispy, garlicky crust paired with juicy, cheesy filling hits all the right notes for game day or any casual get-together.
Feel free to customize the filling or try different cheeses and spices to make this recipe your own—cooking is all about making it yours, after all. Personally, I love how versatile these bombs are, and they never fail to bring smiles around the table.
If you make these, I’d love to hear how you tweaked the recipe or what dips you paired them with—drop a comment below! And hey, if you found this recipe helpful, sharing it with fellow food lovers is always appreciated. Here’s to crispy, cheesy bites that make every game day better!
Frequently Asked Questions
Can I make these cheeseburger bombs ahead of time?
Yes! You can prepare the filling and coat the dough a day ahead, then assemble and bake just before serving for maximum freshness.
What’s the best way to reheat leftovers?
Reheat in a 350°F (175°C) oven for about 10 minutes to restore crispiness. Avoid microwaving as it can make the crust soggy.
Can I freeze these bombs?
Absolutely. Freeze assembled bombs on a baking sheet, then transfer to a freezer bag. Bake from frozen, adding a few extra minutes to the baking time.
Is there a vegetarian version of this recipe?
Yes, swap ground beef with cooked lentils, mushrooms, or plant-based crumbles and use vegetarian cheese to keep it meat-free.
What dipping sauces go well with these cheeseburger bombs?
Classic ketchup, spicy mayo, ranch dressing, or even a smoky BBQ sauce all pair beautifully with the garlicky, cheesy flavors.
Pin This Recipe!
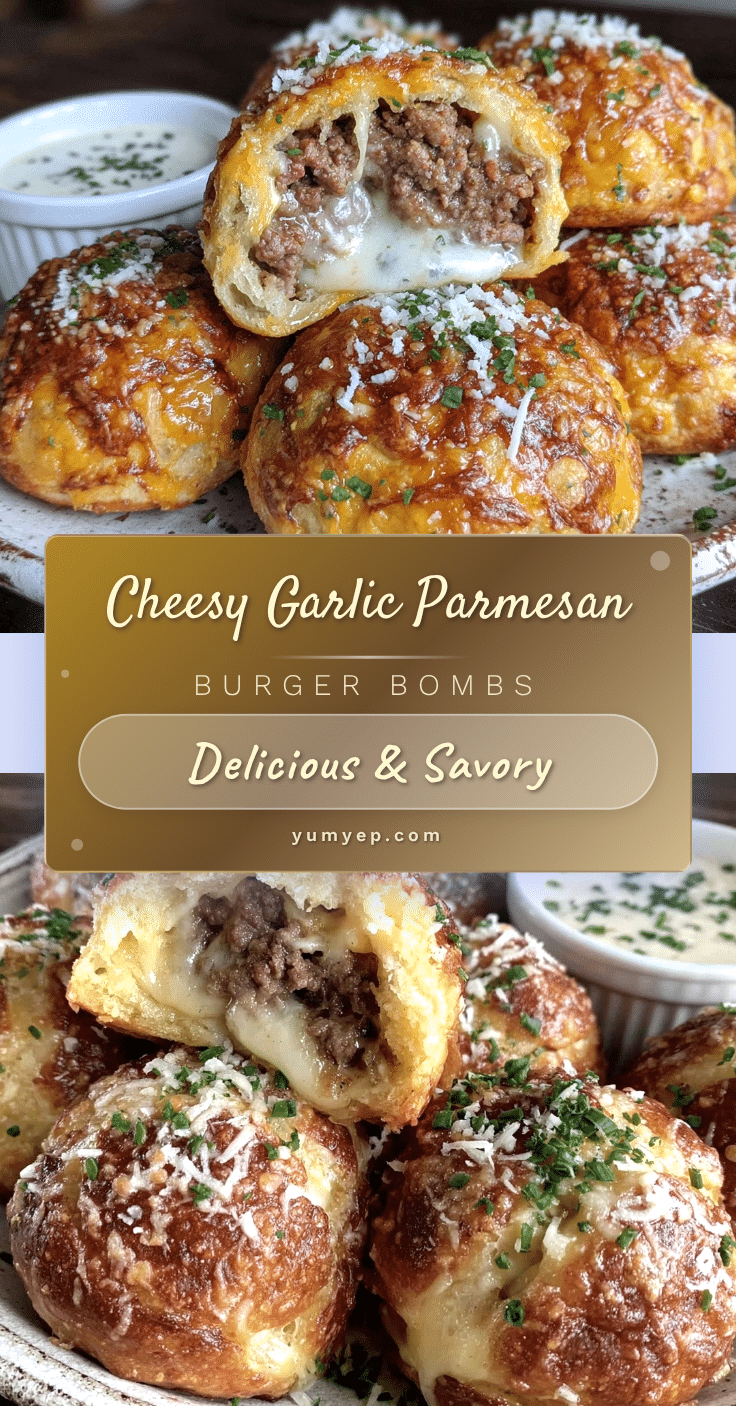
Crispy Garlic Parmesan Cheeseburger Bombs

These Crispy Garlic Parmesan Cheeseburger Bombs are quick, tasty, and crowd-approved snacks featuring a crispy garlic-parmesan crust and a juicy cheeseburger filling, perfect for game day or casual parties.
- Prep Time: 15 minutes
- Cook Time: 18 minutes
- Total Time: 33 minutes
- Yield: 12 bombs (about 6 servings, 2 bombs per serving) 1x
- Category: Snack
- Cuisine: American
Ingredients
- 1 lb (450g) ground beef (80/20 blend recommended for juiciness)
- 1 small onion, finely chopped
- 2 cloves garlic, minced
- 1 tsp Worcestershire sauce (optional)
- 1 tbsp yellow mustard
- Salt and freshly ground black pepper, to taste
- 1 cup (100g) shredded sharp cheddar cheese
- 1 package refrigerated pizza dough (about 13.8 oz / 390g)
- 1 cup (60g) grated Parmesan cheese
- 1 cup (100g) panko breadcrumbs
- 2 cloves garlic, minced (for coating)
- 2 tbsp unsalted butter, melted
- Fresh parsley, chopped (for garnish)
Instructions
- Preheat your oven to 400°F (200°C). Line a baking sheet with parchment paper or a silicone mat.
- Heat a skillet over medium-high heat. Add the ground beef, breaking it up with a spatula. Cook for about 5-7 minutes until browned and cooked through. Drain excess fat if necessary.
- Stir in the finely chopped onion and minced garlic. Cook for another 3-4 minutes until the onion softens and becomes translucent.
- Stir in Worcestershire sauce, yellow mustard, salt, and pepper. Cook an additional minute. Remove from heat and let it cool slightly.
- Fold the shredded cheddar into the warm beef mixture so it starts to melt but doesn’t become too liquidy.
- In a bowl, combine the panko breadcrumbs, grated Parmesan, and minced garlic.
- On a lightly floured surface, roll the pizza dough into a large rectangle about ¼ inch (6 mm) thick.
- Slice the dough into 12 equal squares (about 3×3 inches / 7.5×7.5 cm). Place a generous spoonful (about 2 tablespoons) of the cheeseburger filling in the center of each square.
- Fold each square over the filling to form a triangle or pouch. Pinch the edges tightly to seal, making sure no filling escapes.
- Brush each sealed bomb generously with melted butter, then roll or press into the breadcrumb-Parmesan mixture until fully coated.
- Place the bombs seam-side down on the prepared baking sheet, spacing them about 1 inch (2.5 cm) apart.
- Bake in the preheated oven for 15-18 minutes, or until golden brown and crispy.
- Remove from oven and sprinkle with fresh chopped parsley. Let cool for a few minutes before serving.
Notes
If dough feels sticky, chill for 10 minutes before rolling. Use parchment paper to avoid soggy bottoms. Drain excess fat from beef to prevent greasiness. Let filling cool slightly before stuffing dough to avoid soggy dough. Check bombs at 14 minutes if oven runs hot to prevent burning. Butter brush before coating is essential for crispy crust. Can be frozen and reheated in oven at 350°F for 10 minutes.
Nutrition
- Serving Size: 2 bombs
- Calories: 375
- Sugar: 2
- Sodium: 550
- Fat: 22
- Saturated Fat: 9
- Carbohydrates: 25
- Fiber: 1
- Protein: 20
Keywords: cheeseburger bombs, garlic parmesan, game day recipe, crispy snacks, cheeseburger bites, easy appetizer, party food


