“You sure those little patties are going to be enough?” my cousin chuckled as I juggled the skillet and a handful of slider buns on the grill. Honestly, I wasn’t totally convinced myself. But there I was, late afternoon sun warming the backyard, the scent of sizzling beef mixing with the faint smell of freshly cut grass. It was one of those chaotic family get-togethers where someone forgot the buns, another person brought way too many chips, and the kids were already plotting their escape to the sprinkler.
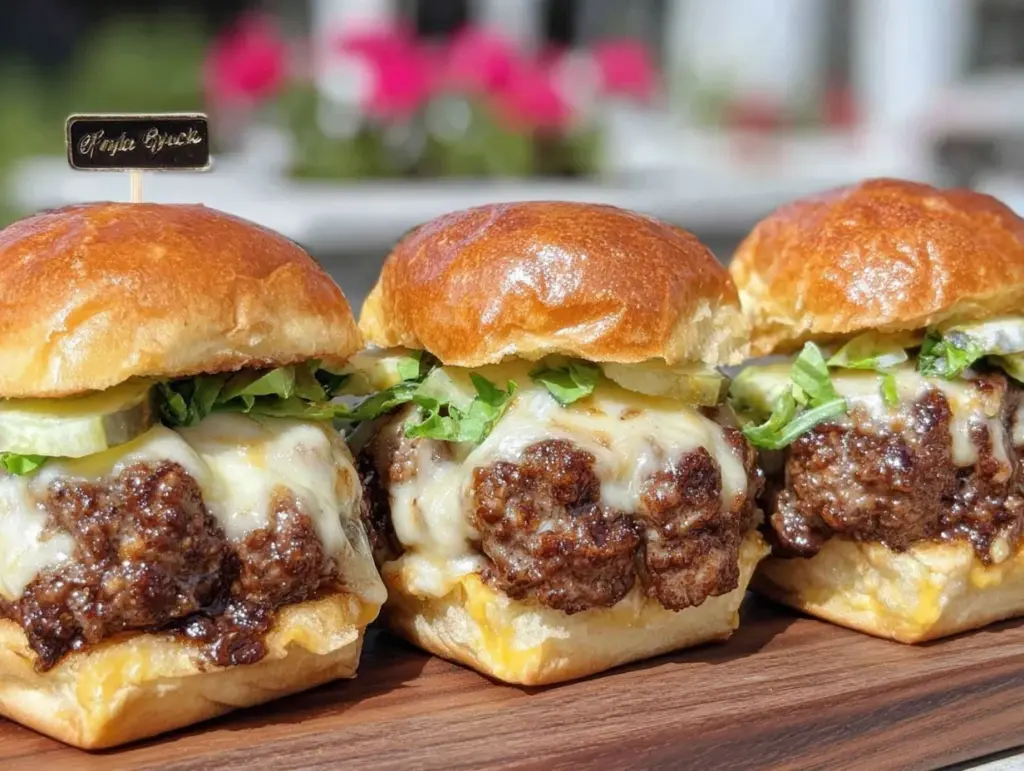
I’d stumbled on this crispy smashburger slider recipe after trying to whip up something quick and impressive with just ground beef and pantry staples. The technique of smashing the patties fast and hard on a hot griddle wasn’t anything new, but the way it crisps the edges just right — that’s where the magic lives. The sliders turned out so crunchy and juicy that even the skeptics (like my cousin) went back for seconds. And thirds. The quiet realization hit me then: these little sliders had become the unexpected hero of our cookout, the perfect bite-sized crowd-pleasers that brought everyone back to the picnic table.
Since then, I’ve found myself making these sliders for everything from casual weekend hangouts to casual Monday dinners — they’re just that reliably delicious. And, honestly, the crisp on the edges paired with melty cheddar and a tangy sauce? Pure comfort food with zero fuss. So, if you’re looking for a recipe that’s easy, fast, and impresses the crowd without needing a grill master degree, these crispy smashburger sliders might just become your new go-to.
There’s something about that satisfying crunch and the way the flavors hit all at once — it’s the kind of recipe that quietly wins over even the pickiest eaters. And that’s why it’s stuck with me, long after the last slider was gone.
Why You’ll Love This Recipe
This crispy smashburger sliders recipe has been through the wringer of family cookouts and solo kitchen experiments, so you can trust it’s been tested for real-life results. Here’s why it’s earned a permanent spot in my recipe rotation:
- Quick & Easy: From mixing to plating, these sliders come together in under 30 minutes — perfect for last-minute cravings or busy weeknights when you want something satisfying without the wait.
- Simple Ingredients: No fancy cuts or exotic spices needed. Just quality ground beef and a handful of pantry basics you probably already have on hand.
- Perfect for Cookouts: These sliders shine when served fresh off the griddle, making them a hit at barbecues, potlucks, or casual backyard parties.
- Crowd-Pleaser: Kids, adults, picky eaters — everyone loves them. The crispy edges and juicy center hit all the right notes.
- Unbelievably Delicious: The secret lies in smashing the patties thin to get that irresistible caramelized crust while keeping the inside tender and juicy.
What sets this recipe apart from the usual burger fare? It’s the technique — smashing the beef on a hot surface creates those crispy bits that just don’t happen with gently formed patties. Plus, the tiny slider size means you can pile on all your favorite toppings without things getting messy. I’ve even swapped in a bit of smoked paprika for a subtle smoky twist that had my friends asking for the recipe again.
Honestly, it’s the kind of recipe that makes you close your eyes after the first bite and think, “Yep, that’s exactly what I needed.” It’s comfort food reimagined — simple, fast, and with the soul-soothing satisfaction of a classic burger, just perfectly crunchy and bite-sized.
What Ingredients You Will Need
This crispy smashburger sliders recipe uses straightforward, wholesome ingredients to deliver that perfect balance of crispy texture and juicy flavor without any fuss. Most of these are pantry staples or easy to find at your local grocery store. Here’s what you’ll want to gather before you start:
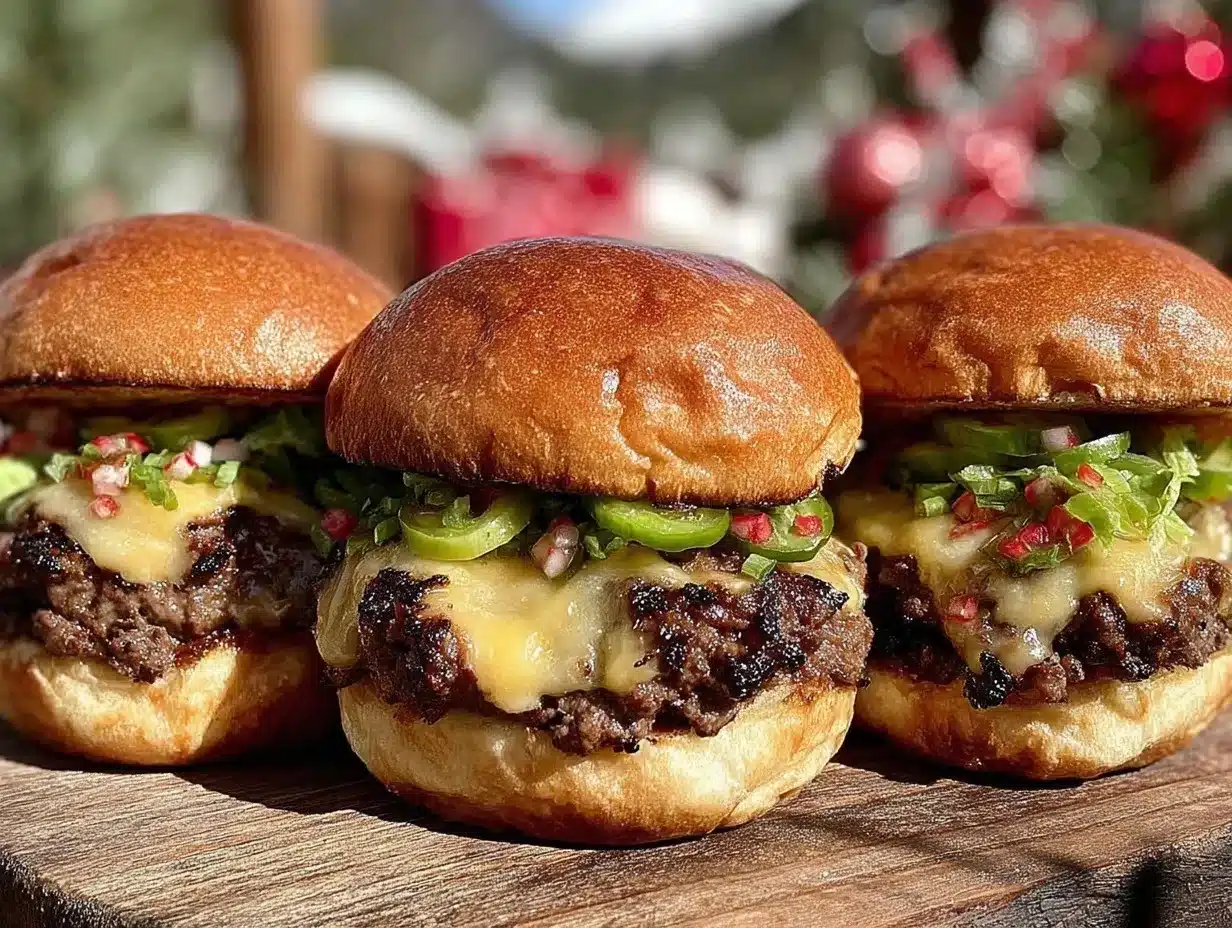
- Ground Beef (80/20 blend, 1 lb / 450 g) – The fat ratio is key for juicy, flavorful patties. I usually go for freshly ground beef from the butcher for best texture.
- Salt and Pepper – Just simple seasoning to bring out the beef’s natural flavor. Kosher salt works great here.
- Slider Buns (8 small buns) – Soft but sturdy buns hold up well to the juicy patties. Brioche buns add a nice buttery note if you want to splurge.
- Cheddar Cheese Slices (8 slices) – Sharp cheddar melts beautifully, but American cheese is classic if you prefer a creamier melt.
- Butter (2 tbsp / 30 g, softened) – For toasting the buns to golden perfection.
- Pickles (sliced) – Adds a tangy crunch that contrasts the rich beef.
- Onion (thinly sliced) – Raw or lightly sautéed, depending on your mood.
- Ketchup and Yellow Mustard – Classic condiments, but feel free to swap in your favorite sauces.
- Optional: Smoked Paprika (1/2 tsp) – Adds a subtle smoky kick, especially if you’re not grilling outdoors.
Substitution tips: If you want a lighter version, you can swap ground beef for ground turkey or chicken, but keep in mind the crispy crust might be less pronounced. For gluten-free buns, look for certified gluten-free slider rolls or use hearty lettuce wraps instead. I like to keep pickles and onions on the side so everyone can customize their sliders just right.
Equipment Needed
- Cast Iron Skillet or Flat Griddle – A heavy-bottomed pan helps get that perfect crust on the smashed patties. I’ve tried nonstick pans, but the cast iron really gives the best sear.
- Spatula (preferably a sturdy metal one) – You’ll want a spatula that can handle pressing down firmly without bending. A wide, thin-edged spatula is ideal for smashing and flipping the patties.
- Mixing Bowl – For seasoning the beef before shaping the patties.
- Butter Knife or Pastry Brush – For spreading butter on the buns before toasting.
- Optional: Grill – If you want to take these outdoors, you can use a grill pan or the grill grates themselves, but a flat surface is easier for smashing.
If you don’t have a cast iron skillet, a heavy stainless steel pan will work, but be patient — it might take a little longer to get the crust right. For budget-friendly options, basic flat griddles from the store do the trick and are easy to clean. Just avoid flimsy pans that don’t hold heat well.
Preparation Method
- Preheat your pan: Place your cast iron skillet or griddle over medium-high heat for about 5 minutes until it’s very hot. You want that surface screaming hot to get the perfect sear.
- Prepare the beef: In a mixing bowl, gently season the ground beef with salt, pepper, and smoked paprika if using. Don’t overwork the meat — just enough to mix the seasoning evenly.
- Divide the beef: Portion the beef into 8 equal balls, about 2 ounces (55 g) each. The smaller size helps them cook quickly while staying juicy.
- Toast the buns: Spread softened butter on the cut side of each slider bun. Place them butter-side down on the hot skillet and toast for 1-2 minutes until golden and crisp. Remove and set aside.
- Smash the patties: Place one beef ball on the hot skillet. Using your spatula (or a heavy-bottomed press covered in parchment paper), press down firmly until the patty is about 1/4 inch (6 mm) thick. Hold for 10-15 seconds to create a crispy crust.
- Cook the patties: Let the patty cook undisturbed for 2-3 minutes until edges are deeply browned and crispy. Flip carefully with your spatula.
- Add cheese: Immediately place a slice of cheddar on each flipped patty. Cook another 1-2 minutes until cheese melts and the patty is cooked through.
- Assemble the sliders: Place each cheesy patty on a toasted bun bottom. Top with pickles, onions, ketchup, and mustard, then cap with the top bun.
- Serve hot: These sliders are best enjoyed fresh off the skillet while the edges are still crispy and the cheese is melty.
If the patties stick when you flip, give them a few more seconds; the crust needs to form a natural release. Also, avoid overcrowding the pan — cook in batches if necessary to keep the heat high. When smashing, don’t press too thin or the patties will dry out; about 1/4 inch thick is sweet spot.
Cooking Tips & Techniques
Getting the perfect crispy edges on your smashburger sliders is all about heat and timing. Here are some tips I’ve picked up after too many slightly underwhelming attempts:
- Use high heat: The pan needs to be hot enough to sear the meat immediately. If it’s not sizzling loudly, turn up the heat.
- Don’t press too hard after the initial smash: Smash just once and hold for a few seconds. Pressing repeatedly squeezes out juices, leading to dry patties.
- Keep the beef cold until cooking: Cold beef balls hold their shape better and develop a better crust.
- Use a sturdy spatula: A flexible or flimsy spatula makes smashing and flipping tricky. A good metal spatula with a thin edge is a game changer.
- Toast buns in the same pan: This adds flavor and texture while saving time and cleanup.
- Multitasking: While the first batch cooks, prep toppings and toast buns to keep things moving smoothly.
One lesson I learned the hard way: don’t skip toasting the buns. Soft buns without that buttery char just don’t hold up to juicy patties and toppings. Also, don’t be shy with the seasoning — a simple sprinkle of salt just before smashing really brings out the beef’s flavor.
Variations & Adaptations
Want to mix it up? These crispy smashburger sliders are a flexible base that you can tweak to fit different tastes and occasions:
- Spicy Kick: Add a pinch of cayenne or chipotle powder to the beef before cooking, or swap ketchup for a smoky chipotle mayo to give the sliders some heat.
- Vegetarian Option: Use a store-bought plant-based ground beef substitute or mashed black beans with spices for the patties. Cook them similarly and top with vegan cheese slices.
- Seasonal Toppings: In summer, swap pickles for fresh tomato slices and crisp lettuce. Autumn sliders pair well with caramelized onions or sautéed mushrooms.
- Cheese Variations: Try pepper jack for a bit of spice, Swiss for nuttiness, or blue cheese crumbles for bold flavor.
- Cooking Method: If you don’t have a skillet, these sliders work on a griddle or even under a broiler with careful watching for the crust development.
One personal favorite twist has been adding a smear of garlic aioli under the cheese — it adds a creamy punch that balances the crispy beef perfectly. It’s fun to experiment but the core technique of smashing thin and cooking hot never changes.
Serving & Storage Suggestions
Serve these crispy smashburger sliders fresh and hot, right off the griddle, with a side of crispy fries or a fresh green salad. They’re perfect finger food for cookouts, so keep napkins handy!
If you want to prep ahead, you can form the beef balls and refrigerate them for up to 24 hours before cooking. The sliders are best enjoyed immediately, but leftover cooked patties can be stored in an airtight container in the fridge for 2 days.
To reheat, pop the patties in a hot skillet for a minute or two to revive the crisp edges, then assemble with fresh buns and toppings. Avoid microwaving if you want to keep that crunch intact.
Over time, the flavors in these sliders actually meld nicely if you wrap leftovers tightly. The savory beef and melted cheese mellow into a comforting snack. And if you’re looking for more ideas to round out your cookout menu, pairing these with easy sides like creamy mashed potatoes or a fresh salad such as my fresh apple pecan salad with maple vinaigrette really hits the spot.
Nutritional Information & Benefits
Each crispy smashburger slider contains approximately 250 calories, with 15 grams of protein and 18 grams of fat, depending on the beef blend and cheese used. Using an 80/20 ground beef blend strikes a good balance of flavor and juiciness, providing essential iron and B vitamins.
The simple ingredients mean no added preservatives or fillers, making these sliders a wholesome choice when enjoyed in moderation. Plus, by controlling the portion size with sliders, it’s easier to satisfy burger cravings without overindulging.
For those watching carbs or gluten, swapping slider buns for lettuce wraps keeps this recipe low-carb and gluten-free. And if dairy is a concern, opting for dairy-free cheese and skipping the butter on buns keeps it friendly for sensitive eaters.
Conclusion
These crispy smashburger sliders have earned their place in my cooking lineup by being just what you want when you need a quick, delicious, and fuss-free meal that still feels special. The perfectly crispy edges, juicy interior, and easy customization make them a hit for any cookout or casual dinner.
I encourage you to tweak the toppings and seasonings to match your cravings — after all, the best recipes are the ones you make your own. For me, this recipe is a little bit of magic in a pan, bringing people together one crispy bite at a time.
If you give these sliders a try, I’d love to hear how you make them your own. Share your favorite add-ons or any tips you discover along the way — there’s always room to grow and improve this classic. Here’s to many delicious cookouts ahead!
FAQs About Crispy Smashburger Sliders
What’s the secret to getting the perfect crispy crust on smashburgers?
Use a hot cast iron skillet and press the beef balls firmly just once when placing them on the pan. Don’t move the patties until the edges have browned and formed a crust, usually about 2-3 minutes per side.
Can I make these sliders ahead of time?
You can prep the beef balls and keep them refrigerated for up to 24 hours before cooking. Cooked sliders are best eaten fresh but will keep in the fridge for 2 days. Reheat in a skillet to keep the crust crisp.
What’s the best ground beef to use?
I recommend an 80/20 blend (80% lean, 20% fat) for juicy, flavorful patties with a good crust. Higher fat content helps prevent dryness and adds richness.
Can I make these sliders on an outdoor grill?
Yes, but use a flat griddle attachment or a cast iron pan on the grill for best smashing results. Directly on grill grates, it’s harder to get the thin, crispy crust.
How do I customize the sliders for different dietary needs?
Swap slider buns for gluten-free buns or lettuce wraps for a gluten-free or low-carb option. Use dairy-free cheese and skip the butter for dairy-free versions. You can also use plant-based ground “meat” for vegetarian sliders.
Pin This Recipe!
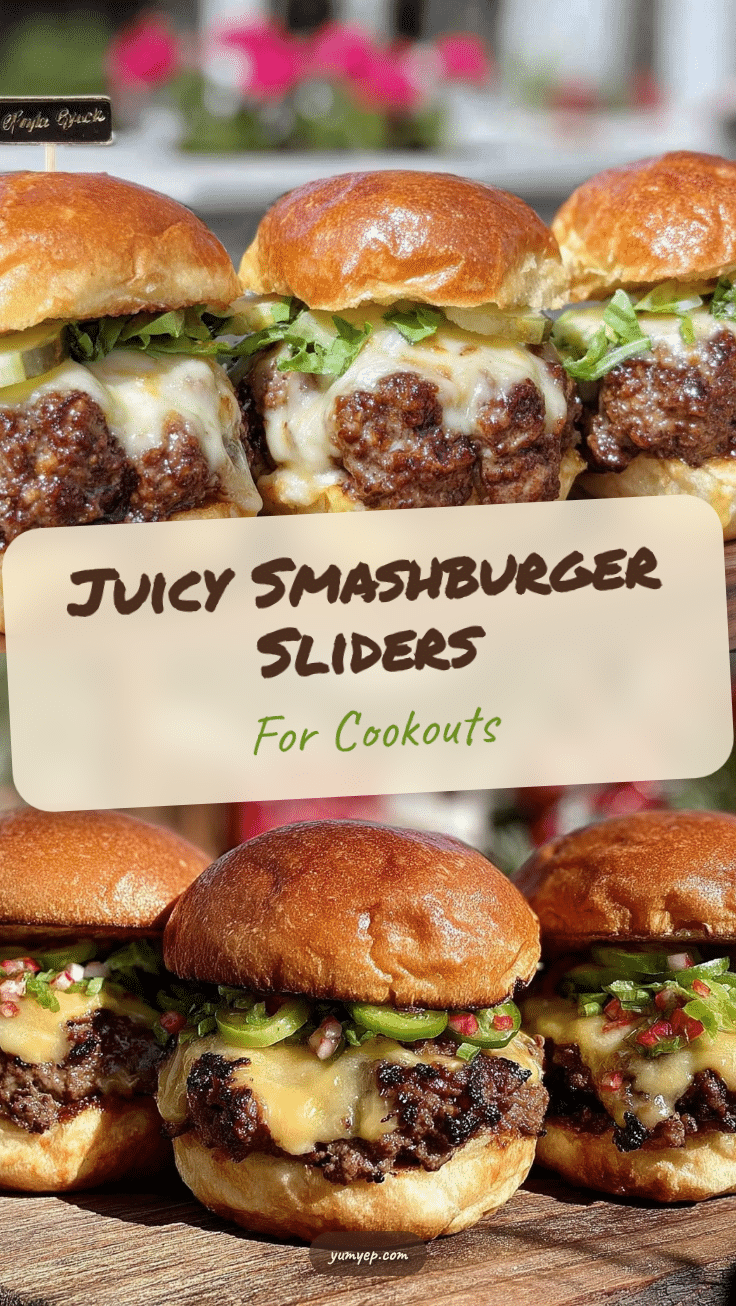
Crispy Smashburger Sliders

These crispy smashburger sliders are quick, easy, and perfect for cookouts, delivering a crunchy crust and juicy interior with simple ingredients and minimal fuss.
- Prep Time: 10 minutes
- Cook Time: 15 minutes
- Total Time: 25 minutes
- Yield: 8 sliders 1x
- Category: Main Course
- Cuisine: American
Ingredients
- 1 lb (450 g) ground beef (80/20 blend)
- Salt and pepper, to taste
- 8 small slider buns
- 8 slices cheddar cheese
- 2 tbsp (30 g) butter, softened
- Pickles, sliced
- Onion, thinly sliced
- Ketchup
- Yellow mustard
- Optional: 1/2 tsp smoked paprika
Instructions
- Preheat your cast iron skillet or griddle over medium-high heat for about 5 minutes until very hot.
- In a mixing bowl, gently season the ground beef with salt, pepper, and smoked paprika if using. Mix just enough to combine.
- Divide the beef into 8 equal balls, about 2 ounces (55 g) each.
- Spread softened butter on the cut side of each slider bun. Place them butter-side down on the hot skillet and toast for 1-2 minutes until golden and crisp. Remove and set aside.
- Place one beef ball on the hot skillet. Using a sturdy spatula, press down firmly until the patty is about 1/4 inch (6 mm) thick. Hold for 10-15 seconds to create a crispy crust.
- Cook the patty undisturbed for 2-3 minutes until edges are deeply browned and crispy. Flip carefully.
- Immediately place a slice of cheddar cheese on each flipped patty. Cook another 1-2 minutes until cheese melts and patty is cooked through.
- Place each cheesy patty on a toasted bun bottom. Top with pickles, onions, ketchup, and mustard, then cap with the top bun.
- Serve hot, fresh off the skillet.
Notes
Use high heat for a perfect crispy crust. Smash patties once and hold pressure for 10-15 seconds. Keep beef cold until cooking. Toast buns in the same pan for added flavor. Cook in batches if pan is crowded. For gluten-free, use gluten-free buns or lettuce wraps. For dairy-free, skip butter and use dairy-free cheese.
Nutrition
- Serving Size: 1 slider
- Calories: 250
- Fat: 18
- Protein: 15
Keywords: smashburger, sliders, crispy burgers, cookout recipe, easy burgers, ground beef sliders, cheddar cheese burgers


