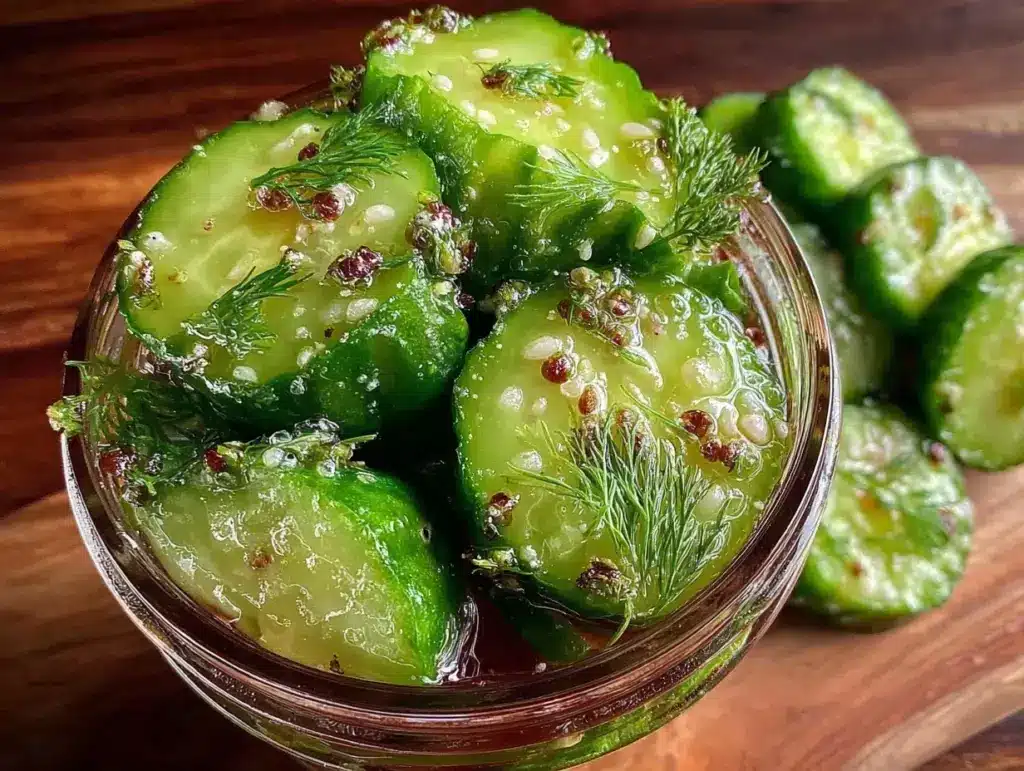
Shaking the jar wildly when I realized I’d forgotten to buy pickles for the barbecue—and only an hour before guests arrived—was not exactly how I pictured the afternoon going. Half a bunch of fresh dill, a few cloves of garlic, and a pile of cucumbers stared back at me from the counter, the clock ticking louder than my stomach growling. Honestly, I didn’t expect much from a “quick” pickle recipe, but with all the chaos swirling around, I tossed together this crunchy garlic dill refrigerator pickles concoction. The smell of fresh garlic mingling with the tangy brine filled the kitchen, and the crunch? Well, that was a surprise hit.
This recipe wasn’t born from calm planning—it came from a last-minute scramble, a need for something crisp, zingy, and homemade, but fast. The way the garlic and dill punch through the cool cucumber crunch instantly turned a rushed snack into a crowd-pleaser. I’ve since made these pickles again and again, sometimes paired with that creamy lemon chicken piccata or even alongside a casual sandwich. They’re a little jar of fresh, tangy joy that’s ready fast when life gets hectic. And honestly, once you try these crunchy garlic dill refrigerator pickles, you might find yourself reaching for cucumbers just to make more.
Why You’ll Love This Recipe
This recipe for crunchy garlic dill refrigerator pickles is one of those kitchen hacks that’s simple but delivers big flavor and texture, no matter how rushed you are.
- Quick & Easy: Ready to eat in as little as 2 hours, these pickles come together in under 15 minutes, perfect for busy weeknights or spontaneous guests.
- Simple Ingredients: No need for fancy or hard-to-find items; you just need fresh cucumbers, garlic, dill, and a few pantry staples.
- Perfect for Any Occasion: Whether it’s a casual snack, a side for grilled meats, or a crunchy addition to sandwiches, they fit right in.
- Crowd-Pleaser: Kids and adults alike love the crisp bite and fresh garlic punch—it’s a flavor combo that somehow always disappears first.
- Unbelievably Delicious: The balance of tangy vinegar, aromatic dill, and bold garlic keeps these pickles fresh, crisp, and irresistibly tasty.
This isn’t your grandma’s pickle recipe that takes weeks to get right. The secret lies in the quick refrigerator method combined with just the right ratio of garlic and dill to cucumber, creating a crispness that stays even after days. The brine is punchy but balanced, so the pickles don’t overwhelm but instead refresh every bite. It’s the kind of recipe you can trust when you need a last-minute side that doesn’t look or taste like you just threw it together.
What Ingredients You Will Need
This recipe uses simple, wholesome ingredients to deliver bold flavor and satisfying texture without the fuss. Most of these are pantry staples or fresh produce you can easily find anywhere.
- Cucumbers: 4 cups, sliced into spears or rounds (I prefer Kirby cucumbers for their firmness and crunch)
- Fresh Dill: 4-5 sprigs (if unavailable, dried dill can be used but fresh gives the best aroma)
- Garlic Cloves: 4 large, peeled and lightly crushed (you want that pungent garlic flavor shining through)
- White Vinegar: 1 cup (use distilled white for a clean tang; apple cider vinegar works too for a milder sweetness)
- Water: 1 cup (filtered or tap is fine, just avoid heavily chlorinated water)
- Salt: 1 tablespoon kosher salt or pickling salt (table salt can be used but reduce quantity slightly)
- Sugar: 1 teaspoon (balances acidity, optional but recommended)
- Black Peppercorns: 1 teaspoon whole (adds subtle spice)
- Red Pepper Flakes: 1/4 teaspoon (optional, for a slight kick)
If you want to try something different, I sometimes swap out a couple of garlic cloves for sliced shallots or add mustard seeds for extra zing. For a gluten-free or paleo option, just make sure your vinegar is compliant (most distilled vinegars are). I also recommend using kosher or pickling salt over table salt to avoid cloudiness in the brine and better texture.
Equipment Needed
- Large Mason Jar or Airtight Container: A 1-quart (1 liter) jar is perfect for this recipe. If you don’t have a mason jar, any glass container with a tight lid works well.
- Measuring Cups and Spoons: Essential for getting the vinegar-to-water ratio right, which makes or breaks the pickle flavor.
- Knife and Cutting Board: For slicing cucumbers and crushing garlic cloves.
- Small Saucepan: To heat the brine ingredients just enough to dissolve salt and sugar (optional but speeds infusion).
If you don’t have a small saucepan handy, you can stir the salt and sugar into warm water in a microwave-safe bowl. I’ve used everything from vintage mason jars to repurposed pickle jars for this, and honestly, the crunch doesn’t care much about the container shape—just make sure it seals well. Keeping your garlic fresh is easier if you have a garlic peeler handy, but a simple knife crush works just fine too.
Preparation Method
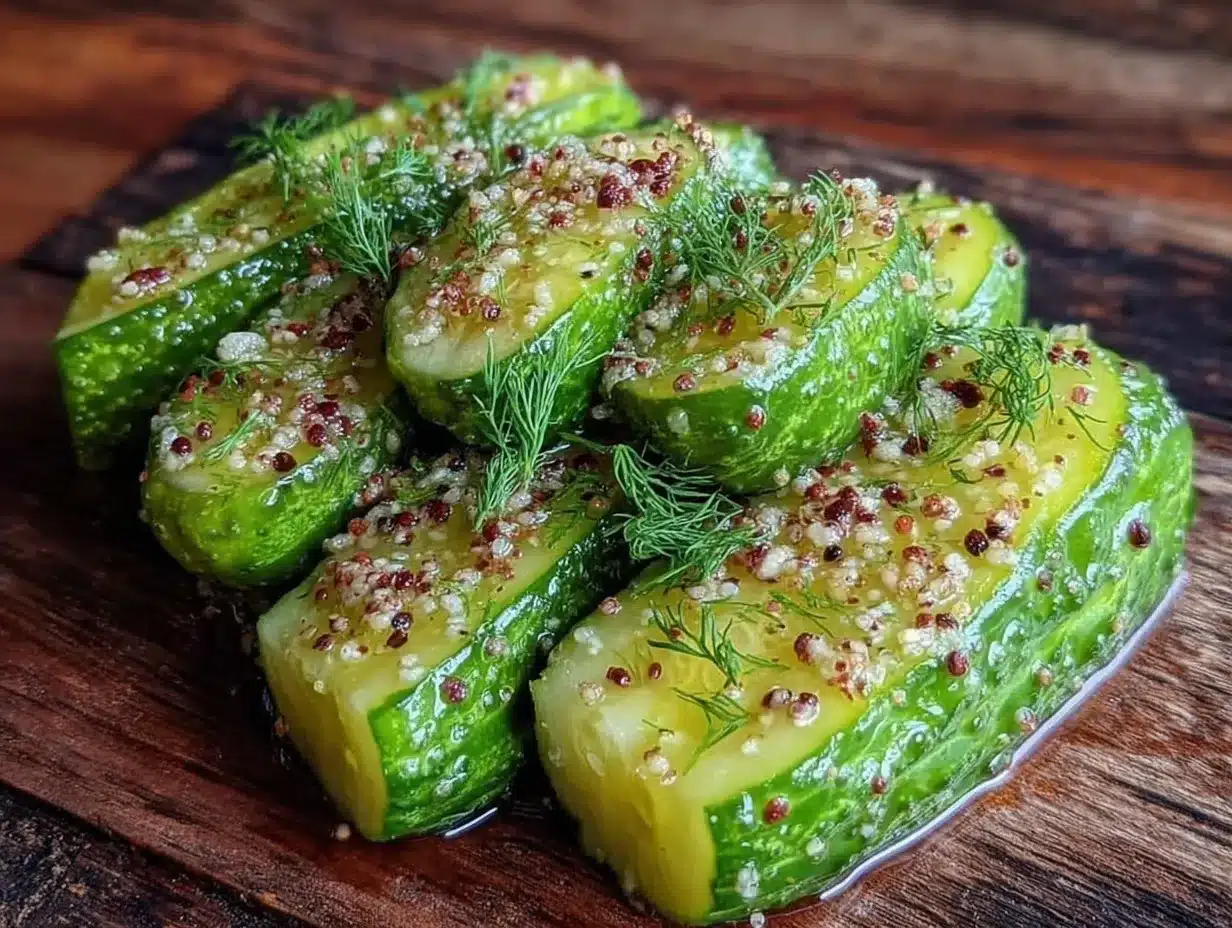
- Prepare the Cucumbers: Wash 4 cups (about 4 medium) Kirby cucumbers thoroughly. Slice them into spears about 3-4 inches long or into 1/4-inch thick rounds, depending on your preference. The spears hold up better for snacking, while rounds are great for sandwiches. (Time: 5 minutes)
- Crush the Garlic: Peel 4 large garlic cloves and give them a light crush with the side of a knife. Crushing releases more flavor into the brine. (Time: 2 minutes)
- Make the Brine: In a small saucepan, combine 1 cup (240 ml) white vinegar, 1 cup (240 ml) water, 1 tablespoon kosher salt, and 1 teaspoon sugar. Heat gently just until salt and sugar dissolve—no need to boil. Remove from heat and let cool slightly. (Time: 5 minutes)
- Layer the Jar: Place the fresh dill sprigs, crushed garlic cloves, 1 teaspoon whole black peppercorns, and 1/4 teaspoon red pepper flakes (if using) at the bottom of your clean jar. Pack the cucumber slices tightly on top without crushing them. (Time: 3 minutes)
- Pour the Brine: Carefully pour the warm brine over the cucumbers, ensuring they are fully submerged. If needed, add a small clean weight or a folded piece of parchment paper to keep cucumbers under the brine to maintain crunch. (Time: 2 minutes)
- Seal and Refrigerate: Close the jar tightly and give it a gentle shake to mix spices. Refrigerate for at least 2 hours before tasting. For best flavor, wait 24 hours. (Time: 2 hours minimum)
- Enjoy: Your crunchy garlic dill refrigerator pickles are ready to enjoy! They keep well in the fridge for up to 2 weeks, developing more intense flavor over time.
Pro tip: If you notice any floating cucumbers, press them down again after a few hours to keep them submerged. This helps maintain that satisfying crunch and prevents any soft spots. Also, don’t skip the sugar—it tames the sharp edge of the vinegar for a rounder taste that won’t overpower your palate.
Cooking Tips & Techniques
Honestly, the key to really crunchy pickles isn’t some fancy trick but a few simple habits I learned the hard way. First, always use fresh, firm cucumbers—old or soft ones just won’t hold up. Kirby cucumbers or pickling cucumbers are your best bet; slicing them just before pickling keeps them crisp.
Don’t rush the brine preparation. Dissolving the salt and sugar in warm vinegar and water ensures even flavor and prevents grainy salt bits in the jar. I’ve tried cold brine before, and while it works, the flavor infusion is slower and uneven.
Pressing the cucumbers down below the brine surface is a small but crucial step. Air exposure leads to softening and off-flavors, so a clean weight or even a kitchen utensil resting on parchment paper helps keep everything submerged.
Resist the urge to open the jar too often while the pickles are marinating. Every time you open, you let in air and slow down the pickling process. I learned this the hard way when my first batch turned out less crunchy because I kept checking!
Lastly, try to keep your pickles refrigerated once made. Unlike canned pickles, these refrigerator pickles aren’t shelf-stable, but the fridge keeps them crisp and safe to eat.
Variations & Adaptations
- Spicy Garlic Dill Pickles: Add more red pepper flakes or a sliced jalapeño for a kick that wakes up your taste buds.
- Low-Sodium Version: Reduce salt to 1/2 tablespoon and add a splash of lemon juice to brighten the flavor without losing the tang.
- Herb Twist: Swap dill for fresh tarragon or add fresh thyme sprigs for a different aromatic profile.
- Vinegar Swap: Use apple cider vinegar instead of white vinegar for a slightly sweeter, fruitier note that pairs well with pork dishes.
- Crunchier Pickles: Add a few grape leaves or horseradish leaves to the jar; they contain tannins that help keep the pickles firm longer.
Once, I tried layering in some thinly sliced carrots and red onions to the jar, which gave a colorful crunch and made for a pretty presentation at a summer picnic. If you want to experiment with the pickling method itself, these are a great base to build on.
Serving & Storage Suggestions
Serve these crunchy garlic dill refrigerator pickles cold straight from the jar. They’re fantastic as a snack on their own or chopped up as a tangy addition to sandwiches and burgers. I often pair them with rich dishes like baked ziti with Italian sausage to cut through the richness.
For storage, keep them tightly sealed in the fridge. They taste best within two weeks but can hold their crunch and flavor for up to three weeks if kept cold. Reheating isn’t recommended since it softens the cucumbers, but bringing them to room temperature briefly can mellow the sharpness if you find the pickles too tangy at first.
Flavors tend to deepen over the first few days, so if you can wait 24 hours before eating, you’ll get the best balance of garlic, dill, and vinegar notes. Just remember to give the jar a little shake before serving to redistribute the spices.
Nutritional Information & Benefits
A one-ounce (28 g) serving of these crunchy garlic dill refrigerator pickles contains approximately:
| Calories | 5-7 kcal |
|---|---|
| Carbohydrates | 1 g |
| Fiber | 0.5 g |
| Sodium | 250-300 mg |
| Fat | 0 g |
| Protein | 0 g |
Pickles are low in calories and can add a probiotic boost if fermented, but these refrigerator pickles focus on fresh ingredients for flavor. Garlic contributes natural antioxidants and immune-boosting compounds, while dill offers digestive benefits and a fresh aroma. Just watch your sodium intake if you’re on a low-salt diet, as the brine is salty by design.
Conclusion
Crunchy garlic dill refrigerator pickles are one of those recipes that come to the rescue when you need a quick, flavorful fix that doesn’t feel thrown together. Their bright, tangy crunch and bold garlic punch make them a kitchen staple in my house, especially when paired with hearty meals or as a crisp snack.
Feel free to tweak the garlic amount or add a little heat to suit your taste buds. This recipe’s simplicity is its charm, and you might find yourself keeping cucumbers and dill on hand just for this quick pickle magic. If you love easy, fresh homemade flavors, this is a recipe worth keeping in your culinary rotation.
And hey, if you enjoyed this, you might appreciate the cozy vibes of my cinnamon roll casserole or the sweet crunch of these crispy candied pecans to round out your snack game. Let me know what variations you try in the comments—there’s nothing better than sharing kitchen wins and happy accidents!
FAQs about Crunchy Garlic Dill Refrigerator Pickles
How long do refrigerator pickles take to get crunchy?
They start to get nicely crunchy after about 2 hours in the fridge, but the best flavor and texture develop after 24 hours.
Can I use regular cucumbers instead of Kirby cucumbers?
You can, but regular slicing cucumbers tend to be less firm and might result in softer pickles. Kirby cucumbers hold up best for crunch.
Do I need to sterilize the jar before making refrigerator pickles?
Since these pickles are stored in the fridge and consumed relatively quickly, sterilizing is not necessary, but make sure the jar is clean and airtight.
Can I omit sugar from the recipe?
Yes, sugar is optional, but it helps balance the acidity and rounds out the flavors nicely.
What’s the best way to keep pickles submerged in the brine?
Use a small clean weight, like a glass or ceramic pickle weight, or place a folded piece of parchment paper on top before sealing to keep cucumbers under the brine.
Pin This Recipe!
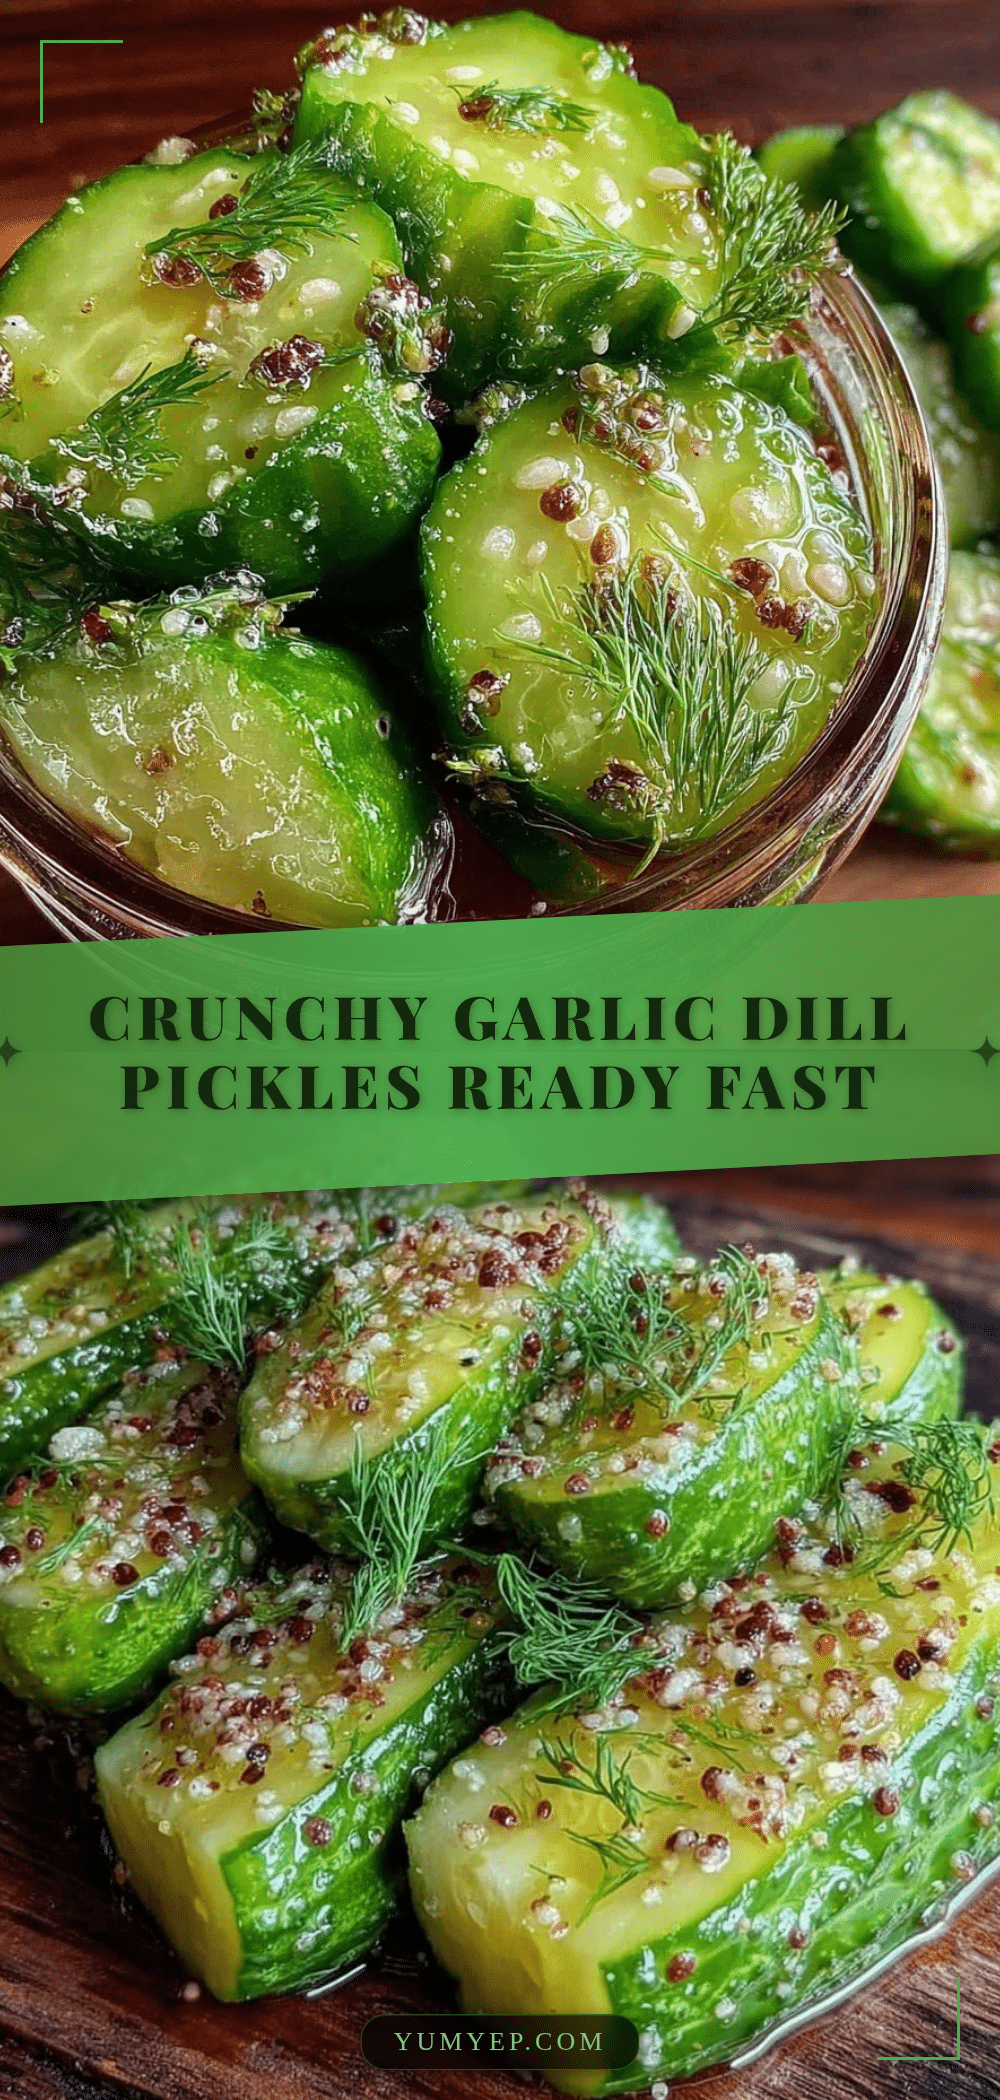
Crunchy Garlic Dill Refrigerator Pickles
A quick and easy recipe for crunchy garlic dill refrigerator pickles that are ready in as little as 2 hours. Perfect for a tangy, crisp snack or a flavorful addition to sandwiches and grilled meats.
- Prep Time: 15 minutes
- Cook Time: 5 minutes
- Total Time: 2 hours 20 minutes
- Yield: 4 servings 1x
- Category: Side Dish
- Cuisine: American
Ingredients
- 4 cups cucumbers, sliced into spears or rounds (preferably Kirby cucumbers)
- 4–5 sprigs fresh dill
- 4 large garlic cloves, peeled and lightly crushed
- 1 cup white vinegar (distilled white or apple cider vinegar)
- 1 cup water (filtered or tap)
- 1 tablespoon kosher salt or pickling salt
- 1 teaspoon sugar (optional but recommended)
- 1 teaspoon whole black peppercorns
- 1/4 teaspoon red pepper flakes (optional)
Instructions
- Wash 4 cups (about 4 medium) Kirby cucumbers thoroughly. Slice into spears about 3-4 inches long or into 1/4-inch thick rounds.
- Peel 4 large garlic cloves and lightly crush with the side of a knife.
- In a small saucepan, combine 1 cup white vinegar, 1 cup water, 1 tablespoon kosher salt, and 1 teaspoon sugar. Heat gently until salt and sugar dissolve. Remove from heat and let cool slightly.
- Place fresh dill sprigs, crushed garlic cloves, 1 teaspoon whole black peppercorns, and 1/4 teaspoon red pepper flakes (if using) at the bottom of a clean 1-quart jar.
- Pack cucumber slices tightly on top without crushing them.
- Pour the warm brine over the cucumbers, ensuring they are fully submerged. Use a small clean weight or folded parchment paper to keep cucumbers under the brine if needed.
- Seal the jar tightly and gently shake to mix spices. Refrigerate for at least 2 hours before tasting; for best flavor, wait 24 hours.
- Enjoy your crunchy garlic dill refrigerator pickles. They keep well in the fridge for up to 2 weeks, developing more intense flavor over time.
Notes
Use fresh, firm Kirby cucumbers for best crunch. Dissolve salt and sugar in warm vinegar and water for even flavor. Keep cucumbers submerged under brine using a weight or parchment paper to maintain crunch. Refrigerate pickles and avoid opening the jar frequently during marinating. Sugar is optional but recommended to balance acidity. These pickles are not shelf-stable and must be kept refrigerated.
Nutrition
- Serving Size: 1 ounce (28 g)
- Calories: 57
- Sodium: 250300
- Carbohydrates: 1
- Fiber: 0.5
Keywords: garlic dill pickles, refrigerator pickles, quick pickles, crunchy pickles, easy pickle recipe, homemade pickles, dill pickles, garlic pickles