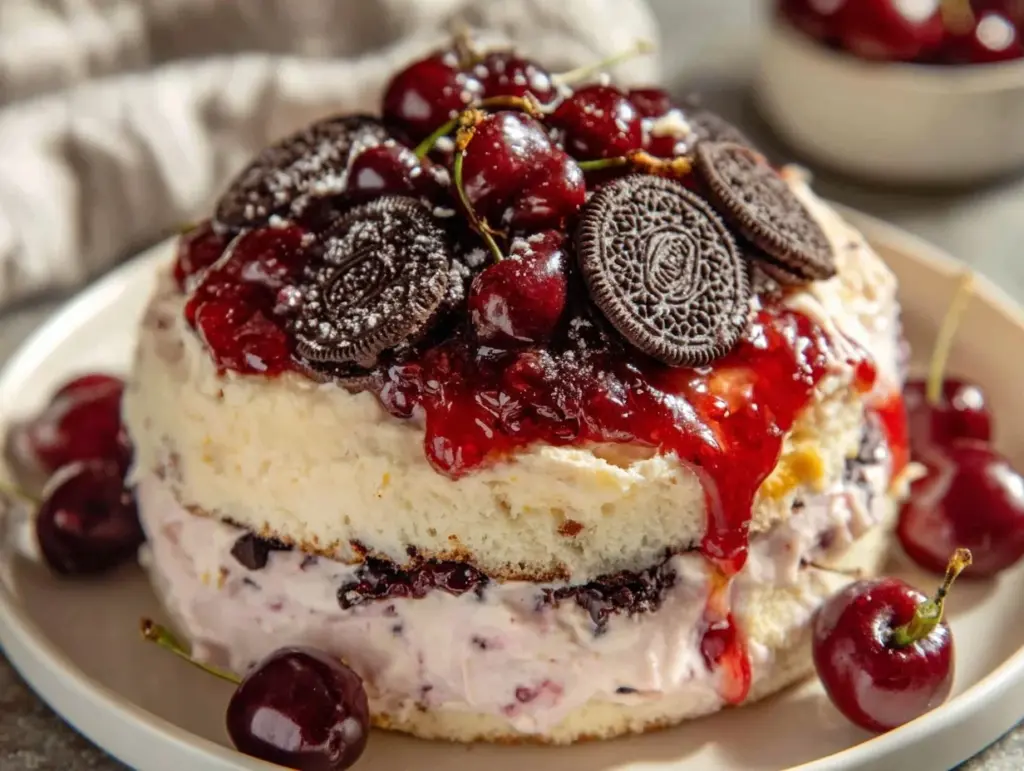
Let me tell you – the first time I made this Decadent Black Forest Icebox Cake, I was blown away. Imagine layers of rich chocolate cookies, luscious whipped cream, and juicy cherries coming together in a no-bake masterpiece. The kind of dessert that feels fancy enough for guests but is secretly so simple, you’ll want to make it every week. The best part? It’s dangerously easy and doesn’t require an oven. My family couldn’t stop sneaking slices from the fridge (and honestly, neither could I).
This recipe came about on a hot summer afternoon when I was craving the classic flavors of a Black Forest cake but couldn’t bear to turn on the oven. Inspired by my childhood love for icebox cakes and my obsession with cherries, I knew I was onto something special. The result is pure nostalgic comfort—a dessert that feels like a warm hug, even when served chilled. Trust me, you’re going to want to bookmark this one.
Why You’ll Love This Recipe
- No Baking Required: Perfect for when you want something sweet without heating up the kitchen.
- Simple Ingredients: You probably have most of the essentials already in your pantry.
- Beautiful Presentation: It looks stunning layered in a glass dish, making it ideal for impressing guests.
- Rich and Creamy: The combination of velvety whipped cream, chocolate, and cherries is pure indulgence.
- Make-Ahead Friendly: Prepare it the night before for a stress-free dessert the next day.
What sets this recipe apart? The balance of flavors is just right—the tart cherries cut through the sweetness, the chocolate cookies soften to a cake-like texture, and the whipped cream ties it all together. It’s the kind of dessert that makes you close your eyes after the first bite.
What Ingredients You Will Need
This recipe uses simple, wholesome ingredients to deliver bold flavor and satisfying texture without the fuss.
- Chocolate Wafer Cookies: Thin cookies that soften beautifully to mimic cake layers.
- Heavy Whipping Cream: Whipped to soft peaks for a light and creamy texture.
- Powdered Sugar: Adds a touch of sweetness to the whipped cream.
- Vanilla Extract: Enhances the flavor of the whipped cream.
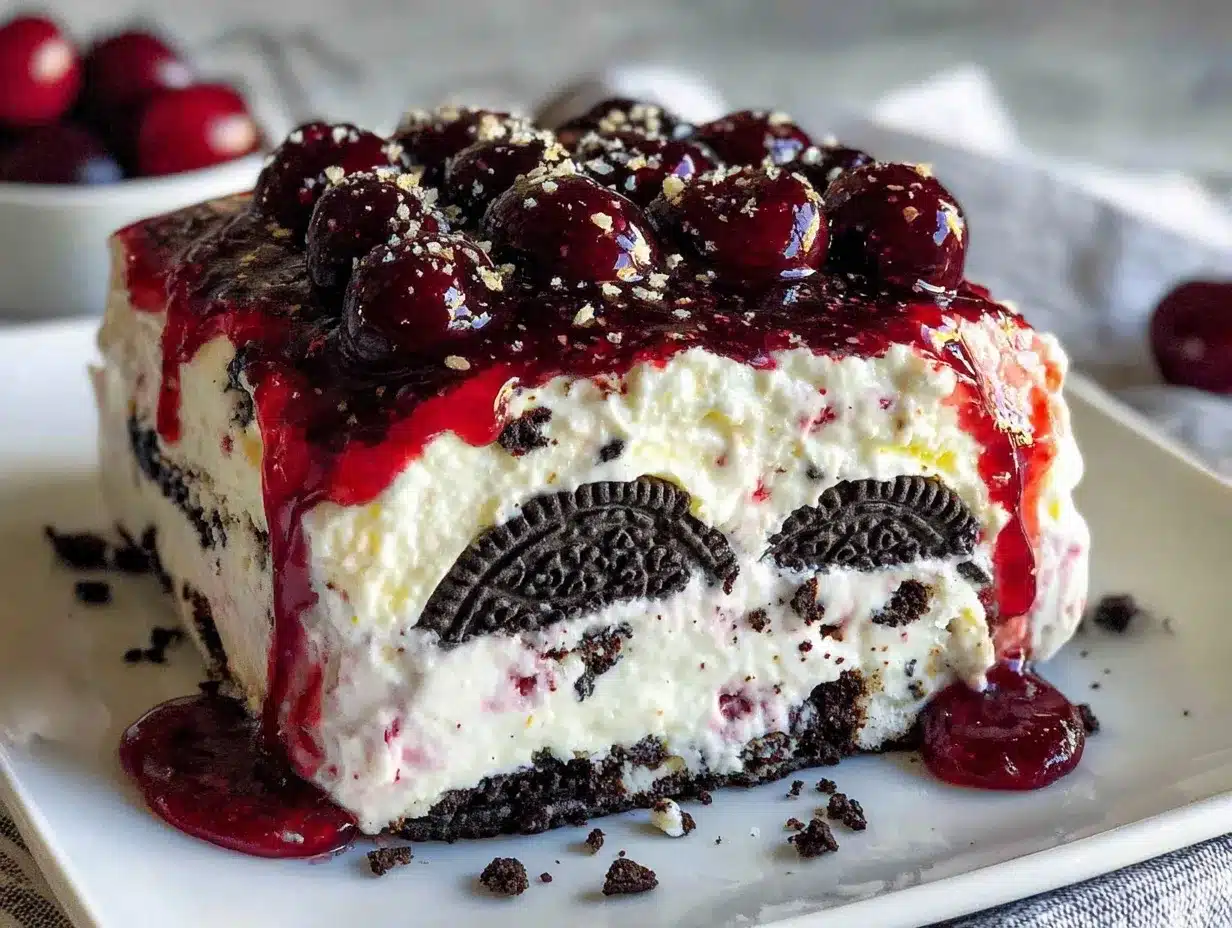
- Canned Cherry Pie Filling: Sweet and tart cherries that are the star of the show.
- Dark Chocolate Shavings: Optional, but adds a beautiful garnish and extra chocolate flavor.
Feel free to swap canned cherries with fresh cherries if they’re in season, or use store-bought whipped topping if you’re in a pinch. For a gluten-free option, choose gluten-free chocolate cookies.
Equipment Needed
- Mixing Bowls: For whipping the cream and assembling the layers.
- Electric Mixer: A handheld or stand mixer will make whipping cream effortless.
- 9×13-inch Glass Baking Dish: Ideal for showcasing those lovely layers.
- Offset Spatula: Helps spread the cream evenly.
- Vegetable Peeler: For shaving chocolate, if desired.
If you don’t have an electric mixer, you can whip the cream by hand—it’ll just take a little more elbow grease. And if you don’t have a glass dish, any shallow dish will work.
Preparation Method
- Whip the Cream: In a large mixing bowl, combine 2 cups (480 ml) of heavy whipping cream, 1/4 cup (30 g) of powdered sugar, and 1 teaspoon (5 ml) of vanilla extract. Beat on medium-high speed until soft peaks form, about 3-5 minutes.
- Layer the Cookies: Spread a thin layer of whipped cream on the bottom of a 9×13-inch glass dish. Place a single layer of chocolate wafer cookies over the cream, ensuring they fit snugly.
- Add the Filling: Spoon half of the cherry pie filling evenly over the cookies, followed by a layer of whipped cream. Smooth the cream with an offset spatula.
- Repeat Layers: Add another layer of cookies, followed by the remaining cherry pie filling, and top with whipped cream. Continue layering until all ingredients are used, finishing with whipped cream.
- Chill: Cover the dish tightly with plastic wrap and refrigerate for at least 4 hours, preferably overnight. This allows the cookies to soften and absorb the flavors.
- Garnish: Before serving, shave dark chocolate over the top for a decadent finish.
Pro tip: If your whipped cream starts to look grainy, you may have over-whipped it. Add a tablespoon of unwhipped cream and gently whisk to bring it back to life.
Cooking Tips & Techniques
- Use Cold Cream: Cold cream whips up faster and holds its shape better.
- Don’t Rush the Chill Time: Giving the cake time to rest in the fridge is key to achieving the perfect texture.
- Layer Strategically: Spread the whipped cream evenly to avoid uneven layers and ensure every bite is balanced.
- Chocolate Shavings: Use a vegetable peeler on a bar of dark chocolate for elegant curls.
- Prevent Soggy Cookies: If using fresh cherries, drain them thoroughly to avoid excess liquid.
From personal experience, I’ve found that using a chilled bowl and beaters for whipping cream speeds up the process and gives you that beautiful, fluffy texture. Trust me, it’s worth it!
Variations & Adaptations
- Gluten-Free Option: Substitute regular chocolate wafer cookies with gluten-free chocolate cookies.
- Fresh Fruit Twist: Use fresh cherries or raspberries instead of canned pie filling for a fresher flavor.
- Chocolate Lovers: Add a layer of chocolate ganache between the whipped cream and cookies.
- Low-Sugar Version: Use unsweetened whipped cream and low-sugar cherry pie filling.
My personal favorite variation? Swapping the cherries for raspberries and adding a drizzle of raspberry sauce on top—it’s a whole new level of delicious!
Serving & Storage Suggestions
This cake is best served chilled, straight from the fridge. Slice it into squares and place on dessert plates for a clean presentation. Pair it with a cup of coffee or a glass of milk for the ultimate treat.
Leftovers can be stored in the fridge for up to 3 days, tightly covered with plastic wrap. If you want to freeze it, wrap the dish in aluminum foil and freeze for up to 1 month. To serve, thaw overnight in the fridge and enjoy!
Nutritional Information & Benefits
Per serving (based on 12 servings):
- Calories: Approximately 300
- Protein: 2 g
- Fat: 15 g
- Carbohydrates: 38 g
- Fiber: 2 g
Cherries are rich in antioxidants and Vitamin C, while dark chocolate provides heart-healthy benefits. This recipe is indulgent but can be adapted for various dietary needs.
Conclusion
If you’re looking for a dessert that’s easy, impressive, and downright delicious, this Decadent Black Forest Icebox Cake is a must-try. It’s perfect for customizing to suit your tastes or dietary needs, and it’s sure to become a family favorite. Honestly, it’s one of those recipes that feels like a little celebration every time you make it.
Give it a try and let me know how it turns out in the comments! I’d love to hear your variations and see your creations. Remember, the best recipes are the ones that bring people together—and this one does just that. Happy baking (well, technically assembling)!
FAQs
Can I use fresh cherries instead of canned pie filling?
Absolutely! Just make sure to pit and slice them, and drain any excess juice to avoid making the cake soggy.
How long does the cake need to chill?
At least 4 hours, but overnight is best to let the flavors meld and the cookies soften.
Can I make this recipe gluten-free?
Yes, simply use gluten-free chocolate cookies in place of traditional wafer cookies.
What’s the best way to store leftovers?
Cover the dish tightly with plastic wrap and store in the fridge for up to 3 days. You can also freeze it for up to a month.
Can I use store-bought whipped cream?
Yes, store-bought whipped topping works in a pinch, but homemade whipped cream will give you a richer flavor and texture.
Pin This Recipe!
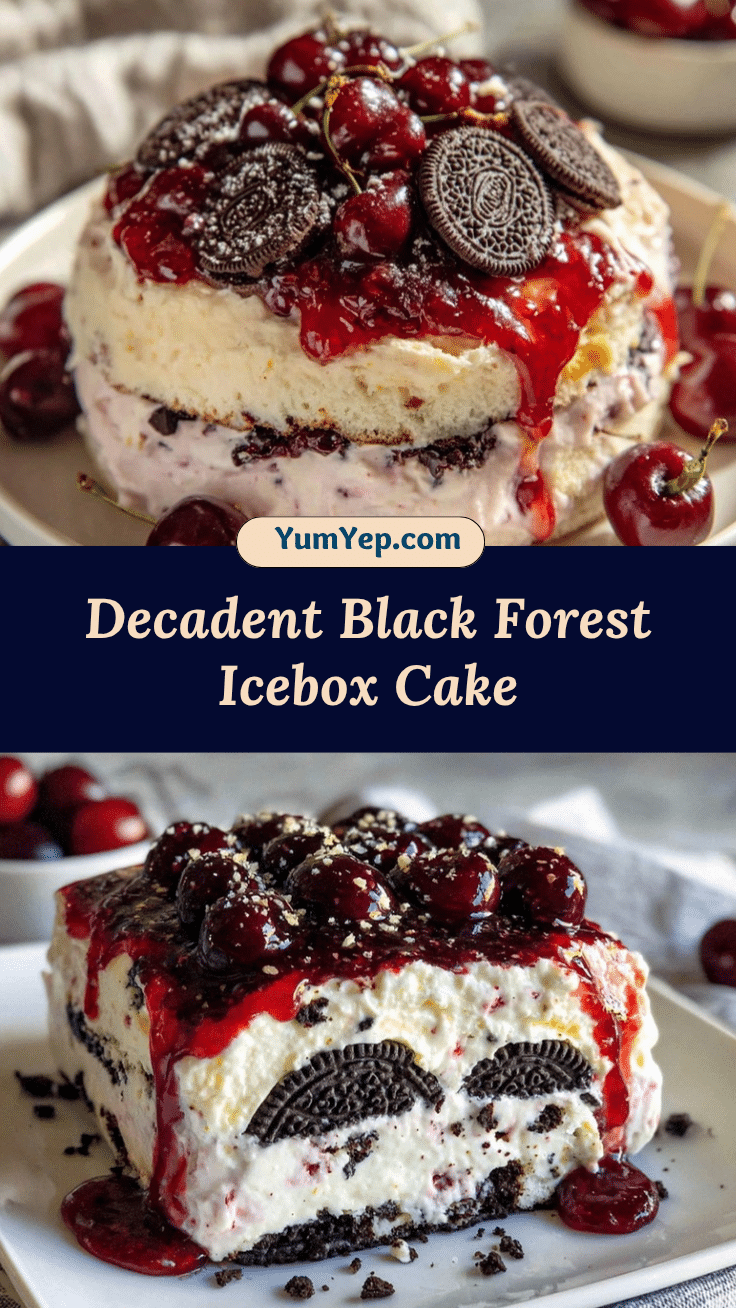
Decadent Black Forest Icebox Cake

A no-bake dessert featuring layers of chocolate cookies, whipped cream, and cherries, perfect for guests or weekly indulgence.
- Prep Time: 15 minutes
- Cook Time: 0 minutes
- Total Time: 4 hours 15 minutes
- Yield: 12 servings 1x
- Category: Dessert
- Cuisine: German
Ingredients
- Chocolate Wafer Cookies
- 2 cups (480 ml) Heavy Whipping Cream
- 1/4 cup (30 g) Powdered Sugar
- 1 teaspoon (5 ml) Vanilla Extract
- Canned Cherry Pie Filling
- Dark Chocolate Shavings (optional)
Instructions
- In a large mixing bowl, combine 2 cups (480 ml) of heavy whipping cream, 1/4 cup (30 g) of powdered sugar, and 1 teaspoon (5 ml) of vanilla extract. Beat on medium-high speed until soft peaks form, about 3-5 minutes.
- Spread a thin layer of whipped cream on the bottom of a 9×13-inch glass dish. Place a single layer of chocolate wafer cookies over the cream, ensuring they fit snugly.
- Spoon half of the cherry pie filling evenly over the cookies, followed by a layer of whipped cream. Smooth the cream with an offset spatula.
- Add another layer of cookies, followed by the remaining cherry pie filling, and top with whipped cream. Continue layering until all ingredients are used, finishing with whipped cream.
- Cover the dish tightly with plastic wrap and refrigerate for at least 4 hours, preferably overnight.
- Before serving, shave dark chocolate over the top for a decadent finish.
Notes
[‘Use cold cream for faster whipping and better texture.’, ‘Allow the cake to chill overnight for the best flavor and texture.’, ‘Spread whipped cream evenly to ensure balanced layers.’, ‘Use a vegetable peeler on a bar of dark chocolate for elegant curls.’, ‘Drain fresh cherries thoroughly to prevent soggy cookies.’]
Nutrition
- Serving Size: 1 slice
- Calories: 300
- Fat: 15
- Carbohydrates: 38
- Fiber: 2
- Protein: 2
Keywords: Black Forest Cake, Icebox Cake, No-Bake Dessert, Chocolate Dessert, Cherry Dessert, Easy Dessert Recipe


