
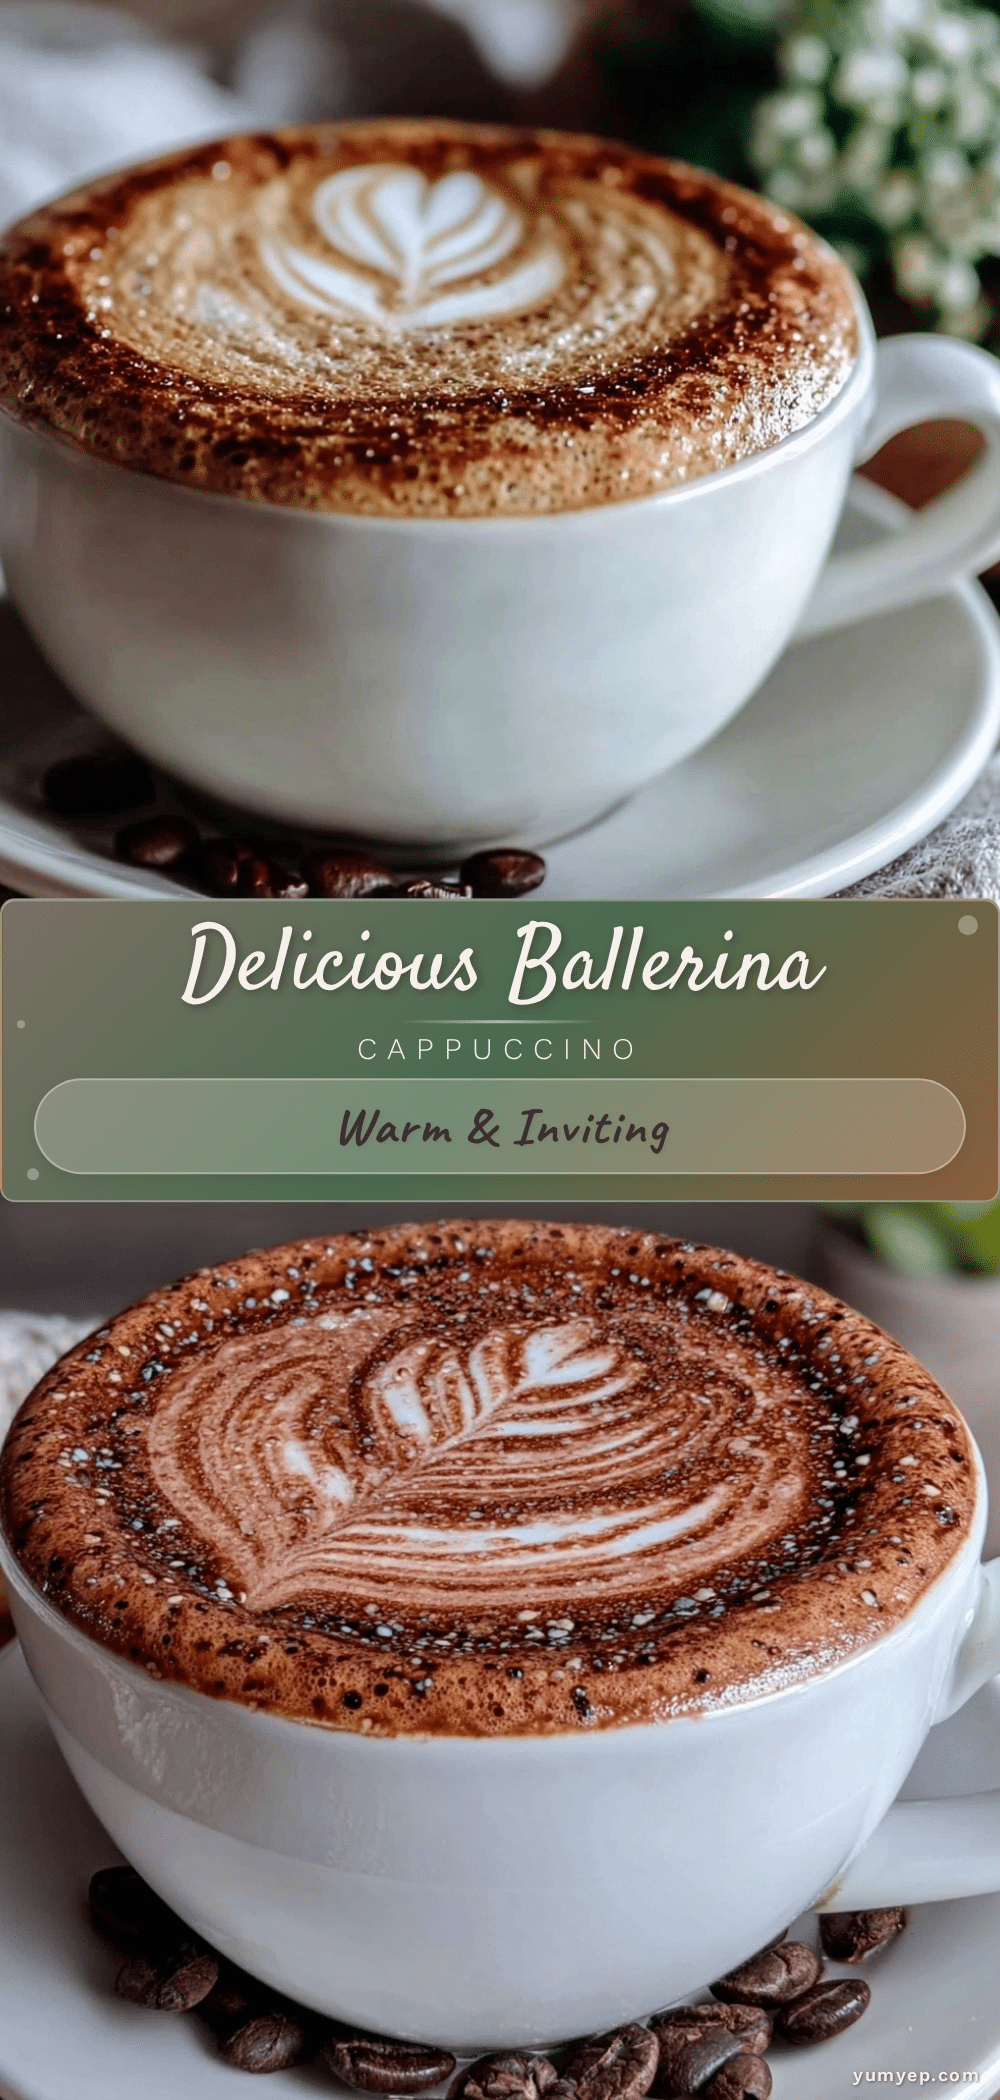
There’s something quietly magical about the first sip of a cappuccino that’s been made with care—especially when it arrives with a swirl of latte art resembling a delicate ballerina. I remember that chilly Saturday morning, standing in my tiny kitchen, fumbling with the milk frother and espresso machine, utterly skeptical that I could pull off any sort of “elegant” design. Honestly, I was just craving a good cup of coffee after a long week, not picturing myself as some latte artist. But as the steam hissed and the froth thickened, something clicked. The swirls started to look like a twirling dancer, and suddenly, this wasn’t just a drink—it was a little moment of grace.
That first attempt was far from perfect (the “ballerina” looked more like she’d had a rough day), but the warmth of the cup and the gentle dance of cream and coffee made me keep trying. Over a handful of weekends, I refined the technique—learning to balance the espresso’s rich bitterness with silky, textured milk. The Delicious Ballerina Cappuccino with Elegant Latte Art became my go-to comfort, the one I’d make when I needed a quiet pause that felt special. It’s funny how a simple cup of coffee can turn into a tiny act of artistry and calm in the buzz of daily life.
And that’s why this recipe stuck—because it’s not just about coffee, it’s about the little graceful moments we create for ourselves. If you ever thought latte art was too tricky or that cappuccinos were just for the pros, this ballerina will gently prove you wrong.
Why You’ll Love This Recipe
Making the Delicious Ballerina Cappuccino with Elegant Latte Art isn’t just a recipe; it’s a little ritual that brings a touch of elegance and comfort to your day. After perfecting this recipe through trial, error, and a few too many spilled milk moments, I can say with confidence it’s accessible and rewarding.
- Quick & Easy: Comes together in under 10 minutes, perfect for those mornings when you need a pick-me-up without the fuss.
- Simple Ingredients: Uses common coffee essentials—espresso, milk, and a bit of patience. No fancy syrups or obscure tools required.
- Perfect for Solo Moments or Impressing Guests: Whether you’re enjoying a calm morning alone or want to wow friends with your barista skills, this recipe fits the bill.
- Crowd-Pleaser: The smooth texture and balanced flavor always get compliments, especially when paired with the graceful latte art design.
- Unbelievably Delicious: The creamy, foamy milk perfectly offsets the robust espresso, creating a comforting yet sophisticated flavor combo.
What really sets this apart is the technique behind the latte art—a gentle wrist motion and just the right milk texture create that ballerina silhouette that feels like a secret celebration in your cup. It’s not just a drink; it’s a moment of creativity and calm. And honestly, once you master it, you might find yourself making cappuccinos more often than you thought.
What Ingredients You Will Need
This recipe uses simple, wholesome ingredients to deliver bold flavor and satisfying texture without the fuss. Most of these are pantry staples or easy to find at your local store.
- Espresso: 1 shot (about 30 ml / 1 fl oz) of freshly brewed espresso. I prefer a medium roast like Lavazza for a smooth, balanced flavor.
- Milk: 6 oz (180 ml) whole milk, cold (for the best froth and creaminess). You can substitute with oat milk or almond milk if you prefer a dairy-free option—just note the texture might change slightly.
- Sugar: Optional, to taste. I usually skip it, but brown sugar adds a nice caramel hint.
- Cocoa Powder or Cinnamon: For light dusting on top, optional but adds a lovely aroma and subtle flavor.
For latte art, the milk’s texture is crucial. Look for fresh milk with a high fat content for a creamier foam. If you’re using plant-based milk, oat milk tends to froth the best. I’ve tried barista blends from Oatly and Califia Farms, which work well.
Equipment Needed
- Espresso Machine: Essential for a true cappuccino. I use a mid-range machine with a steam wand, but if you don’t have one, a stovetop espresso maker paired with a handheld milk frother works too.
- Milk Frother or Steam Wand: For creating that silky microfoam. A manual frother or electric frother can substitute but might take a little extra practice to get the texture right.
- Milk Pitcher: A small stainless steel pitcher with a narrow spout helps with pouring latte art designs.
- Coffee Grinder (optional): Freshly ground beans make a big difference. I recommend a burr grinder for consistency.
- Thermometer (optional): To check milk temperature; aim for 140–150°F (60–65°C) to avoid scalding.
When I first started, I used a budget handheld frother and a small glass pitcher. It took some patience, but it worked! If you’re on a tight budget, start simple and upgrade as you go. Keeping your equipment clean is key—milk residue can kill your foam quality fast.
Preparation Method

- Prepare the Espresso: Brew a fresh shot of espresso (about 30 ml / 1 fl oz) using your espresso machine. The espresso should have a rich, golden crema on top. This usually takes 25–30 seconds brewing time.
- Steam the Milk: Pour 6 oz (180 ml) of cold whole milk into your milk pitcher. Insert the steam wand just below the surface and start steaming, creating a gentle whirlpool. The goal is to introduce air to form microfoam, making the milk silky and smooth. Aim for a temperature between 140–150°F (60–65°C). This step usually takes 20–30 seconds.
- Tap and Swirl: Once steamed, tap the pitcher gently on the counter to break any large bubbles, then swirl the milk to keep the texture even and glossy.
- Pour the Milk: Hold the cup with the espresso at a slight angle. Start pouring the milk slowly from about 3 inches (7.5 cm) above the cup, aiming for the center. Once the cup is about half full, move the pitcher closer, pouring faster to bring the foam on top.
- Create the Ballerina Art: To form the ballerina shape, use a steady wrist motion to draw a teardrop shape, then a gentle flick to create the “skirt” flare. It helps to keep the spout close to the surface for better control. Practice makes perfect here—don’t worry if your first tries look more abstract!
- Optional Topping: Lightly dust with cocoa powder or cinnamon for a finishing touch.
Quick tip: If your milk is too hot, the foam won’t be as smooth. If it’s too cold, it won’t blend well. Watch for that subtle hissing sound during steaming—it’s your cue to stop.
Cooking Tips & Techniques
Making the perfect ballerina cappuccino is all about finesse and timing. From my experience, these tips can save you a lot of frustration:
- Milk Texture Is Everything: Aim for microfoam—tiny, velvety bubbles—not big airy ones. If your foam looks bubbly or dry, you probably introduced too much air or overheated the milk.
- Practice Your Pour: Latte art is mostly about steady hands and fluid motion. If your pour starts too high, the milk will sink below the crema; too low, and it splashes. I found that a pitcher with a sharp, narrow spout makes a huge difference.
- Don’t Rush the Espresso: Fresh, well-extracted espresso with a thick crema sets the perfect canvas for your art.
- Multitasking Helps: Get your milk steaming right as your espresso finishes brewing to keep everything hot and fresh.
- Keep Equipment Clean: Milk residue quickly ruins frothing quality. I wipe down the steam wand immediately after each use—it’s a small step that pays off big.
One time, I overheated the milk and ended up with a burnt taste that no sugar could fix. Lesson learned: patience and proper temperature control make all the difference.
Variations & Adaptations
This ballerina cappuccino recipe is quite adaptable. Here are a few ways I’ve tweaked it over time:
- Dairy-Free Version: Swap whole milk for barista-style oat milk, which froths beautifully and adds a subtle sweetness. Almond or soy milk works too but can be trickier to foam.
- Flavored Twist: Add a drop of vanilla or hazelnut syrup before pouring the milk for a cozy, nutty note. I once made this for a friend who loved lavender syrup—it was unexpectedly delightful!
- Decaf Delight: Use decaf espresso if you want the ritual without the jitters. The latte art technique stays the same.
- Cold Ballerina Latte: For warmer days, chill your espresso and froth cold milk to create a refreshing iced version. Just pour gently over ice and attempt the art on top.
Don’t hesitate to experiment with milk temperatures or pouring speed to find what works best for your style and equipment.
Serving & Storage Suggestions
The Delicious Ballerina Cappuccino is best enjoyed fresh, ideally within five minutes of making it. Serve it in a pre-warmed cup to keep the temperature steady longer and to preserve the intricate latte art.
Pair it with a buttery croissant, almond biscotti, or even a small piece of dark chocolate for a little indulgence. The mild bitterness of the espresso cuts beautifully through sweet or flaky treats.
If you have leftovers (which is rare!), store the cappuccino in the fridge for up to 24 hours, but note the foam will collapse and the texture won’t be the same. Reheating in a microwave is possible but will flatten the milk—better to re-steam if you have the machine handy.
Interestingly, I’ve noticed the flavors deepen slightly if you let the cup sit for a few minutes, but the art fades quickly. So, sip slowly but not too slowly!
Nutritional Information & Benefits
A standard Delicious Ballerina Cappuccino (1 shot espresso + 6 oz whole milk) contains approximately 80–100 calories, mostly from the milk. It provides a moderate caffeine boost (about 63 mg per shot) and offers calcium and protein from the milk.
Choosing whole milk delivers healthy fats that contribute to the creamy mouthfeel, while plant-based alternatives can lower calories and fat but may vary in protein content.
This recipe is naturally gluten-free and can be made vegan by swapping the milk. Just watch for added sugars if you include syrups.
From a wellness perspective, this cappuccino offers a satisfying ritual with moderate caffeine, helping many of us start the day focused without overdoing it.
Conclusion
The Delicious Ballerina Cappuccino with Elegant Latte Art is more than just a coffee recipe—it’s a small ceremony that turns your kitchen into a little café. Whether you’re new to espresso or a seasoned coffee lover, the gentle swirl of milk and coffee creates a comforting pause that feels personal and rewarding.
Feel free to make it your own, adjusting milk types, flavors, or the art itself. What matters most is the joy you get from the process and that first warm sip. Honestly, this recipe is a reminder that sometimes the simplest things—coffee, a bit of foam, a slow pour—can bring a surprising amount of happiness.
Try it out, share your ballerina moments, and enjoy the quiet dance in your cup.
FAQs
What kind of milk works best for latte art?
Whole milk is ideal because of its fat content and ability to froth into smooth microfoam. Barista-style oat milk is the best dairy-free option for frothing.
Can I make the ballerina cappuccino without an espresso machine?
You can use a stovetop espresso maker (Moka pot) for strong coffee and a handheld milk frother to create foam, but the latte art may be trickier.
How do I fix milk that’s too bubbly or dry when frothing?
Try steaming at a lower temperature and avoid introducing too much air early on. The goal is velvety, fine bubbles rather than large foam bubbles.
Is it necessary to dust the cappuccino with cocoa or cinnamon?
No, it’s optional but adds a nice aroma and visual contrast. You can skip it or try other spices like nutmeg.
How long does the latte art last?
Latte art looks best immediately after pouring. It usually starts fading after a couple of minutes as the foam settles.
Pin This Recipe!
Delicious Ballerina Cappuccino Recipe with Elegant Latte Art Tutorial

A comforting and elegant cappuccino recipe featuring a delicate ballerina latte art design, perfect for quiet moments or impressing guests.
- Prep Time: 5 minutes
- Cook Time: 5 minutes
- Total Time: 10 minutes
- Yield: 1 serving 1x
- Category: Beverage
- Cuisine: Italian
Ingredients
- 1 shot (about 30 ml / 1 fl oz) freshly brewed espresso
- 6 oz (180 ml) whole milk, cold (can substitute with oat milk or almond milk for dairy-free)
- Sugar, optional, to taste
- Cocoa powder or cinnamon, optional for dusting
Instructions
- Brew a fresh shot of espresso (about 30 ml / 1 fl oz) using your espresso machine, aiming for a rich, golden crema on top.
- Pour 6 oz (180 ml) of cold whole milk into a milk pitcher. Steam the milk using a steam wand just below the surface to create microfoam, aiming for 140–150°F (60–65°C).
- Tap the pitcher gently on the counter to break large bubbles, then swirl the milk to keep the texture even and glossy.
- Hold the cup with espresso at a slight angle. Pour the milk slowly from about 3 inches above the cup, aiming for the center. When the cup is half full, move the pitcher closer and pour faster to bring foam on top.
- Use a steady wrist motion to create a teardrop shape and a gentle flick to form the ballerina skirt flare in the latte art.
- Optionally, dust the top with cocoa powder or cinnamon.
Notes
Use whole milk for best froth and creaminess; oat milk is the best dairy-free alternative for frothing. Keep equipment clean to maintain foam quality. Practice steady pouring for better latte art. Avoid overheating milk to prevent burnt taste.
Nutrition
- Serving Size: 1 cup (about 8 oz)
- Calories: 80100
- Sugar: 6
- Sodium: 50
- Fat: 4.5
- Saturated Fat: 3
- Carbohydrates: 6
- Protein: 4
Keywords: cappuccino, latte art, ballerina cappuccino, espresso, coffee recipe, milk froth, barista, easy cappuccino


