“Hey, do you have any snacks for after practice?” That question hit me again as I was trying to juggle three backpacks, a soccer ball, and a tired toddler in one hand. Honestly, the chaos of weekend soccer games had me scrambling—not just for snacks but for something healthy, quick, and that wouldn’t vanish in five seconds. I didn’t want to rely on store-bought bars loaded with stuff I couldn’t pronounce, so I tried making granola bars at home. What started as a last-minute experiment one busy Saturday morning turned into a weekly staple for our whole family.
These easy homemade granola bars for busy soccer moms became my secret weapon. They’re not fancy or complicated—just a simple mix of wholesome ingredients that stick together well and taste pretty darn good, even if you’re eating them between car rides. No weird textures, no crumbling mess, just grab-and-go energy. It’s funny how a little batch of bars ended up saving not just snack time but my sanity on those hectic days.
I remember the first time I packed these bars in my daughter’s bag and got the biggest smile when she pulled one out after a tough game. That quiet moment made me realize I’d found something worth sharing—something that’s as much about convenience as it is about care. So, here’s the recipe that’s been my go-to, quietly reliable and easy enough for anyone juggling a packed schedule.
Why You’ll Love This Recipe
Having tried more granola bars than I can count (and thrown out half of them), this recipe really stands out. It’s tested, family-approved, and honestly, it just works. Here’s what makes these bars a winner for busy soccer moms and anyone on the run:
- Quick & Easy: Comes together in under 20 minutes, no baking skills required—perfect for those last-minute snack needs.
- Simple Ingredients: You probably have most of these pantry staples already, no need for specialty stores or weird add-ins.
- Perfect for On-the-Go: Whether it’s a soccer game, school lunchbox, or a quick breakfast, these bars keep energy steady without a sugar crash.
- Crowd-Pleaser: My kids, husband, and even the pickiest neighbors have all asked for seconds, which says a lot.
- Unbelievably Delicious: The chewy texture with just a hint of honey and cinnamon makes these bars more than just “healthy”—they’re genuinely tasty.
What sets this recipe apart is the balance—no overly sweet or dry bars here. The secret? Toasting the oats lightly before mixing, which adds a toasty depth and stops the bars from turning into a crumbly mess. Also, blending the nut butter with a touch of honey creates a sticky but smooth binder that holds everything perfectly.
Honestly, it’s the kind of recipe that makes you close your eyes after the first bite, thinking, “Yep, this works.” It’s comforting, practical, and just the right amount of sweet to keep everyone happy.
What Ingredients You Will Need
This recipe uses straightforward, wholesome ingredients to deliver bold flavor and a satisfying texture without fuss. Most of these are pantry staples, making it easy to whip up a batch anytime you need a quick energy boost.
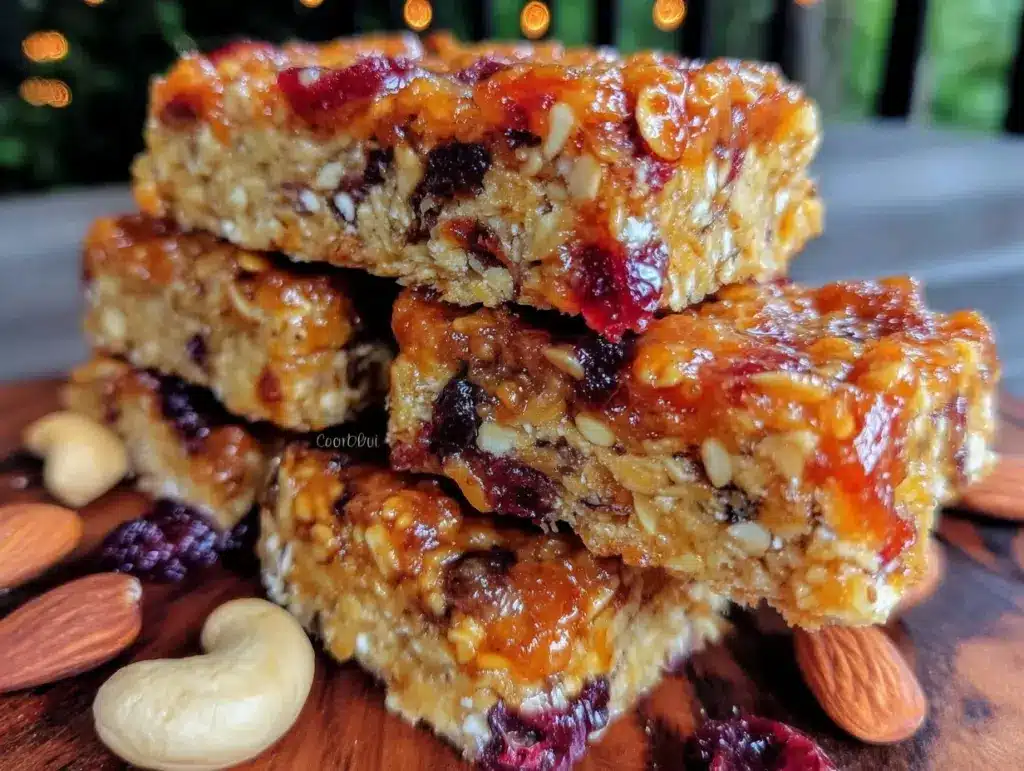
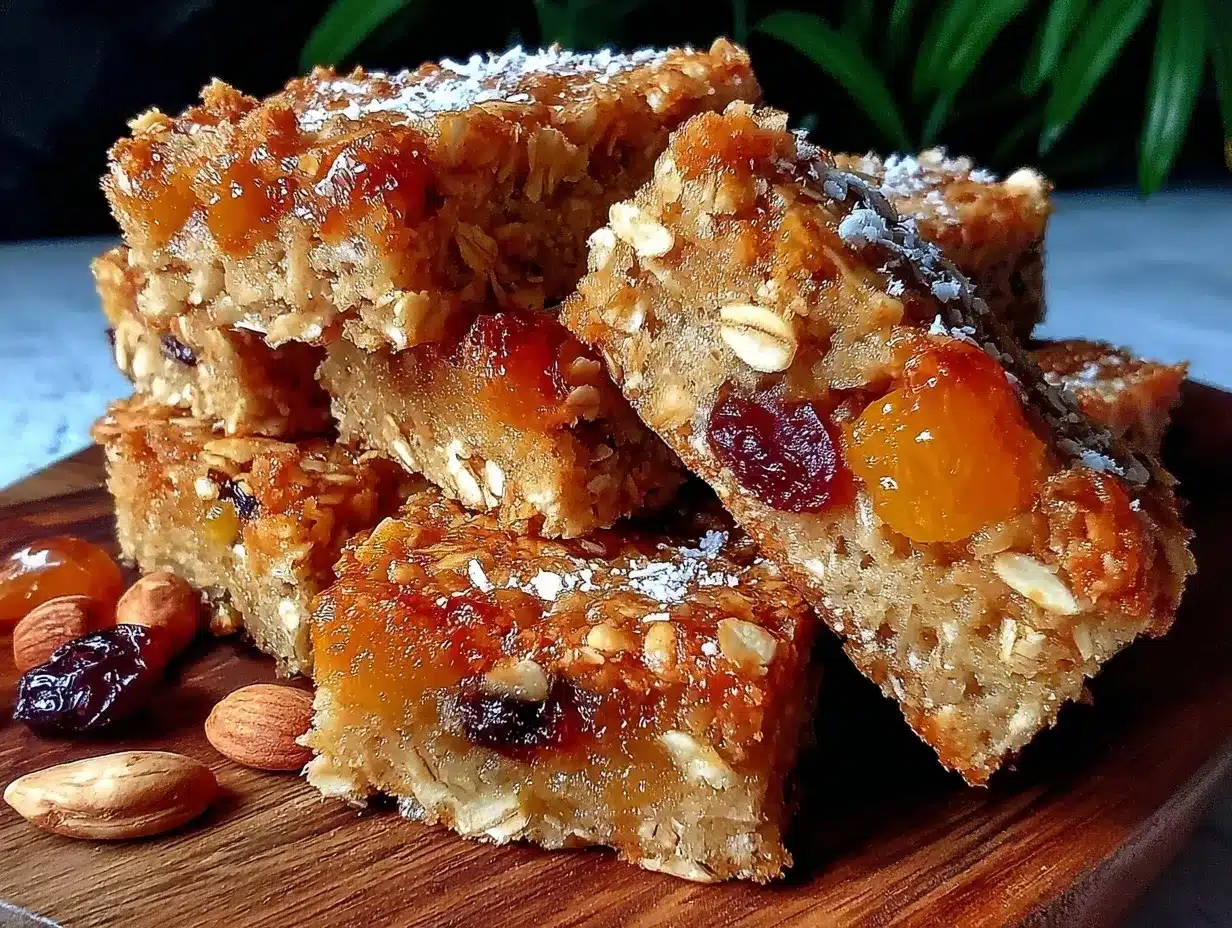
- Old-fashioned rolled oats (2 cups / 180g) – toasted lightly for a nutty flavor
- Nut butter (1/2 cup / 125g) – creamy peanut butter or almond butter works best (I often use natural almond butter from Justin’s for smooth texture)
- Honey (1/3 cup / 113g) – the natural sweetener and binder
- Chopped nuts (1/2 cup / 60g) – walnuts, pecans, or almonds add crunch (I love tossing in some crispy candied pecans for a special touch)
- Dried fruit (1/3 cup / 50g) – raisins, cranberries, or chopped apricots (fresh seasonal berries can be swapped in summer)
- Ground cinnamon (1 tsp) – adds warmth and depth
- Vanilla extract (1 tsp) – for a subtle flavor lift
- Salt (1/4 tsp) – balances the sweetness
- Chia seeds or flaxseeds (optional, 2 tbsp) – boost fiber and omega-3s, plus a touch of texture
You can swap peanut butter for sunflower seed butter if allergies are a concern, or use maple syrup instead of honey for a vegan-friendly bar. I’ve found that using firm, small-curd dried fruit yields the best chew without sogginess. The combination of nuts and seeds is flexible—feel free to tailor it to what you have on hand.
Equipment Needed
Luckily, this recipe calls for minimal kitchen gear—perfect for anyone who doesn’t want to drag out a bunch of gadgets before making snacks.
- Mixing bowl: A medium-sized bowl to combine all ingredients comfortably.
- Spoon or spatula: For stirring the sticky mixture thoroughly.
- Baking pan: An 8×8-inch (20×20 cm) square pan works great to press and shape the bars.
- Parchment paper: Essential to line the pan for easy removal of bars without sticking.
- Measuring cups and spoons: For precise ingredient amounts (I prefer using kitchen scales too for accuracy).
If you don’t have a baking pan that size, a similar-sized glass or metal dish will do. Pressing the mixture firmly into the pan helps the bars hold together better, so don’t skip that step. If you want to get fancy, a food processor can chop nuts and fruit quickly, but it’s not a must-have.
Preparation Method
- Toast the oats: Preheat your oven to 350°F (175°C). Spread 2 cups (180g) of rolled oats on a baking sheet and toast for about 8-10 minutes until they’re lightly golden and smell nutty. Keep an eye on them so they don’t burn.
- Mix wet ingredients: In a mixing bowl, combine 1/2 cup (125g) nut butter with 1/3 cup (113g) honey. Warm slightly in the microwave for 15-20 seconds if stiff, then stir in 1 tsp vanilla extract and 1/4 tsp salt until smooth.
- Add dry ingredients: To the wet mixture, fold in the toasted oats, 1/2 cup (60g) chopped nuts, 1/3 cup (50g) dried fruit, 1 tsp ground cinnamon, and optional 2 tbsp chia or flaxseeds. Stir everything until well combined.
- Press into pan: Line an 8×8-inch (20×20 cm) baking pan with parchment paper, leaving some overhang for easy removal. Transfer the mixture and press it firmly and evenly into the pan using the back of a spoon or your hands (lightly greased).
- Chill to set: Refrigerate the pan for at least 2 hours, or overnight if you can wait. This step helps the bars hold their shape and makes cutting easier.
- Cut into bars: Lift the chilled mixture out using the parchment overhang, then slice into 10-12 bars (depending on your preferred size). If the bars crumble, pop them back in the fridge a bit longer.
Pro tip: Toasting the oats is a small step that makes a big difference—you’ll notice a richer flavor and better texture. Also, don’t rush the chilling; it really helps keep these bars from falling apart. If you want softer bars, press gently; for firmer bars (great for lunchboxes), press firmly.
Cooking Tips & Techniques
Making homemade granola bars can sometimes feel tricky, but a few simple pointers make all the difference. Here’s what I’ve learned:
- Toast oats evenly: Spread oats in a single layer to avoid burnt spots. Stir halfway through to keep the color consistent.
- Warm nut butter gently: If it’s too thick, the bars won’t bind well. A quick microwave zap loosens it up without cooking it.
- Press firmly: Don’t be shy here; compact bars hold together better. Use the bottom of a measuring cup for an even finish.
- Chill adequately: Cutting before chilling leads to crumbly bars. Patience here pays off.
- Customize texture: Want crunchier bars? Add more nuts. Prefer chewy? Increase dried fruit slightly.
I once skipped chilling because I was rushing—big mistake. Bars fell apart faster than you can say “snack time.” Lesson learned! Also, when mixing, be gentle; over-stirring can crush nuts and fruit, making bars dense rather than light and chewy.
Timing-wise, I often multitask by toasting oats while prepping other breakfast items, like my cinnamon roll casserole. It’s all about fitting these small steps into your busy morning rhythm.
Variations & Adaptations
This recipe is super flexible, so don’t hesitate to make it your own based on what you have, dietary needs, or flavor cravings.
- Gluten-free option: Use certified gluten-free oats and swap nut butter for sunflower seed butter to avoid nut allergens.
- Seasonal twist: Swap dried fruit for fresh chopped apples and add a pinch of nutmeg in fall for cozy vibes.
- Chocolate chip delight: Toss in 1/4 cup mini dark chocolate chips after mixing for a sweet surprise—just add them last to keep from melting.
- Protein boost: Add 1/4 cup protein powder or hemp seeds to the dry mix for extra staying power during long games.
- Personal favorite: I once made a batch with coconut flakes and macadamia nuts that brought a tropical feel—it was gone in no time.
If you want to bake the bars instead of chilling, press the mixture into the pan and bake at 325°F (160°C) for about 20 minutes. Just keep a close watch so they don’t dry out. Baked bars have a crunchier edge but can be less chewy.
Serving & Storage Suggestions
These granola bars are best served chilled or at room temperature. They’re perfect on their own or paired with a glass of milk or a warm cup of tea for a quick pick-me-up.
For easy packing, wrap individual bars in parchment paper or store them in an airtight container. They keep well in the fridge for up to a week, or you can freeze them for up to 3 months—just thaw at room temperature before eating.
Reheating isn’t necessary, but if you prefer them softer, a few seconds in the microwave works wonders. Over time, the flavors meld nicely—the cinnamon and honey deepen, and the bars become even more comforting.
These bars also make a great addition to a lunchbox alongside a fruit cup or a container of yogurt. They’ve saved many of my mornings when I needed a quick, wholesome bite before rushing out the door.
Nutritional Information & Benefits
Each bar (assuming 12 bars per batch) contains approximately:
| Calories | 150-170 kcal |
|---|---|
| Protein | 4-5g |
| Fat | 7-9g (mostly healthy fats) |
| Carbohydrates | 18-20g |
| Fiber | 3-4g |
| Sugar | 8-10g (natural sources) |
The oats provide slow-release energy, fiber, and essential vitamins, while the nuts and seeds supply heart-healthy fats and protein to keep you full. Honey and dried fruit add natural sweetness and antioxidants without refined sugar.
These bars are naturally gluten-free if you use certified oats and are free from artificial preservatives. They’re a smart option for anyone needing a balanced snack that supports active lifestyles without the crash from sugary snacks.
Conclusion
This easy homemade granola bars recipe for busy soccer moms is more than just a snack—it’s a little bit of calm in the whirlwind. It’s adaptable, reliable, and genuinely delicious, making it a staple in my kitchen and hopefully yours too.
Feel free to tweak the nuts, fruits, or sweeteners to suit your family’s tastes or dietary needs. The best part is how effortlessly these bars fit into your day, whether it’s a hectic morning or a long afternoon at the field.
Honestly, these bars remind me that even in the busiest moments, a homemade touch can bring comfort and a bit of joy. If you give them a try, I’d love to hear how you make them your own—drop a comment or share your favorite tweaks!
Here’s to simple snacks that keep you going.
FAQs About Easy Homemade Granola Bars for Busy Soccer Moms
Can I make these granola bars vegan?
Yes! Simply swap honey for maple syrup or agave nectar, and use a nut butter that doesn’t contain animal products (most do not). This keeps the bars plant-based and delicious.
How long do homemade granola bars last?
Stored in an airtight container in the fridge, they last about a week. You can freeze them for up to 3 months—just thaw before eating.
Can I add protein powder to these bars?
Absolutely! Adding about 1/4 cup of your favorite protein powder to the dry ingredients boosts nutrition without affecting the texture much.
What if my bars are too crumbly?
Make sure you press the mixture firmly into the pan and chill the bars long enough before cutting. If crumbly, you can add a little more nut butter or honey next time for better binding.
Are these bars gluten-free?
They can be if you use certified gluten-free oats and avoid cross-contamination. Check your nut butter and other ingredients to be sure.
Pin This Recipe!
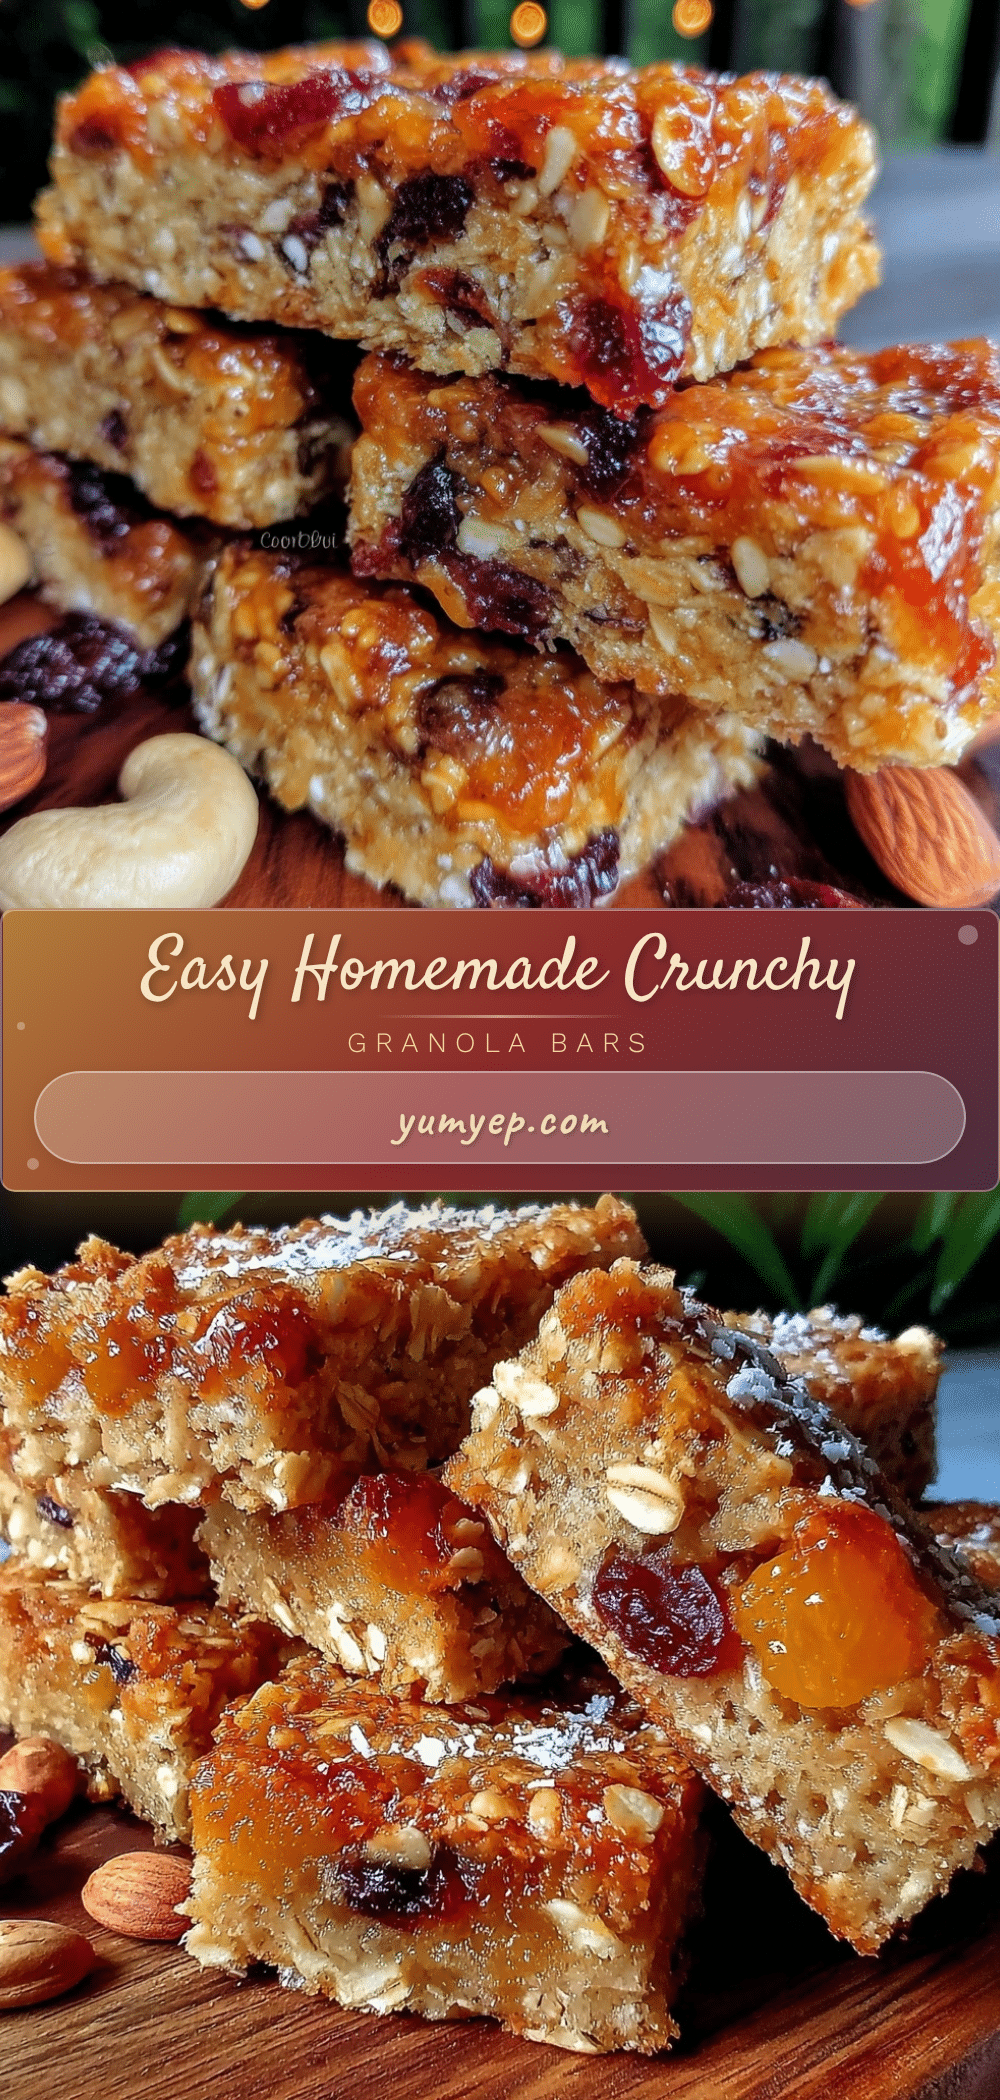
Easy Homemade Granola Bars Recipe for Busy Soccer Moms to Energize

These easy homemade granola bars are a quick, healthy, and delicious snack perfect for busy soccer moms and anyone on the go. Made with simple pantry staples, they offer a chewy texture with a hint of honey and cinnamon.
- Prep Time: 10 minutes
- Cook Time: 10 minutes
- Total Time: 2 hours 20 minutes
- Yield: 10-12 bars 1x
- Category: Snack
- Cuisine: American
Ingredients
- 2 cups (180g) old-fashioned rolled oats, toasted lightly
- 1/2 cup (125g) nut butter (creamy peanut butter or almond butter)
- 1/3 cup (113g) honey
- 1/2 cup (60g) chopped nuts (walnuts, pecans, or almonds)
- 1/3 cup (50g) dried fruit (raisins, cranberries, or chopped apricots)
- 1 tsp ground cinnamon
- 1 tsp vanilla extract
- 1/4 tsp salt
- 2 tbsp chia seeds or flaxseeds (optional)
Instructions
- Preheat oven to 350°F (175°C). Spread 2 cups (180g) rolled oats on a baking sheet and toast for 8-10 minutes until lightly golden and nutty. Watch carefully to avoid burning.
- In a mixing bowl, combine 1/2 cup (125g) nut butter with 1/3 cup (113g) honey. Warm in microwave for 15-20 seconds if stiff. Stir in 1 tsp vanilla extract and 1/4 tsp salt until smooth.
- Fold toasted oats, 1/2 cup (60g) chopped nuts, 1/3 cup (50g) dried fruit, 1 tsp ground cinnamon, and optional 2 tbsp chia or flaxseeds into the wet mixture. Stir until well combined.
- Line an 8×8-inch (20×20 cm) baking pan with parchment paper, leaving overhang for easy removal. Transfer mixture and press firmly and evenly into the pan using a spoon or lightly greased hands.
- Refrigerate for at least 2 hours or overnight to set the bars.
- Lift mixture out using parchment overhang and cut into 10-12 bars. If bars crumble, chill longer.
Notes
Toast oats evenly to avoid burnt spots and enhance flavor. Warm nut butter slightly for better binding. Press mixture firmly for bars that hold together well. Chill adequately before cutting to prevent crumbling. Optional baking at 325°F (160°C) for 20 minutes yields crunchier bars but less chewiness. Customize nuts, fruits, and sweeteners to taste. Use maple syrup and sunflower seed butter for vegan and allergy-friendly versions.
Nutrition
- Serving Size: 1 bar (if cut into 1
- Calories: 160
- Sugar: 9
- Sodium: 70
- Fat: 8
- Saturated Fat: 1
- Carbohydrates: 19
- Fiber: 3.5
- Protein: 4.5
Keywords: granola bars, homemade snacks, healthy snacks, easy granola bars, peanut butter bars, energy bars, quick snacks, gluten-free option


