
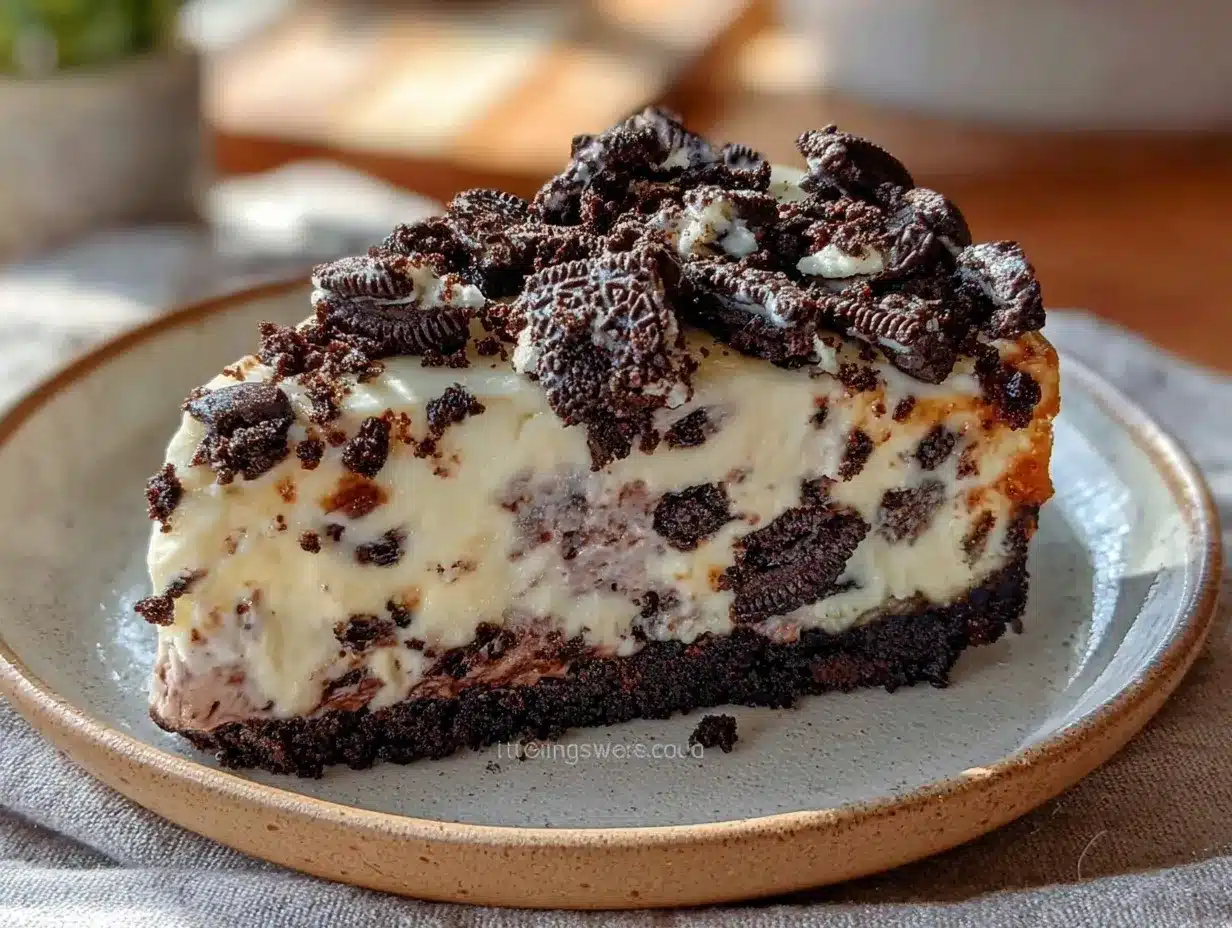
“You’re telling me we don’t have to turn on the oven for this? Seriously?” That’s what my skeptical roommate blurted out the first time I whipped up this easy no-bake Oreo cheesecake. Honestly, I wasn’t convinced either at first. Cheesecake without baking? It sounded like some kind of culinary witchcraft. But after a late-night craving collided with zero energy to fuss around the kitchen, this dessert saved the day—and then some.
The whole thing started on a random Thursday evening. Our oven was out of commission (long story), and I was staring at a box of Oreos and a tub of cream cheese, half wondering if I should just eat them straight. Instead, I took a chance on this no-bake recipe I’d tucked away, skeptical but desperate. The next morning, I found a slice waiting for me in the fridge, and one bite shut me up for a solid minute. The cookies were perfectly crunchy, the filling creamy and sweet but not too heavy, and the best part? No oven mess or waiting around.
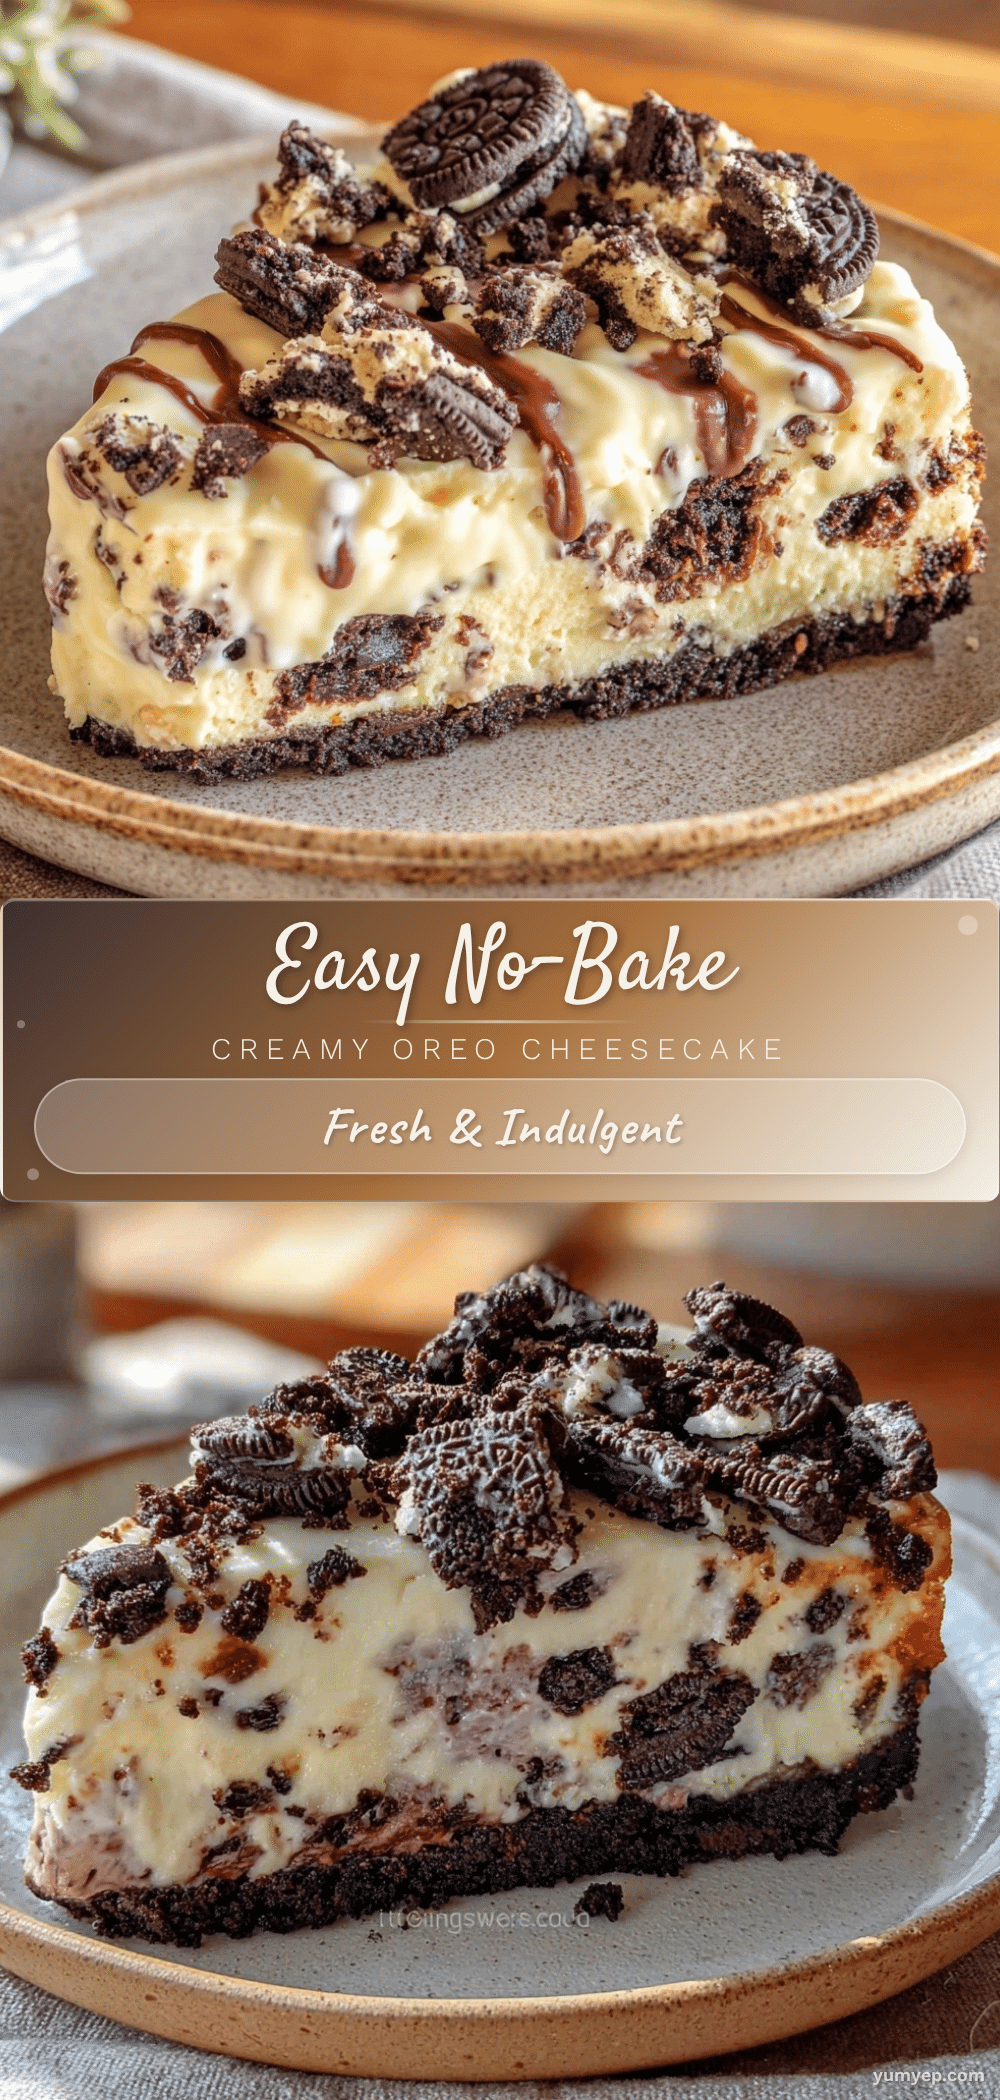
Since then, this cheesecake has quietly taken over my dessert rotation. It’s the one I reach for when friends drop by unannounced or when I just want a sweet treat that doesn’t feel like a kitchen marathon. If you’ve ever wished for a dessert that feels indulgent but actually respects your time and sanity, this Easy No-Bake Oreo Cheesecake might just become your new best friend too.
What sticks with me about this recipe is that it’s proof you don’t need fancy equipment or complicated steps to make something that looks—and tastes—like you’ve got dessert game on lock. Plus, it’s a neat little reminder that sometimes the easiest things are the best surprises.
Why You’ll Love This Recipe
After testing this recipe a bunch of times (yes, I admit—I was obsessed), I can say it really hits the mark for anyone who loves a quick, fuss-free dessert that still wows. Here’s what makes this easy no-bake Oreo cheesecake stand out:
- Quick & Easy: Ready in about 20 minutes of hands-on time, then just a few hours chilling—perfect for those last-minute dessert emergencies or lazy weekends.
- Simple Ingredients: No weird or expensive stuff here. Just classic Oreos, cream cheese, whipped cream, and a few pantry staples you probably already have.
- Perfect for Any Occasion: Whether it’s a casual get-together, a birthday, or even a holiday party, this cheesecake fits right in with minimal stress.
- Crowd-Pleaser: My family and friends can’t get enough of it—kids love the cookie crunch, and adults appreciate the creamy texture.
- Unbelievably Delicious: The balance between sweet and creamy with a hint of chocolate crunch is just right—no over-the-top sweetness here.
What really sets this cheesecake apart is the way the Oreo crumbs form a crunchy, buttery crust that holds up perfectly without baking. Plus, the filling gets that silky, dreamy texture thanks to folding in whipped cream gently—trust me, rushing this step can mess up the whole vibe! This isn’t just another no-bake cheesecake; it’s the one that makes you close your eyes on the first bite and forget all about the fuss.
It’s the dessert that feels like a treat but is actually pretty laid-back to make. If you’ve been hunting for a stress-free, delicious dessert, you’re in for a real win.
What Ingredients You Will Need
This recipe uses simple, wholesome ingredients to deliver bold flavor and satisfying texture without the fuss. Most of these ingredients are pantry staples, and you can easily swap a few if needed without losing the magic.
- Oreo Cookies (about 24 cookies, finely crushed) – The star of the show. I like using classic Oreos, but feel free to try the Double Stuf if you want a little extra cream.
- Unsalted Butter (6 tablespoons / 85 grams, melted) – Helps bind the crust with a nice buttery richness. I usually go for Land O’Lakes or Kerrygold for best flavor.
- Cream Cheese (16 ounces / 450 grams, softened) – Full-fat is best for that creamy texture, but you can use reduced-fat if you want a lighter dessert.
- Powdered Sugar (¾ cup / 90 grams) – Adds a smooth sweetness without graininess. Sift it if you want the silkiest filling.
- Vanilla Extract (1 teaspoon) – Just a splash to round out the flavors.
- Heavy Whipping Cream (1 cup / 240 ml, cold) – Whipped to soft peaks for folding into the cream cheese mixture. This step is key for that fluffy, airy texture.
- Extra Oreo Pieces (optional, for garnish) – A few roughly chopped for topping and extra crunch.
If you want to make this gluten-free, you can find gluten-free Oreo-style cookies or swap in your favorite gluten-free chocolate sandwich cookies. For a dairy-free twist, try using dairy-free cream cheese and whipped topping alternatives, but keep in mind the texture might shift a bit.
Equipment Needed
- Mixing Bowls: One large bowl for the filling and another for whipping cream.
- Electric Hand Mixer or Stand Mixer: Essential for whipping the cream and cream cheese smoothly. I’ve tried doing it by hand, but it’s a workout and the texture just isn’t as light.
- Food Processor or Plastic Bag & Rolling Pin: For crushing the Oreos finely. I often use a food processor for speed, but a zip-top bag and rolling pin work just as well.
- Springform Pan (9-inch / 23 cm): Makes it super easy to release the cheesecake without ruining the sides. If you don’t have one, a regular cake pan lined with parchment will do.
- Rubber Spatula: For folding whipped cream into the cream cheese mixture gently.
- Measuring Cups and Spoons: Accuracy matters, especially for the sugar and vanilla.
On a budget? Skip the springform pan and use a simple glass pie dish instead. The cheesecake won’t slice as neatly, but it still tastes amazing. Also, keeping your cream cheese at room temperature really helps mixing go smoothly, so plan ahead a bit.
Preparation Method
- Prepare the Crust: Crush about 24 Oreo cookies into fine crumbs using a food processor or by placing them in a zip-top bag and rolling with a rolling pin. Pour the crumbs into a bowl and mix in 6 tablespoons (85 grams) of melted unsalted butter until the mixture resembles wet sand.
- Press the Crust: Transfer the Oreo crumb mixture into a 9-inch (23 cm) springform pan. Use the back of a spoon or the bottom of a glass to press it down firmly and evenly. This step is crucial for a sturdy crust. Place the pan in the fridge to chill while you make the filling (about 15 minutes).
- Make the Filling: In a large bowl, beat 16 ounces (450 grams) of softened cream cheese with ¾ cup (90 grams) powdered sugar and 1 teaspoon vanilla extract until smooth and creamy. This usually takes around 3-5 minutes on medium speed with an electric mixer.
- Whip the Cream: In a separate chilled bowl, whip 1 cup (240 ml) cold heavy whipping cream to soft peaks. Watch carefully—stop whipping as soon as you see soft, billowy peaks that hold shape but are still soft to the touch. This usually takes 3-4 minutes.
- Fold the Cream into the Cream Cheese: Gently fold the whipped cream into the cream cheese mixture using a rubber spatula. Take your time here to keep the filling light and airy. You want a fluffy, uniform mixture with no streaks.
- Combine Crushed Oreos: Fold in about 1 cup (about 12 cookies) of finely crushed Oreo pieces into the filling for that iconic cookie crunch throughout the cheesecake.
- Assemble and Chill: Pour the filling over the chilled crust and spread evenly with a spatula. Sprinkle extra chopped Oreos on top for garnish.
- Chill the Cheesecake: Refrigerate for at least 4 hours, preferably overnight. This allows the cheesecake to set properly and the flavors to meld beautifully.
- Serve: Carefully release the springform pan and slice the cheesecake using a sharp knife dipped in hot water for clean cuts.
Pro tip: If the filling feels too soft or runny at any point, pop it in the fridge for 10-15 minutes before assembly. It firms up nicely and makes spreading easier.
Cooking Tips & Techniques
Whipping the cream properly is the real game-changer here. Under-whipped cream can make the filling too dense, while over-whipped cream turns grainy and can separate. If you’re unsure, whip until you see soft peaks that gently fold over when you lift the whisk.
Pressing the crust firmly and evenly is another crucial step. I’ve learned from experience that a loosely packed crust crumbles when you slice, and nobody wants Oreo crumbs on their plate (except maybe me, but still). Using the bottom of a glass helps get a nice compact base.
Folding the whipped cream into the cream cheese mixture might sound simple, but rushing it can deflate all that airy goodness. Use slow, gentle strokes—like you’re folding in fragile paper—to keep the texture light.
Timing is flexible with this cheesecake, which is part of what makes it so perfect for busy days. Just remember the longer it chills, the better it sets. I usually make mine the night before, but a solid 4-hour chill works in a pinch.
One hiccup I’ve had: sometimes the crust gets a bit soggy if the cheesecake sits too long. To avoid that, I recommend serving within 2 days of assembling or freezing leftovers (more on that later).
Variations & Adaptations
- Peanut Butter Oreo Cheesecake: Stir ½ cup (125 grams) creamy peanut butter into the cream cheese mixture for a nutty twist that pairs insanely well with the Oreos.
- Mint Oreo Version: Swap classic Oreos for Mint Oreos to give the cheesecake a refreshing, cool flavor. Top with a few fresh mint leaves for a fun garnish.
- Gluten-Free Option: Use gluten-free chocolate sandwich cookies in place of Oreos. The texture and taste remain just as satisfying.
- Mini Cheesecakes: Make the recipe in a muffin tin lined with cupcake liners for individual portions—perfect for parties or grab-and-go treats.
- Chocolate Ganache Topping: Warm ½ cup (120 ml) heavy cream and pour over ½ cup (90 grams) chopped dark chocolate, stir until smooth, then spread over the set cheesecake for an extra luscious finish.
For an easy holiday spin, I often pair this no-bake cheesecake with other festive treats like the creamy pumpkin roll or cranberry orange bread for a dessert table that feels special but not overwhelming.
Serving & Storage Suggestions
This cheesecake is best served chilled straight from the fridge. I like to slice it with a warm, wet knife for clean edges—dip the knife in hot water and wipe it dry between cuts to keep the presentation neat.
It pairs beautifully with a simple cup of coffee or a light glass of dessert wine. If you’re serving it for brunch, consider adding fresh berries or a drizzle of caramel sauce for extra flair.
Store leftovers tightly covered in the fridge for up to 3 days. The flavors actually deepen as it sits, but the crust may soften a bit over time.
For longer storage, freeze the cheesecake (whole or sliced) wrapped in plastic wrap and foil for up to a month. Thaw overnight in the fridge before serving. The texture holds up surprisingly well, and it makes a great make-ahead dessert.
Nutritional Information & Benefits
One generous slice (about 1/12 of the cheesecake) contains approximately 350 calories, 25 grams of fat, 28 grams of carbohydrates, and 5 grams of protein. The rich cream cheese and butter make it a treat to enjoy in moderation.
Key ingredients like cream cheese provide calcium and some vitamin A, while Oreos add a nostalgic chocolate crunch. If you opt for reduced-fat cream cheese and a lighter whipped topping alternative, you can trim some calories without sacrificing much flavor.
This recipe is naturally gluten-free if you use gluten-free sandwich cookies, making it an inclusive dessert for many dietary needs.
Conclusion
This easy no-bake Oreo cheesecake is the kind of dessert that feels fancy but demands very little from you—a rare win in the kitchen. It’s flexible, forgiving, and genuinely delicious, making it a staple in my recipe collection.
Whether you’re feeding a crowd or indulging solo, this cheesecake invites you to make it your own, whether that’s adding peanut butter, mint, or even turning it into mini treats.
Honestly, it’s the kind of recipe I come back to whenever I want something sweet without the fuss, and I trust you’ll feel the same once you try it. If you make it, I’d love to hear how you customized it or what unexpected twist you added—sharing those little experiments is half the fun!
Frequently Asked Questions
Can I make this cheesecake without a springform pan?
Yes! A regular cake pan or pie dish lined with parchment paper works fine. Just be gentle when slicing and serving.
How long does the cheesecake need to chill?
At least 4 hours, but overnight is best for a firm, sliceable texture.
Can I use low-fat cream cheese?
You can, but the cheesecake might be less creamy and a bit tangier. Full-fat cream cheese gives the best texture.
Is it possible to freeze this no-bake cheesecake?
Absolutely. Wrap it tightly and freeze up to a month. Thaw in the fridge overnight before serving.
Can I substitute the Oreos for another cookie?
Yes, chocolate wafer cookies or gluten-free sandwich cookies work well if you want a different flavor or need a gluten-free version.
Pin This Recipe!
Easy No-Bake Oreo Cheesecake

A quick and fuss-free no-bake Oreo cheesecake with a crunchy cookie crust and creamy filling, perfect for any occasion.
- Prep Time: 20 minutes
- Cook Time: 0 minutes
- Total Time: 4 hours 20 minutes
- Yield: 12 servings 1x
- Category: Dessert
- Cuisine: American
Ingredients
- 24 Oreo Cookies, finely crushed
- 6 tablespoons (85 grams) unsalted butter, melted
- 16 ounces (450 grams) cream cheese, softened
- ¾ cup (90 grams) powdered sugar
- 1 teaspoon vanilla extract
- 1 cup (240 ml) heavy whipping cream, cold
- Extra Oreo pieces (optional, for garnish)
Instructions
- Crush about 24 Oreo cookies into fine crumbs using a food processor or by placing them in a zip-top bag and rolling with a rolling pin.
- Mix the Oreo crumbs with 6 tablespoons (85 grams) melted unsalted butter until the mixture resembles wet sand.
- Press the Oreo crumb mixture firmly and evenly into the bottom of a 9-inch (23 cm) springform pan. Chill in the fridge for about 15 minutes.
- In a large bowl, beat 16 ounces (450 grams) softened cream cheese with ¾ cup (90 grams) powdered sugar and 1 teaspoon vanilla extract until smooth and creamy.
- In a separate chilled bowl, whip 1 cup (240 ml) cold heavy whipping cream to soft peaks.
- Gently fold the whipped cream into the cream cheese mixture using a rubber spatula until light and airy.
- Fold in about 1 cup (12 cookies) of finely crushed Oreo pieces into the filling.
- Pour the filling over the chilled crust and spread evenly. Sprinkle extra chopped Oreos on top for garnish.
- Refrigerate for at least 4 hours, preferably overnight, to set.
- Carefully release the springform pan and slice the cheesecake using a sharp knife dipped in hot water for clean cuts.
Notes
Whip the cream to soft peaks to keep the filling light and airy. Press the crust firmly to avoid crumbling. Chill the cheesecake for at least 4 hours or overnight for best results. Use a warm knife dipped in hot water for clean slicing. If filling is too soft, chill for 10-15 minutes before assembling.
Nutrition
- Serving Size: 1 slice (1/12 of che
- Calories: 350
- Fat: 25
- Carbohydrates: 28
- Protein: 5
Keywords: no-bake cheesecake, Oreo cheesecake, easy dessert, no oven dessert, quick cheesecake, Oreo dessert


