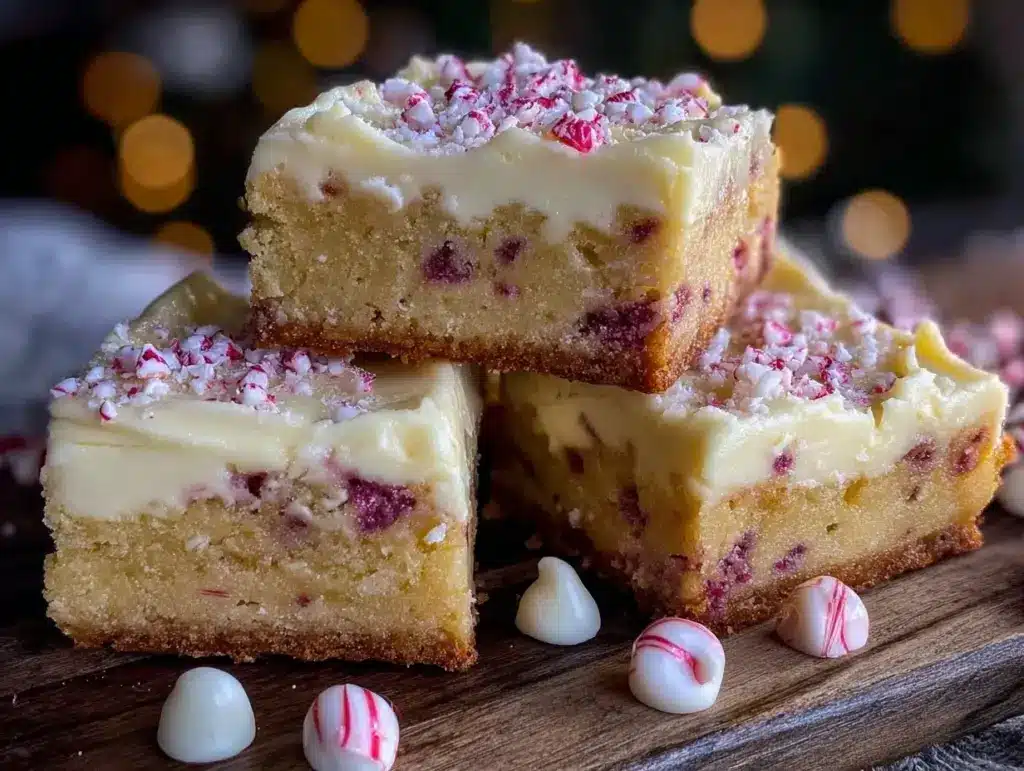
Let me tell you, the moment you unwrap these Easy Peppermint Sugar Cookie Bars, the sweet, minty aroma hits you like a festive breeze on a chilly winter evening. That crisp peppermint scent mingling with buttery sugar cookie goodness is enough to make anyone’s mouth water instantly. The first time I baked these bars, I was knee-high to a grasshopper in my grandma’s kitchen, watching her sprinkle crushed candy canes on top. I was instantly hooked—the kind of moment where you pause, take a deep breath, and just smile because you know you’re onto something truly special.
Years ago, during a particularly gloomy holiday season, I stumbled upon this recipe while trying to recreate the magic of those classic sugar cookies but in a simpler, fuss-free bar form. Honestly, I wish I had found these Easy Peppermint Sugar Cookie Bars way sooner! My family couldn’t stop sneaking them off the cooling rack (and I can’t really blame them). They’re dangerously easy to make but deliver pure, nostalgic comfort with every bite.
You know what makes these bars perfect? They’re just right for potlucks, a sweet treat for your kids after school, or to brighten up your Pinterest cookie board when you want to impress without the stress. Tested repeatedly (in the name of research, of course), they’ve become a staple for our holiday gatherings and gifting. If you’re looking for a festive treat that feels like a warm hug wrapped in peppermint and sugar, you’re going to want to bookmark this one.
Why You’ll Love This Recipe
Having whipped up countless holiday treats over the years, this Easy Peppermint Sugar Cookie Bars recipe stands out for a bunch of reasons. Here’s why you’ll find yourself coming back to it again and again:
- Quick & Easy: Comes together in under 30 minutes, perfect for busy holiday prep or last-minute cravings.
- Simple Ingredients: No fancy grocery trips needed; you likely already have everything in your pantry and fridge.
- Perfect for Festive Occasions: Great for holiday parties, cookie exchanges, or cozy nights by the fire.
- Crowd-Pleaser: Always earns rave reviews from kids and adults alike (trust me, they don’t last long!).
- Unbelievably Delicious: The buttery sugar cookie base paired with crushed peppermint candies creates a next-level flavor combo that’s pure comfort food.
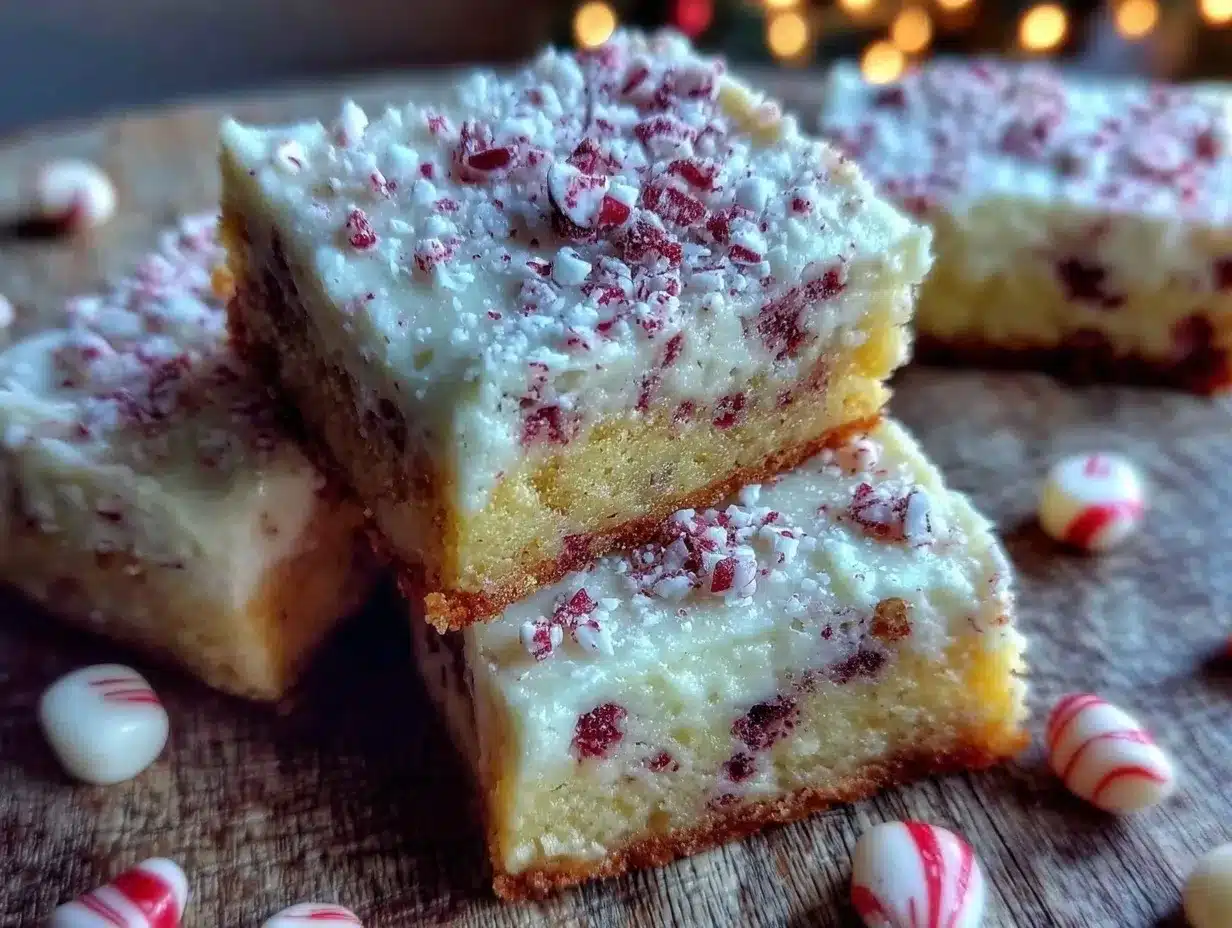
This isn’t just another sugar cookie bar recipe. What sets it apart is the perfectly balanced peppermint flavor that isn’t overpowering but just right to add that festive zing. The texture? Soft and chewy with a slight crunch from the candy topping that makes every bite a little celebration. You won’t find any weird ingredients or complicated steps—just honest-to-goodness holiday magic in bar form.
Honestly, this recipe feels like comfort food reimagined—easy, quick, and with all the soul-soothing satisfaction of a classic sugar cookie. Whether you’re impressing guests without breaking a sweat or simply treating yourself, this recipe has got your back.
What Ingredients You Will Need
This recipe uses simple, wholesome ingredients to deliver bold peppermint flavor and that classic sugar cookie texture without the fuss. Most of these you’ll likely have on hand, making it a perfect last-minute holiday treat.
- Unsalted butter, softened (adds richness and tenderness)
- Granulated sugar (for that sweet, classic sugar cookie taste)
- Large eggs, room temperature (helps bind everything together)
- Pure vanilla extract (adds depth and warmth to the flavor)
- All-purpose flour (for the sturdy yet tender cookie base)
- Baking powder (for a slight lift and fluffiness)
- Salt (balances sweetness)
- Crushed peppermint candies or candy canes (the star topping that adds festive crunch and minty freshness)
- Powdered sugar (optional, for a light dusting or glaze)
Ingredient tips: For best results, I recommend using a quality unsalted butter like Kerrygold for that rich flavor. When picking your peppermint candies, go for small pieces so they melt slightly but keep some crunch. If you want to switch it up, you can use peppermint extract in the dough for an extra punch, but be careful not to overdo it—it can get bitter fast.
Substitutions: Feel free to swap all-purpose flour with a gluten-free blend if needed. Use dairy-free butter and egg alternatives to make this recipe vegan-friendly. For a lower sugar version, reduce the granulated sugar slightly and skip the powdered sugar dusting.
Equipment Needed
- 9×13-inch baking pan: This size is perfect for evenly baking the bars without them getting too thick or thin. I’ve tried smaller pans, but the texture changes.
- Mixing bowls: Two bowls—one for wet ingredients, one for dry.
- Electric mixer or hand whisk: An electric mixer makes creaming butter and sugar a breeze, but a sturdy whisk works fine if you’re feeling old school.
- Spatula: For folding and scraping the batter.
- Measuring cups and spoons: Accurate measurement is key for perfect texture.
- Parchment paper: Optional but highly recommended for easy removal and cleanup.
If you don’t have a 9×13-inch pan, a similarly sized glass or metal pan works, but keep an eye on baking time as it might vary slightly. When it comes to mixers, I personally love my KitchenAid stand mixer, but a handheld mixer from Cuisinart does the job just fine.
Preparation Method
- Preheat your oven to 350°F (175°C). Line your 9×13-inch baking pan with parchment paper, leaving some overhang on the sides to lift the bars out easily after baking.
- Cream the butter and sugar: In a large bowl, beat 1 cup (227g) softened unsalted butter with 1 ½ cups (300g) granulated sugar using an electric mixer on medium speed for about 3–5 minutes. You want it light and fluffy, almost like a creamy cloud—this step is crucial for tender bars.
- Add eggs and vanilla: Beat in 2 large eggs, one at a time, mixing well after each addition. Stir in 1 tablespoon pure vanilla extract. The batter should look smooth and glossy.
- Combine dry ingredients: In a separate bowl, whisk together 3 cups (375g) all-purpose flour, 1 teaspoon baking powder, and ½ teaspoon salt. This ensures even distribution of leavening.
- Mix dry into wet: Gradually add the dry ingredients to the wet, mixing on low speed just until combined—don’t overmix or your bars could turn tough. The dough will be thick but spreadable.
- Transfer to pan and smooth: Spread the dough evenly into your prepared pan using a spatula. It might feel a little stiff, but just press it gently to cover the bottom.
- Add crushed peppermint candies: Sprinkle about ½ to ¾ cup crushed peppermint candies evenly over the top, gently pressing them into the dough so they stick but don’t sink too deep.
- Bake: Place in the preheated oven and bake for 25–30 minutes. Start checking around 22 minutes—the edges should be golden but the center still slightly soft. A toothpick inserted in the center should come out with a few moist crumbs.
- Cool completely: Let the bars cool in the pan for at least 30 minutes before lifting them out with the parchment overhang. Cooling fully is key for clean cuts and best texture.
- Optional dusting or glaze: If you like, dust the top with powdered sugar or drizzle a simple glaze made from powdered sugar and a little milk for extra sweetness and sparkle.
Pro tip: If your peppermint candies are large chunks, pulse them in a food processor for a finer crush. Also, don’t rush the cooling—these bars firm up wonderfully and slice like a dream once cooled.
Cooking Tips & Techniques
Honestly, baking sugar cookie bars isn’t rocket science, but these tips from my many holiday trials can save you some headaches:
- Softened butter is key: Butter that’s too cold won’t cream properly, and melted butter will make the dough greasy. Aim for that perfect “just soft” stage, like butter you can press a finger into with slight resistance.
- Don’t overmix the dough: Once you add flour, mix only until combined to keep your bars tender and not chewy or dry.
- Watch your baking time closely: Ovens vary, so start checking a few minutes early. Overbaking dries bars out fast.
- Press peppermint candies gently: You want them to stick but not sink too deeply, or they’ll lose that lovely crunch.
- Use parchment paper: It’s a lifesaver for removing bars cleanly and speeds up cleanup.
- Multitasking hack: While the bars bake, clean your mixing bowls and prep your peppermint candies for the next batch (trust me, you might want seconds!).
One time, I accidentally used baking soda instead of baking powder and ended up with bars that spread too thin and tasted a little off—lesson learned! Stick with baking powder here for the perfect lift.
Variations & Adaptations
Want to put your own spin on these Easy Peppermint Sugar Cookie Bars? Here are a few fun twists I’ve tried or recommend:
- Chocolate Peppermint Bars: Swirl in ½ cup melted semi-sweet chocolate into the dough before spreading it in the pan. Top with both crushed peppermint and mini chocolate chips for double delight.
- Gluten-Free Version: Substitute all-purpose flour with a 1:1 gluten-free baking flour blend. Add an extra 1/4 teaspoon xanthan gum if your blend doesn’t already contain it.
- Vegan Adaptation: Use dairy-free butter (like Earth Balance) and replace eggs with flax eggs (1 tablespoon ground flaxseed + 3 tablespoons water per egg). Add a touch more vanilla to round out flavor.
- Seasonal Twist: Swap peppermint candies for crushed ginger snaps or cinnamon candies for a different holiday vibe.
- Nutty Upgrade: Fold in ½ cup chopped toasted pecans or walnuts for an added crunch and warmth.
I once made a batch with peppermint extract instead of candies on top—it got intense quickly, so a little goes a long way. These variations keep things fresh and let you tailor the bars to your crowd’s taste buds or dietary needs.
Serving & Storage Suggestions
These bars are best served at room temperature, letting that buttery, minty flavor shine through. They make a charming addition to any holiday dessert tray, especially paired with a hot cup of cocoa or peppermint tea.
Looking to impress? Cut the bars into small squares and serve on a festive platter dusted lightly with powdered sugar or garnished with whole candy canes.
For storage, keep the bars in an airtight container at room temperature for up to 3 days. They also freeze beautifully—wrap tightly in plastic wrap and foil, then thaw overnight in the fridge before serving. Reheat gently in a warm oven for a few minutes if you want that fresh-baked feel again.
Fun fact: The peppermint flavor actually gets more pronounced after a day or two, making these bars an even better treat the next day. So don’t be shy about making them ahead for your holiday parties.
Nutritional Information & Benefits
Each serving (based on 12 bars) contains roughly:
| Nutrient | Amount |
|---|---|
| Calories | 220 kcal |
| Fat | 10g |
| Carbohydrates | 30g |
| Protein | 2g |
| Sugar | 18g |
While these bars are a sweet treat, using real butter and fresh eggs provides some wholesome nutrition compared to processed snacks. Peppermint candies can aid digestion and freshen breath, which is a nice little bonus after a holiday feast.
For those with dietary needs, swapping ingredients can make these bars gluten-free or vegan, making them accessible to more family members or guests. Just a heads-up—these bars contain wheat, eggs, and dairy by default, so keep that in mind if allergies are a concern.
Conclusion
In a nutshell, these Easy Peppermint Sugar Cookie Bars are a no-fuss, crowd-pleasing holiday treat that’s going to become your go-to dessert for years to come. They blend the best of buttery sugar cookies with festive peppermint crunch—without all the rolling, cutting, and fuss of traditional cookies.
Customize them however you want—add chocolate, nuts, or go vegan—and they’ll still taste like a warm holiday hug. I love this recipe because it brings back memories, creates new traditions, and honestly, it tastes like happiness in every bite.
Give it a try and let me know how you make it your own! Drop a comment below with your favorite twists or questions, and don’t forget to share this recipe with friends who need a little festive baking magic in their lives. Happy holidays and happy baking!
FAQs
Can I make these peppermint sugar cookie bars ahead of time?
Yes! They actually taste better after resting a day. Store them in an airtight container at room temperature or freeze for longer storage.
What can I use instead of crushed peppermint candies?
You can swap with mini chocolate chips, crushed toffee, or even chopped nuts for a different texture and flavor.
How do I prevent the bars from becoming too hard?
Don’t overbake! Pull them out when edges are golden but the center is still slightly soft. Also, don’t overmix the dough to keep them tender.
Can I add peppermint extract to the dough?
Yes, but use sparingly—about ½ teaspoon—to avoid a bitter taste. The candies on top usually provide enough peppermint flavor.
Are these bars gluten-free?
The standard recipe uses all-purpose flour, but you can substitute a gluten-free flour blend 1:1 to make them gluten-free.
Pin This Recipe!
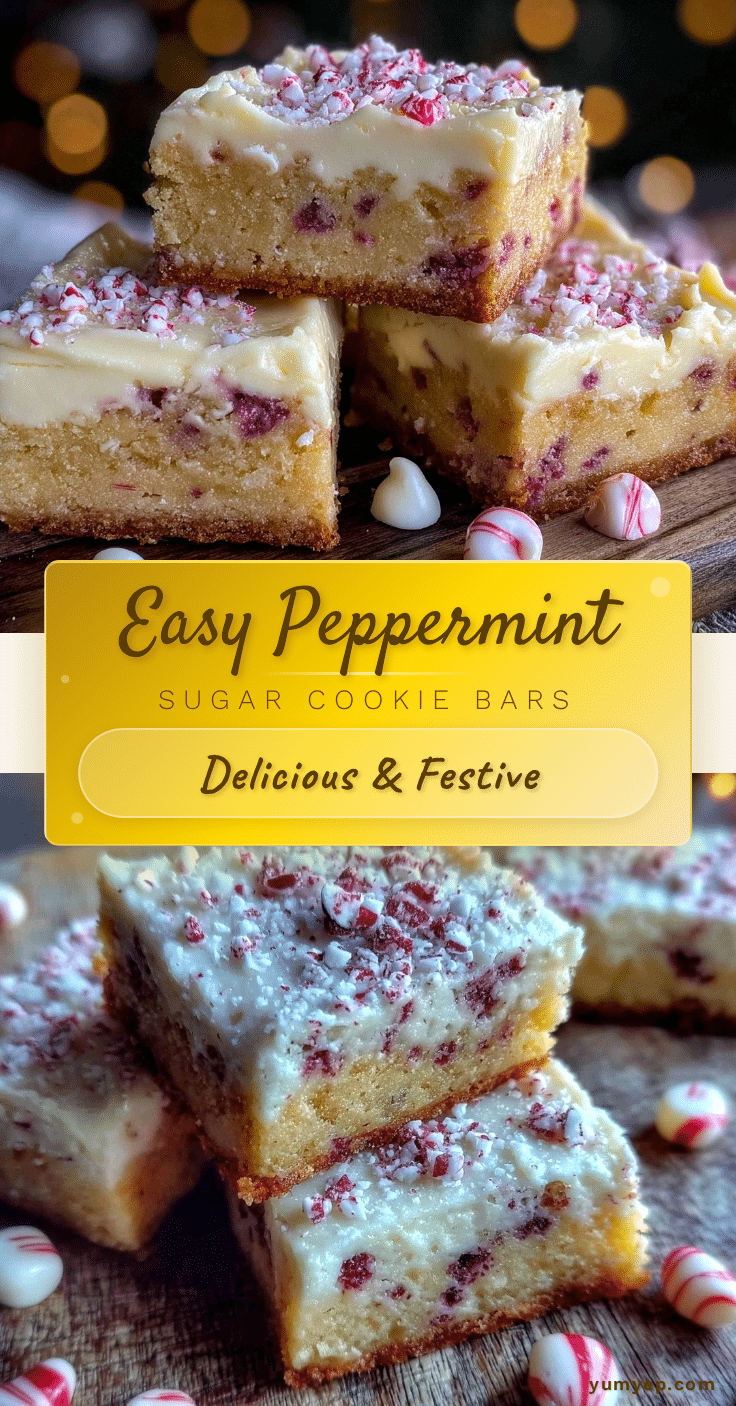
Easy Peppermint Sugar Cookie Bars

These Easy Peppermint Sugar Cookie Bars are a quick and festive holiday treat featuring a buttery sugar cookie base topped with crushed peppermint candies for a soft, chewy, and minty delight.
- Prep Time: 15 minutes
- Cook Time: 25-30 minutes
- Total Time: 40-45 minutes
- Yield: 12 bars 1x
- Category: Dessert
- Cuisine: American
Ingredients
- 1 cup (227g) unsalted butter, softened
- 1 ½ cups (300g) granulated sugar
- 2 large eggs, room temperature
- 1 tablespoon pure vanilla extract
- 3 cups (375g) all-purpose flour
- 1 teaspoon baking powder
- ½ teaspoon salt
- ½ to ¾ cup crushed peppermint candies or candy canes
- Powdered sugar (optional, for dusting or glaze)
Instructions
- Preheat your oven to 350°F (175°C). Line a 9×13-inch baking pan with parchment paper, leaving some overhang on the sides.
- In a large bowl, beat the softened unsalted butter and granulated sugar using an electric mixer on medium speed for 3–5 minutes until light and fluffy.
- Beat in the eggs one at a time, mixing well after each addition. Stir in the vanilla extract until the batter is smooth and glossy.
- In a separate bowl, whisk together the all-purpose flour, baking powder, and salt.
- Gradually add the dry ingredients to the wet ingredients, mixing on low speed just until combined. Do not overmix.
- Spread the dough evenly into the prepared baking pan using a spatula, pressing gently to cover the bottom.
- Sprinkle the crushed peppermint candies evenly over the top, pressing them gently into the dough.
- Bake for 25–30 minutes, starting to check at 22 minutes. The edges should be golden and the center slightly soft with moist crumbs on a toothpick.
- Cool the bars completely in the pan for at least 30 minutes before lifting out using the parchment overhang.
- Optionally, dust with powdered sugar or drizzle a glaze made from powdered sugar and a little milk.
Notes
Use softened butter (not cold or melted) for best creaming results. Do not overmix the dough after adding flour to keep bars tender. Start checking baking time early to avoid overbaking. Press peppermint candies gently to keep crunch. Cooling completely before cutting ensures clean slices. Variations include adding chocolate, nuts, or using gluten-free and vegan substitutions.
Nutrition
- Serving Size: 1 bar
- Calories: 220
- Sugar: 18
- Fat: 10
- Carbohydrates: 30
- Protein: 2
Keywords: peppermint sugar cookie bars, holiday treats, peppermint bars, sugar cookie bars, easy holiday dessert, peppermint candy bars


