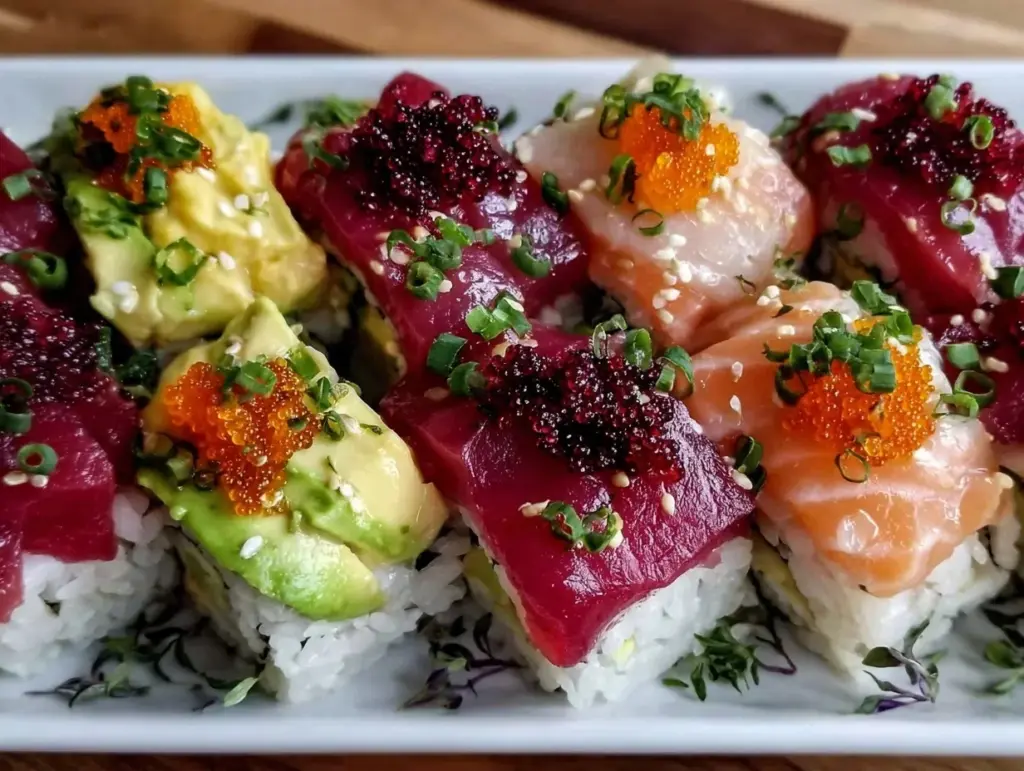
Let me tell you, the crisp snap of fresh veggies mingling with tender rice and delicate nori sheets is enough to make anyone’s mouth water. The first time I rolled these fresh spring sushi rolls, I was instantly hooked—the kind of moment where you pause, take a deep breath, and just smile because you know you’re onto something truly special. I was knee-high to a grasshopper when I first tasted sushi, but creating these vibrant homemade rolls brought a whole new level of joy to my kitchen.
Years ago, on a rainy weekend with nothing but pantry staples and a craving for something light and colorful, I stumbled upon this recipe. Honestly, I wish I’d discovered fresh spring sushi rolls with vibrant ingredients years ago—they’re dangerously easy and bring pure, nostalgic comfort with every bite. My family couldn’t stop sneaking them off the platter (and I can’t really blame them). You know what makes these rolls a standout? They’re perfect for potlucks, a sweet treat for your kids’ lunchboxes, or just to brighten up your Pinterest recipe board.
After testing this recipe multiple times in the name of research, of course, it has become a staple for family gatherings and gifting. These fresh spring sushi rolls feel like a warm hug wrapped in rice paper, and you’re going to want to bookmark this one for good.
Why You’ll Love This Recipe
From my many kitchen experiments and family feedback sessions, I can say this fresh spring sushi rolls recipe really shines. It’s approachable for beginners but still packs that wow factor for anyone who loves vibrant, fresh flavors.
- Quick & Easy: Comes together in under 30 minutes, perfect for busy weeknights or last-minute cravings.
- Simple Ingredients: No fancy grocery trips needed; you probably already have most of these ingredients in your pantry or fridge.
- Perfect for Any Occasion: Great for light lunches, casual dinners, or impressing guests at potlucks and parties.
- Crowd-Pleaser: Kids and adults alike rave about these—fresh, crunchy, and just the right balance of flavors.
- Unbelievably Delicious: The combination of creamy avocado, fresh herbs, and tangy dipping sauce makes every bite memorable.
What makes this recipe different from others? It’s the careful balance of fresh, vibrant ingredients combined with a foolproof rolling technique that anyone can master. Plus, the dipping sauce adds a little zing that keeps you coming back for more. This isn’t just another sushi roll recipe—it’s my best version, tested and loved over and over.
This recipe isn’t just good—it’s the kind that makes you close your eyes after the first bite. Comfort food, reimagined: lighter, fresher, but still soul-soothing. Whether you want to impress guests without stress or turn an ordinary mealtime into something memorable, these fresh spring sushi rolls have your back.
What Ingredients You Will Need
This recipe uses simple, wholesome ingredients to deliver bold flavor and satisfying texture without the fuss. Most are pantry staples, and many have easy substitutions if you need them.
- Sushi rice (1 cup / 200g, rinsed and cooked) – the foundation, sticky but fluffy
- Rice vinegar (2 tablespoons) – adds that classic sushi tang
- Nori sheets (4 sheets) – the seaweed wrapper, look for medium-sized sheets for easy rolling
- Rice paper wrappers (optional alternative) – for a lighter, gluten-free roll option
- Carrot (1 medium, julienned) – adds crunch and sweetness
- Cucumber (1 small, julienned) – fresh, watery crunch
- Avocado (1 ripe, sliced) – creamy, luscious texture
- Red bell pepper (1/2, thinly sliced) – vibrant color and sweet peppery bite
- Fresh herbs: cilantro and mint (a handful of each) – brightness and a fresh herbal pop
- Cooked shrimp (8 medium, peeled and deveined) or tofu for a vegetarian option
- Soy sauce or tamari (for dipping) – use tamari for gluten-free
- Sesame seeds (1 tablespoon, toasted) – nutty finish
- Optional: pickled ginger and wasabi for serving
I personally love using Jasmine sushi rice for its texture and flavor, but any good quality short-grain rice works. For herbs, fresh is best—dried won’t give you that vibrant pop. If you want to swap out shrimp, firm tofu or cooked chicken strips work wonderfully.
Equipment Needed
- Bamboo sushi rolling mat: Essential for tight, neat rolls. If you don’t have one, a clean kitchen towel works in a pinch.
- Sharp knife: For slicing the rolls cleanly without squishing them.
- Rice cooker or pot: To cook your sushi rice perfectly (I swear by my trusty rice cooker—it takes the guesswork out).
- Mixing bowl: To season the rice with vinegar and cool it quickly.
- Cutting board: For prepping your veggies and slicing rolls.
If you don’t own a sushi mat yet, they’re usually budget-friendly and a great investment. Keep it clean by wiping immediately after use and letting it air dry. A dull knife will make your rolls look messy, so a sharp blade is definitely worth it!
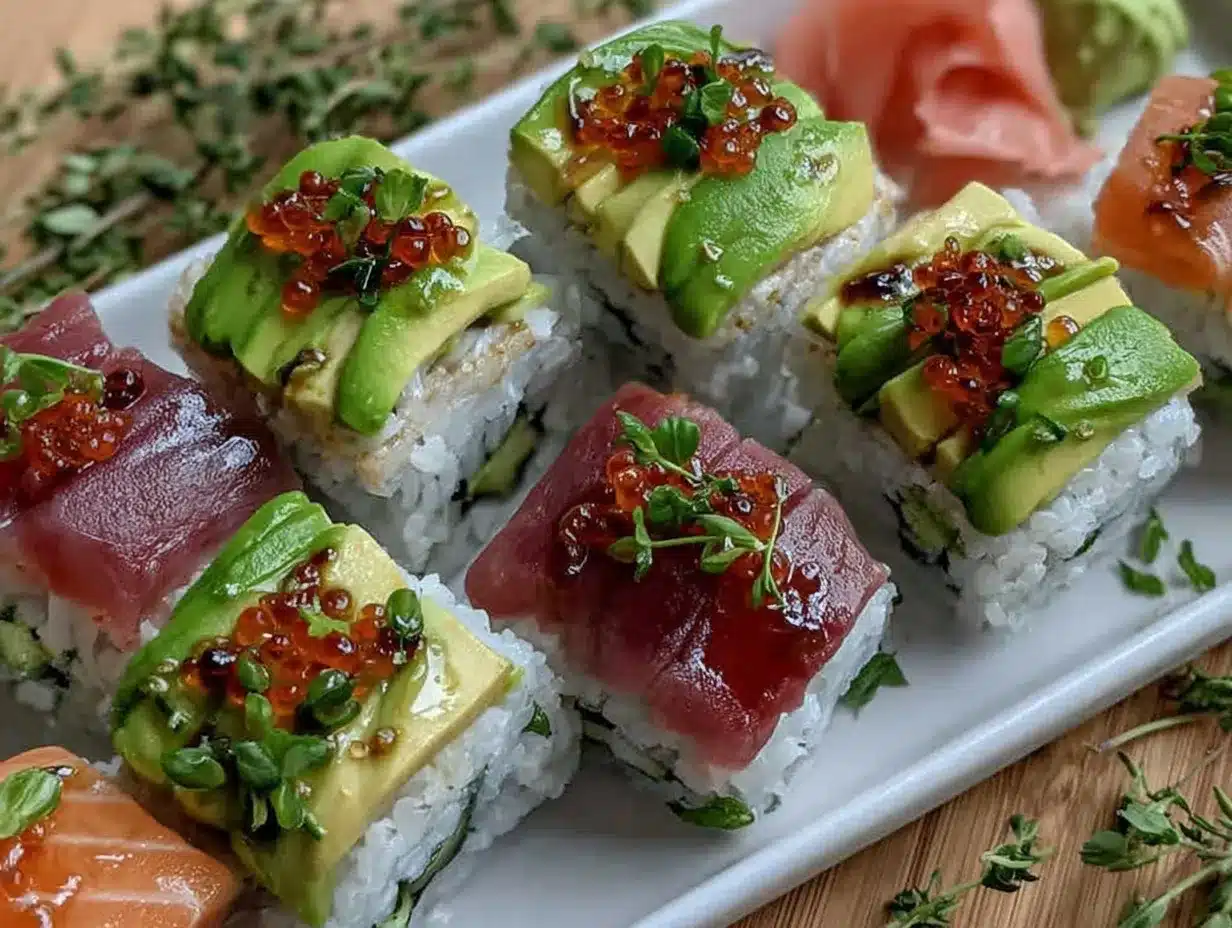
Preparation Method
- Cook the sushi rice: Rinse 1 cup (200g) of sushi rice under cold water until the water runs clear. Cook according to package instructions or in a rice cooker (about 20 minutes). Once cooked, transfer to a large bowl.
- Season the rice: While the rice is still warm, gently fold in 2 tablespoons of rice vinegar. Spread the rice thinly in the bowl to cool to room temperature, fanning it occasionally to give it that shiny finish.
- Prepare the fillings: Julienne the carrot, cucumber, and red bell pepper into thin strips. Slice the avocado just before rolling to prevent browning. Peel and devein shrimp or prepare tofu.
- Set up your rolling station: Lay a bamboo sushi mat on a flat surface, cover with plastic wrap to prevent sticking. Place a nori sheet (or rice paper) shiny side down on the mat.
- Spread the rice: Wet your hands to prevent sticking, then spread an even layer of rice (about 3/4 cup or 150g) over the nori, leaving a 1-inch (2.5cm) border at the top edge.
- Add fillings: Arrange a small handful of carrot, cucumber, bell pepper, avocado slices, herbs, and shrimp across the middle of the rice.
- Roll it up: Lift the edge of the mat nearest to you and roll it over the fillings tightly but gently. Pull the mat as you roll to keep it snug. Seal the edge with a little water.
- Slice and serve: Using a sharp knife moistened with water, slice the roll into 6-8 pieces. Sprinkle with toasted sesame seeds and serve with soy sauce, pickled ginger, and wasabi.
Tip: If your rice feels dry or crumbly, add a tiny bit more vinegar or a light mist of water to keep it sticky and pliable. When rolling, don’t rush—take your time to get a tight, neat roll. The first couple might look rough, but honestly, practice makes perfect!
Cooking Tips & Techniques
One of the trickiest parts is handling sushi rice—it needs to be sticky but not mushy. Rinsing your rice thoroughly before cooking helps remove excess starch, so the grains stay separate but cling together enough to roll. I’ve learned the hard way that undercooked rice just won’t stick well.
When spreading rice on nori, wet your hands often. If your hands are dry, the rice sticks and becomes a mess. Also, don’t overload your rolls with filling—that’s a rookie mistake. Keep it balanced so the roll stays intact.
For slicing, a dull knife can squish your rolls. I always wipe my knife with a damp towel between cuts to keep slices clean and neat. Multitasking is key; while your rice cools, prep fillings to save time.
Last but not least, don’t skip the vinegar seasoning—it’s what makes your sushi rice sing. This extra step might feel small, but it’s a game-changer for flavor and that classic sushi aroma.
Variations & Adaptations
These fresh spring sushi rolls are a blank canvas for your creativity. Here are some ideas to customize:
- Vegetarian/Vegan: Replace shrimp with marinated tofu, roasted sweet potato, or tempura veggies. Use tamari instead of soy sauce for gluten-free.
- Seasonal twists: Swap in fresh mango or ripe peaches for a sweet contrast in summer. In cooler months, roasted butternut squash or sautéed mushrooms add warmth.
- Different wrappers: Use rice paper for a lighter, chewier texture. Or try soy or spinach nori sheets for extra color and nutrients.
One time, I made a spicy variation by adding a thin smear of sriracha mayo inside the roll—it was a hit! Feel free to adjust fillings based on what you love or have on hand.
Serving & Storage Suggestions
Serve these fresh spring sushi rolls immediately for the best texture and flavor. They’re perfect at room temperature or slightly chilled. Present them on a platter garnished with pickled ginger, wasabi dollops, and a small bowl of soy sauce for dipping.
Pair the rolls with a crisp cucumber salad or a light miso soup to round out the meal. For beverages, a chilled green tea or sparkling water with lemon complements the freshness beautifully.
If you have leftovers, wrap them tightly in plastic wrap and store in the refrigerator for up to 24 hours. Sushi rolls are best eaten fresh, but if you must reheat, avoid microwaving. Instead, let them sit at room temperature for 15 minutes to soften slightly before enjoying.
Flavors develop subtly over time, but the crisp crunch of veggies can soften, so fresh is always best.
Nutritional Information & Benefits
Each fresh spring sushi roll (about 6 pieces) contains approximately 250-300 calories, making it a light yet satisfying meal option. The combination of fresh vegetables, lean protein from shrimp or tofu, and fiber-rich rice offers a balanced bite.
Key benefits include vitamin C and antioxidants from bell peppers and herbs, heart-healthy fats from avocado, and low saturated fat overall. This recipe is naturally gluten-free if you choose tamari and rice paper wrappers.
Note that soy sauce contains sodium, so use it sparingly if watching salt intake. For a low-carb alternative, swap rice with cauliflower rice, though texture will differ.
From a personal wellness angle, these rolls feel nourishing without heaviness—a perfect way to enjoy sushi’s magic while keeping things fresh and wholesome.
Conclusion
If you’re looking for a recipe that’s fresh, colorful, and impressively easy, these fresh spring sushi rolls with vibrant ingredients are definitely worth trying. They bring that satisfying crunch and bright flavor punch without the fuss or expensive sushi-grade fish.
Feel free to customize the fillings based on your taste and pantry—whether that’s extra herbs, a spicy kick, or swapping proteins. This recipe has become a personal favorite because it’s flexible, quick, and always hits the spot.
Give it a whirl and let me know how you like to roll yours! Don’t forget to leave a comment, share your own variations, or pass this recipe along to friends who love a good homemade sushi fix. Here’s to many happy rolling adventures ahead!
FAQs About Fresh Spring Sushi Rolls
Can I make these sushi rolls ahead of time?
It’s best to enjoy them fresh, but you can prep fillings and cook rice a few hours ahead. Assemble right before serving for best texture.
What’s the difference between nori and rice paper wrappers?
Nori is dried seaweed with a stronger flavor and chewy texture; rice paper is translucent, lighter, and gluten-free, giving a different mouthfeel.
Can I use other proteins besides shrimp?
Absolutely! Cooked chicken, crab sticks, smoked salmon, or tofu all work beautifully.
How do I prevent the rice from sticking to my hands?
Keep a small bowl of water nearby to wet your hands each time before handling the rice—it makes spreading much easier.
What dipping sauces go well with these rolls?
Classic soy sauce or tamari is perfect, but you can also try ponzu, spicy mayo, or a ginger-soy vinaigrette for variety.
Pin This Recipe!

Fresh Spring Sushi Rolls

These fresh spring sushi rolls combine crisp veggies, tender rice, and delicate nori or rice paper wrappers for a vibrant, easy-to-make homemade sushi experience. Perfect for light lunches, potlucks, or impressing guests with fresh, colorful flavors.
- Prep Time: 15 minutes
- Cook Time: 20 minutes
- Total Time: 35 minutes
- Yield: 4 servings 1x
- Category: Main Course
- Cuisine: Japanese
Ingredients
- 1 cup (200g) sushi rice, rinsed and cooked
- 2 tablespoons rice vinegar
- 4 nori sheets (medium-sized)
- Rice paper wrappers (optional, for gluten-free option)
- 1 medium carrot, julienned
- 1 small cucumber, julienned
- 1 ripe avocado, sliced
- 1/2 red bell pepper, thinly sliced
- A handful each of fresh cilantro and mint
- 8 medium cooked shrimp, peeled and deveined (or tofu for vegetarian option)
- Soy sauce or tamari (for dipping)
- 1 tablespoon toasted sesame seeds
- Optional: pickled ginger and wasabi for serving
Instructions
- Rinse 1 cup (200g) sushi rice under cold water until water runs clear. Cook according to package instructions or in a rice cooker (about 20 minutes). Transfer to a large bowl once cooked.
- While rice is warm, gently fold in 2 tablespoons rice vinegar. Spread rice thinly in the bowl to cool to room temperature, fanning occasionally for a shiny finish.
- Julienne carrot, cucumber, and red bell pepper into thin strips. Slice avocado just before rolling to prevent browning. Prepare shrimp or tofu.
- Lay bamboo sushi rolling mat on flat surface and cover with plastic wrap. Place a nori sheet (or rice paper) shiny side down on the mat.
- Wet hands to prevent sticking, then spread an even layer of rice (about 3/4 cup or 150g) over nori, leaving a 1-inch (2.5cm) border at the top edge.
- Arrange a small handful of carrot, cucumber, bell pepper, avocado slices, herbs, and shrimp across the middle of the rice.
- Lift the edge of the mat nearest you and roll it over the fillings tightly but gently. Pull the mat as you roll to keep it snug. Seal the edge with a little water.
- Using a sharp knife moistened with water, slice the roll into 6-8 pieces. Sprinkle with toasted sesame seeds and serve with soy sauce, pickled ginger, and wasabi.
Notes
Wet your hands often to prevent rice from sticking. Use a sharp knife moistened with water to slice rolls cleanly. Practice rolling to get tight, neat rolls. Rice should be sticky but not mushy. Vinegar seasoning is essential for authentic flavor. Store leftovers wrapped tightly in plastic wrap in the refrigerator for up to 24 hours; avoid microwaving.
Nutrition
- Serving Size: About 6 pieces per s
- Calories: 275
- Sugar: 4
- Sodium: 450
- Fat: 8
- Saturated Fat: 1
- Carbohydrates: 38
- Fiber: 5
- Protein: 10
Keywords: fresh spring sushi rolls, homemade sushi, sushi recipe, easy sushi rolls, gluten-free sushi, vegetarian sushi, shrimp sushi rolls


