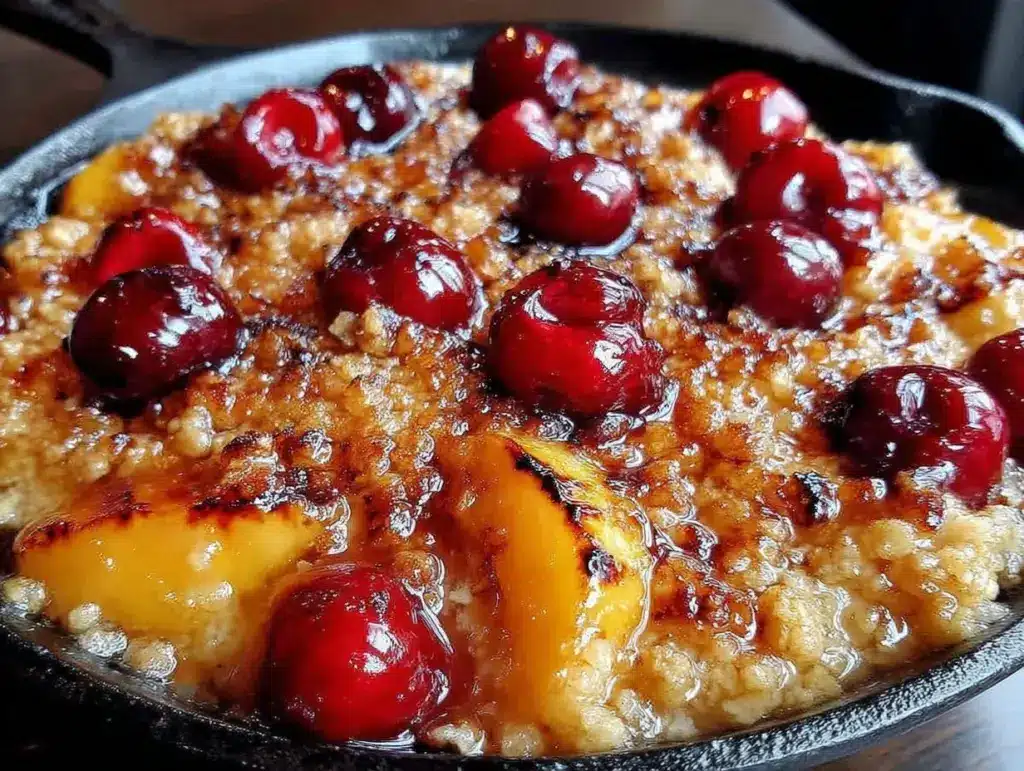
“You have to try this,” my neighbor called over the fence last summer, holding a cast iron skillet that smelled like a sweet campfire dream. I was skeptical at first—grilled fruit dessert? But when she handed me a forkful of her grilled peach and cherry crisp, I was instantly hooked. There was something about the smoky char from the grill that paired perfectly with the juicy peaches and tart cherries. Honestly, it felt like a dessert that belonged somewhere between a summer picnic and a cozy night by the fire. That moment became a small ritual for me—not just the recipe itself, but the slow, relaxing act of grilling fruit outdoors, letting the sweet juices caramelize and bubble beneath the crispy topping.
It’s funny how this recipe wasn’t planned; it came from her running out of oven space during a barbecue. The cast iron skillet was her go-to, and the result was magic. I found myself making the grilled peach and cherry crisp more than a few times that week, tweaking the topping and sneaking bites whenever I could. There’s something quietly satisfying about fruit crisps that feel both rustic and indulgent at once—the kind of dessert that doesn’t need fuss but rewards patience. If you’re anything like me, a cast iron skillet and a backyard grill are about to become your new best friends.
This crisp stuck with me because it’s simple, yet every bite bursts with flavors that remind me of warm summer evenings and good company. Whether you’re firing up the grill for a casual dinner or looking for a way to make the most of fresh stone fruits, this recipe promises a sweet, smoky treat you’ll want to come back to again and again.
Why You’ll Love This Recipe
This grilled peach and cherry crisp isn’t just any dessert—it’s one of those recipes that quickly becomes a favorite for so many reasons:
- Quick & Easy: You can have it ready in under 45 minutes from start to finish, which is perfect when you want something homemade but not time-consuming.
- Simple Ingredients: No need to hunt down exotic items. Most of these ingredients are pantry staples or fresh seasonal fruits you can find at your local market.
- Great for Summer Gatherings: This crisp shines at backyard cookouts, potlucks, or even casual family dinners when you want a dessert that feels special but not over-the-top.
- Crowd-Pleaser: Kids, adults, fruit lovers, and dessert fans alike go crazy for the balance of smoky grilled fruit and buttery, crumbly topping.
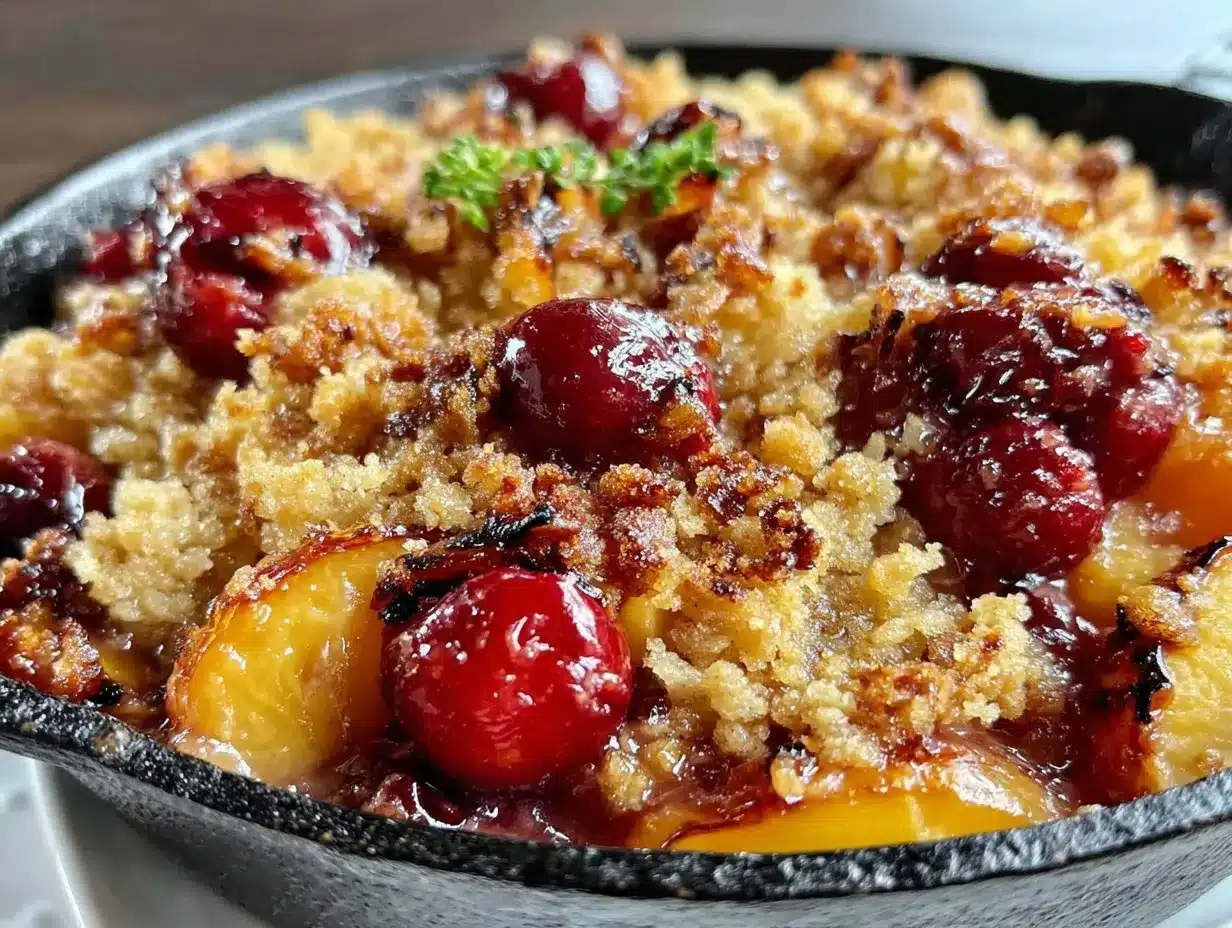
- Unbelievably Delicious: The cast iron skillet locks in heat perfectly, giving the crisp a fantastic texture contrast—crispy on top, juicy and tender underneath.
What sets this apart from other fruit crisps? The grilling step adds a subtle smokiness that you just don’t get from oven-baking alone. Plus, using a cast iron skillet helps develop that perfect crust without extra fuss. I’ve tried this recipe with fresh cherries and peaches from my farmer’s market and even swapped cherries for blueberries once—the flavor profile still blew me away. It’s comforting, but with a little twist that makes you want to close your eyes after the first bite.
What Ingredients You Will Need
This recipe uses simple, wholesome ingredients to deliver bold flavor and satisfying texture without the fuss. The combination of fresh peaches and cherries is classic, but the secret lies in balancing sweetness and a touch of tartness, with a buttery topping that crisps up just right. Most of these ingredients are pantry staples, and you can easily swap out or adjust depending on what’s available.
- For the Fruit Filling:
- 3 large ripe peaches, pitted and sliced (look for firm, juicy peaches for best grilling results)
- 1 ½ cups fresh or frozen cherries, pitted (fresh is best for grilling, but frozen works too)
- 2 tablespoons granulated sugar (adjust based on fruit sweetness)
- 1 tablespoon lemon juice (brightens the fruit flavors)
- 1 teaspoon vanilla extract (adds warmth and depth)
- 1 tablespoon cornstarch (helps thicken the juicy filling)
- For the Crisp Topping:
- ¾ cup old-fashioned rolled oats (adds chewiness and texture)
- ½ cup all-purpose flour (for structure; use almond flour to make gluten-free)
- ½ cup packed light brown sugar (for a hint of molasses flavor)
- ½ teaspoon ground cinnamon (warm spice to complement the fruit)
- ¼ teaspoon salt
- 6 tablespoons unsalted butter, cold and cubed (you can substitute with coconut oil for dairy-free)
- ½ cup chopped pecans or walnuts (optional, for crunch; I love these in my crispy candied pecans recipe)
Choosing ripe but firm peaches is key—they shouldn’t be mushy, or they’ll fall apart on the grill. For cherries, fresh pitted cherries bring a bright, juicy pop, but frozen thawed ones work just fine. If you want to swap out fruit, plums or nectarines make great alternatives. I recommend using real butter here because it really helps create that golden, rich topping, but coconut oil works well if you prefer a dairy-free version.
Equipment Needed
- Cast Iron Skillet (10-inch): Essential for this recipe—it holds heat evenly and helps develop a crisp topping. If you don’t have cast iron, a heavy-duty oven-safe skillet or baking dish will work, though the texture might differ slightly.
- Grill: Charcoal or gas grills both do the job. A grill pan is a decent indoor alternative if you don’t have outdoor space, but the smoky flavor won’t be the same.
- Mixing Bowls: For tossing fruit and mixing the crisp topping.
- Pastry Cutter or Fork: To cut the butter into the dry ingredients—you can also use your fingers if you’re feeling hands-on.
- Spatula or Wooden Spoon: For mixing and serving.
- Measuring Cups and Spoons: Accurate measurements make a difference, especially in the topping.
Personally, I’ve had cast iron skillets that needed a little extra seasoning to keep the crisp from sticking. A well-seasoned pan really shines here. If you’re on a budget, Lodge offers great affordable cast iron cookware that lasts forever. Maintaining your cast iron with regular oiling after use keeps it performing at its best—trust me, it’s worth it!
Preparation Method
- Prepare the Grill: Preheat your grill to medium heat, aiming for about 350°F (175°C). If using charcoal, set up for indirect grilling by piling coals on one side only. This helps avoid burning the topping.
- Mix the Fruit Filling (10 minutes): In a large bowl, combine the sliced peaches, pitted cherries, granulated sugar, lemon juice, vanilla extract, and cornstarch. Toss gently until the fruit is evenly coated. The cornstarch thickens the juices during cooking, so don’t skip this step. Set aside.
- Make the Crisp Topping (15 minutes): In a separate bowl, mix the oats, flour, brown sugar, cinnamon, and salt. Add the cold cubed butter. Using a pastry cutter or your fingers, work the butter into the dry ingredients until the mixture resembles coarse crumbs with pea-sized bits. Stir in chopped nuts if using. This topping should hold together slightly when pressed but still be crumbly.
- Assemble in Cast Iron Skillet (5 minutes): Lightly grease your cast iron skillet with butter or non-stick spray. Pour the fruit mixture evenly into the skillet. Sprinkle the crisp topping evenly over the fruit layer, spreading it gently but thoroughly.
- Grill the Crisp (25-30 minutes): Place the skillet on the grill, away from direct flames if possible. Close the lid and cook until the topping is golden brown and crisp, and the fruit is bubbly and soft—approximately 25 to 30 minutes. Rotate the skillet halfway through for even cooking. You’ll know it’s done when the edges bubble and the top is a deep golden color.
- Cool Slightly and Serve (5 minutes): Remove the skillet from the grill carefully—cast iron gets very hot! Let the crisp cool for about 5 minutes so the fruit filling sets slightly. Serve warm, ideally with a scoop of vanilla ice cream or a dollop of whipped cream.
Pro tip: If your grill tends to run hot, watch the crisp closely after 20 minutes to avoid burning the topping. You can also place a sheet of aluminum foil loosely over the skillet if it’s browning too fast. Also, using fresh, firm peaches means they’ll hold their shape nicely rather than turning to mush during grilling.
Cooking Tips & Techniques
Making a great grilled fruit crisp is about balancing heat, timing, and texture. Here are some tips I’ve learned from a few trial runs (and a couple of charred mishaps):
- Keep the Butter Cold: When mixing the topping, cold butter creates flaky, crunchy bits. If the butter melts while mixing, the topping can turn dense and greasy.
- Don’t Overcrowd the Grill: Cast iron retains heat, but if your grill is too crowded, hot spots can burn the crust. Give your skillet room to breathe.
- Use Indirect Heat: Placing the skillet away from direct flames prevents burning. The goal is slow, even heat that crisps the topping while softening the fruit inside.
- Test Fruit Ripeness: Ripe peaches with a slight firmness work best. Overripe fruit can become too mushy on the grill.
- Multitasking Strategy: While the crisp cooks, clean up your prep area or whip up a quick whipped cream topping. This helps keep the cooking flow smooth.
- Watch the Topping Color: The crisp should be a deep golden brown, not burnt. If it’s getting too dark early, turn down the heat or tent with foil.
One time, I left the grill lid open by accident, and the crisp took almost twice as long to cook. Lesson learned: keep that lid closed to trap heat and cook evenly. Also, I usually chop my pecans a bit finer after learning from my crispy candied pecans experience, so they mix better into the topping and avoid big burnt chunks.
Variations & Adaptations
This grilled crisp is super adaptable—you can tweak it to fit different diets, seasons, or flavor preferences with ease.
- Seasonal Fruit Swap: Substitute cherries and peaches with other stone fruits like plums, nectarines, or apricots in summer. In fall, try apples and pears with a pinch of nutmeg.
- Gluten-Free Version: Replace all-purpose flour with almond flour or a gluten-free baking blend. Use certified gluten-free oats to keep it safe.
- Dairy-Free Option: Swap butter for coconut oil or a vegan butter substitute. The crisp topping still crisps nicely with coconut oil, though the flavor is slightly different.
- Extra Crunch: Add chopped toasted almonds, walnuts, or even a handful of sunflower seeds to the topping for a nutty twist.
- Spiced Twist: Try adding ground ginger, cardamom, or allspice to the topping for a warm, aromatic flavor profile perfect for cooler nights.
I personally love adding a splash of bourbon or rum to the fruit mixture sometimes—it adds a subtle depth of flavor that’s unexpected but delightful. If you want a recipe for a comforting morning treat, the cinnamon roll casserole pairs wonderfully with this dessert for a full breakfast dessert spread.
Serving & Storage Suggestions
Serve this grilled peach and cherry crisp warm, straight from the skillet for maximum enjoyment. The smell alone—smoky, sweet, buttery—is enough to make anyone sit down at the table.
- Serving Temperature: Best served warm or at room temperature. A scoop of vanilla ice cream or a dollop of whipped cream takes it over the top.
- Presentation: Serve right in the cast iron skillet for rustic charm, or scoop into bowls for individual portions.
- Complementary Pairings: Goes great with fresh whipped cream, creamy vanilla yogurt, or even a splash of heavy cream. For drinks, try iced tea or a chilled glass of white wine.
- Storage: Cover leftovers tightly and refrigerate for up to 3 days. The crisp topping softens in the fridge but still tastes great.
- Reheating: Warm in a 350°F (175°C) oven for 10-15 minutes to crisp the topping again. Avoid microwaving if you want to keep the texture.
- Flavor Development: The fruit juices continue to mingle overnight, making the crisp even more flavorful the next day—great for a make-ahead dessert.
Nutritional Information & Benefits
This dessert balances indulgence with wholesome ingredients. Per serving (approximately 1/6 of the skillet), you can expect:
| Nutrient | Amount |
|---|---|
| Calories | 320 |
| Fat | 14g (mostly from butter and nuts) |
| Carbohydrates | 45g (natural sugars from fruit and added sugars) |
| Fiber | 4g (from oats, fruit, and nuts) |
| Protein | 4g |
Peaches and cherries bring antioxidants and vitamins like A and C, which support immune health. The oats add fiber that’s good for digestion. If you’re mindful of sugar, you can reduce the added sugar or swap for natural sweeteners like maple syrup.
This crisp fits nicely into a balanced diet—offering a satisfying sweet treat without artificial ingredients. For those watching gluten, almond flour and gluten-free oats make it accessible, while the nut topping gives a nice boost of healthy fats.
Conclusion
This grilled peach and cherry crisp in cast iron is one of those recipes that feels like a little celebration of summer’s best flavors, made all the better by a touch of smoky grill magic. It’s approachable, forgiving, and a treat that’s as fun to make as it is to eat. The cast iron skillet really makes the whole experience special—both in the kitchen and at the table.
Whether you stick to the peaches and cherries or try your own fruit combos, this dessert invites you to play with texture and flavor in a way that’s surprisingly easy. I’ve loved sharing it with friends and family; it’s the kind of recipe that gets requests for repeats, just like my cranberry orange bread often does during holidays.
Give it a go, and don’t hesitate to tweak it to fit your tastes. I’d love to hear how you make it your own—drop a comment or share your adaptations. Here’s to sweet, smoky, summery moments made simple!
Frequently Asked Questions
Can I make this crisp indoors without a grill?
Yes! You can bake it in a 350°F (175°C) oven for about 35-40 minutes until the topping is golden and fruit is bubbly. A grill adds smokiness, but the oven method still yields a delicious crisp.
What if I don’t have a cast iron skillet?
A heavy, oven-safe skillet or baking dish works fine. Cast iron is preferred for even heat and texture, but you can adapt with what you have.
Can I use frozen fruit instead of fresh?
Absolutely. Just thaw and drain any excess juice before mixing to avoid a soggy topping. Frozen cherries and peaches work well year-round.
How do I store leftovers?
Cover and refrigerate for up to 3 days. Reheat in the oven to crisp the topping again, avoiding microwaving if possible.
Can I make this dessert vegan?
Yes, swap butter with coconut oil or a vegan butter substitute, and ensure your sugar is vegan-friendly. The texture and flavor will be slightly different but still tasty.
Pin This Recipe!
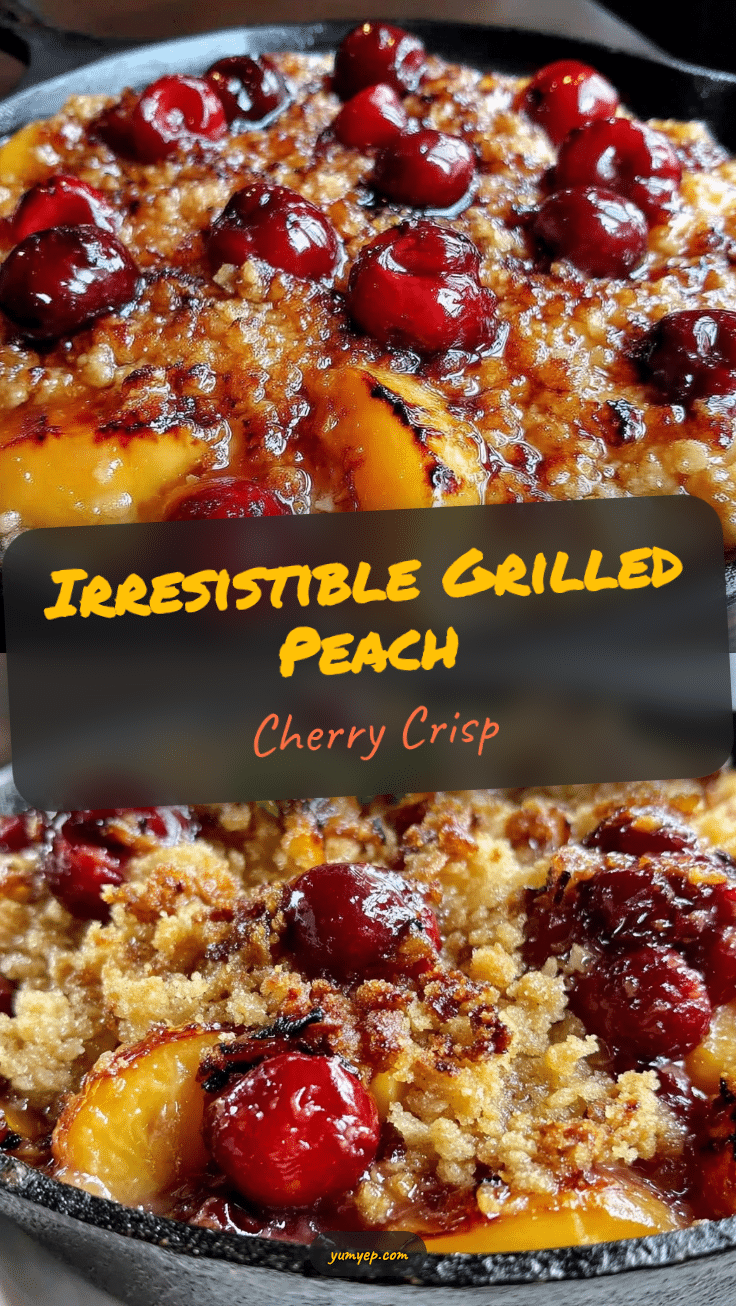
Irresistible Grilled Peach and Cherry Crisp

A simple and delicious grilled peach and cherry crisp with a smoky char from the grill, juicy fruit filling, and a buttery, crumbly topping. Perfect for summer gatherings and easy to make in a cast iron skillet.
- Prep Time: 30 minutes
- Cook Time: 25-30 minutes
- Total Time: 55-60 minutes
- Yield: 6 servings 1x
- Category: Dessert
- Cuisine: American
Ingredients
- 3 large ripe peaches, pitted and sliced
- 1 ½ cups fresh or frozen cherries, pitted
- 2 tablespoons granulated sugar
- 1 tablespoon lemon juice
- 1 teaspoon vanilla extract
- 1 tablespoon cornstarch
- ¾ cup old-fashioned rolled oats
- ½ cup all-purpose flour (or almond flour for gluten-free)
- ½ cup packed light brown sugar
- ½ teaspoon ground cinnamon
- ¼ teaspoon salt
- 6 tablespoons unsalted butter, cold and cubed (or coconut oil for dairy-free)
- ½ cup chopped pecans or walnuts (optional)
Instructions
- Preheat your grill to medium heat, about 350°F (175°C). For charcoal grills, set up for indirect grilling by piling coals on one side only.
- In a large bowl, combine sliced peaches, pitted cherries, granulated sugar, lemon juice, vanilla extract, and cornstarch. Toss gently until fruit is evenly coated. Set aside.
- In a separate bowl, mix oats, flour, brown sugar, cinnamon, and salt. Add cold cubed butter and work into dry ingredients using a pastry cutter or fingers until mixture resembles coarse crumbs. Stir in chopped nuts if using.
- Lightly grease a 10-inch cast iron skillet with butter or non-stick spray. Pour fruit mixture evenly into the skillet. Sprinkle crisp topping evenly over the fruit layer.
- Place skillet on the grill away from direct flames. Close lid and cook for 25 to 30 minutes, rotating skillet halfway through, until topping is golden brown and fruit is bubbly and soft.
- Remove skillet from grill carefully and let cool for about 5 minutes. Serve warm, optionally with vanilla ice cream or whipped cream.
Notes
Use ripe but firm peaches to prevent mushiness on the grill. Keep butter cold when mixing topping for a flaky texture. Use indirect heat on the grill to avoid burning the topping. Rotate skillet halfway through cooking for even browning. If topping browns too fast, tent with foil. Leftovers can be refrigerated up to 3 days and reheated in the oven to crisp topping again.
Nutrition
- Serving Size: Approximately 1/6 of
- Calories: 320
- Fat: 14
- Carbohydrates: 45
- Fiber: 4
- Protein: 4
Keywords: grilled peach crisp, cherry crisp, grilled fruit dessert, summer dessert, cast iron skillet dessert, easy fruit crisp, backyard dessert


