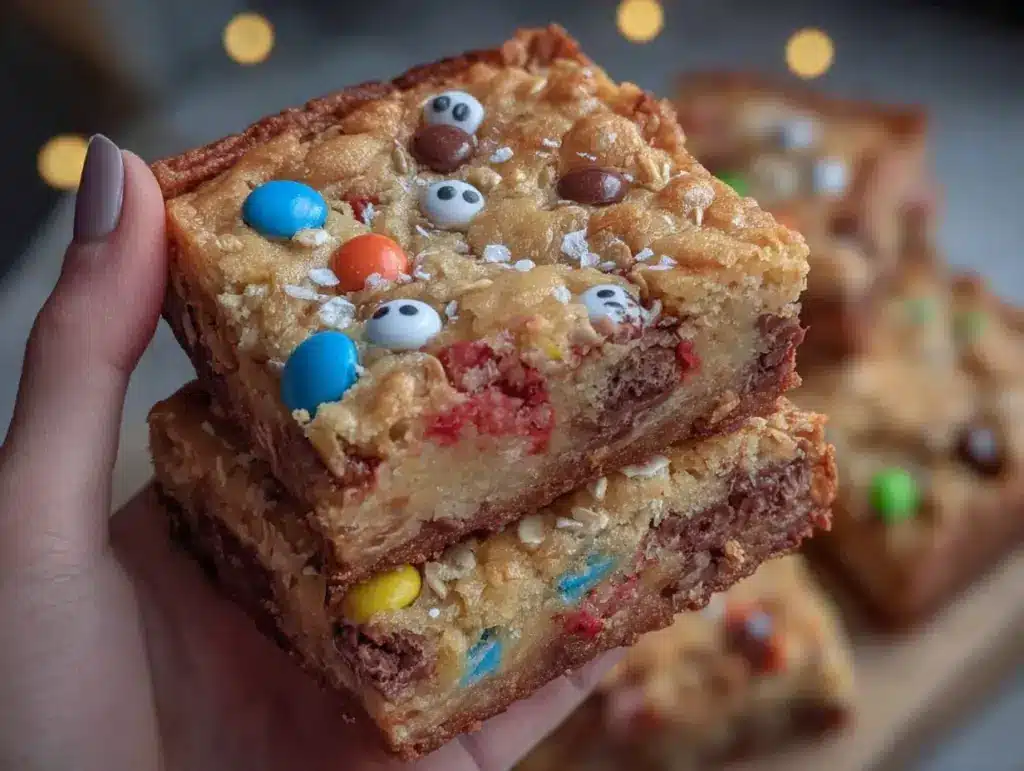
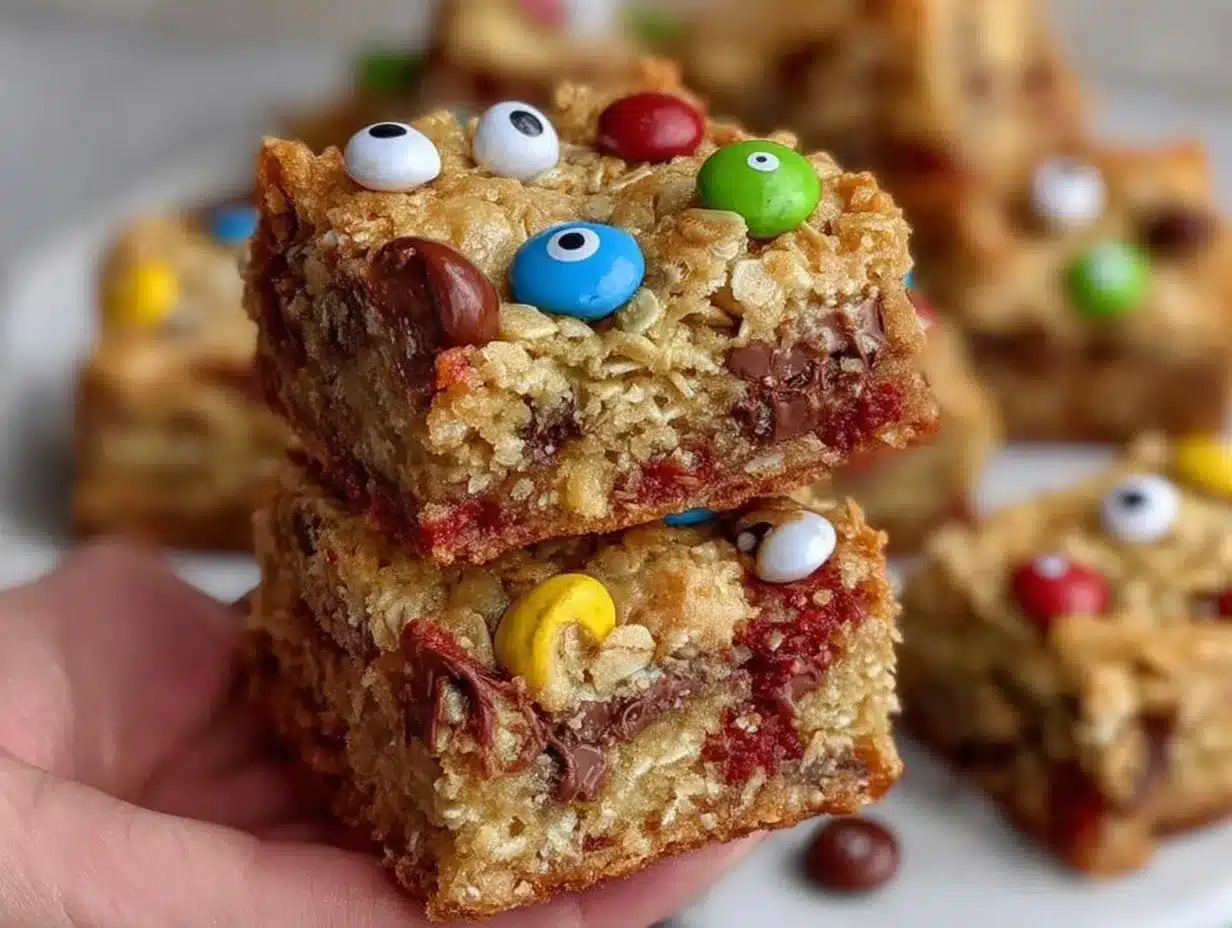
Picture this: the sweet scent of brown sugar and peanut butter swirling through your kitchen, mingling with bursts of chocolate and candy-coated crunch. The first time I pulled a tray of these Monster Cookie Bars out of the oven, the house transformed into a cozy, chaotic carnival—bright colors, giggles, and a little impatient finger poking at the cooling rack. You know that feeling when you catch your family sneaking treats before they’ve cooled? That’s exactly what happened here (I can’t really blame them, honestly).
There’s something about the chewy texture and playful googly eyes that brings everyone together—kids, grown-ups, even the neighbor who “just happened to stop by.” These Monster Cookie Bars aren’t just cookies in bar form; they’re a celebration. I remember the first time I whipped up a batch for a Halloween party years ago, when I was knee-high to a grasshopper, and my grandma let me stick candy eyes on top. It was a messy masterpiece, and the memory still makes me grin.
Honestly, if you’re looking for pure, nostalgic comfort with a dash of festive fun, you’ve landed in the right place. These bars shine at potlucks, jazz up lunchboxes, and totally brighten up your Pinterest board (I mean, those goofy eyes!). They’re dangerously easy to make—no fancy steps, just a bowl and a spoon—and they disappear faster than you’d expect. I’ve tested them (in the name of research, of course) for every occasion: family gatherings, bake sales, birthday parties, and they never disappoint. It’s a recipe I wish I’d discovered years ago, and now it’s a staple in our home—one of those treats that feels like a warm hug. You’re going to want to bookmark this one!
Why You’ll Love This Monster Cookie Bars Recipe
Let’s face it—there are a million cookie bar recipes out there, but these Monster Cookie Bars with Googly Eyes bring something totally unique to the table. I’ve baked my way through countless batches, tweaking and taste-testing until every bite hit that sweet spot of chewy, chocolatey, and just a little bit silly. Here’s why you’ll fall head over heels for this recipe:
- Quick & Easy: Comes together in under 40 minutes (bake time included) so you can whip up a batch even on busy weeknights or for last-minute playdates.
- Simple Ingredients: No fancy grocery runs required—just pantry staples like oats, peanut butter, chocolate chips, and M&Ms. Most of these are probably hanging out in your kitchen right now.
- Perfect for Parties: These bars were made for Halloween, but honestly, they’re a hit at birthday parties, bake sales, and even Friday night movie marathons.
- Crowd-Pleaser: Kids beg for seconds, adults try to sneak an extra bar, and everyone asks for the recipe (trust me, it happens every single time).
- Unbelievably Delicious: The combo of creamy peanut butter, chewy oats, melty chocolate, and crunchy candies is basically comfort food on overdrive.
What sets these Monster Cookie Bars apart? For starters, they’re not just a copy of the classic cookie—these bars are thicker, chewier, and loaded with candy eyes for a playful twist. I use old-fashioned oats for maximum chew, and always opt for creamy peanut butter (Jif or Skippy, if you’re asking my favorite). The trick is pressing the dough just enough so the bars stay soft, never dry.
This recipe isn’t just fun—it’s the kind that makes you close your eyes after the first bite and savor that chocolate and peanut butter magic. It’s comfort food, reimagined for busy bakers and families who want something special without the fuss. Whether you need to impress a crowd or just want to make your kids smile, these bars deliver every time. You won’t regret making a double batch!
What Ingredients You Will Need
This Monster Cookie Bars recipe uses simple, wholesome ingredients to deliver bold flavor and that signature chewy texture—no fuss, just fun. Most of these are pantry staples, and you can easily swap things in and out to fit your tastes or dietary needs.
For the Monster Cookie Bar Dough:
- 2 cups (200g) old-fashioned rolled oats (gives that chewy bite—quick oats work in a pinch, but texture won’t be the same)
- 1 1/2 cups (180g) all-purpose flour (King Arthur’s is my go-to for consistency)
- 1 teaspoon baking soda
- 1/2 teaspoon salt
- 1 cup (226g) unsalted butter, softened (adds richness and helps bars stay moist)
- 1 cup (200g) packed light brown sugar (for that deep, caramel flavor)
- 1/2 cup (100g) granulated sugar
- 1 cup (250g) creamy peanut butter (Jif or Skippy; natural peanut butter can separate, so mix well)
- 2 large eggs, room temperature
- 2 teaspoons pure vanilla extract
Mix-Ins & Toppings:
- 1 cup (175g) semi-sweet chocolate chips (I like Ghirardelli for a meltier, richer bite)
- 1 cup (170g) M&Ms or candy-coated chocolate pieces (classic monster cookie colors!)
- 30-40 candy googly eyes (Wilton makes great edible eyes; these make the bars “monster” themed)
Optional & Substitutions:
- Swap almond flour for all-purpose for gluten-free bars (texture will be softer, but still tasty)
- Use sunflower seed butter for a nut-free option—just double-check your M&Ms for allergens
- Add 1/2 cup (50g) chopped walnuts or pecans for crunch (skip for allergy-friendly bars)
- Mix in mini marshmallows or sprinkles for extra color and fun
- In summer, swap classic M&Ms for pastel or themed candy pieces
I always recommend tasting your peanut butter before mixing—some brands are saltier or sweeter, and that can affect your final flavor. If you need to go dairy-free, use a vegan butter alternative and dairy-free chocolate chips; I’ve tried Earth Balance and Enjoy Life, and both work well. Everything else is fair game—don’t be afraid to personalize!
Equipment Needed
You don’t need a fancy kitchen setup to make these Monster Cookie Bars, just a few trusty tools—most likely already in your cabinets.
- Large mixing bowl (for combining wet and dry ingredients)
- Hand mixer or stand mixer (makes creaming butter and sugar a breeze—stirring by hand works too if you’ve got some muscle!)
- Spatula (a silicone one helps scrape every last bit of dough)
- 9×13-inch (23x33cm) baking pan (metal pans bake more evenly; glass pans work but may need an extra minute or two)
- Parchment paper or nonstick baking spray (for easy release—trust me, it saves cleanup)
- Measuring cups and spoons (accuracy matters for chewy bars)
- Offset spatula or spoon (for smoothing the dough in the pan)
- Wire cooling rack (helps bars cool evenly and prevents soggy bottoms)
If you don’t have a 9×13 pan, you can use two 8×8 pans for slightly thicker bars—just add a few minutes to your bake time. I’ve baked these in disposable foil pans for parties, and they work fine, though the edges might get a bit crispier.
Maintenance tip: Keep your mixer paddles and spatulas in good shape by washing them right after use (peanut butter is a pain once it dries!). Budget-friendly bakers can use a sturdy wooden spoon—my grandma swears by hers and it’s still going strong after decades.
Preparation Method
- Preheat & Prep: Set your oven to 350°F (175°C). Line your 9×13-inch (23x33cm) pan with parchment paper, leaving a little overhang for easy lifting later. If you don’t have parchment, a good spritz of nonstick spray will do the trick.
- Mix Dry Ingredients: In a medium bowl, whisk together 2 cups (200g) oats, 1 1/2 cups (180g) flour, 1 teaspoon baking soda, and 1/2 teaspoon salt. Set aside. (Tip: Don’t skip this step—it helps prevent clumps in your dough.)
- Cream Butter & Sugars: In a large bowl, beat together 1 cup (226g) softened butter, 1 cup (200g) brown sugar, and 1/2 cup (100g) granulated sugar until light and fluffy (about 2-3 minutes). If your butter’s too cold, soften it in the microwave for 10 seconds—just don’t melt it completely.
- Add Peanut Butter, Eggs & Vanilla: Mix in 1 cup (250g) creamy peanut butter until well combined. Beat in 2 eggs, one at a time, then stir in 2 teaspoons vanilla extract. Scrape down the sides so everything gets mixed evenly.
- Combine Wet & Dry: Add the dry mixture to your wet ingredients, stirring just until combined. Don’t overmix—too much mixing can make the bars tough.
- Fold in Mix-Ins: Gently fold in 1 cup (175g) chocolate chips and 1 cup (170g) M&Ms. (Reserve a handful for pressing on top—makes the bars look extra festive!) If using nuts or extra candies, add them now.
- Spread & Decorate: Transfer the dough to your prepared pan. Use an offset spatula or spoon to spread it evenly. Sprinkle reserved chocolate chips and M&Ms on top, then gently press candy googly eyes into the surface. (Tip: Space eyes out so every bar gets at least one.)
- Bake: Bake for 22-26 minutes, until the edges are golden and the center is just set. The bars should look slightly underdone in the middle (they’ll firm up as they cool). If using glass pans, add an extra 2-3 minutes.
- Cool: Let the bars cool in the pan for at least 30 minutes. This is the hardest part—everyone will want to dig in early, but patience pays off. Cutting too soon can make them crumble!
- Slice & Serve: Lift the bars out with the parchment overhang and transfer to a cutting board. Slice into squares or rectangles. If you want sharper edges, chill the bars for 15 minutes before cutting.
Prep note: If your dough seems dry, add an extra tablespoon of peanut butter. If it’s super sticky, pop it in the fridge for 5 minutes before spreading. Sensory cue—when bars are done, they’ll smell nutty, the edges will be lightly browned, and the center will jiggle just a bit.
Personal tip: For even baking, rotate your pan halfway through. If you’re baking with kids, let them press on the googly eyes—messy hands, big smiles, and memories in the making!
Cooking Tips & Techniques
I’ve baked more batches of Monster Cookie Bars than I care to admit, and along the way, I’ve picked up a few tricks (and learned from a few mishaps!). Here’s what makes the difference between good bars and truly great ones:
- Don’t Overbake: The bars will look slightly underdone in the center when you pull them out—this is key! They’ll set up as they cool, staying soft and chewy. Overbaking turns them dry and crumbly (been there, done that).
- Room Temp Ingredients: Using eggs and butter at room temperature helps everything blend smoothly. Cold eggs can make the dough stiff.
- Mix-Ins Placement: Press a few extra chocolate chips and M&Ms on top right before baking so the bars look vibrant. The googly eyes go on last, and gently press so they stick but don’t sink.
- Pan Prep: Parchment paper makes lifting and cutting a breeze—no stuck bars, no sad crumbs left behind.
- Batch Baking: If you double the recipe, use two pans or one extra-large pan. Don’t overfill; thick bars need a longer bake and risk burning on the edges.
Common mistake? Overmixing. Trust me, I’ve made bars that could double as hockey pucks! Stir just until combined and you’ll get that perfect chewy texture. If your bars bake unevenly, try rotating the pan halfway through. For multitasking, prep the dry ingredients ahead of time and store in a zip-top bag for quick assembly on busy days.
Consistency is key: always measure ingredients precisely, and if you switch brands (especially peanut butter), taste-test for sweetness and salt. One time my bars came out way too salty—turns out I used a super salty store brand. Lesson learned. These little tweaks make all the difference!
Variations & Adaptations
Monster Cookie Bars are a blank canvas for creativity. Over the years, I’ve tried countless twists—some on purpose, some by accident—and they’re fun every time. Here are a few easy ways to make them your own:
- Gluten-Free: Swap all-purpose flour for almond or oat flour and use certified gluten-free oats. Bars will be a bit softer but still chewy.
- Nut-Free: Use sunflower seed butter in place of peanut butter and double-check your candies for allergens. Perfect for classroom treats.
- Seasonal Flavors: Try swapping M&Ms for pastel candies at Easter, peppermint chips at Christmas, or caramel bits in the fall.
- Extra Crunch: Add 1/2 cup (50g) chopped walnuts, pecans, or pretzels for a salty crunch. I once tossed in crushed potato chips—don’t knock it until you try it!
- Vegan Adaptation: Use a vegan butter substitute, flax eggs (1 tbsp flaxseed meal + 2.5 tbsp water per egg), and dairy-free chocolates. Bars will be a bit denser but totally delicious.
If you prefer a thinner bar, spread dough in a larger pan and reduce bake time. For thicker, bakery-style squares, use an 8×8 pan and add 5 minutes. You can even press half the dough in the pan, add a layer of marshmallow fluff, and top with the rest for a gooey surprise—my personal favorite for sleepovers!
Serving & Storage Suggestions
These Monster Cookie Bars are best served at room temperature—soft, chewy, and just the right amount of gooey. Presentation matters, especially for parties or Pinterest snaps: stack bars on a colorful platter, scatter a few extra candies around, and don’t forget those googly eyes for extra giggles.
Pair them with a cold glass of milk, hot cocoa, or coffee for grown-ups. They’re awesome alongside fresh fruit, or set out with salty snacks for a fun sweet-and-savory spread.
- Storage: Store bars in an airtight container at room temperature for up to 5 days. They keep their chewiness surprisingly well!
- Freezing: Wrap individual squares in plastic wrap and stash in a freezer bag. They’ll stay fresh for up to 2 months. Thaw at room temp or microwave for 10 seconds for a quick treat.
- Reheating: If you like your bars warm, a quick zap in the microwave brings back the melty chocolate goodness. Just don’t overdo it or the candies will melt.
Flavor deepens over time—the peanut butter and brown sugar mingle, and the bars get even chewier by day two. If you’re gifting, wrap bars in wax paper and tie with a ribbon for festive flair. They travel well, making them perfect for bake sales or school lunchboxes.
Nutritional Information & Benefits
Each Monster Cookie Bar (based on a 24-bar batch) contains approximately:
- Calories: 220
- Fat: 11g
- Carbohydrates: 28g
- Protein: 4g
- Sugar: 16g
The oats bring fiber and a bit of protein, and peanut butter adds healthy fats and more protein—so there’s a little balance in the treat. Using natural peanut butter and swapping in dark chocolate chips can boost antioxidant value. For gluten-free or nut-free diets, simple substitutions make these bars accessible (just watch for candy allergens).
From a wellness perspective, these bars are an occasional treat, but I love knowing they’re made with real ingredients and can be adapted for most dietary needs. Always check candy packaging for hidden allergens—especially if sharing with friends. Honestly, life’s too short not to enjoy a monster cookie once in a while!
Conclusion
If you’re searching for a recipe that’s fun, festive, and always a hit—these Chewy Monster Cookie Bars with Googly Eyes are it. They’re easy to customize, quick to make, and guaranteed to bring smiles (and lots of requests for seconds). Whether you’re baking for your family, a party, or just treating yourself, these bars are pure, nostalgic comfort with a twist.
Don’t be afraid to make them your own—switch up the candies, add a sprinkle of sea salt, or let your kids go crazy with the googly eyes. I love this recipe because it’s forgiving, fun, and always delicious. If you give it a try, let me know how you adapted it, or drop a comment below with your favorite mix-ins!
Baking should be joyful, a little messy, and full of good memories. Save this recipe to your Pinterest board, share it with friends, and most of all—enjoy every chewy, chocolatey bite!
Frequently Asked Questions
Can I use quick oats instead of old-fashioned oats?
Yes, you can use quick oats if that’s all you have. The bars will be slightly less chewy, but they’ll still taste great!
How do I keep the googly eyes from melting?
Press the candy eyes into the bars right after baking. If you add them before baking, they might melt or lose shape.
Can I make these Monster Cookie Bars nut-free?
Absolutely! Use sunflower seed butter instead of peanut butter and check your candy pieces for nut-free labeling.
Can I freeze Monster Cookie Bars for later?
Definitely. Wrap individual bars and freeze for up to 2 months. Thaw at room temperature or microwave briefly before serving.
How do I make vegan Monster Cookie Bars?
Swap in vegan butter, flax eggs, and dairy-free chocolate chips. The bars will be a bit denser but still delicious!
Pin This Recipe!

Monster Cookie Bars Recipe – Easy Chewy Halloween Treats Kids Love

These Monster Cookie Bars are thick, chewy, and loaded with peanut butter, oats, chocolate chips, M&Ms, and playful candy googly eyes. Perfect for Halloween parties, bake sales, or any festive gathering, they’re quick to make and guaranteed to bring smiles to kids and adults alike.
- Prep Time: 15 minutes
- Cook Time: 25 minutes
- Total Time: 40 minutes
- Yield: 24 bars 1x
- Category: Dessert
- Cuisine: American
Ingredients
- 2 cups old-fashioned rolled oats
- 1 1/2 cups all-purpose flour
- 1 teaspoon baking soda
- 1/2 teaspoon salt
- 1 cup unsalted butter, softened
- 1 cup packed light brown sugar
- 1/2 cup granulated sugar
- 1 cup creamy peanut butter
- 2 large eggs, room temperature
- 2 teaspoons pure vanilla extract
- 1 cup semi-sweet chocolate chips
- 1 cup M&Ms or candy-coated chocolate pieces
- 30–40 candy googly eyes
- Optional: 1/2 cup chopped walnuts or pecans
- Optional: mini marshmallows or sprinkles
Instructions
- Preheat oven to 350°F (175°C). Line a 9×13-inch baking pan with parchment paper or spray with nonstick baking spray.
- In a medium bowl, whisk together oats, flour, baking soda, and salt. Set aside.
- In a large bowl, beat together softened butter, brown sugar, and granulated sugar until light and fluffy (about 2-3 minutes).
- Mix in creamy peanut butter until well combined. Beat in eggs, one at a time, then stir in vanilla extract.
- Add the dry mixture to the wet ingredients, stirring just until combined. Do not overmix.
- Gently fold in chocolate chips and M&Ms, reserving a handful for topping. Add nuts or extra candies if desired.
- Spread dough evenly in prepared pan. Sprinkle reserved chocolate chips and M&Ms on top, then gently press candy googly eyes into the surface.
- Bake for 22-26 minutes, until edges are golden and center is just set. If using a glass pan, add 2-3 minutes.
- Let bars cool in the pan for at least 30 minutes before slicing.
- Lift bars out using parchment overhang, transfer to cutting board, and slice into squares or rectangles. For sharper edges, chill bars for 15 minutes before cutting.
Notes
Do not overbake—the bars should look slightly underdone in the center when you pull them out. For gluten-free, use almond or oat flour and certified gluten-free oats. For nut-free, use sunflower seed butter and check candies for allergens. Press googly eyes on after baking to prevent melting. Bars freeze well for up to 2 months.
Nutrition
- Serving Size: 1 bar
- Calories: 220
- Sugar: 16
- Sodium: 120
- Fat: 11
- Saturated Fat: 5
- Carbohydrates: 28
- Fiber: 2
- Protein: 4
Keywords: monster cookie bars, Halloween treats, chewy cookie bars, peanut butter bars, kids party dessert, easy cookie bars, M&M cookie bars, festive baking, bake sale recipes, party snacks


