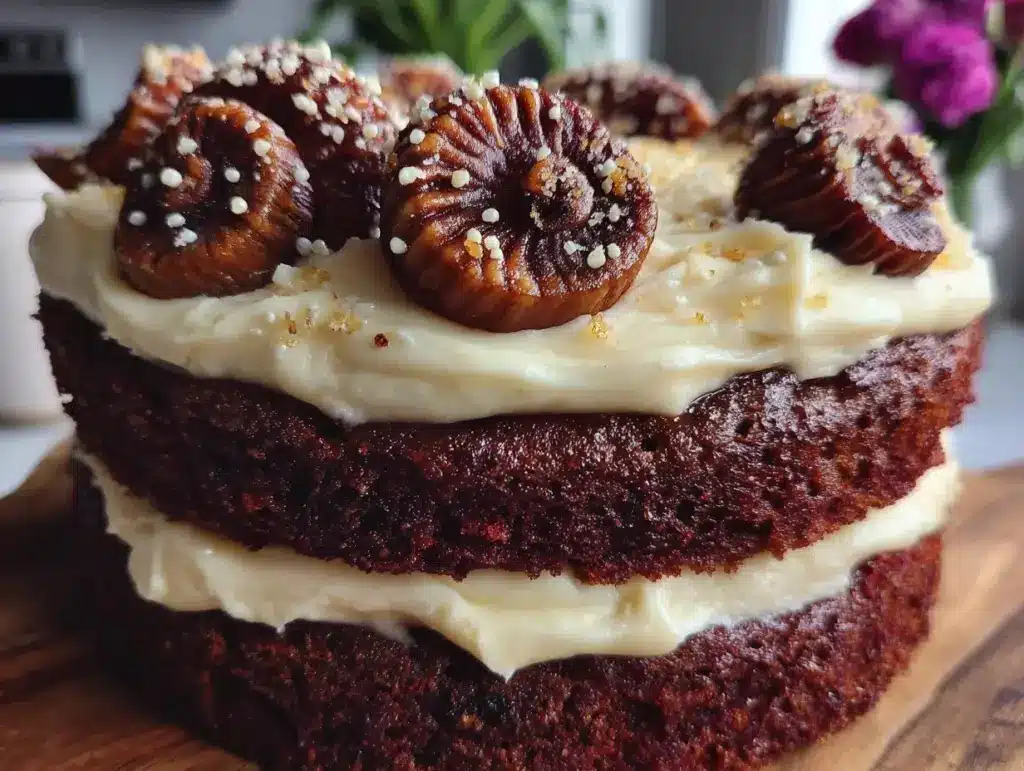
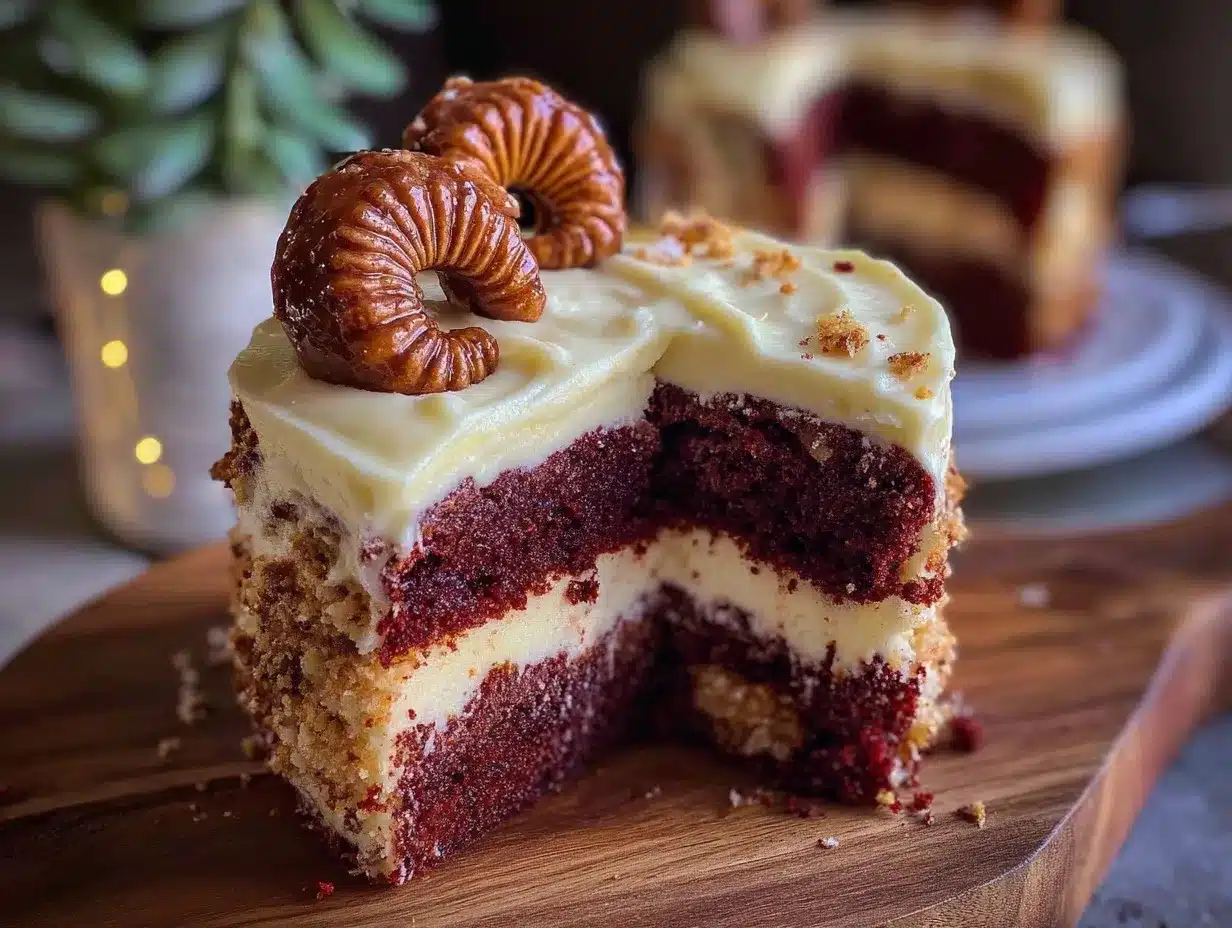
“Wait, you made a red velvet cake with ram horns on top? For my Aries birthday?” my friend laughed through the phone, disbelief tinged with excitement. Honestly, I wasn’t sure if I could pull off this idea when I first started baking this Aries red velvet birthday cake. The whole thing began on a chaotic morning, scrambling to create something special for my Aries cousin’s birthday. I had the red velvet flavor down—her favorite—but the ram horns fondant topper was a last-minute whim after scrolling through astrology memes. I wasn’t sure if it’d look right or taste as good as it sounded, but hey, it was worth a shot.
The kitchen was a mess, flour dusted everywhere, and the fondant didn’t cooperate at first—too sticky, too stiff—but after a few tries, those twisted horns took shape. That cake wasn’t just a birthday treat; it felt like a little victory, a quirky, personal touch that made the whole party buzz. You know that kind of cake that makes people pause, smile, and ask for the recipe? This Aries red velvet birthday cake with ram horns fondant topper is exactly that. It’s not perfect, but it’s real, fun, and surprisingly easy once you know the tricks.
Every time I make this cake now, it brings me right back to that wild morning, the laughter, and the unexpected joy of turning astrology into edible art. It’s not just a cake—it’s a statement, a little celebration of personality baked into every bite.
Why You’ll Love This Recipe
This Aries red velvet birthday cake with ram horns fondant topper isn’t just a dessert; it’s a showstopper that’s surprisingly straightforward to make. Here’s why it’s earned a permanent spot in my baking rotation:
- Quick & Easy: The cake comes together in about 1 hour and 30 minutes, including decorating time—perfect for those last-minute birthday surprises.
- Simple Ingredients: You probably have most of these ingredients right in your pantry, no need to hunt down anything exotic.
- Perfect for Astrology-Themed Celebrations: If you’re into zodiac vibes or know an Aries who loves personalized touches, this cake is a guaranteed hit.
- Crowd-Pleaser: The classic red velvet flavor with smooth cream cheese frosting wins over kids and adults alike, every single time.
- Creative Fondant Topper: The ram horns aren’t just decorative—they bring a fun, personalized twist that makes this cake stand out from the usual birthday fare.
What sets this cake apart is the balance between tradition and creativity. The red velvet base is rich yet tender, a recipe I’ve refined after many tries, much like perfecting the cream cheese frosting for my red velvet crinkle cookies. The fondant topper might look fancy, but it’s made easy with a few simple techniques that anyone can master—even if you’re not “really a baker.”
This cake isn’t just for Aries birthdays either; it’s a fun way to celebrate anyone who loves a bit of flair and flavor. Plus, it has that cozy, homemade feel that leaves you closing your eyes with each bite—comfort food with personality.
What Ingredients You Will Need
For this Aries red velvet birthday cake, I stick to straightforward, reliable ingredients that bring out the classic red velvet flavor and smooth cream cheese frosting. The fondant topper calls for a few special touches, but nothing too intimidating.
- For the Red Velvet Cake:
- All-purpose flour, 2 ½ cups (315g)
- Granulated sugar, 1 ½ cups (300g)
- Cocoa powder, unsweetened, 1 ½ tablespoons (12g)
- Baking soda, 1 teaspoon (5g)
- Salt, ½ teaspoon (3g)
- Buttermilk, 1 ½ cups (360ml), room temperature (or use dairy-free milk mixed with 1 tablespoon vinegar)
- Vegetable oil, 1 cup (240ml)
- Eggs, 2 large, room temperature
- White vinegar, 1 tablespoon (15ml)
- Vanilla extract, 2 teaspoons (10ml)
- Red food coloring, 2 tablespoons (30ml) — use gel for vibrant color without thinning batter
- For the Cream Cheese Frosting:
- Cream cheese, 16 oz (450g), softened (I recommend Philadelphia for smoothness)
- Unsalted butter, ½ cup (115g), softened
- Powdered sugar, 4 cups (480g), sifted
- Vanilla extract, 1 teaspoon (5ml)
- A pinch of salt
- For the Ram Horns Fondant Topper:
- White fondant, 8 oz (225g) — Wilton brand works well for beginners
- Black gel food coloring
- Edible gold dust (optional, for a luxe twist)
- Cornstarch or powdered sugar for dusting
- Water or edible glue (to help pieces stick)
These ingredients are mostly pantry staples or easy to find at your local grocery store. If you want a dairy-free version, swapping the buttermilk and cream cheese with plant-based alternatives works without much fuss. For a gluten-free twist, almond flour can replace all-purpose flour, but the texture will be a bit denser.
Equipment Needed
- Two 9-inch (23cm) round cake pans — non-stick or lined with parchment paper
- Electric mixer (stand or handheld) for smooth batter and frosting
- Mixing bowls in various sizes
- Measuring cups and spoons for accuracy
- Rubber spatula for scraping bowls
- Cooling racks to prevent soggy cake bottoms
- Offset spatula or butter knife for frosting
- Rolling pin for fondant shaping
- Small sharp knife or fondant sculpting tools for shaping ram horns
- Pastry brush for applying edible glue or water
If you don’t have a rolling pin, a smooth glass bottle works fine for rolling out fondant. And for the fondant shaping, simple kitchen knives can do the trick, no fancy tools required. I’ve found that investing in a good electric mixer saves a lot of elbow grease, especially when making the cream cheese frosting nice and fluffy. Also, having cooling racks is a game-changer to keep cakes from steaming and becoming dense.
Preparation Method
- Preheat & Prep: Preheat your oven to 350°F (175°C). Grease and flour two 9-inch round cake pans or line them with parchment paper. This stops the cake from sticking and keeps edges neat.
- Mix Dry Ingredients: In a medium bowl, sift together 2 ½ cups (315g) all-purpose flour, 1 ½ tablespoons (12g) cocoa powder, 1 teaspoon (5g) baking soda, ½ teaspoon (3g) salt, and set aside.
- Combine Wet Ingredients: In a large bowl, whisk 1 ½ cups (360ml) buttermilk, 1 cup (240ml) vegetable oil, 2 large eggs, 1 tablespoon (15ml) white vinegar, 2 teaspoons (10ml) vanilla extract, and 2 tablespoons (30ml) red food coloring until smooth.
- Make the Batter: Gradually add the dry ingredients to the wet, mixing on low with an electric mixer until just combined. Avoid overmixing to keep the cake tender. The batter should be smooth and vibrant red.
- Bake: Divide batter evenly between pans. Bake for 25-30 minutes or until a toothpick inserted comes out clean. The cake should spring back lightly when touched.
- Cool: Let cakes cool in pans for 10 minutes, then transfer to cooling racks to cool completely. This prevents the frosting from melting later.
- Prepare Frosting: Beat 16 oz (450g) softened cream cheese and ½ cup (115g) softened unsalted butter until smooth and creamy. Gradually add 4 cups (480g) powdered sugar and 1 teaspoon (5ml) vanilla extract. Beat until light and fluffy, about 5 minutes.
- Assemble Cake: Level cakes if domed. Spread a generous layer of frosting on the first layer, then place the second cake on top. Apply a thin crumb coat over the entire cake and chill for 30 minutes.
- Final Frosting Layer: Add a thick, even layer of frosting over the crumb coat. Smooth with an offset spatula. Chill again while you prepare the fondant topper.
- Create Ram Horns Fondant Topper: Knead white fondant until pliable. Tint portions with black gel food coloring to create a marbled effect or paint details later. Roll fondant into long ropes and twist into horn shapes. Attach ends to form curled ram horns, using water or edible glue to stick pieces together. Let dry for 1-2 hours for firmness.
- Decorate: Place ram horns gently on top of the cake. Optionally dust with edible gold for a special Aries glow. Chill the cake for 10 minutes before serving to set the topper.
Pro tip: If frosting feels too soft, pop it in the fridge for 10 minutes before spreading. Also, when twisting the fondant horns, don’t rush—slow and steady lets you shape without cracks. The horns might look tricky, but with a little patience, they come together beautifully.
Cooking Tips & Techniques
Getting the perfect red velvet texture means balancing moisture and crumb. Using buttermilk (or a good substitute) is key—it tenderizes and adds that subtle tang that sets red velvet apart. I learned the hard way that skipping vinegar dulls the color and flavor, so don’t skip it.
When mixing batter, always add dry ingredients slowly to wet. Overmixing develops gluten and makes the cake tough—that’s a mistake I made many times before perfecting this recipe.
For the cream cheese frosting, soften your cream cheese and butter fully to avoid lumps. Beat them longer than you think—fluffy frosting tastes lighter and spreads easier.
Fondant can be intimidating, but keep it simple: knead well to avoid cracks and use cornstarch to prevent sticking. If your fondant feels dry or cracks, a tiny bit of shortening kneaded in helps. Also, rolling the fondant on a smooth, clean surface keeps it even.
Chilling between frosting layers is a lifesaver for neat finishes, especially if you’re decorating with fondant. And if you want to speed things up on a busy day, you can prepare the fondant topper a day ahead and store it in an airtight container.
Variations & Adaptations
- Flavor Swaps: If red velvet’s not your thing, try swapping cocoa powder for a teaspoon of instant espresso powder for a mocha twist that pairs beautifully with cream cheese frosting.
- Fondant Alternatives: Instead of fondant, pipe ram horns using stiff buttercream tinted with black food coloring for a rustic, softer look.
- Dietary Adjustments: Use almond flour and a dairy-free cream cheese alternative to make this cake gluten- and dairy-free. The texture will be slightly different but still delicious.
- Seasonal Twists: Add fresh raspberries or strawberries between layers for a pop of color and fresh flavor, especially lovely in spring or summer.
- Personal Touch: I once made this cake with edible star sprinkles on the frosting to mimic Aries’ constellation—added a fun cosmic vibe that guests loved.
Serving & Storage Suggestions
This Aries red velvet birthday cake is best served chilled or at room temperature for the perfect balance of creaminess and softness. I like to slice it with a warm, clean knife to get smooth edges, especially when the fondant topper is on.
Pair it with a lightly brewed black tea or a creamy latte to complement the cocoa and cream cheese flavors. For an extra treat, a glass of cold milk never disappoints—classic combo, you know?
Store leftover cake covered tightly in the refrigerator for up to 4 days. The flavors actually deepen after a day or two, so it’s great for making ahead. To freeze, wrap individual slices in plastic wrap and place in an airtight container for up to 2 months.
When reheating refrigerated cake slices, let them come to room temperature or warm gently in the microwave for 10-15 seconds. Avoid overheating or the cream cheese frosting might melt.
Nutritional Information & Benefits
Per serving (based on 12 slices), this Aries red velvet birthday cake has roughly 350 calories, 15g fat, 45g carbohydrates, and 4g protein. The cream cheese frosting adds richness as well as calcium.
Key ingredients like buttermilk provide probiotics for digestion, and cocoa powder offers antioxidants. While this is a celebratory cake and not an everyday treat, the recipe can be adjusted to lower sugar or fat content by using less frosting or swapping sugar alternatives.
Be mindful that this recipe contains dairy, gluten, and eggs, so it’s not suitable for those with allergies to those ingredients unless adapted.
Conclusion
Making this perfect Aries red velvet birthday cake with ram horns fondant topper was more than a baking project—it was a way to celebrate personality, creativity, and flavor all in one. Whether you’re baking for an Aries or just want a cake that stands out, this recipe offers a fun, approachable way to impress without stress.
Feel free to tweak the colors, flavors, or decorations to fit your vibe. I love how this cake brings a smile and sparks conversation every time I serve it, reminding me that baking is as much about connection as it is about taste. If you try it out, I’d love to hear how your ram horns turned out or what personal touches you added. Happy baking and may your celebrations be as bold and spirited as Aries themselves!
Frequently Asked Questions
- Can I make the cake layers a day ahead?
Yes! Bake and cool the layers completely, then wrap tightly in plastic wrap and store at room temperature. Frost and decorate the next day for best results. - How do I prevent the fondant horns from cracking?
Knead the fondant thoroughly to loosen it before shaping. If cracking happens, add a tiny bit of shortening and knead again. - Is there a substitute for buttermilk?
You can mix 1 ½ cups of milk with 1 tablespoon of white vinegar or lemon juice, let sit for 5 minutes, and use as a buttermilk substitute. - Can I color the cream cheese frosting instead of using fondant?
Absolutely! Using gel food coloring, you can tint the frosting and pipe ram horn shapes for a softer, more rustic look. - How should I store leftover cake with the fondant topper?
Keep the cake in a cool, dry place. If your kitchen is warm, refrigerate it in an airtight container to keep the fondant from softening.
Pin This Recipe!
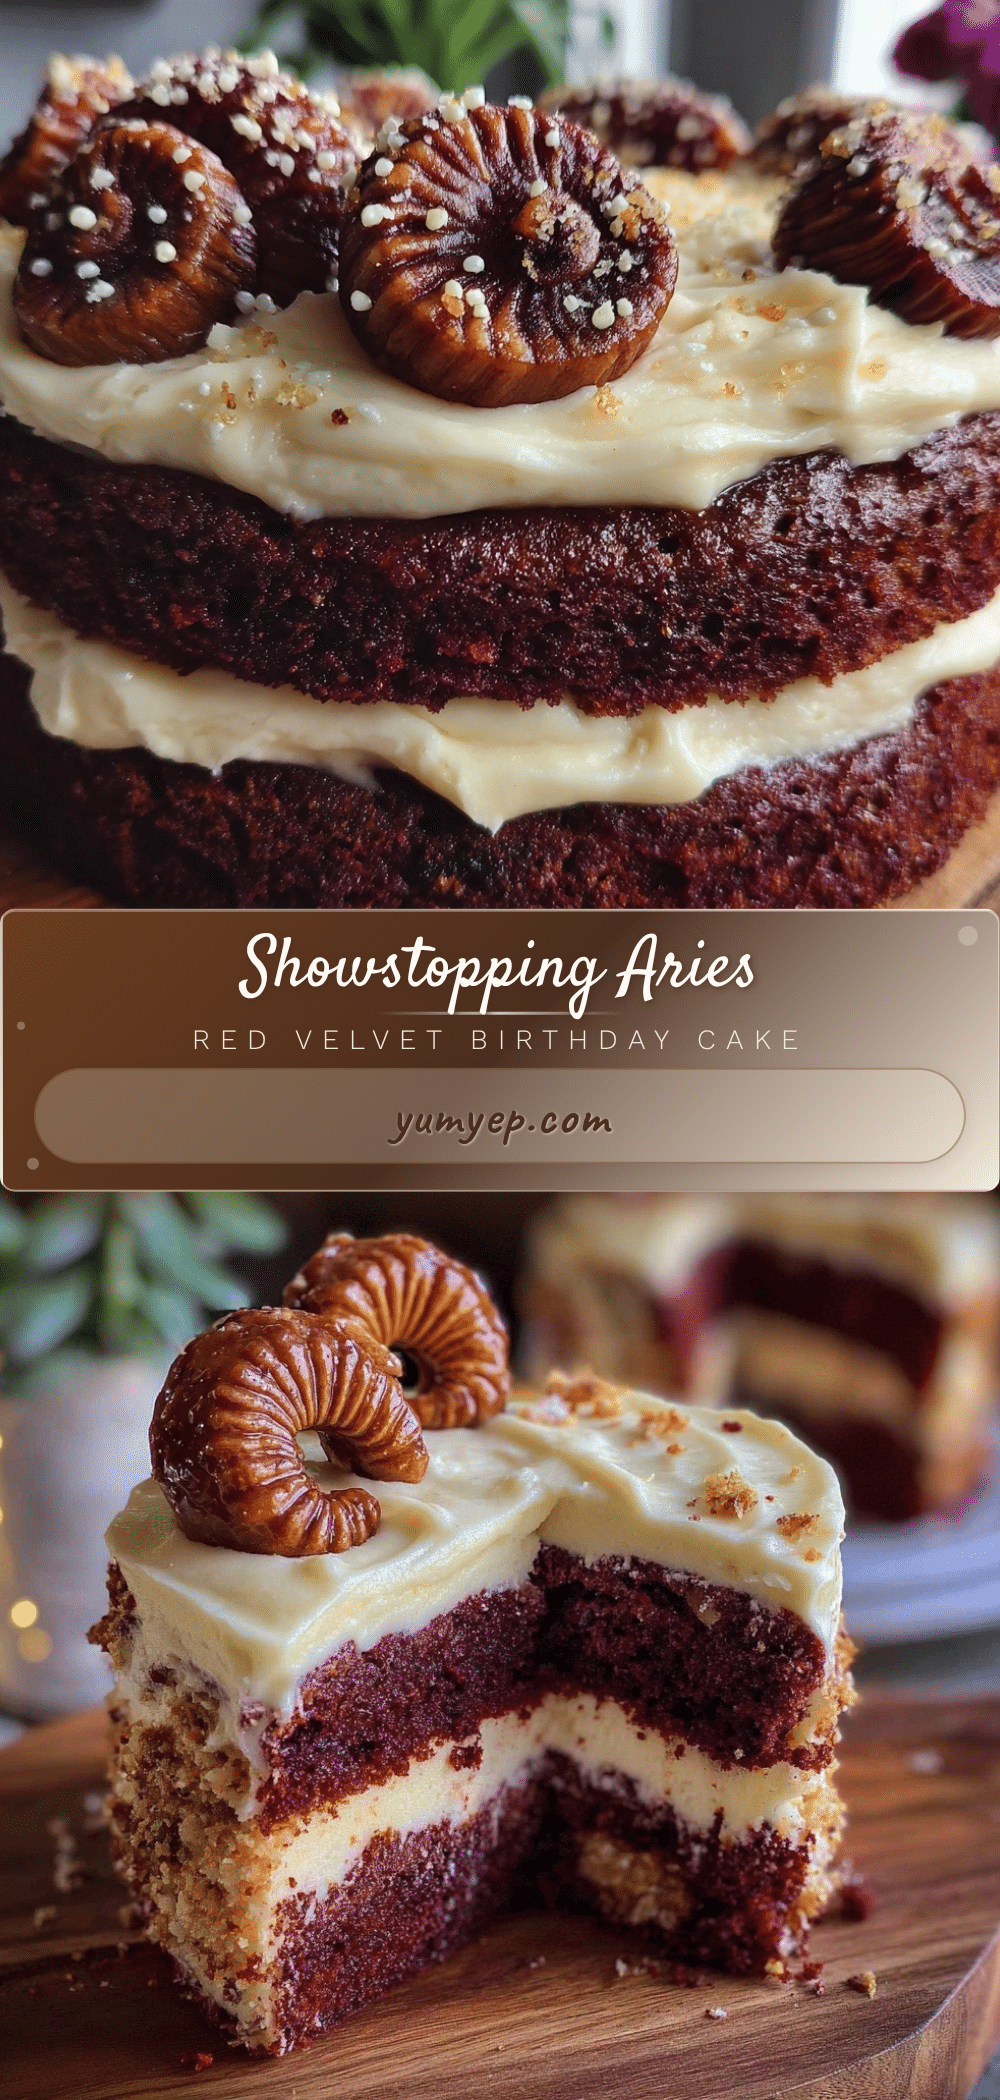
Perfect Aries Red Velvet Birthday Cake Recipe with Easy Ram Horns Fondant Topper

A classic red velvet birthday cake with smooth cream cheese frosting and a creative ram horns fondant topper, perfect for astrology-themed celebrations and Aries birthdays.
- Prep Time: 30 minutes
- Cook Time: 30 minutes
- Total Time: 1 hour 30 minutes
- Yield: 12 servings
- Category: Dessert
- Cuisine: American
Ingredients
- All-purpose flour, 2 ½ cups (315g)
- Granulated sugar, 1 ½ cups (300g)
- Cocoa powder, unsweetened, 1 ½ tablespoons (12g)
- Baking soda, 1 teaspoon (5g)
- Salt, ½ teaspoon (3g)
- Buttermilk, 1 ½ cups (360ml), room temperature (or dairy-free milk mixed with 1 tablespoon vinegar)
- Vegetable oil, 1 cup (240ml)
- Eggs, 2 large, room temperature
- White vinegar, 1 tablespoon (15ml)
- Vanilla extract, 2 teaspoons (10ml)
- Red food coloring, 2 tablespoons (30ml) gel
- Cream cheese, 16 oz (450g), softened
- Unsalted butter, ½ cup (115g), softened
- Powdered sugar, 4 cups (480g), sifted
- Vanilla extract, 1 teaspoon (5ml)
- A pinch of salt
- White fondant, 8 oz (225g)
- Black gel food coloring
- Edible gold dust (optional)
- Cornstarch or powdered sugar for dusting
- Water or edible glue
Instructions
- Preheat oven to 350°F (175°C). Grease and flour two 9-inch round cake pans or line with parchment paper.
- Sift together flour, cocoa powder, baking soda, and salt in a medium bowl; set aside.
- Whisk buttermilk, vegetable oil, eggs, white vinegar, vanilla extract, and red food coloring in a large bowl until smooth.
- Gradually add dry ingredients to wet ingredients, mixing on low with an electric mixer until just combined. Avoid overmixing.
- Divide batter evenly between pans and bake for 25-30 minutes or until a toothpick inserted comes out clean.
- Cool cakes in pans for 10 minutes, then transfer to cooling racks to cool completely.
- Beat cream cheese and butter until smooth and creamy. Gradually add powdered sugar, vanilla extract, and salt. Beat until light and fluffy, about 5 minutes.
- Level cakes if domed. Spread a generous layer of frosting on the first layer, place second cake on top. Apply a thin crumb coat over entire cake and chill for 30 minutes.
- Add a thick, even layer of frosting over crumb coat. Smooth with an offset spatula. Chill again while preparing fondant topper.
- Knead white fondant until pliable. Tint portions with black gel food coloring for marbled effect or paint details later.
- Roll fondant into long ropes and twist into horn shapes. Attach ends to form curled ram horns using water or edible glue. Let dry 1-2 hours.
- Place ram horns gently on top of cake. Optionally dust with edible gold dust. Chill cake for 10 minutes before serving.
Notes
If frosting is too soft, chill for 10 minutes before spreading. Knead fondant well to avoid cracks; add a tiny bit of shortening if cracking occurs. Chill between frosting layers for neat finish. Fondant topper can be made a day ahead and stored airtight.
Nutrition
- Serving Size: 1 slice (1/12 of cak
- Calories: 350
- Sugar: 30
- Sodium: 300
- Fat: 15
- Saturated Fat: 7
- Carbohydrates: 45
- Fiber: 1
- Protein: 4
Keywords: red velvet cake, Aries birthday cake, ram horns fondant, cream cheese frosting, astrology cake, birthday cake, easy red velvet