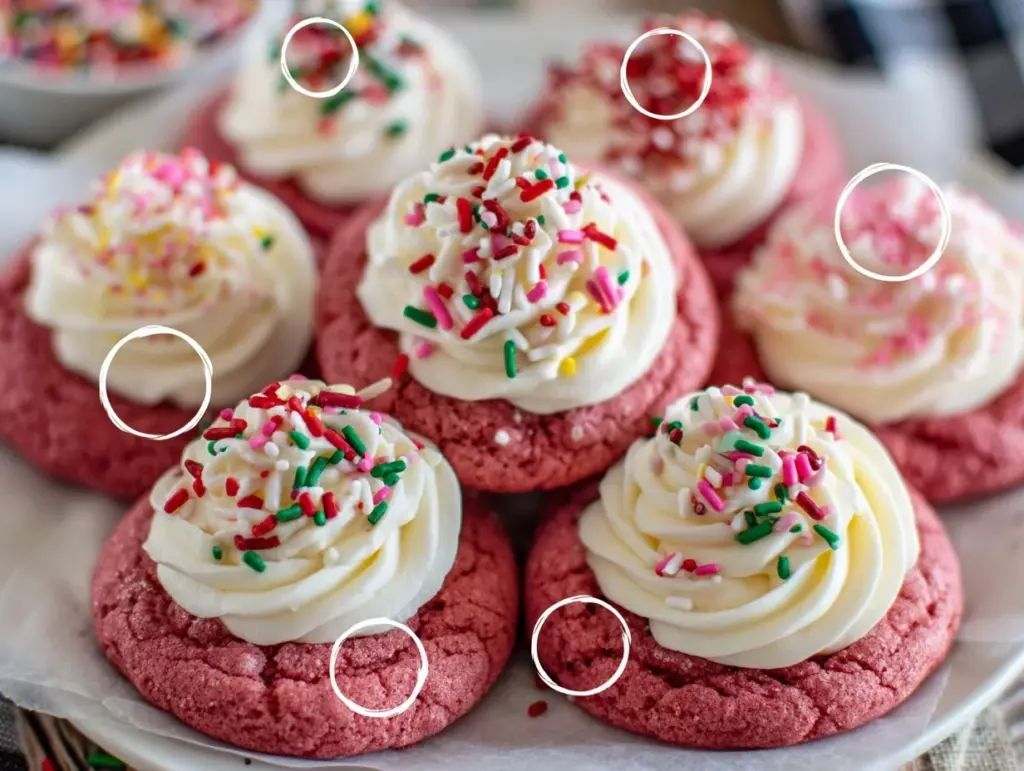
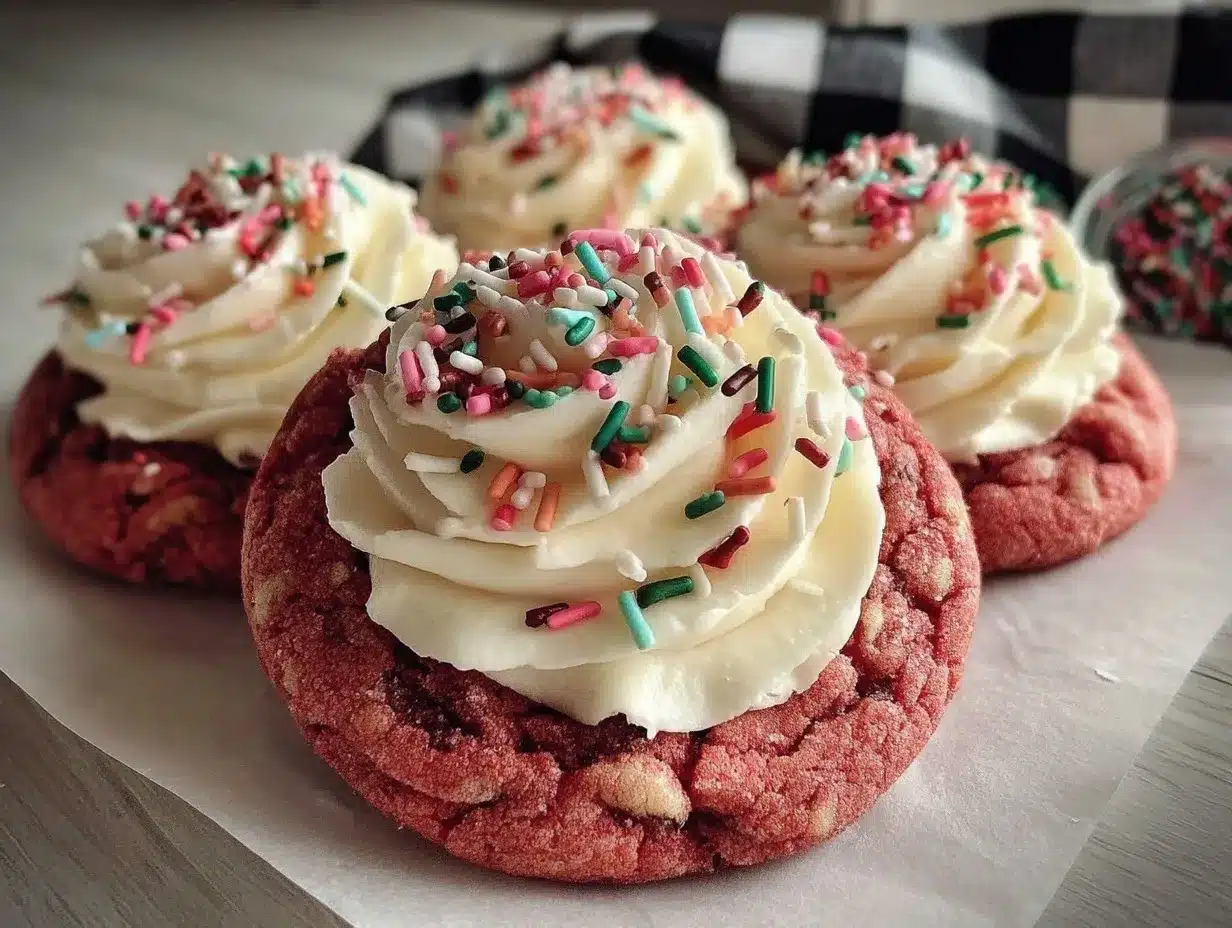
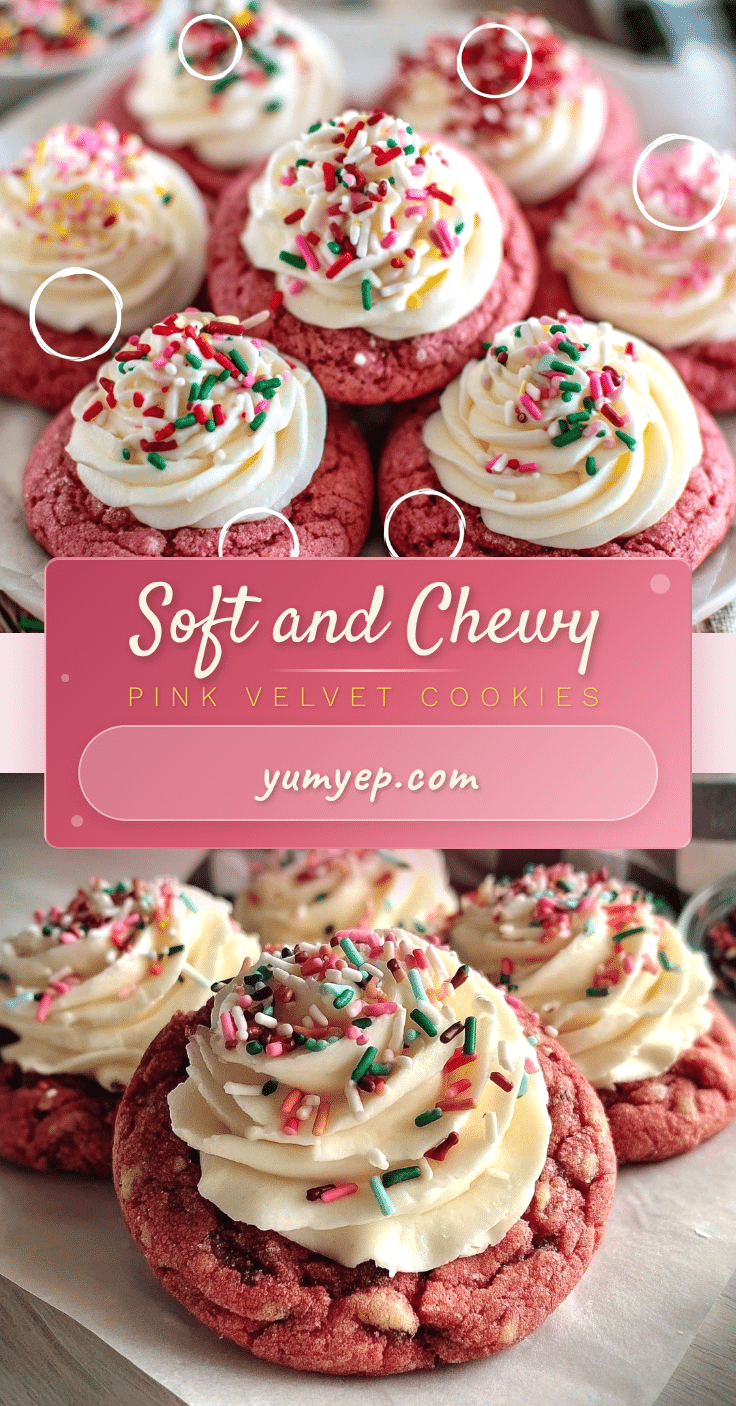
Let me tell you, the sight of these Perfect Pink Velvet Cookies cooling on my kitchen rack is like a burst of holiday cheer all wrapped up in one sweet bite. The gentle, rosy hue paired with that tender crumb and just the right hint of vanilla makes these cookies dangerously easy to fall in love with. The first time I baked these, I was instantly hooked—the kind of moment where you pause, take a deep breath, and just smile because you know you’re onto something truly special.
Years ago, when I was knee-high to a grasshopper, my grandma used to bake the most enchanting holiday treats, but pink velvet cookies weren’t in her repertoire. I stumbled upon this recipe on a rainy weekend, trying to recreate festive magic with a twist. Honestly, I wish I’d found this gem years ago—it’s become a staple for family gatherings and gifting ever since. My family couldn’t stop sneaking them off the cooling rack (and I can’t really blame them!).
Let’s face it, these Perfect Pink Velvet Cookies are more than just pretty—they bring pure, nostalgic comfort with every bite. Perfect for potlucks, filling cookie tins for neighbors, or just brightening up your Pinterest cookie board, these cookies are a festive must-have. I’ve tested this recipe multiple times in the name of research, of course, and I promise you’re going to want to bookmark this one for your holiday traditions.
Why You’ll Love This Recipe
This Perfect Pink Velvet Cookies recipe isn’t just another holiday treat—it’s the one you’ll keep coming back to year after year. Here’s why:
- Quick & Easy: Comes together in under 30 minutes, perfect for those last-minute festive baking sessions.
- Simple Ingredients: No fancy grocery trips needed—you likely have everything in your pantry already.
- Perfect for Holiday Parties: These cookies bring a splash of color and joy to any festive spread.
- Crowd-Pleaser: Always gets rave reviews from kids and adults alike—pink and yummy, what’s not to love?
- Unbelievably Delicious: The tender, melt-in-your-mouth texture combined with a subtle cocoa undertone makes this cookie stand out.
What makes this recipe different? It’s the way the cream cheese frosting melts slightly into the cookie, giving you that perfect balance of soft and sweet. Plus, the hint of vanilla and the touch of vinegar in the dough create that classic velvet flavor without the fuss. This isn’t just pink sugar cookies—it’s your best version of festive comfort food that feels like a warm hug. Whether you’re impressing guests or sneaking a midnight snack, these cookies are the real deal.
What Ingredients You Will Need
This recipe uses simple, wholesome ingredients to deliver bold flavor and satisfying texture without the fuss. Most of these are pantry staples, making it easy to whip up a batch anytime.
- For the Cookie Dough:
- All-purpose flour – 2 ½ cups (312 g), sifted for a light, tender crumb
- Unsweetened cocoa powder – 2 tbsp (15 g), for that subtle velvet flavor
- Baking powder – 1 tsp
- Baking soda – ½ tsp
- Salt – ½ tsp
- Unsalted butter – ¾ cup (170 g), softened (I recommend using a high-quality brand like Kerrygold for best texture)
- Granulated sugar – 1 ¼ cups (250 g)
- Large eggs – 2, room temperature
- Pure vanilla extract – 2 tsp (use the real stuff; it makes a world of difference!)
- Buttermilk – ½ cup (120 ml), adds moisture and tang (you can substitute with regular milk plus 1 tsp vinegar)
- Red food coloring – 2 tbsp (I use gel-based for vibrant color without extra liquid)
- White vinegar – 1 tsp, to help activate the leavening and keep the color bright
- For the Cream Cheese Frosting:
- Cream cheese – 8 oz (226 g), softened (Philadelphia is my go-to)
- Unsalted butter – ½ cup (113 g), softened
- Powdered sugar – 3 cups (360 g), sifted for smooth frosting
- Pure vanilla extract – 1 tsp
- Optional: pinch of salt to balance sweetness
Feel free to swap all-purpose flour for a gluten-free blend if needed, and dairy-free cream cheese and butter alternatives work pretty well in the frosting for those with dietary restrictions. In summer, I like to add a hint of fresh lemon zest to the frosting for a bright twist.
Equipment Needed
- Mixing bowls – at least two (one large for wet ingredients, one for dry)
- Electric mixer or stand mixer – to cream butter and sugar smoothly (a hand mixer works just fine too)
- Measuring cups and spoons – for precise measurements
- Sifter – helps achieve that light, airy texture by removing lumps from flour and cocoa powder
- Baking sheets – preferably heavy-duty with a non-stick surface or lined with parchment paper
- Cooling racks – essential for letting cookies cool evenly and avoiding sogginess
- Spatula – for mixing and folding ingredients gently
- Cookie scoop or tablespoon – for even-sized cookies
If you don’t have a stand mixer, no worries—just make sure your butter is soft enough to cream by hand. I’ve tried silicone baking mats instead of parchment paper, and while they work well, the cookies spread a little more, so keep an eye on baking times. For frosting, a small offset spatula or piping bag makes decorating a breeze, but a simple butter knife does just fine for spreading.
Preparation Method
- Preheat your oven to 350°F (175°C) and line two baking sheets with parchment paper. This prep sets you up for smooth baking and easy cleanup.
- Whisk together the dry ingredients: In a medium bowl, sift 2 ½ cups (312 g) all-purpose flour, 2 tbsp (15 g) cocoa powder, 1 tsp baking powder, ½ tsp baking soda, and ½ tsp salt. Set aside.
- Cream the butter and sugar: In a large bowl, beat ¾ cup (170 g) softened unsalted butter with 1 ¼ cups (250 g) granulated sugar until light and fluffy—this usually takes about 3-4 minutes with an electric mixer on medium speed. You’ll know it’s ready when the mixture looks pale and has a slightly airy texture.
- Add eggs and vanilla: Beat in 2 large eggs, one at a time, followed by 2 tsp pure vanilla extract. Scrape down the bowl to make sure everything is fully combined.
- Mix in color and vinegar: Add 2 tbsp gel red food coloring and 1 tsp white vinegar, blending until the dough is evenly pink. The vinegar brightens the color and reacts with the baking soda for that perfect lift.
- Alternate adding dry ingredients and buttermilk: Gradually add the dry mixture in three parts, alternating with ½ cup (120 ml) buttermilk, beginning and ending with the dry ingredients. Mix gently after each addition until just combined. Overmixing can make cookies tough, so stop as soon as the dough comes together.
- Scoop and shape: Using a cookie scoop or tablespoon, drop dough balls about 2 inches apart on the prepared baking sheets. I like to give each cookie a gentle flattening with the back of a spoon for even baking.
- Bake: Place in the oven and bake for 10-12 minutes or until the edges are set but the centers still look slightly soft. The cookies will continue to firm up as they cool.
- Cool: Let cookies rest on the baking sheet for 5 minutes before transferring to a cooling rack to cool completely. This step prevents breakage and lets the texture settle perfectly.
- Prepare the frosting: While cookies cool, beat 8 oz (226 g) softened cream cheese with ½ cup (113 g) softened unsalted butter until creamy. Gradually add 3 cups (360 g) powdered sugar and 1 tsp vanilla extract. Mix until smooth and spreadable.
- Frost: Once cookies are completely cool, spread a generous dollop of cream cheese frosting on each one. For a fancy touch, use a piping bag or sprinkle with festive colored sugar or edible glitter.
Quick tip: If your frosting is too soft, chill it for 15 minutes before spreading. If too firm, add a teaspoon of milk to loosen it up. The right frosting texture makes all the difference!
Cooking Tips & Techniques
When making these Perfect Pink Velvet Cookies, timing and texture are everything. Here’s what I’ve learned through trial and a few mistakes:
- Don’t overmix the dough: Once you add the flour, mix just until combined. Overworking the dough develops gluten and makes cookies dense.
- Softened butter is key: If your butter is too cold, it won’t cream properly with the sugar, resulting in heavier cookies. Too soft, and the dough gets greasy.
- Use gel food coloring: It gives vibrant color without adding extra liquid that can throw off the dough consistency.
- Watch your oven temperature: Oven temps vary, so start checking cookies at 10 minutes. They should look set on the edges but soft in the center for that perfect chew.
- Chill your dough if your kitchen is warm: This helps control spreading so you get nice, thick cookies instead of flat discs.
- Multitask by preparing frosting while cookies bake and cool: Saves time and gets you frosting-ready right when cookies are cool.
Honestly, I once ignored the vinegar and the color was dull, so don’t skip it if you want that signature pink pop! Also, I recommend letting cookies cool completely before frosting to avoid melting and mess.
Variations & Adaptations
These Perfect Pink Velvet Cookies are versatile and easy to tweak to suit your preferences or dietary needs. Here are some fun ways to switch things up:
- Gluten-Free Version: Swap all-purpose flour for a 1:1 gluten-free baking blend. The texture remains soft and tender.
- Vegan Adaptation: Use vegan butter and a flax egg (1 tbsp flaxseed meal + 3 tbsp water) instead of eggs. For frosting, try dairy-free cream cheese and powdered sugar.
- Flavor Twists: Add ½ tsp almond extract with the vanilla for a nutty note or swap cocoa powder for beet powder for a natural color boost.
- Cooking Method: Try these as mini cookie sandwiches by adding frosting between two cookies, then chilling for a delightful treat.
- Seasonal Variations: In spring, fold in some freeze-dried raspberries into the dough for tart bursts or top frosting with crushed peppermint for winter holidays.
I once made a batch with lavender extract and it was surprisingly lovely—just a little goes a long way! Feel free to play around; this recipe handles tweaks like a champ.
Serving & Storage Suggestions
Serve your Perfect Pink Velvet Cookies at room temperature for the best texture and flavor. They’re lovely paired with a cup of hot cocoa or a glass of cold milk—classic holiday comfort, you know?
If you want to impress guests, arrange them on a festive platter dusted with powdered sugar or scatter some edible glitter for holiday sparkle. These cookies also make wonderful gifts when stacked in pretty tins or wrapped with ribbons.
For storage, keep cookies in an airtight container at room temperature for up to 3 days. If you’ve frosted them, refrigerate and bring to room temp before serving to soften the frosting. You can freeze unfrosted cookies for up to 3 months—just thaw and frost when ready. Reheating frosted cookies gently in a warm oven (about 300°F/150°C for 3-4 minutes) can revive that fresh-baked feel.
Flavors actually deepen if you let them sit overnight, so if you have the patience, make them a day ahead to truly impress.
Nutritional Information & Benefits
Each Perfect Pink Velvet Cookie (without frosting) contains approximately 180 calories, 8 grams of fat, 25 grams of carbohydrates, and 2 grams of protein. The cream cheese frosting adds richness and about 100 more calories per cookie.
The recipe uses wholesome ingredients like real butter and cream cheese, which provide calcium and vitamin A. Cocoa powder adds a subtle antioxidant boost. Using buttermilk contributes to tender texture and a slight tang without extra fat.
For those watching carbs or dairy, consider swapping ingredients as suggested in the variations. Keep in mind these cookies contain gluten, dairy, and eggs, so they’re not suitable for all allergies without modification.
From a wellness perspective, this recipe hits the sweet spot—treating yourself with something homemade and lovingly crafted, which honestly matters during busy holiday seasons.
Conclusion
So, why try these Perfect Pink Velvet Cookies? Because they combine simple ingredients with a pretty pink pop and a texture that feels like a cozy holiday hug. Whether you’re a seasoned baker or a beginner, this recipe is approachable and forgiving, and you can make it your own with easy variations.
I love this recipe because it brings a little joy every time I bake it—perfect for sharing, gifting, or just sneaking a few when no one’s looking. Don’t be shy about customizing the frosting or adding your favorite festive toppings; this cookie welcomes creativity!
If you give this recipe a try, please drop a comment or share your twists—I love hearing how you make it your own. Now, grab your mixing bowl and get ready to fill your kitchen with the sweet scent of holiday magic. Happy baking!
FAQs
Can I use regular milk instead of buttermilk?
Yes! Simply add 1 teaspoon of white vinegar or lemon juice to ½ cup (120 ml) of regular milk, let it sit for 5 minutes, and use as a buttermilk substitute.
How do I prevent my cookies from spreading too much?
Make sure your butter is softened but not melted, chill the dough for 15-30 minutes before baking if your kitchen is warm, and avoid overmixing the dough once flour is added.
Can I make these cookies ahead of time?
Absolutely! You can bake and frost them a day ahead. Store in an airtight container in the fridge, then bring to room temperature before serving.
What can I use instead of red food coloring for natural color?
Beet powder or freeze-dried raspberry powder can add a lovely natural pinkish-red tint, though the color may be less vibrant than with food coloring.
How should I store leftover cookies with frosting?
Store frosted cookies in an airtight container in the refrigerator for up to 3 days. Let them come to room temperature before serving for the best taste and texture.
Pin This Recipe!
Perfect Pink Velvet Cookies

These Perfect Pink Velvet Cookies are tender, melt-in-your-mouth treats with a subtle cocoa undertone and cream cheese frosting that melts slightly into the cookie, making them a festive holiday favorite.
- Prep Time: 15 minutes
- Cook Time: 12 minutes
- Total Time: 27 minutes
- Yield: 24 cookies 1x
- Category: Dessert
- Cuisine: American
Ingredients
- 2 ½ cups (312 g) all-purpose flour, sifted
- 2 tbsp (15 g) unsweetened cocoa powder
- 1 tsp baking powder
- ½ tsp baking soda
- ½ tsp salt
- ¾ cup (170 g) unsalted butter, softened
- 1 ¼ cups (250 g) granulated sugar
- 2 large eggs, room temperature
- 2 tsp pure vanilla extract
- ½ cup (120 ml) buttermilk (or ½ cup regular milk + 1 tsp white vinegar)
- 2 tbsp gel red food coloring
- 1 tsp white vinegar
- For the Cream Cheese Frosting:
- 8 oz (226 g) cream cheese, softened
- ½ cup (113 g) unsalted butter, softened
- 3 cups (360 g) powdered sugar, sifted
- 1 tsp pure vanilla extract
- Optional: pinch of salt
Instructions
- Preheat oven to 350°F (175°C) and line two baking sheets with parchment paper.
- In a medium bowl, sift together flour, cocoa powder, baking powder, baking soda, and salt. Set aside.
- In a large bowl, beat softened butter and granulated sugar until light and fluffy, about 3-4 minutes.
- Beat in eggs one at a time, then add vanilla extract and mix until combined.
- Add red food coloring and white vinegar, mixing until dough is evenly pink.
- Alternately add dry ingredients and buttermilk in three parts, beginning and ending with dry ingredients. Mix gently until just combined.
- Using a cookie scoop or tablespoon, drop dough balls about 2 inches apart on baking sheets. Flatten slightly with the back of a spoon.
- Bake for 10-12 minutes until edges are set but centers are still soft.
- Let cookies rest on baking sheet for 5 minutes, then transfer to cooling racks to cool completely.
- For frosting, beat cream cheese and butter until creamy. Gradually add powdered sugar and vanilla extract, mixing until smooth and spreadable.
- Once cookies are cool, spread frosting on each cookie. Optionally decorate with colored sugar or edible glitter.
Notes
Do not overmix the dough after adding flour to avoid tough cookies. Use gel food coloring for vibrant color without extra liquid. Chill dough if kitchen is warm to prevent spreading. Let cookies cool completely before frosting to avoid melting. If frosting is too soft, chill for 15 minutes; if too firm, add a teaspoon of milk.
Nutrition
- Serving Size: 1 cookie with frosti
- Calories: 280
- Sugar: 22
- Sodium: 150
- Fat: 16
- Saturated Fat: 9
- Carbohydrates: 35
- Fiber: 1
- Protein: 3
Keywords: pink velvet cookies, holiday cookies, cream cheese frosting, festive treats, easy cookies, homemade cookies


