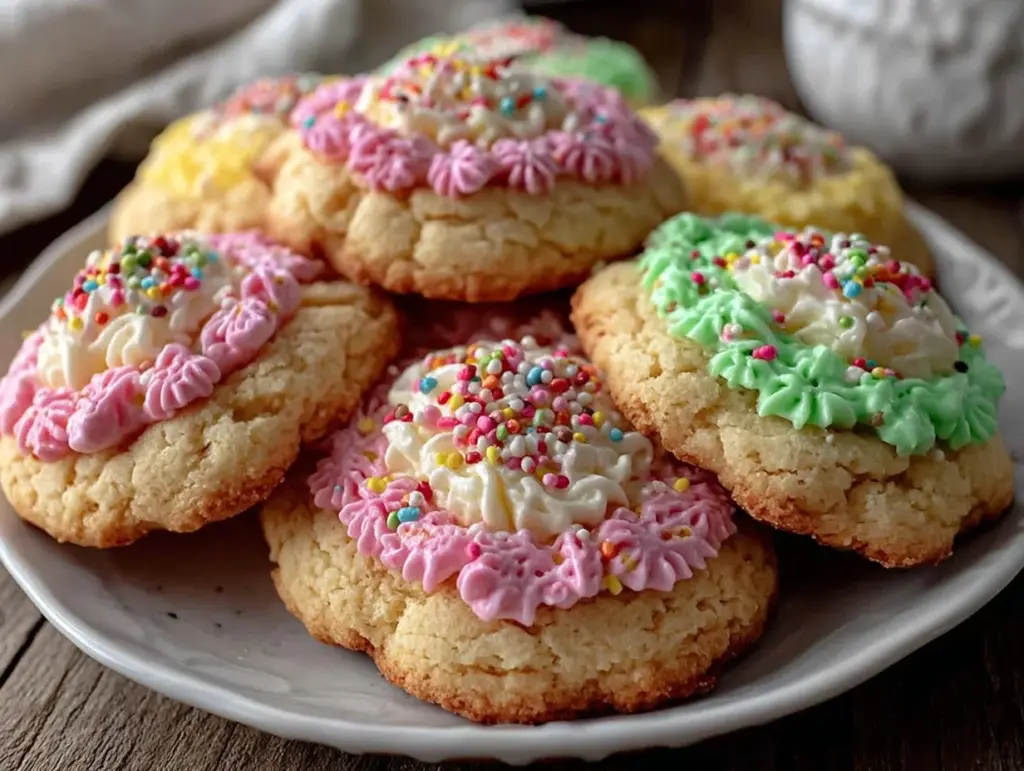
My morning was already spinning out of control when my neighbor’s kid showed up at the door clutching a crumpled note about a surprise back-to-school party happening in less than two hours. The fridge was a sad sight—mostly empties and a lone bag of sugar. No time for a trip to the store, and honestly, I wasn’t even sure what I could whip up that would look halfway decent. Then I spotted the bag of flour hiding in the cabinet, and suddenly, an idea sparked: some perfect soft frosted sugar cookies with a back to school pencil design. It wasn’t planned, but somehow this quick, sweet fix became the star of the afternoon.
The smell of vanilla and sugar filling the kitchen while I rolled out the dough felt like a tiny victory amid the chaos. I didn’t have fancy cutters or a ton of icing colors, but a little improvisation turned those cookies into charming little pencils that made the kiddos smile wide enough to forget the surprise part of the party. Honestly, it’s a recipe born out of necessity, but it stuck with me because it’s simple, fun, and delivers that soft, melt-in-your-mouth texture that’s just perfect for sharing around the start of the school year. It’s not fancy, but it’s exactly what you want when time is short and hearts are full.
Why You’ll Love This Recipe
These soft frosted sugar cookies aren’t just your average cookie—they come with a little back-to-school magic baked right in. Through multiple trials (and a few frosting mishaps), I’ve perfected the balance between softness and just enough structure to hold that cute pencil design.
- Quick & Easy: Comes together in under 45 minutes, perfect for last-minute celebrations or school events.
- Simple Ingredients: Uses pantry staples you probably already have—no need for fancy extras or specialty stores.
- Perfect for Back to School: The pencil design adds a playful, themed touch that’s great for classrooms or after-school snacks.
- Crowd-Pleaser: Kids and adults alike rave about the soft texture and sweet frosting combo.
- Unbelievably Delicious: The frosting is creamy but not overwhelming, letting the buttery cookie shine through.
What sets this recipe apart? The frosting isn’t just slapped on—it’s carefully whipped to just the right consistency for smooth, neat pencil designs, even if you’re not a pro decorator. Plus, the cookie dough is forgiving; it handles well even if you’re rushing or don’t have the perfect rolling pin. This isn’t just another sugar cookie recipe—it’s the one I trust when I need something that looks special but tastes like home.
There’s something about these cookies that makes me close my eyes after the first bite—comfort food with a little twist of nostalgia, somehow both simple and thoughtful. Plus, they’re a great way to sneak a little joy into hectic mornings.
What Ingredients You Will Need
This recipe uses simple, wholesome ingredients to deliver bold flavor and satisfying texture without the fuss. Most are pantry staples, and you can easily swap a few if needed.
- All-purpose flour – 2 ¾ cups (345 g), sifted for a tender crumb
- Baking powder – 1 teaspoon (4 g), to give a light lift
- Salt – ½ teaspoon (3 g), balances sweetness
- Unsalted butter – 1 cup (226 g), softened (I prefer Land O’Lakes for consistent texture)
- Granulated sugar – 1 ½ cups (300 g), for that classic sweet base
- Large eggs – 2, room temperature (helps with dough consistency)
- Pure vanilla extract – 2 teaspoons (10 ml), for aroma and depth
- Milk – 2 tablespoons (30 ml), any kind, to loosen the dough slightly
For the frosting:
- Powdered sugar – 3 cups (360 g), sifted to avoid lumps
- Unsalted butter – ½ cup (113 g), softened
- Milk – 2-3 tablespoons (30-45 ml), to adjust texture
- Vanilla extract – 1 teaspoon (5 ml)
- Food coloring – yellow, pink, green, and black gel colors for pencil design
Substitution tips: For a gluten-free version, swap the flour with a 1-to-1 gluten-free baking flour blend. If avoiding dairy, use dairy-free margarine and almond or oat milk instead. I find gel food coloring works best here because it gives bright hues without thinning the frosting too much.
Equipment Needed
- Mixing bowls – I like using glass or stainless steel
- Electric hand mixer or stand mixer – speeds up creaming butter and sugar
- Measuring cups and spoons – for precise ingredients
- Rolling pin – silicone or wooden, either works well; silicone tends not to stick as much
- Parchment paper or silicone baking mats – prevents sticking and easy cleanup
- Cookie cutters – pencil-shaped if you have them, or a simple rectangle cutter and a sharp knife to shape
- Small piping bags or plastic sandwich bags – for frosting details
- Offset spatula or small knife – for spreading base frosting layers
If you don’t own a rolling pin, a clean wine bottle works surprisingly well in a pinch. For frosting, I’ve tried decorating with just a butter knife, but piping bags make the pencil design much easier and neater. I store my cookie cutters in a dedicated box to keep them in good shape—avoid bending the metal edges!
Preparation Method

- Prepare the dough: In a medium bowl, sift together 2 ¾ cups (345 g) all-purpose flour, 1 teaspoon (4 g) baking powder, and ½ teaspoon (3 g) salt. Set aside. (5 minutes)
- Cream butter and sugar: In a large mixing bowl, beat 1 cup (226 g) softened unsalted butter and 1 ½ cups (300 g) granulated sugar on medium speed until light and fluffy, about 3-4 minutes. (4 minutes)
- Add eggs and vanilla: Beat in 2 large eggs, one at a time, then add 2 teaspoons (10 ml) vanilla extract. Mix until combined. (2 minutes)
- Combine dry and wet: Gradually add the flour mixture in batches, alternating with 2 tablespoons (30 ml) milk, mixing on low speed just until incorporated. Don’t overmix! The dough should be soft but not sticky. (5 minutes)
- Chill the dough: Shape dough into a flat disk, wrap in plastic wrap, and chill for at least 1 hour. This helps the dough firm up, making it easier to roll out and less likely to spread in the oven. (1 hour)
- Preheat oven: Set oven to 350°F (175°C). Line baking sheets with parchment paper.
- Roll and cut: Lightly flour your surface and rolling pin. Roll dough to about ¼ inch (6 mm) thickness. Use pencil-shaped cookie cutters or cut rectangles approx 3 inches (7.5 cm) long and 1 inch (2.5 cm) wide, then shape the tip into a pointed pencil end with a knife. (15 minutes)
- Bake: Place cookies about 1 inch (2.5 cm) apart on baking sheets. Bake 8-10 minutes or until edges just start to turn golden. Don’t overbake; cookies should be soft. (8-10 minutes)
- Cool: Let cookies cool completely on wire racks before decorating. (20-30 minutes)
- Make frosting: Beat ½ cup (113 g) softened butter until creamy. Gradually add 3 cups (360 g) powdered sugar, then 1 teaspoon (5 ml) vanilla extract and 2-3 tablespoons (30-45 ml) milk until smooth but thick enough to hold shape. Divide frosting into bowls and color accordingly.
- Decorate: Spread a base layer of yellow frosting for the pencil body. Pipe a pink tip for the eraser end, a thin black line for the lead point, and a green stripe to mimic the metal ferrule if you like. Let the frosting set at room temperature for about an hour. (30-40 minutes)
If the dough feels sticky while rolling, chill it a bit longer—you want it pliable, not gooey. When frosting, don’t overload your piping bag or the designs can blur; a steady hand goes a long way. If you want to speed up frosting drying, pop the cookies in the fridge for 15 minutes after decorating.
Cooking Tips & Techniques
One key to perfect soft sugar cookies is not overbaking. I learned this the hard way when a batch turned rock hard after the timer dinged. Trust me, pulling them out when the edges just start to color is crucial. They’ll continue to firm up as they cool.
For frosting, I recommend using an electric mixer to get that creamy, spreadable consistency. If it’s too runny, add more powdered sugar; too thick, add a splash more milk. I once tried piping directly from a spoon—don’t do that unless you enjoy a frosting mess!
When rolling dough, chill it well to prevent sticking and cracking. Lightly flour your surface but don’t go overboard, or the cookies will dry out. I like to roll from the center outward for even thickness. Also, when decorating, start with the yellow base and let it dry a bit before adding details to keep colors from bleeding.
Multitasking tip: While the dough chills, prep your frosting colors and tools—that way, once cookies are cool, you can jump right into decorating without delay.
Variations & Adaptations
- Gluten-Free: Use a gluten-free flour blend instead of all-purpose flour. The texture will be slightly different but still delicious.
- Vegan: Swap butter with vegan margarine and use flax eggs (1 tablespoon ground flaxseed + 3 tablespoons water per egg). Dairy-free milk works well for frosting, too.
- Flavor Twist: Add a teaspoon of almond extract to the dough for a subtle nutty note, or mix lemon zest for a bright, fresh flavor.
- Design Variations: Instead of pencil shapes, use apple-shaped cutters and frost with red and green for a back-to-school theme twist.
- Seasonal Adaptation: For a holiday spin, try the frosting technique on red velvet crinkle cookies—the contrast is stunning.
Once, I swapped the buttercream frosting for a cream cheese version. It gave the cookies a tangy twist everyone loved, though it was a bit trickier to pipe. If you want to try that, chill the frosting well before decorating.
Serving & Storage Suggestions
Serve these cookies at room temperature, ideally on a colorful platter to highlight the pencil designs. They pair wonderfully with a cup of hot cocoa or a glass of cold milk for after-school snacks. For parties, arrange them alongside simple fruit skewers or a cranberry orange bread to keep the spread bright and inviting.
Store cookies in an airtight container at room temperature for up to 4 days. For longer storage, freeze undecorated cookies wrapped tightly in plastic wrap and placed in a freezer-safe bag for up to 3 months. Thaw at room temperature before frosting.
Once decorated, store in a single layer with parchment paper between layers and refrigerate if your kitchen is warm—the frosting firms up nicely but can get soft if left out. Reheat slightly in a warm oven (about 200°F/93°C for 5 minutes) if you want that freshly baked feel again.
Flavors actually deepen a bit after resting overnight, so if you can, make these a day ahead—it’s worth the wait.
Nutritional Information & Benefits
Each cookie provides roughly 150-180 calories, depending on size and amount of frosting used. They contain moderate amounts of fat and sugar, so best enjoyed as an occasional treat. The use of real butter and eggs adds some protein and essential nutrients compared to more processed options.
This recipe is naturally gluten-containing but can be adapted for gluten-free diets. The pencil design adds an element of fun that encourages kids to enjoy baking and celebrating milestones. Plus, baking together promotes mindful eating and family bonding—something I personally value with my own kids.
While not a health food, these cookies bring smiles and a little sweetness to busy school days, which is just as important in my book.
Conclusion
If you’re hunting for a soft, sweet treat that’s easy to make and perfect for back-to-school celebrations, these soft frosted sugar cookies with the pencil design are a winner. They’re forgiving enough for beginners, yet charming enough to impress little ones and adults alike. I love this recipe because it’s a little bit of calm in the chaos—something sweet, simple, and cheerful to share when life feels rushed.
Feel free to tweak the colors, try different shapes, or swap out extracts to fit your family’s tastes. Baking these cookies became a favorite ritual in my house, especially when school is just around the corner and we all need a small moment of joy.
If you make these, I’d love to hear how your pencil cookies turned out or any creative twists you tried. Happy baking and good luck with the school year ahead!
FAQs
Can I make the cookie dough ahead of time?
Yes! You can prepare the dough and refrigerate it wrapped in plastic wrap for up to 3 days before rolling and baking.
What if I don’t have pencil-shaped cookie cutters?
No worries! Use a rectangular cutter or knife to cut rectangles, then shape the tips into pencil points by trimming with a sharp knife.
How do I keep the frosting from bleeding colors?
Let each color layer dry for 10-15 minutes before adding the next, and avoid adding too much liquid to your frosting to keep it thick and stable.
Can these cookies be frozen after decorating?
It’s best to freeze them undecorated. Frost them after thawing for the freshest look and texture.
How soft will the cookies stay after a day?
They stay soft for several days if stored properly in an airtight container at room temperature. The frosting helps keep them moist too.
Pin This Recipe!

Perfect Soft Frosted Sugar Cookies Easy Back to School Pencil Design Tutorial

Soft frosted sugar cookies with a playful back-to-school pencil design, perfect for last-minute celebrations and school events. These cookies are quick, easy, and deliver a melt-in-your-mouth texture with creamy frosting.
- Prep Time: 20 minutes
- Cook Time: 10 minutes
- Total Time: 1 hour 30 minutes
- Yield: 24 cookies 1x
- Category: Dessert
- Cuisine: American
Ingredients
- 2 ¾ cups (345 g) all-purpose flour, sifted
- 1 teaspoon (4 g) baking powder
- ½ teaspoon (3 g) salt
- 1 cup (226 g) unsalted butter, softened
- 1 ½ cups (300 g) granulated sugar
- 2 large eggs, room temperature
- 2 teaspoons (10 ml) pure vanilla extract
- 2 tablespoons (30 ml) milk
- For the frosting:
- 3 cups (360 g) powdered sugar, sifted
- ½ cup (113 g) unsalted butter, softened
- 2–3 tablespoons (30–45 ml) milk
- 1 teaspoon (5 ml) vanilla extract
- Food coloring: yellow, pink, green, and black gel colors
Instructions
- Prepare the dough: In a medium bowl, sift together flour, baking powder, and salt. Set aside.
- Cream butter and sugar: In a large mixing bowl, beat softened butter and granulated sugar on medium speed until light and fluffy, about 3-4 minutes.
- Add eggs and vanilla: Beat in eggs one at a time, then add vanilla extract. Mix until combined.
- Combine dry and wet: Gradually add flour mixture in batches, alternating with milk, mixing on low speed just until incorporated. Do not overmix.
- Chill the dough: Shape dough into a flat disk, wrap in plastic wrap, and chill for at least 1 hour.
- Preheat oven to 350°F (175°C). Line baking sheets with parchment paper.
- Roll and cut: Lightly flour surface and rolling pin. Roll dough to about ¼ inch (6 mm) thickness. Use pencil-shaped cookie cutters or cut rectangles approx 3 inches (7.5 cm) long and 1 inch (2.5 cm) wide, then shape the tip into a pointed pencil end with a knife.
- Bake: Place cookies about 1 inch (2.5 cm) apart on baking sheets. Bake 8-10 minutes or until edges just start to turn golden. Do not overbake.
- Cool: Let cookies cool completely on wire racks before decorating.
- Make frosting: Beat softened butter until creamy. Gradually add powdered sugar, then vanilla extract and milk until smooth but thick enough to hold shape. Divide frosting into bowls and color accordingly.
- Decorate: Spread a base layer of yellow frosting for the pencil body. Pipe a pink tip for the eraser end, a thin black line for the lead point, and a green stripe to mimic the metal ferrule. Let frosting set at room temperature for about an hour.
Notes
Do not overbake cookies; remove when edges just start to turn golden to keep them soft. Chill dough well to prevent sticking and cracking. Use gel food coloring for bright hues without thinning frosting. Let each frosting color dry before adding the next to prevent bleeding. Cookies can be frozen undecorated and frosted after thawing.
Nutrition
- Serving Size: 1 cookie
- Calories: 165
- Sugar: 14
- Sodium: 90
- Fat: 8
- Saturated Fat: 5
- Carbohydrates: 22
- Fiber: 0.5
- Protein: 2
Keywords: soft sugar cookies, frosted sugar cookies, back to school cookies, pencil design cookies, easy sugar cookies, kid-friendly cookies