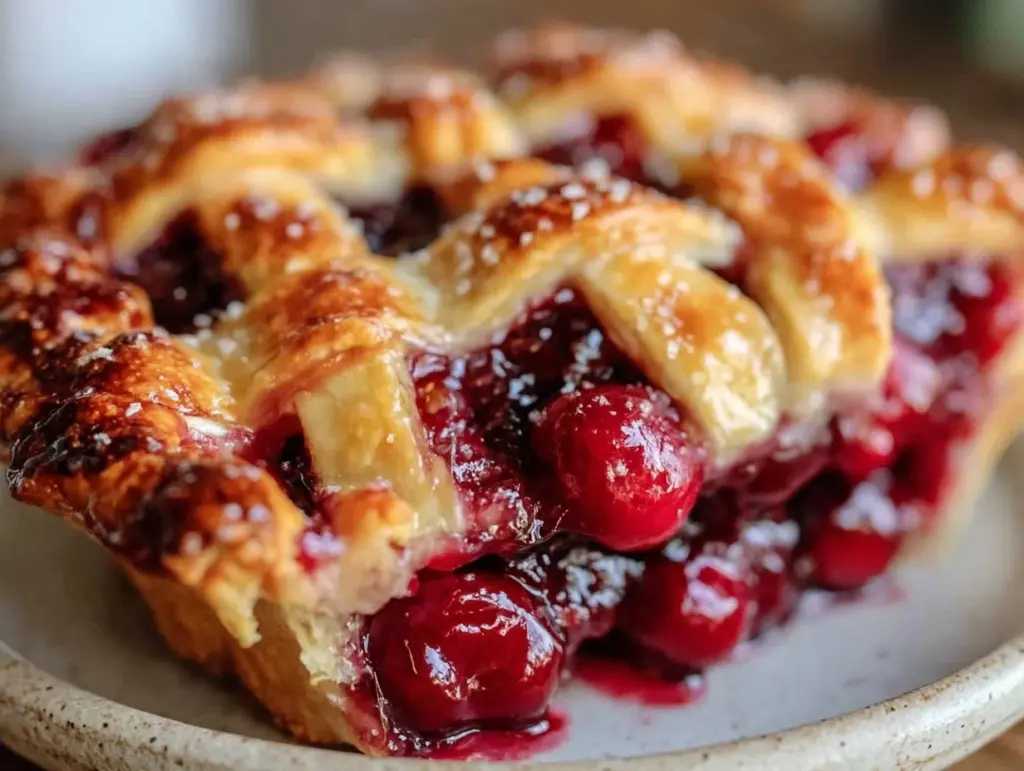
“You really think cherries belong in a pie?” my friend asked, raising an eyebrow as I pulled a rustic lattice pie from the oven. Honestly, I wasn’t sure either the first time I tried making this perfect sour cherry pie with flaky lattice crust. It started on a hectic Sunday afternoon when I was craving something both tart and sweet, but I only had a bag of frozen sour cherries sitting neglected in the freezer. I figured, why not? The kitchen smelled like cherry blossoms and warm butter as the pie baked, and that first bite—tangy cherry filling balanced by a buttery, flaky crust—changed everything.
Making the lattice crust was a bit of a gamble, too. I’m not really a baker by nature, but something about weaving the dough strips felt calming, almost meditative. The golden-brown crust with its delicate, flaky layers was the kind of thing I never expected to pull off. Yet, here we are. Weeks later, I still find myself making this pie more than once a week, tweaking the crust thickness or adding a pinch more cinnamon to the filling. It’s become my quiet little indulgence, a perfect mix of nostalgia and new tradition.
What sticks with me is how this pie feels like a gentle reset. After long days, it’s comforting but never cloying. The tart cherries cut through the sweetness, and the flaky lattice crust invites you to savor each bite slowly—no rush, just that satisfying crumble and burst of flavor. It’s the kind of recipe you hold onto, the one you feel confident sharing with friends, even those who say they don’t usually like fruit pies.
Why You’ll Love This Recipe
Through several rounds of trial and error, this perfect sour cherry pie recipe became a reliable favorite in my kitchen. The balance between the flaky lattice crust and the bright, tangy cherry filling is just right, and it’s surprisingly easy to pull off, even if you’re not a seasoned baker. Here’s why it’s worth having in your recipe collection:
- Quick & Easy: You can have this pie ready to bake in about 30 minutes, making it great for spontaneous dessert cravings or last-minute gatherings.
- Simple Ingredients: Nothing fancy here—just pantry staples and frozen or fresh sour cherries, so no need for special grocery runs.
- Perfect for Seasonal Celebrations: Whether it’s summer cherry picking season or a cozy winter night, this pie fits right in with holidays and casual dinners alike.
- Crowd-Pleaser: I’ve brought this pie to potlucks and family dinners, and it’s always devoured first—kids and adults alike can’t get enough.
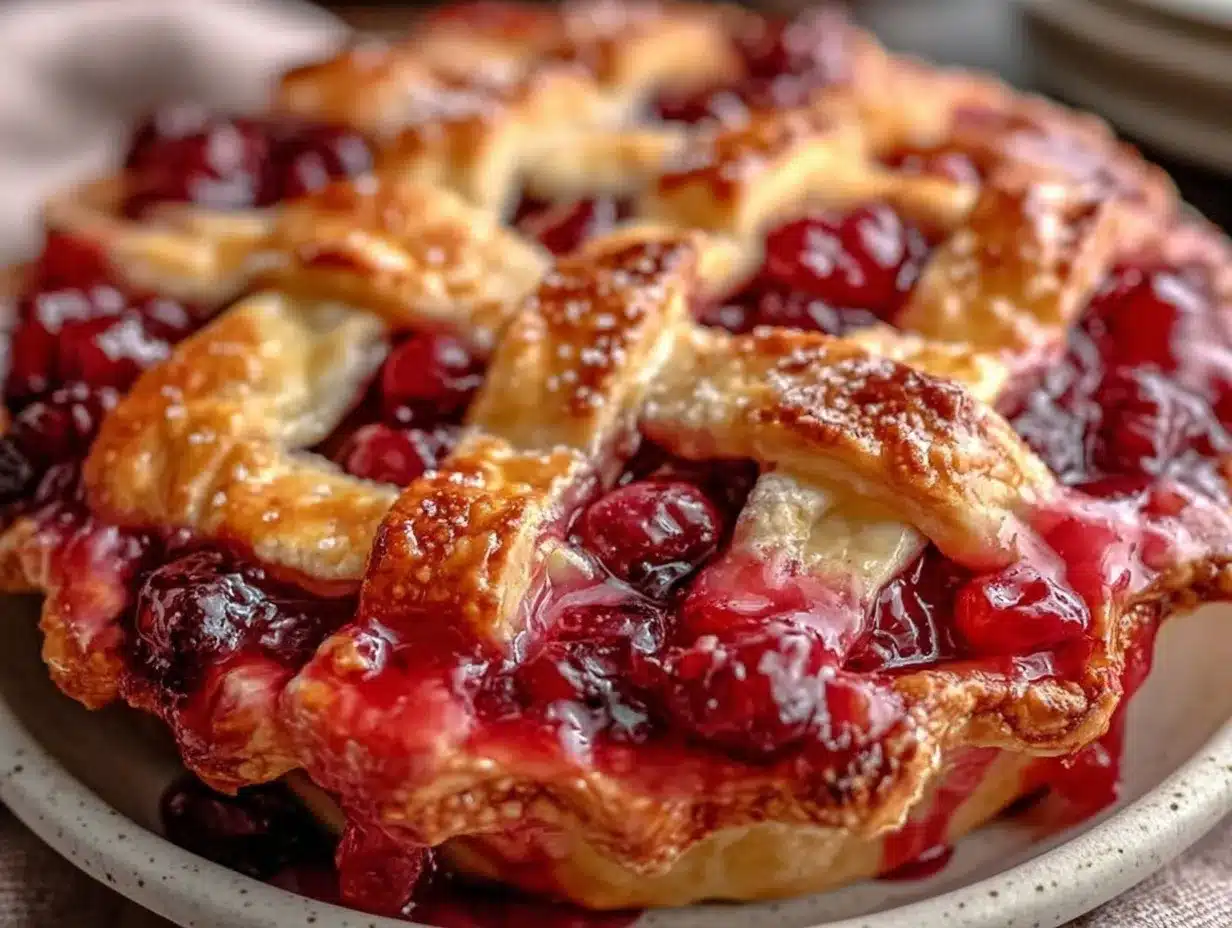
- Unbelievably Delicious: The flaky lattice crust has that melt-in-your-mouth texture, thanks to just the right amount of butter, while the cherry filling bursts with natural tartness balanced by a touch of sugar and almond extract.
This perfect sour cherry pie recipe stands apart because of its subtly infused almond extract in the filling, which complements the cherries without overpowering them. The lattice crust isn’t just decorative—it’s flaky and tender, achieved by chilling the dough properly and handling it gently, which is a game-changer compared to rushed or overworked crusts. Honestly, it’s one of those recipes that makes you close your eyes after the first bite because it just feels right, comforting yet fresh.
Plus, if you’re a fan of homemade desserts but sometimes find yourself intimidated by pie crusts, this tutorial breaks it down so that the flaky lattice crust feels achievable. It’s not just a recipe; it’s a little baking confidence boost.
What Ingredients You Will Need
This perfect sour cherry pie recipe uses simple, wholesome ingredients to deliver bold flavor and satisfying texture without fuss. You’ll find most of these in your pantry or freezer, and the fresh or frozen cherries bring that signature tartness.
- For the Pie Crust:
- All-purpose flour, 2 ½ cups (300 g) — I prefer King Arthur for the best texture
- Unsalted butter, 1 cup (226 g), very cold and cubed (adds richness and flakiness)
- Granulated sugar, 1 tablespoon (optional for slight sweetness)
- Salt, 1 teaspoon
- Ice water, 6 to 8 tablespoons, as needed to bring dough together
- For the Cherry Filling:
- Sour cherries, 5 cups (about 700 g), fresh or frozen (thawed and drained)
- Granulated sugar, 1 cup (200 g) — adjust slightly depending on cherry tartness
- Cornstarch, 3 tablespoons (for thickening)
- Lemon juice, 1 tablespoon (brightens and balances flavors)
- Almond extract, ½ teaspoon (a subtle but key flavor enhancer)
- Salt, a pinch
- Unsalted butter, 2 tablespoons (cut into small bits, dotted on top of filling before baking)
- For Egg Wash:
- Large egg, beaten (for brushing lattice crust and giving it that golden shine)
- Coarse sugar, 1 tablespoon (optional, for sprinkling on crust)
This recipe shines using fresh sour cherries if you can get them, but frozen cherries work perfectly well and save time pitting. If you’re feeling adventurous, swapping almond extract for vanilla is an easy variation, but the almond really makes the cherry pop. For a gluten-free crust, try substituting almond flour mixed with tapioca starch, but note the texture will be slightly different.
Equipment Needed
To make this perfect sour cherry pie with flaky lattice crust, you’ll want a few basic kitchen tools:
- 9-inch (23 cm) pie dish: Ceramic or glass works well to evenly distribute heat.
- Mixing bowls: One large for crust, another for filling.
- Pastry blender or food processor: To cut cold butter into flour quickly. If you don’t have one, two forks or your fingertips work fine, just don’t overwork the dough.
- Rolling pin: For rolling out the dough to even thickness. A silicone rolling pin can help prevent sticking.
- Sharp knife or pizza cutter: To cut strips for the lattice crust.
- Pastry brush: For applying the egg wash.
- Cooling rack: To let the pie cool properly before slicing.
If you’re tight on budget, a rolling pin substitute like a clean wine bottle can work wonders. For my lattice crust, I found a bench scraper helpful to lift dough strips carefully without tearing, but you can manage with a spatula or knife edge. Keeping your butter cold while working is the trick to flaky crust, so if you have a chilled surface or marble slab, that’s a bonus but not necessary.
Preparation Method
- Make the Pie Dough: In a large bowl, whisk together 2 ½ cups (300 g) flour, 1 tablespoon sugar (if using), and 1 teaspoon salt. Add 1 cup (226 g) cold, cubed unsalted butter. Using a pastry blender or your fingertips, quickly cut the butter into the flour until pea-sized pieces remain. This step is crucial for getting that flaky texture. Don’t overmix—some larger butter chunks are good! (About 5 minutes)
- Add Ice Water: Drizzle in 6 tablespoons cold ice water, mixing gently with a fork until dough just starts to hold together. Add more water, 1 tablespoon at a time, if needed. Form the dough into two discs, wrap in plastic, and chill for at least 1 hour. (About 10 minutes prep + chilling)
- Prepare the Cherry Filling: In a bowl, combine 5 cups pitted sour cherries, 1 cup sugar, 3 tablespoons cornstarch, 1 tablespoon lemon juice, ½ teaspoon almond extract, and a pinch of salt. Stir gently until well mixed and set aside to macerate while dough chills. (5 minutes)
- Roll Out the Dough: On a lightly floured surface, roll one disc of dough into a 12-inch (30 cm) circle, about ⅛ inch (3 mm) thick. Transfer to your 9-inch pie dish, letting excess hang over edges. Trim edges to about 1 inch overhang. (10 minutes)
- Add Filling: Pour the cherry mixture into the crust and dot with 2 tablespoons butter pieces. This helps add richness and a glossy finish inside. (5 minutes)
- Create the Lattice Crust: Roll out the second dough disc to the same size. Using a sharp knife or pizza cutter, cut into ¾-inch (2 cm) wide strips. Lay half the strips horizontally over the filling, spacing evenly. Fold back every other strip halfway, then place a strip vertically over the filling. Unfold the folded strips over the vertical one. Repeat this weaving until the lattice is complete. Trim the edges, pressing gently to seal with the bottom crust. Crimp edges decoratively if you like. (15-20 minutes)
- Apply Egg Wash and Sugar: Brush the lattice crust with beaten egg for a golden finish. Sprinkle coarse sugar on top for sparkle and texture. (5 minutes)
- Bake the Pie: Place pie on a baking sheet to catch drips. Bake in a preheated oven at 400°F (200°C) for 20 minutes, then reduce heat to 350°F (175°C) and bake for another 30-35 minutes until crust is golden and filling is bubbling. If edges brown too quickly, shield with foil. (About 55 minutes total)
- Cool Before Serving: Let pie cool on a wire rack for at least 2 hours to allow filling to set properly. This step is key; otherwise, your filling might be runny. (2 hours)
One tip I learned the hard way: don’t rush the chilling of dough or the cooling of the pie. Both steps make a huge difference in texture and sliceability. And if your lattice looks a little uneven? That’s part of the charm—rustic and homemade beats perfect every time in my book.
Cooking Tips & Techniques
Making the perfect sour cherry pie with flaky lattice crust involves some little tricks that make a big difference.
- Keep Butter Cold: Cold butter is the secret to flaky crust. When it melts in the oven, it creates steam pockets that lift the dough. Warm butter means dense crust. I sometimes freeze my butter cubes for an extra chill before starting.
- Don’t Overwork the Dough: Mix just until the dough holds together. Overworking develops gluten, making the crust tough.
- Drain Cherry Juice: If using frozen cherries, thaw and drain well to avoid a soggy crust. You can reserve the juice to add to the filling, but too much liquid will make it runny.
- Use Cornstarch for Thickening: Cornstarch works better than flour here to keep the filling clear and glossy.
- Egg Wash for Color: Brushing the lattice with egg wash gives that irresistible golden shine and helps the sugar stick.
- Watch Your Oven: Pie edges can brown faster; tent foil over them if needed after 30 minutes.
- Cooling is Crucial: Let the pie cool completely before cutting to keep the filling from spilling everywhere. Patience pays off!
Early on, I tried rushing through the lattice weaving and ended up with a dense, uneven crust. Now, I take my time, which somehow makes the process almost soothing. Also, I multitask by prepping the filling while the dough chills, so no time is wasted. Plus, if you’ve ever wondered about adding a little candied pecans to the topping for crunch, I’ve done that too—delicious twist!
Variations & Adaptations
This perfect sour cherry pie is flexible enough to suit different tastes and dietary needs.
- Gluten-Free Crust: Swap all-purpose flour for a gluten-free blend or almond flour mixed with tapioca starch. Expect a slightly more crumbly texture but still tasty.
- Vegan Version: Use coconut oil or vegan butter for the crust and replace the egg wash with a mixture of almond milk and maple syrup to get that golden crust.
- Flavor Twists: Adding a teaspoon of cinnamon or a splash of vanilla extract to the filling can change the pie’s profile subtly. I once added a handful of fresh blueberries for a summer berry medley—pretty and flavorful.
- Different Crust Styles: Instead of the lattice, try a full top crust with vent slits or a crumb topping for a rustic look.
- Alternative Thickeners: Tapioca starch works if you don’t have cornstarch, but the filling might be slightly less glossy.
Personally, I love this pie paired with a scoop of vanilla ice cream or a dollop of lightly sweetened whipped cream. If you’re interested in other sweet treats with a holiday vibe, the Snowball Cookies are a perfect companion dessert!
Serving & Storage Suggestions
This perfect sour cherry pie is best served slightly warm or at room temperature, allowing that tender lattice crust and bubbling cherry filling to shine. I like to let it rest on a wire rack for at least two hours after baking; the filling thickens and slices cleanly that way.
For a cozy presentation, serve with a scoop of vanilla bean ice cream or a drizzle of heavy cream. A cup of strong coffee or black tea pairs beautifully—trust me, it turns any afternoon into a special occasion.
To store, cover the pie loosely with foil or plastic wrap and refrigerate for up to 4 days. Reheat slices gently in a 300°F (150°C) oven for about 10 minutes to bring back that just-baked feeling. The flavors actually mellow and deepen after a day, so leftovers can be even better.
For freezing, wrap the unbaked pie tightly and freeze for up to 2 months. Bake from frozen, but add 10-15 minutes to baking time, tenting edges with foil as usual. If you want to freeze slices after baking, wrap individually and thaw overnight in the fridge before reheating.
Nutritional Information & Benefits
This perfect sour cherry pie recipe offers a delightful way to enjoy cherries, which are packed with antioxidants and vitamins like vitamin C and potassium. Sour cherries, especially, are known for their anti-inflammatory properties and natural melatonin, which may help with sleep.
Each slice (assuming 8 servings) contains approximately:
| Calories | 320 kcal |
|---|---|
| Fat | 15 g |
| Carbohydrates | 42 g |
| Sugar | 25 g |
| Protein | 3 g |
While this pie isn’t low sugar, it’s a treat where the fruit shines through naturally. Substituting part of the sugar with coconut sugar or a natural sweetener can reduce the refined sugar content if you want to be mindful. The almond extract adds flavor with no calories, and the homemade crust lets you control the butter quality.
Conclusion
This perfect sour cherry pie with flaky lattice crust has become one of those recipes I find myself falling back on when I want something both elegant and comforting. It’s approachable enough for less experienced bakers but yields impressive results that invite compliments. The balance of tart cherries and buttery crust makes every slice worth savoring, no matter the season.
Feel free to tweak the filling sweetness or experiment with crust variations until you find your own perfect combo. I’ve loved seeing how this pie fits into different celebrations and quiet nights alike, and I hope it becomes a staple in your kitchen too. If you try it, I’d love to hear how your lattice crust turned out or any twists you added!
And hey, if you’re thinking about other desserts with that cozy, homemade feel, the cranberry orange bread is a lovely treat to keep on hand for sharing.
Happy baking, and may your kitchen always smell like warm cherries and butter.
FAQs
Can I use fresh cherries instead of frozen for this pie?
Absolutely! Fresh sour cherries work beautifully when in season. Just make sure to pit them well and adjust sugar based on their natural tartness.
How do I prevent the crust from getting soggy?
Drain frozen cherries well to remove excess liquid, use cornstarch to thicken the filling, and bake the pie on a baking sheet to catch drips. Chilling the dough and brushing with egg wash also helps create a barrier.
What’s the best way to store leftover pie?
Store covered in the fridge for up to 4 days. Reheat slices gently in a 300°F (150°C) oven for about 10 minutes before serving to refresh the crust.
Can I make the pie crust ahead of time?
Yes! You can prepare the dough up to 2 days in advance and keep it wrapped in the fridge. Alternatively, freeze it for up to 1 month and thaw before use.
Is there a substitute for almond extract in the filling?
Vanilla extract is a common substitute but will give a different flavor profile. Some also use a touch of amaretto liqueur for a similar almond note.
Pin This Recipe!

Perfect Sour Cherry Pie Recipe Easy Flaky Lattice Crust Tutorial
A perfect sour cherry pie featuring a flaky lattice crust and a bright, tangy cherry filling balanced with almond extract. Easy to make and ideal for seasonal celebrations or cozy nights.
- Prep Time: 30 minutes (including chilling prep)
- Cook Time: 55 minutes
- Total Time: 3 hours 25 minutes (including chilling and cooling)
- Yield: 8 servings 1x
- Category: Dessert
- Cuisine: American
Ingredients
- 2 ½ cups (300 g) all-purpose flour
- 1 cup (226 g) unsalted butter, very cold and cubed
- 1 tablespoon granulated sugar (optional)
- 1 teaspoon salt
- 6 to 8 tablespoons ice water
- 5 cups (about 700 g) sour cherries, fresh or frozen (thawed and drained)
- 1 cup (200 g) granulated sugar
- 3 tablespoons cornstarch
- 1 tablespoon lemon juice
- ½ teaspoon almond extract
- Pinch of salt
- 2 tablespoons unsalted butter, cut into small bits
- 1 large egg, beaten (for egg wash)
- 1 tablespoon coarse sugar (optional, for sprinkling on crust)
Instructions
- Make the Pie Dough: In a large bowl, whisk together flour, sugar (if using), and salt. Add cold, cubed unsalted butter. Using a pastry blender or fingertips, cut the butter into the flour until pea-sized pieces remain. Do not overmix.
- Add Ice Water: Drizzle in 6 tablespoons cold ice water, mixing gently with a fork until dough just starts to hold together. Add more water, 1 tablespoon at a time, if needed. Form dough into two discs, wrap in plastic, and chill for at least 1 hour.
- Prepare the Cherry Filling: In a bowl, combine pitted sour cherries, sugar, cornstarch, lemon juice, almond extract, and a pinch of salt. Stir gently until well mixed and set aside to macerate while dough chills.
- Roll Out the Dough: On a lightly floured surface, roll one disc of dough into a 12-inch circle about ⅛ inch thick. Transfer to a 9-inch pie dish, letting excess hang over edges. Trim edges to about 1 inch overhang.
- Add Filling: Pour the cherry mixture into the crust and dot with butter pieces.
- Create the Lattice Crust: Roll out the second dough disc to the same size. Cut into ¾-inch wide strips. Lay half the strips horizontally over the filling, spacing evenly. Fold back every other strip halfway, place a strip vertically, then unfold the folded strips over it. Repeat weaving until lattice is complete. Trim edges and press gently to seal. Crimp edges decoratively if desired.
- Apply Egg Wash and Sugar: Brush the lattice crust with beaten egg and sprinkle coarse sugar on top.
- Bake the Pie: Place pie on a baking sheet. Bake at 400°F for 20 minutes, then reduce heat to 350°F and bake for another 30-35 minutes until crust is golden and filling bubbles. Shield edges with foil if browning too quickly.
- Cool Before Serving: Let pie cool on a wire rack for at least 2 hours to allow filling to set.
Notes
Keep butter cold to ensure flaky crust. Do not overwork dough to avoid toughness. Drain frozen cherries well to prevent soggy crust. Use cornstarch for thickening the filling. Brush lattice with egg wash for golden color and sprinkle sugar for texture. Cool pie completely before slicing to set filling. Tent edges with foil if browning too fast. Dough can be made ahead and chilled or frozen. For gluten-free crust, substitute flour with gluten-free blend or almond flour with tapioca starch. Vegan version uses coconut oil or vegan butter and almond milk with maple syrup for egg wash.
Nutrition
- Serving Size: 1 slice (1/8 of pie)
- Calories: 320
- Sugar: 25
- Fat: 15
- Carbohydrates: 42
- Protein: 3
Keywords: sour cherry pie, lattice crust, flaky pie crust, cherry dessert, easy pie recipe, homemade pie, tart cherry pie, almond extract pie


