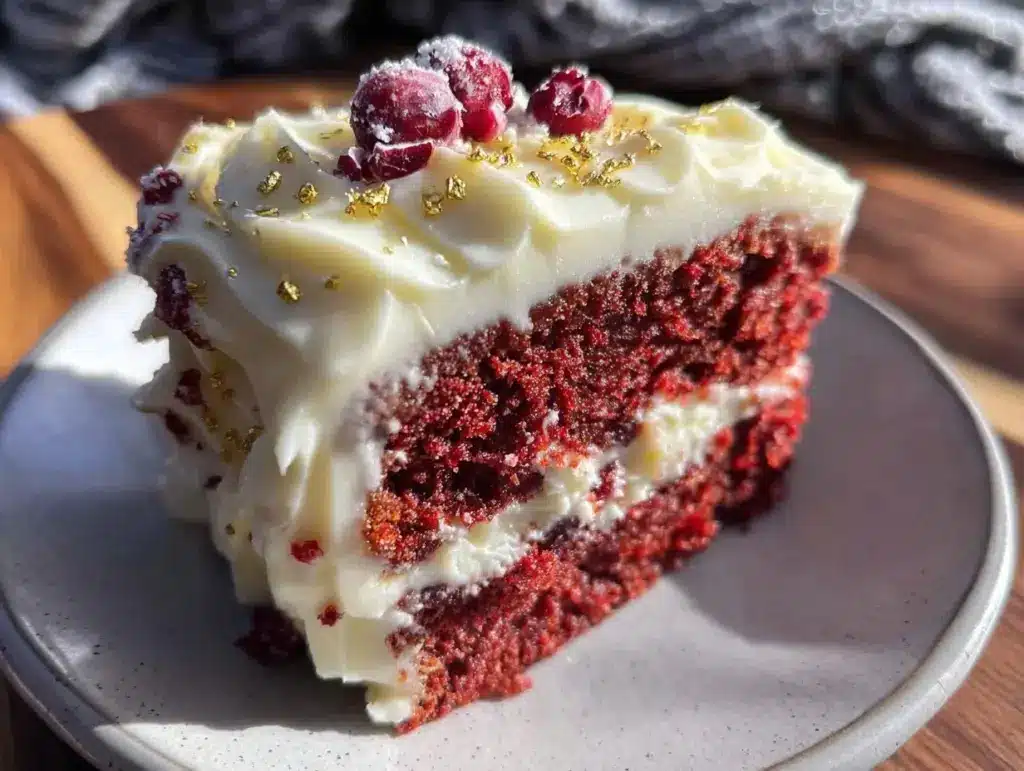
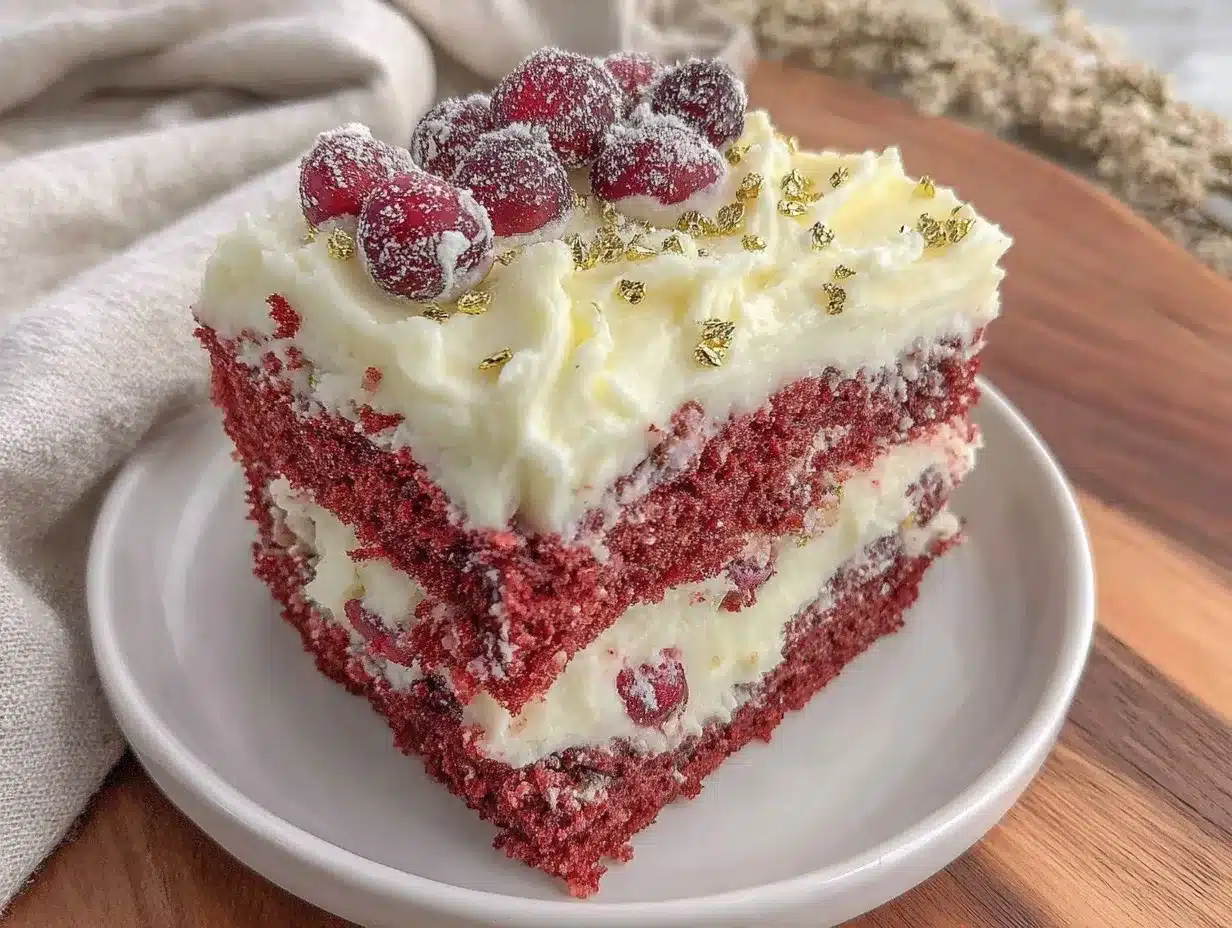
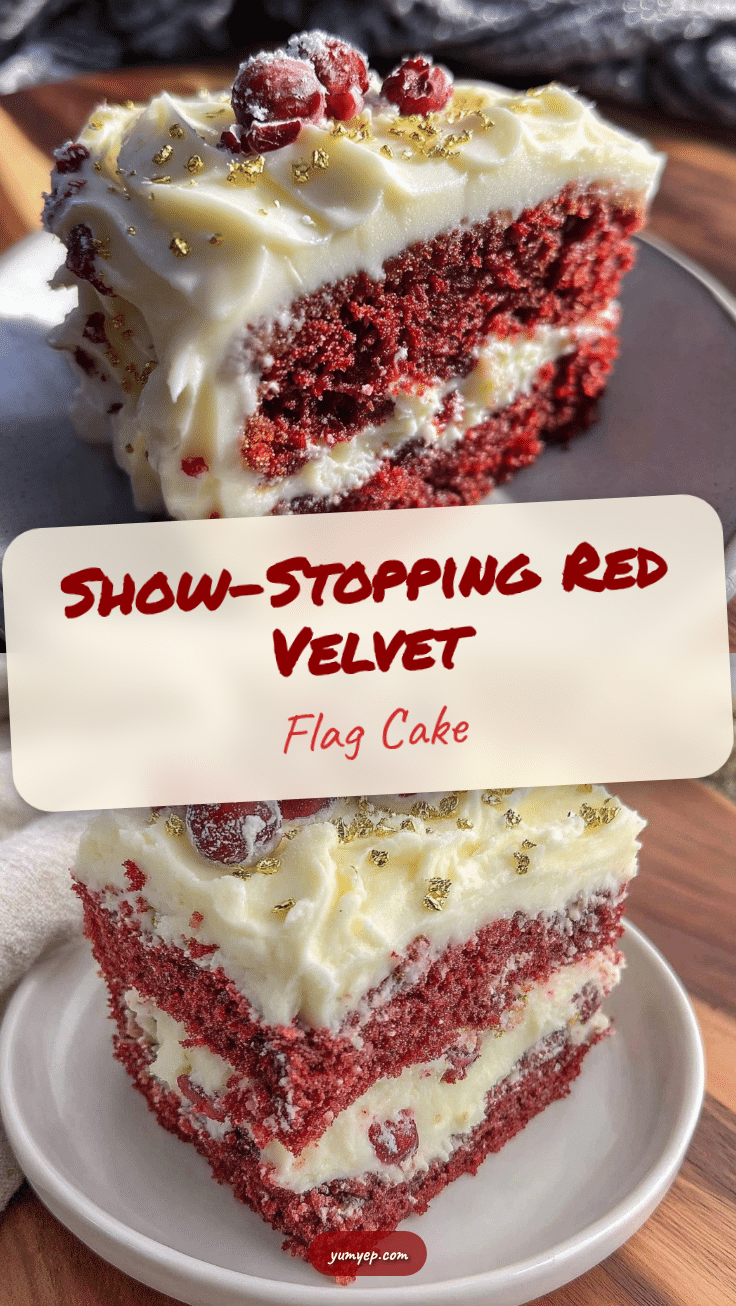
“Are you seriously making a red velvet flag cake?” my neighbor called out, half teasing, half impressed, as I balanced a towering layered cake on my kitchen counter. Honestly, I wasn’t expecting much when I first thought of this idea—a festive, eye-catching dessert that could double as a centerpiece for the Fourth of July picnic. But the way the vibrant red velvet layers peeked through the creamy white frosting stripes, it felt like I’d stumbled on something worth keeping in my recipe box.
It started on a rather chaotic afternoon when I found myself with a bit of leftover cream cheese frosting from a failed batch of cinnamon rolls (you know, sometimes kitchens get messy in the best ways). Instead of tossing it, I grabbed my trusty red velvet cake mix and decided to try layering it in a pattern that would mimic the stars and stripes. Honestly, I was skeptical at first—would it look too complicated? Would the flavors clash?
But as the cake baked and cooled, something about the rich, tender crumb paired with that tangy cream cheese frosting made me pause. This wasn’t just a pretty face; it was a show-stopper in both looks and taste. The red velvet flag cake quickly became the dessert everyone asked about, especially when I paired it with a batch of crispy candied pecans for a crunchy contrast. There’s something quietly satisfying about a dessert that brings a bit of whimsy and a lot of comfort to the table. So, if you’re game for a cake that’s as fun to make as it is to eat, this recipe is for you.
Why You’ll Love This Recipe
After baking this red velvet flag cake more times than I can count (seriously, it’s been a fixture at cookouts and holiday dinners), I’ve come to appreciate what sets it apart from any other layered cake you’ve tried.
- Quick & Easy: From start to finish, this cake comes together in about 1.5 hours, including baking and assembly—perfect for last-minute celebrations.
- Simple Ingredients: No need for fancy or hard-to-find items—mostly pantry staples like red food coloring, cocoa powder, and cream cheese.
- Perfect for Celebrations: Whether it’s Independence Day, Memorial Day, or just a summer BBQ, this cake’s patriotic design steals the show.
- Crowd-Pleaser: Kids and adults alike rave about the moist, tender crumb and the rich cream cheese frosting that’s never overpowering.
- Unbelievably Delicious: The classic red velvet flavor with a hint of cocoa and that smooth, tangy cream cheese frosting makes it a comforting treat with a twist.
What makes this recipe truly different? It’s the way the layers are carefully arranged to mimic a flag without complicated piping or fondant. The cream cheese frosting is whipped just right—not too sweet, not too dense—giving it that soft, spreadable texture that holds the shape beautifully. I’ve tried other versions, but this one nails the balance every time.
Honestly, there’s a sort of quiet joy in crafting something both festive and homey. When you slice into this cake and see those crisp, red velvet stripes alongside creamy white frosting, it’s a little moment of celebration in itself. That’s why this cake sticks with me—it’s not just dessert; it’s a conversation starter and a memory maker.
What Ingredients You Will Need
This red velvet flag cake recipe uses straightforward, wholesome ingredients to create bold flavors and a moist, tender crumb without complicated steps. Most of these are pantry staples or easy to find at any grocery store.
- For the Red Velvet Cake:
- All-purpose flour – 2½ cups (315 g), sifted for a light texture
- Granulated sugar – 1¾ cups (350 g), for balanced sweetness
- Unsweetened cocoa powder – 1½ tbsp (12 g), for that subtle chocolate hint
- Baking soda – 1 tsp (5 g), to help the cake rise
- Salt – ½ tsp (3 g), to enhance flavor
- Buttermilk – 1½ cups (360 ml), room temperature (adds moisture and tang)
- Vegetable oil – 1 cup (240 ml), keeps the cake moist
- Large eggs – 2, room temperature (helps with structure)
- Red food coloring – 2 tbsp (30 ml), for that iconic red hue (I use AmeriColor gels for vibrant color)
- White distilled vinegar – 1 tsp (5 ml), reacts with baking soda for lift
- Pure vanilla extract – 1 tsp (5 ml), adds depth
- For the Cream Cheese Frosting:
- Cream cheese – 16 oz (450 g), softened (full-fat for best flavor)
- Unsalted butter – ½ cup (115 g), softened (adds richness)
- Powdered sugar – 4 cups (480 g), sifted for smoothness
- Pure vanilla extract – 1 tsp (5 ml), for subtle warmth
- Pinch of salt – just a touch to balance sweetness
Feel free to swap buttermilk with a mix of milk and lemon juice if needed, or use dairy-free cream cheese and vegan butter to adapt for dietary preferences. The key is to keep the frosting smooth and spreadable, so don’t skip softening your dairy ingredients.
Equipment Needed
- Two 9-inch (23 cm) round cake pans – you want even layers; if you only have one, just bake in batches and cool between.
- Mixing bowls – a large one for the batter and a medium for frosting.
- Electric mixer or stand mixer – makes whipping the frosting effortless (a hand whisk works, but takes patience).
- Measuring cups and spoons – precision helps the cake rise just right.
- Rubber spatula – great for folding ingredients and scraping bowls clean.
- Cooling racks – to let your cakes cool evenly without sogginess.
- Offset spatula or butter knife – for smoothing frosting layers perfectly.
If you don’t have an offset spatula, a regular butter knife or the back of a spoon works fine, just take your time. For budget-friendly pans, I personally recommend using non-stick aluminum pans; they heat evenly and clean up easily, which is a lifesaver during busy baking days.
Preparation Method
- Preheat and prep pans: Preheat your oven to 350°F (175°C). Grease two 9-inch (23 cm) round cake pans and lightly dust with flour or use parchment paper rounds for easy release. This step takes about 10 minutes.
- Mix dry ingredients: In a large bowl, sift together 2½ cups (315 g) all-purpose flour, 1¾ cups (350 g) granulated sugar, 1½ tbsp (12 g) cocoa powder, 1 tsp (5 g) baking soda, and ½ tsp (3 g) salt. Mixing these first prevents lumps and ensures even rising. Takes 2-3 minutes.
- Combine wet ingredients: In a separate bowl, whisk 1½ cups (360 ml) buttermilk, 1 cup (240 ml) vegetable oil, 2 large eggs, 2 tbsp (30 ml) red food coloring, 1 tsp (5 ml) white vinegar, and 1 tsp (5 ml) vanilla extract until smooth and uniform in color. This usually takes 3-4 minutes.
- Incorporate wet into dry: Slowly pour the wet ingredients into the dry mixture, folding gently with a spatula until just combined. Avoid overmixing to keep the cake tender. Batter should be smooth and vibrant red with no streaks. About 2 minutes.
- Divide and bake: Pour batter evenly into the two prepared pans. Smooth the tops with a spatula. Bake for 30-35 minutes, or until a toothpick inserted in the center comes out clean. The cakes should spring back lightly when touched.
- Cool completely: Remove pans from oven and let cakes cool for 10 minutes before turning them out onto cooling racks. Cool fully to avoid melting your frosting later—this can take 1-2 hours depending on room temperature.
- Prepare the cream cheese frosting: Using an electric mixer, beat 16 oz (450 g) softened cream cheese and ½ cup (115 g) softened unsalted butter on medium speed until creamy (about 3-4 minutes). Gradually add 4 cups (480 g) powdered sugar, mixing on low until combined, then beat on medium-high for 2-3 minutes until fluffy. Stir in 1 tsp (5 ml) vanilla and a pinch of salt. Taste and adjust sweetness as you like.
- Assemble the flag pattern: Slice each cake horizontally into two even layers (you’ll have 4 layers total). On your serving plate, arrange layers alternating red velvet and frosting stripes to mimic flag stripes. Use your offset spatula to spread frosting smoothly between layers and on top. For the star section, you can pipe small frosting stars or use a stencil with powdered sugar if you want to get fancy.
Pro tip: If your cake layers dome in the middle, trim them with a serrated knife for even stacking. It really helps the flag look sharp and neat.
Cooking Tips & Techniques
Red velvet cake can be tricky if you rush through it, but a few practical tricks make a huge difference. First, always use room temperature eggs and buttermilk. Cold ingredients don’t mix well and can yield a denser cake. When mixing, folding the wet and dry ingredients gently keeps the crumb light—it’s tempting to overbeat but resist that urge.
For the cream cheese frosting, patience is key. Beat the cream cheese and butter really well before adding sugar to avoid lumps. If your frosting feels too soft, chilling it for 15 minutes helps it firm up for easier spreading without losing that creamy texture.
Timing your cooling is another biggie. I’ve learned the hard way that frosting a warm cake turns the cream cheese into a melty mess. So, cool completely—overnight in the fridge works wonders if you’re prepping ahead.
Don’t forget to prep your pans well—greasing and flouring or parchment paper layers prevent heartbreak when unmolding.
To multitask, whip up the frosting while the cakes are baking and cooling. That way, you’re ready to assemble as soon as the layers are cool.
Variations & Adaptations
This red velvet flag cake recipe is versatile enough for tweaks depending on your occasion or dietary needs. Here are a few ways to make it your own:
- Gluten-Free Version: Substitute all-purpose flour for a 1:1 gluten-free baking blend. I’ve tested Bob’s Red Mill with great results—just watch baking time as it may vary slightly.
- Vegan Adaptation: Use a vegan cream cheese and butter alternative, almond or oat milk mixed with vinegar for buttermilk, and flax eggs (1 tbsp ground flaxseed + 3 tbsp water per egg). The texture will be a bit different but still delightful.
- Berry Twist: Add a thin layer of fresh blueberries or raspberry jam between the cake layers for a pop of fruity brightness that complements the tangy frosting.
- Mini Cakes or Cupcakes: Use this batter to make individual cupcakes and pipe the cream cheese frosting with star tips for a patriotic party platter.
- Alternative Frosting: Swap cream cheese frosting for a whipped mascarpone topping for a lighter finish.
Personally, I once made a version decorated with edible silver stars for a New Year’s bash, which added a little sparkle without losing that classic red velvet vibe.
Serving & Storage Suggestions
Serve your red velvet flag cake chilled or at room temperature—both work beautifully. If you like, pair it with a simple cup of coffee or a light, sparkling drink to balance the rich cream cheese frosting. I’ve found it pairs surprisingly well with a fresh fruit salad or even alongside a batch of snowball cookies during holiday spreads.
To store, cover the cake loosely with plastic wrap and keep it refrigerated for up to 4 days. The flavors actually meld and deepen after a day, so leftovers are fantastic. For longer storage, slice the cake into portions and freeze in airtight containers for up to 3 months. Thaw overnight in the fridge before serving.
When reheating, avoid microwaving the whole cake. Instead, warm single slices gently in the microwave for 10-15 seconds if you want that freshly baked vibe without melting the frosting.
Nutritional Information & Benefits
This red velvet flag cake offers a delightful balance of indulgence and familiar ingredients. Each serving (1/12th of the cake) contains approximately 350 calories, with moderate fat from butter and cream cheese, and a touch of protein from eggs and dairy.
The cream cheese provides calcium and vitamin A, while the cocoa powder adds antioxidants in small amounts. Using real buttermilk adds a tangy flavor and some probiotics, which are nice if you’re mindful of gut health.
If you’re watching sugar intake, you can reduce the powdered sugar in the frosting slightly or try natural sweeteners, but the classic version is definitely a treat best enjoyed in the moment.
For those with gluten sensitivities, the recipe’s gluten-free adaptation keeps the festive spirit without compromise.
Conclusion
There’s something quietly satisfying about crafting a dessert that’s both visually stunning and genuinely delicious, and this red velvet flag cake does just that. Its moist layers, vibrant color, and smooth cream cheese frosting come together in a way that’s truly special without being intimidating.
Whether you’re marking a holiday, impressing guests, or just craving a slice of nostalgia with a twist, this recipe is a reliable winner. I love how it invites creativity—you can tweak the flavors, colors, or presentation to suit your style and occasion.
Give it a try, and let the cake speak for itself. I’d love to hear how your version turned out or what personal touches you added!
FAQs About Red Velvet Flag Cake
How do I prevent the red velvet cake from tasting too bitter?
Using good quality unsweetened cocoa powder and the right amount of sugar balances the flavor. Avoid overbaking, which can also make the cake dry and bitter.
Can I make this cake ahead of time?
Absolutely! Bake and cool the layers one day in advance. Wrap them tightly and refrigerate. Assemble and frost the next day for best results.
What if I don’t have buttermilk?
Mix 1½ cups (360 ml) of milk with 1½ tbsp (22 ml) of lemon juice or white vinegar. Let it sit for 5-10 minutes before using as a buttermilk substitute.
How do I get the cream cheese frosting smooth and lump-free?
Make sure the cream cheese and butter are softened to room temperature before beating. Sift powdered sugar to avoid clumps and beat on medium speed for several minutes until fluffy.
Can I use this cake recipe for cupcakes?
Yes! Bake in cupcake liners for about 20-25 minutes at 350°F (175°C). Adjust frosting with a piping bag for a festive look.
Pin This Recipe!
Red Velvet Flag Cake Recipe Easy Homemade Dessert with Cream Cheese Frosting

A festive and eye-catching red velvet layered cake with tangy cream cheese frosting, perfect for celebrations like the Fourth of July. This quick and easy recipe yields moist, tender cake layers arranged to mimic a flag.
- Prep Time: 20 minutes
- Cook Time: 35 minutes
- Total Time: 1 hour 30 minutes
- Yield: 12 servings 1x
- Category: Dessert
- Cuisine: American
Ingredients
- 2½ cups (315 g) all-purpose flour, sifted
- 1¾ cups (350 g) granulated sugar
- 1½ tbsp (12 g) unsweetened cocoa powder
- 1 tsp (5 g) baking soda
- ½ tsp (3 g) salt
- 1½ cups (360 ml) buttermilk, room temperature
- 1 cup (240 ml) vegetable oil
- 2 large eggs, room temperature
- 2 tbsp (30 ml) red food coloring (AmeriColor gels recommended)
- 1 tsp (5 ml) white distilled vinegar
- 1 tsp (5 ml) pure vanilla extract
- 16 oz (450 g) cream cheese, softened (full-fat)
- ½ cup (115 g) unsalted butter, softened
- 4 cups (480 g) powdered sugar, sifted
- 1 tsp (5 ml) pure vanilla extract (for frosting)
- Pinch of salt (for frosting)
Instructions
- Preheat oven to 350°F (175°C). Grease two 9-inch round cake pans and lightly dust with flour or use parchment paper rounds.
- In a large bowl, sift together flour, sugar, cocoa powder, baking soda, and salt.
- In a separate bowl, whisk together buttermilk, vegetable oil, eggs, red food coloring, white vinegar, and vanilla extract until smooth.
- Slowly pour wet ingredients into dry ingredients, folding gently with a spatula until just combined. Avoid overmixing.
- Divide batter evenly between prepared pans and smooth tops.
- Bake for 30-35 minutes or until a toothpick inserted in the center comes out clean and cakes spring back lightly when touched.
- Cool cakes in pans for 10 minutes, then turn out onto cooling racks and cool completely (1-2 hours).
- Prepare frosting: Beat cream cheese and butter on medium speed until creamy (3-4 minutes). Gradually add powdered sugar on low speed, then beat on medium-high until fluffy (2-3 minutes). Stir in vanilla and salt.
- Slice each cake horizontally into two even layers (4 layers total).
- Assemble cake by alternating red velvet layers and frosting stripes to mimic flag stripes. Spread frosting smoothly between layers and on top.
- Optionally, pipe small frosting stars or use a stencil with powdered sugar for the star section.
- Trim domed cake layers with a serrated knife if needed for even stacking.
Notes
Use room temperature eggs and buttermilk for best texture. Avoid overmixing batter to keep cake tender. Chill frosting if too soft before spreading. Cool cakes completely before frosting to prevent melting. Trim domed layers for even stacking. Can substitute gluten-free flour or vegan ingredients as needed.
Nutrition
- Serving Size: 1 slice (1/12th of c
- Calories: 350
- Sugar: 28
- Sodium: 280
- Fat: 22
- Saturated Fat: 10
- Carbohydrates: 38
- Fiber: 1
- Protein: 4
Keywords: red velvet cake, flag cake, cream cheese frosting, Fourth of July dessert, patriotic cake, layered cake, easy red velvet


