Let me set the scene: the sweet aroma of vanilla cake mingling with melted chocolate, drifting through my kitchen just as the leaves outside blush crimson and gold. There’s something magical about the way Thanksgiving brings everyone together, and honestly, nothing captures that cheerful spirit quite like a batch of Thanksgiving cake pops. The first time I made these, it was a chilly November afternoon—wind whistling at the windows, my little ones bundled up and peeking over the counter, eyes wide with anticipation.
I was instantly hooked, not just by the irresistible taste but by the playful, festive vibe these cake pops bring to the table. It’s the kind of moment where you pause, take a deep breath, and just smile because you know you’re onto something truly special. Years ago, when I was knee-high to a grasshopper, my grandma would make simple cakes for the holiday, but I wish she’d known about cake pops—they’re dangerously easy and a total crowd-pleaser. My family couldn’t stop sneaking them off the cooling rack (and I can’t really blame them). Even my pickiest eater had chocolate smeared across his cheeks, proof that these treats are a hit with all ages.
Honestly, these Thanksgiving cake pops are pure, nostalgic comfort wrapped up in a bite-sized ball. Whether you’re looking for something cute to brighten up your Pinterest holiday board, need a sweet treat for your kids, or want a showstopper for your Thanksgiving potluck, this recipe delivers big. I’ve tested it more times than I can count (all in the name of research, of course), and it’s now a staple for family gatherings, gifting, and those cozy nights when you just want something special. It feels like a warm hug, and you’re going to want to bookmark this one for every holiday season.
Why You’ll Love This Thanksgiving Cake Pops Recipe
If you’re searching for a holiday treat that’s both festive and foolproof, these Thanksgiving cake pops are about to become your new favorite. I’ve spent years perfecting the process—trust me, there have been plenty of lopsided pops and messy counters along the way. But out of all my baking adventures, this recipe stands out for its simplicity and pure fun. Here’s why you’re going to adore making (and eating) these:
- Quick & Easy: Comes together in under an hour—perfect for busy holiday schedules or last-minute dessert needs.
- Simple Ingredients: No fancy grocery list required; you probably already have everything you need in your pantry.
- Perfect for Any Occasion: These cake pops shine at Thanksgiving dinners, classroom parties, Friendsgiving, or as adorable gifts for neighbors.
- Crowd-Pleaser: Kids love decorating them, and adults love sneaking a second (or third!) when no one’s looking.
- Unbelievably Delicious: Soft, moist cake on the inside—crunchy chocolate shell on the outside. The texture and flavor combo is next-level comfort food.
What sets this Thanksgiving cake pops recipe apart? Honestly, it’s the little details: mixing in just the right amount of frosting for a moist but not mushy center, using real chocolate melts instead of candy wafers (it makes a difference!), and decorating with festive sprinkles or tiny candy corn for that holiday wow-factor. It’s the kind of treat that makes you close your eyes after the first bite.
This isn’t just another cake pop recipe—it’s the one that transforms leftover cake into something memorable, perfect for impressing guests without the stress. It’s comfort food made playful, and every batch is a chance to create new traditions (and happy memories) around the Thanksgiving table.
What Ingredients You Will Need
This recipe uses simple, wholesome ingredients to deliver bold flavor and satisfying texture without the fuss. Most are pantry staples, and you can easily swap in alternatives if needed. Here’s what you’ll need for your Thanksgiving cake pops:
- For the Cake:
- 1 box vanilla or yellow cake mix (or homemade cake, if you’re feeling fancy)
- Ingredients for cake mix: eggs, oil, and water (as directed on package)
- For the Cake Pop Mixture:
- 1 cup (240g) vanilla frosting (store-bought or homemade)
- For Coating & Decoration:
- 2 cups (340g) semisweet or white chocolate melts (I recommend Ghirardelli for smooth texture)
- 1 tablespoon coconut oil or vegetable shortening (for thinning chocolate)
- Assorted Thanksgiving-themed sprinkles (orange, brown, gold)
- Candy corn, mini chocolate chips, or edible eyes (for decorating)
- Colored gel icing (optional, for drawing leaves or turkey faces)
- For Assembly:
- 24 cake pop sticks
Ingredient Tips: For best results, use a moist cake (homemade is lovely, but boxed works great, too). If you want a gluten-free option, swap in your favorite GF cake mix. Dairy-free? Use coconut yogurt-based frosting and dairy-free chocolate melts. In early autumn, try adding a pinch of cinnamon or pumpkin spice to the cake mix for a seasonal twist. If you’re making a big batch, buy sprinkles in bulk—they tend to disappear fast!
I’ve tried a few different brands for the chocolate melts, and honestly, some don’t melt as smoothly. Ghirardelli and Wilton are my go-tos for that shiny finish. If you’re using homemade frosting, make sure it’s thick enough to bind the cake crumbs (runny frosting makes messy pops).
Equipment Needed
You don’t need a fancy kitchen to whip up Thanksgiving cake pops, but a few trusty tools make the process smoother (and less messy—promise!). Here’s what you’ll want to have on hand:
- Mixing bowls: One large for crumbling cake, one small for melting chocolate.
- Baking sheet: Lined with parchment paper, for chilling and setting pops.
- Hand mixer or stand mixer: Optional, but helps blend cake and frosting quickly.
- Spatula: For scraping, mixing, and smoothing.
- Cake pop sticks: Wooden or plastic, sturdy enough to hold the pops.
- Microwave-safe bowl: For melting chocolate. Double boiler works too, if you prefer.
- Styrofoam block or cake pop stand: For holding pops upright while the coating sets (a cardboard box with holes poked works in a pinch).
If you don’t have a cake pop stand, just flip a colander upside down and poke the sticks through the holes—works like a charm! I’ve used everything from old coffee mugs to egg cartons for propping up pops. For cleaning, soak sticky bowls in warm water right away—chocolate can be stubborn once it sets. There’s no need for a cake pop maker; hands and patience work best.
Preparation Method
- Bake the Cake: Preheat your oven to 350°F (175°C). Prepare the cake mix according to package instructions (or your favorite recipe), using the eggs, oil, and water specified. Pour batter into a greased 9×13-inch (23x33cm) pan. Bake for 25-30 minutes, until a toothpick inserted in the center comes out clean. Cool completely—this step’s important, or you’ll end up with mushy pops.
- Crumble the Cake: Once cooled, break the cake into large chunks and transfer to a big mixing bowl. Use your hands or a fork to crumble it into fine crumbs. (It’s a little messy, but kind of fun!)
- Mix with Frosting: Add 1 cup (240g) vanilla frosting to the cake crumbs. Start with half, mix, then add more as needed. The mixture should hold together when squeezed but not feel wet or sticky. (If it’s too dry, add a spoonful of frosting; too wet, add more cake crumbs.)
- Shape the Pops: Scoop out tablespoon-sized portions and roll between your palms to form smooth balls, about 1-inch (2.5cm) diameter. Place balls on a parchment-lined baking sheet. Chill in the fridge for at least 1 hour, or 30 minutes in the freezer. This helps them hold their shape when dipped.
- Melt the Chocolate: Place chocolate melts and coconut oil in a microwave-safe bowl. Heat in 30-second bursts, stirring after each, until smooth and glossy. (If using a double boiler, stir gently over low heat.) Thin with a little extra oil if needed.
- Attach Cake Pop Sticks: Dip the tip of each stick into melted chocolate, then insert halfway into each chilled cake ball. This acts like glue to hold the stick in place. Let set for a few minutes.
- Dip and Decorate: Working one at a time, dip each cake pop into melted chocolate, turning to coat completely. Tap off excess gently. Immediately add sprinkles, candy corn, or other decorations before the coating sets. Stand pops upright in a cake pop stand or improvised holder.
- Chill and Set: Refrigerate finished pops for 30 minutes, until chocolate is firm and decorations are set.
- Serve: Arrange on a platter, tuck into treat bags, or display in a festive vase for instant holiday charm.
Notes: If your cake balls fall off the stick, they’re too heavy or too soft—chill longer, or make smaller pops. If chocolate coating cracks, the balls may be too cold; let them sit out for a few minutes before dipping. For extra shine, use a little more coconut oil in your melted chocolate. And if you want to color your coating, use oil-based food coloring (water-based will seize the chocolate).
Cooking Tips & Techniques
Here’s where a little experience goes a long way! Making Thanksgiving cake pops isn’t rocket science, but there are a few tricks that’ll save your sanity and guarantee show-stopping results.
- Temperature Matters: Don’t dip super-cold cake balls into hot chocolate—they’ll crack. Let them rest a few minutes after chilling.
- Frosting Balance: Too much frosting makes pops mushy; too little and they crumble. Add frosting gradually, and test the texture as you go.
- Stick Security: Dipping the stick in melted chocolate before inserting keeps pops firmly attached.
- Chocolate Consistency: If your chocolate is too thick, add a bit more coconut oil. Too thin, add more chocolate. Stir often for a silky finish.
- Decoration Timing: Add sprinkles or candy while the coating is wet, or they’ll slide right off.
- Batch Prep: Make cake and shape balls a day ahead, then dip and decorate fresh before serving.
I’ve had pops fall off sticks and chocolate seize up more times than I care to admit. If you run into trouble, just pause and regroup—sometimes letting things chill or warm up a bit solves everything. For multitasking, bake the cake while prepping decorations and melting chocolate. And if you want perfectly round pops, roll the balls between slightly damp hands to smooth out cracks.
Consistency is key—use a cookie scoop for even pops, and keep your chocolate the right temperature for smooth dipping. It’s totally normal to have a few “ugly ducklings” in the batch; those are the ones you eat first (chef’s privilege!).
Variations & Adaptations
Thanksgiving cake pops are endlessly customizable, so don’t be afraid to play with flavors and shapes. Here are a few of my favorite twists:
- Dietary Swaps: Use gluten-free cake mix and dairy-free frosting for allergy-friendly pops. Try almond flour-based cake for a low-carb option.
- Seasonal Flavors: Add pumpkin spice, apple pie spice, or a touch of maple syrup to the cake mix for autumn vibes. Use spice cake or carrot cake for a deeper, richer flavor.
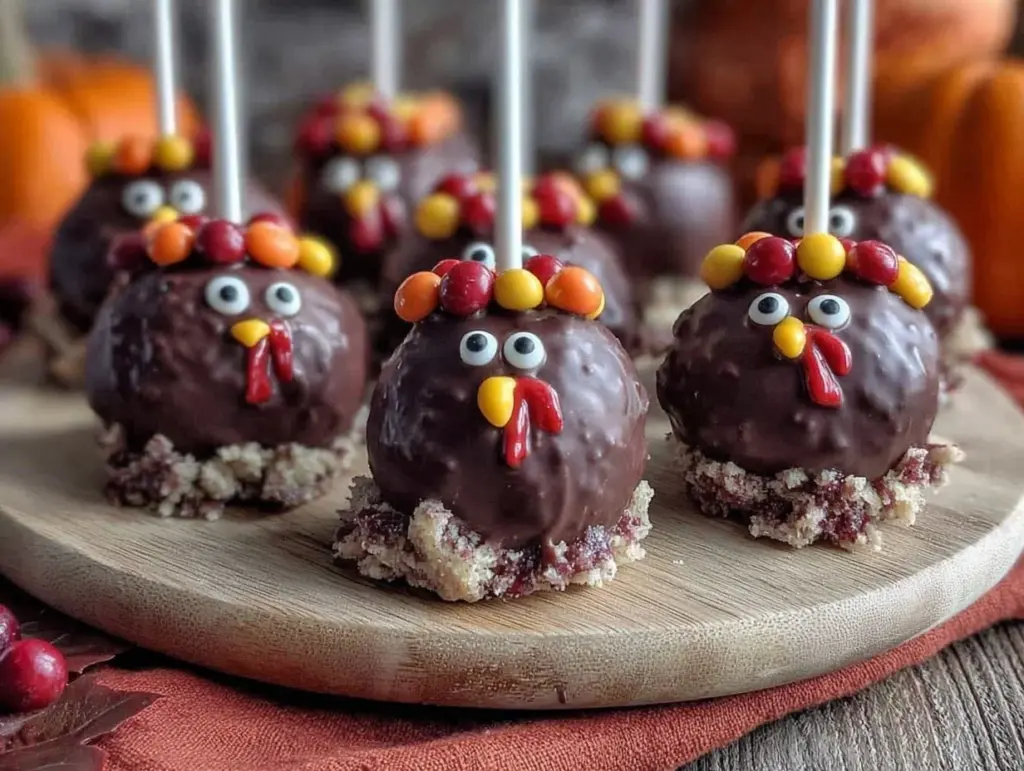
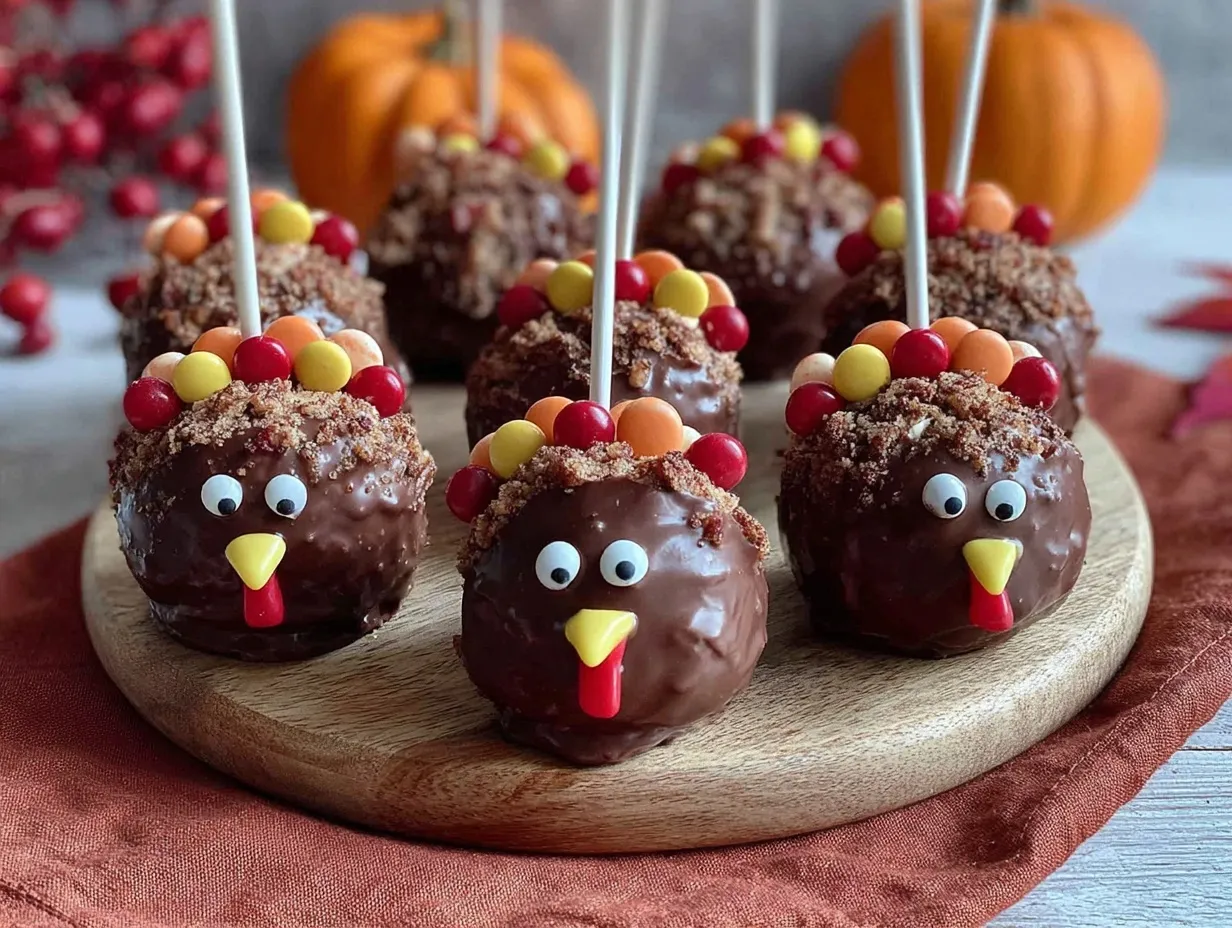
- Festive Shapes: Shape balls into tiny turkeys, pumpkins, or acorns, then decorate with colored icing and candy.
- Cooking Methods: No oven? Use store-bought pound cake or leftover cupcakes—just crumble and mix as usual.
- Taste Preferences: For grown-ups, add a splash of bourbon or rum extract to the cake mix. For kids, stick with classic vanilla or chocolate.
- Personal Fave: Last year, I made a batch using gingerbread cake and white chocolate coating—everyone asked for the recipe!
Allergen tips: Always check labels for nuts, dairy, or gluten. Swap out cake mix brands as needed, and use vegan chocolate melts for dairy-free pops. If you want extra crunch, roll finished pops in crushed pretzels or toasted coconut. The possibilities are endless—let your creativity shine!
Serving & Storage Suggestions
These Thanksgiving cake pops are best served fresh, at room temperature, for maximum flavor and texture. Arrange them on a decorative platter, stick them into a pumpkin for a cute centerpiece, or package individually in cellophane bags with festive ribbon for gifting.
Pair with apple cider, hot chocolate, or spiced tea for cozy vibes. They also look adorable alongside pies, cookies, or a fruit tray at your Thanksgiving spread. For storage, keep pops in an airtight container in the fridge for up to 5 days. Freeze undecorated pops for up to 2 months—thaw and decorate the day you serve.
To reheat, don’t! Cake pops are meant to be enjoyed cold or at room temp. If the coating sweats after refrigeration, let them sit out for 10 minutes before serving. Flavors develop the longer they sit, so make a batch a day ahead for even richer taste. (Just don’t be surprised if a few disappear overnight!)
Nutritional Information & Benefits
Each Thanksgiving cake pop averages about 120 calories, with 6g fat, 15g carbs, and 1g protein. The main ingredients—cake and chocolate—aren’t exactly health food, but the portion control means you can enjoy a sweet bite without going overboard.
Key benefits: Cake pops are naturally portioned, easy to customize for dietary needs, and free of major allergens if you use gluten-free and dairy-free swaps. They’re nut-free (unless you add nuts), and you can control the sugar by using lower-sugar cake mixes and dark chocolate.
From a wellness perspective, these treats offer joyful moments, creative fun, and a little indulgence—because balance is the name of the game at Thanksgiving. As always, check labels for potential allergens, especially if serving to a crowd.
Conclusion
If you’re looking for a holiday treat that’s festive, easy, and guaranteed to spark smiles, these Thanksgiving cake pops are absolutely worth a try. They’re customizable, kid-friendly, and (let’s face it) just plain adorable. I love how they turn simple cake into something special, and how every batch feels like a mini celebration.
Don’t be afraid to put your own spin on this recipe—change up the flavors, decorations, or shapes to fit your family’s traditions. Honestly, these cake pops bring people together in the sweetest way, and I hope your holiday table is filled with laughter, love, and lots of cake pops.
Let me know how yours turn out! Drop a comment below if you try a fun variation, share the recipe with friends who need a little holiday cheer, or tag me with your festive creations. Happy Thanksgiving—wishing you full hearts and full plates!
FAQs
Can I use homemade cake instead of boxed mix for these cake pops?
Absolutely! Homemade cake works perfectly and adds a more personal touch. Just be sure it’s moist and cooled completely before crumbling.
How do I prevent cake pops from falling off the sticks?
Dip the stick in melted chocolate before inserting into the cake ball—this helps anchor it. Also, chill the pops well before dipping.
Can I make Thanksgiving cake pops ahead of time?
Yes, you can make the cake balls and freeze them undecorated for up to 2 months. Dip and decorate the day you plan to serve for best results.
What’s the best chocolate for coating cake pops?
I prefer Ghirardelli or Wilton melts for smooth texture. Add a bit of coconut oil for shine and easier dipping.
Are these cake pops allergy-friendly?
They can be! Use gluten-free cake mix and dairy-free frosting or chocolate as needed. Always check ingredient labels for potential allergens.
Pin This Recipe!
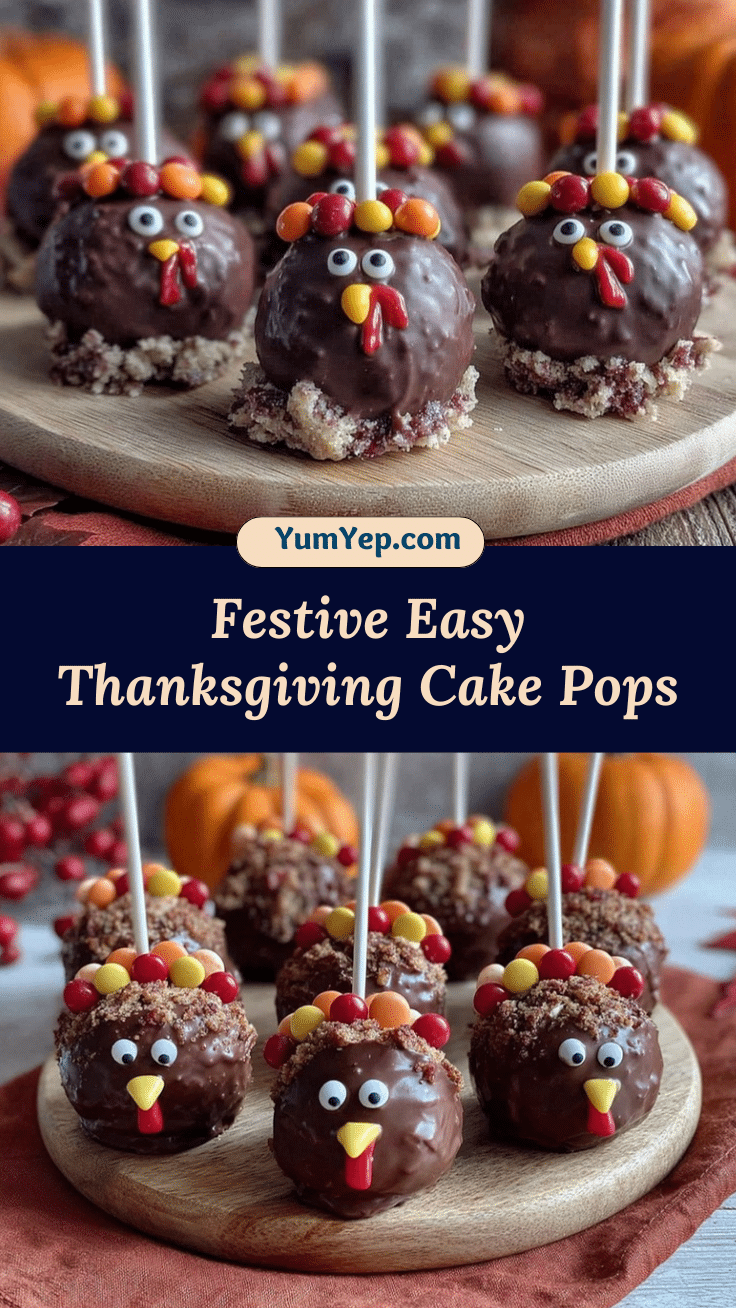
Thanksgiving Cake Pops Recipe: Easy Festive Holiday Treats

These festive Thanksgiving cake pops are a quick, crowd-pleasing treat featuring moist vanilla cake, creamy frosting, and a crunchy chocolate shell. Perfect for holiday gatherings, gifting, or a fun family baking project.
- Prep Time: 20 minutes
- Cook Time: 30 minutes
- Total Time: 1 hour
- Yield: 24 cake pops 1x
- Category: Dessert
- Cuisine: American
Ingredients
- 1 box vanilla or yellow cake mix (or homemade cake)
- Ingredients for cake mix: eggs, oil, and water (as directed on package)
- 1 cup (240g) vanilla frosting (store-bought or homemade)
- 2 cups (340g) semisweet or white chocolate melts
- 1 tablespoon coconut oil or vegetable shortening
- Assorted Thanksgiving-themed sprinkles (orange, brown, gold)
- Candy corn, mini chocolate chips, or edible eyes (for decorating)
- Colored gel icing (optional, for drawing leaves or turkey faces)
- 24 cake pop sticks
Instructions
- Preheat oven to 350°F (175°C). Prepare cake mix according to package instructions, using eggs, oil, and water. Pour batter into a greased 9×13-inch pan and bake for 25-30 minutes, until a toothpick comes out clean. Cool completely.
- Break cooled cake into chunks and crumble into fine crumbs in a large mixing bowl.
- Add 1 cup vanilla frosting to cake crumbs, starting with half and adding more as needed. Mix until the mixture holds together but is not wet or sticky.
- Scoop tablespoon-sized portions and roll into 1-inch balls. Place on a parchment-lined baking sheet and chill in the fridge for at least 1 hour, or 30 minutes in the freezer.
- Melt chocolate melts and coconut oil in a microwave-safe bowl in 30-second bursts, stirring until smooth. Thin with extra oil if needed.
- Dip the tip of each cake pop stick into melted chocolate, then insert halfway into each chilled cake ball. Let set for a few minutes.
- Dip each cake pop into melted chocolate, turning to coat completely. Tap off excess gently. Immediately add sprinkles, candy corn, or other decorations before the coating sets. Stand pops upright in a cake pop stand or improvised holder.
- Refrigerate finished pops for 30 minutes, until chocolate is firm and decorations are set.
- Serve on a platter, in treat bags, or display in a festive vase.
Notes
For best results, use a moist cake and thick frosting. Chill cake balls well before dipping to prevent them from falling off sticks. If chocolate coating cracks, let cake balls sit out a few minutes before dipping. Use oil-based food coloring to tint chocolate. Pops can be made gluten-free or dairy-free with appropriate ingredient swaps.
Nutrition
- Serving Size: 1 cake pop
- Calories: 120
- Sugar: 10
- Sodium: 80
- Fat: 6
- Saturated Fat: 3
- Carbohydrates: 15
- Protein: 1
Keywords: Thanksgiving, cake pops, holiday dessert, kid-friendly, party treat, festive, easy baking, chocolate, vanilla cake, fall recipes


