“You’re telling me I can make banana pudding ice cream without a fancy machine?” That was my initial thought when I stumbled on this recipe. Honestly, I was skeptical—ice cream usually meant either a bulky ice cream maker or endless stirring and patience. But after a chaotic week juggling work and family life, I just wanted something sweet, creamy, and quick to lift my spirits without any extra hassle.
One late evening, with just a few ripe bananas sitting on the counter and a craving for that nostalgic banana pudding flavor, I gave this no-machine ice cream a shot. The magic was in the simplicity: ripe bananas, creamy custard base, and that unmistakable pudding twist all whipped together and frozen without any special equipment. The texture blew me away—silky smooth, rich, and cool, with just the right banana sweetness and vanilla undertones.
I kept making it again and again over the next week—honestly, it became my little comfort ritual. No more excuses about not having an ice cream maker. This creamy banana pudding ice cream recipe without a machine felt like a little homemade luxury I could whip up anytime. Plus, it’s a dessert that feels familiar and indulgent but made with ingredients I trust and keep on hand.
What really stuck with me was how this recipe captures that old-fashioned banana pudding vibe but in a totally fresh way. It’s like a cozy hug on a spoon, and that’s why I keep coming back to it.
Why You’ll Love This Recipe
After testing this creamy banana pudding ice cream recipe without a machine multiple times, I can say it’s a keeper for so many reasons. It’s not just about convenience—though that’s huge—it’s about delivering that dreamy banana pudding flavor in a way that’s simple yet totally satisfying. Here’s why this recipe has become a favorite in my kitchen:
- Quick & Easy: Ready in under 30 minutes before freezing, making it perfect for busy weeknights or those spontaneous dessert cravings.
- Simple Ingredients: Uses everyday pantry staples and ripe bananas—no need to hunt down specialty items or fancy dairy.
- Perfect for Casual Gatherings: Whether you’re hosting friends or just want a solo treat, this ice cream impresses without the fuss.
- Crowd-Pleaser: The creamy texture combined with the classic banana pudding taste wins over kids and adults alike.
- Unbelievably Delicious: The velvety custard base blends with mashed bananas for a luxuriously smooth bite that feels like comfort food reinvented.
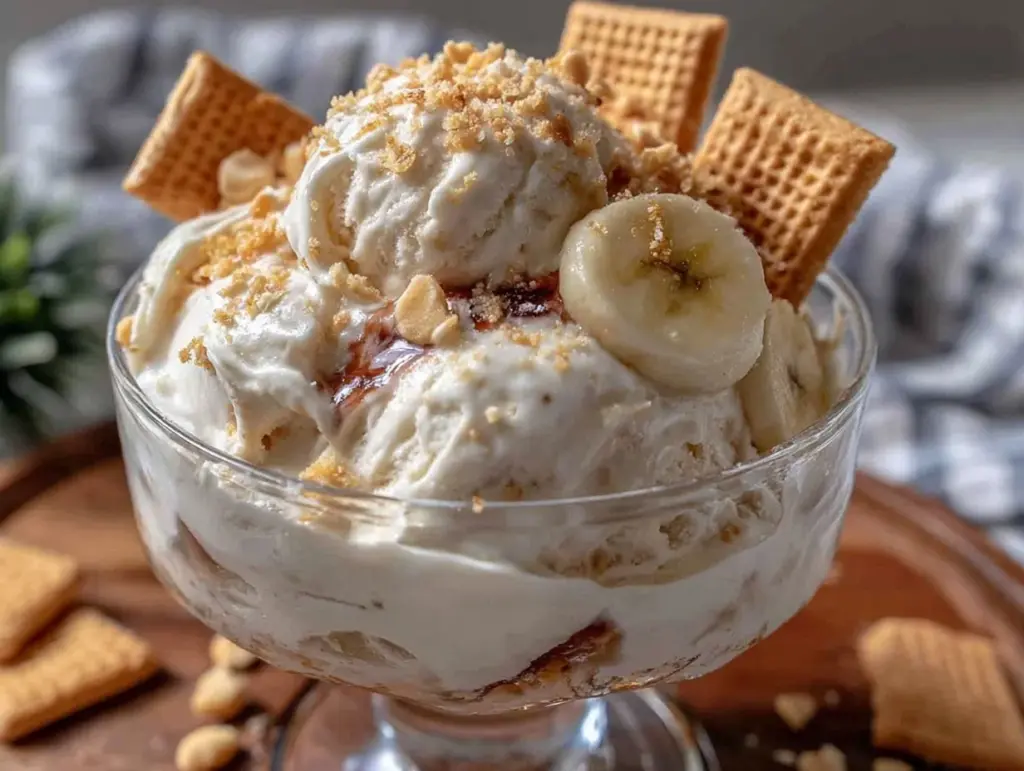
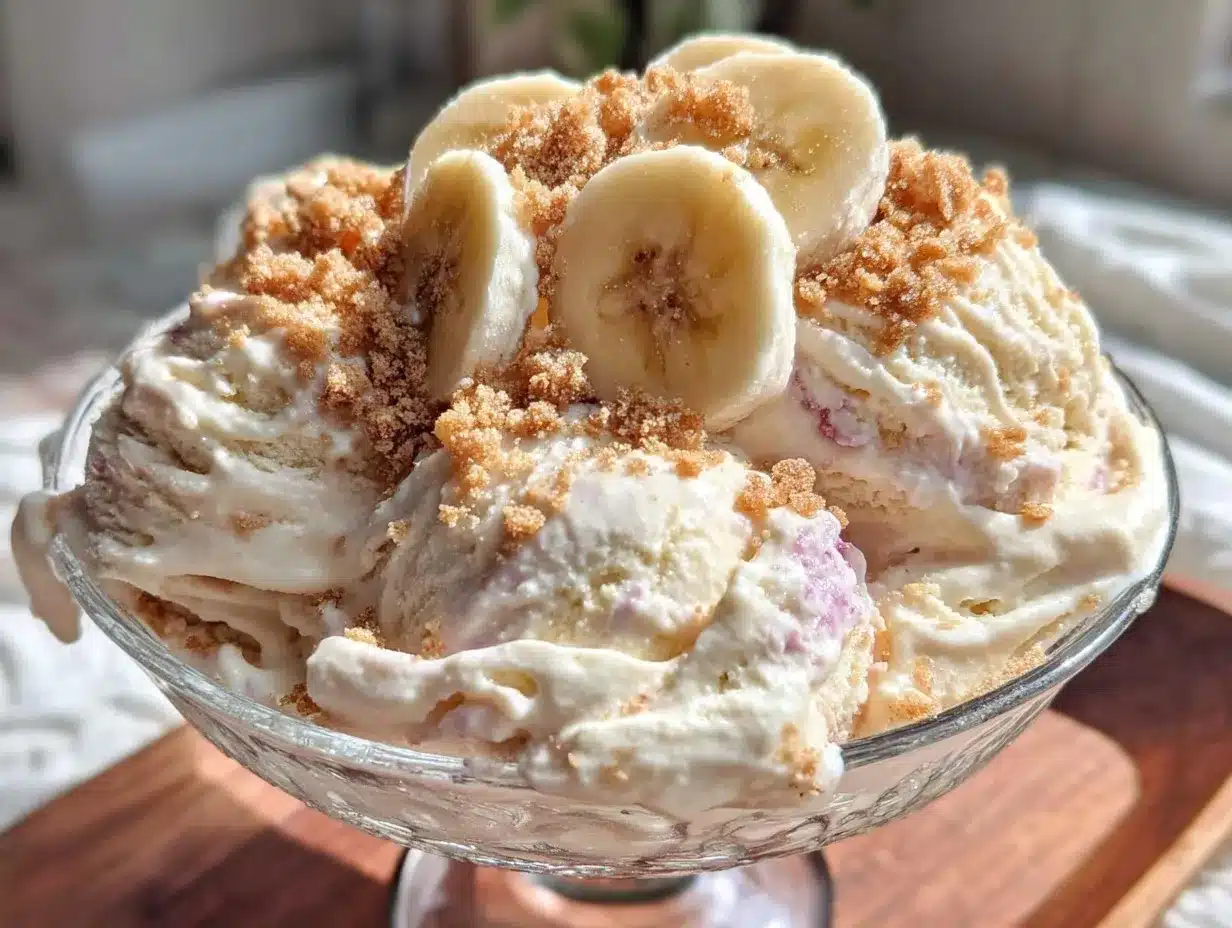
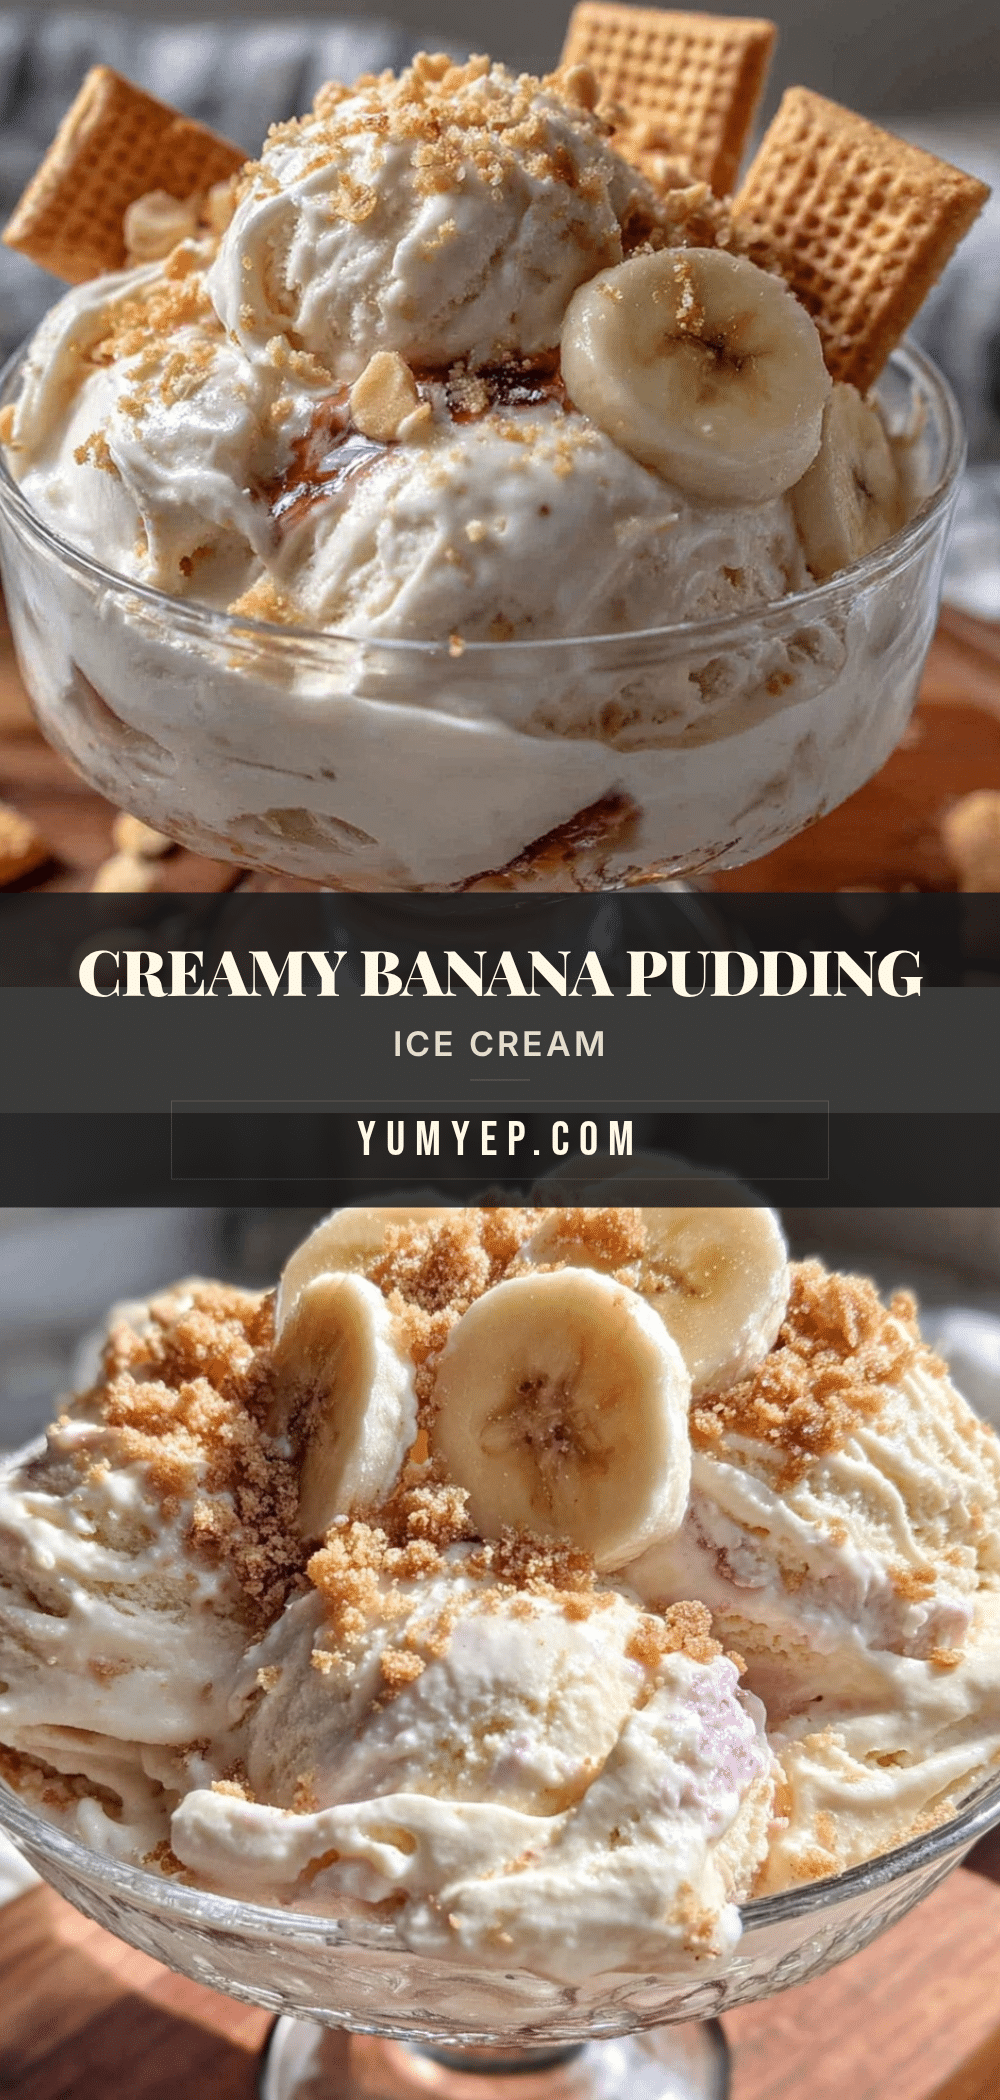
What really sets this apart is the no-machine approach that doesn’t sacrifice texture or flavor. Instead of icy chunks, you get a creamy finish because of the way the bananas and pudding elements come together. Plus, I give it a little twist by folding in crushed vanilla wafers for that iconic crunch—because, honestly, what’s banana pudding without those?
This recipe isn’t just another frozen banana dessert. It’s the kind of treat that makes you pause after the first taste and think, “Wow, I made this at home?” It’s reliable, delicious, and perfect when you want something both nostalgic and fresh.
What Ingredients You Will Need
This creamy banana pudding ice cream recipe without a machine relies on simple, wholesome ingredients that bring out the best banana flavor while keeping the texture smooth and rich. Most of these are pantry staples, and the bananas themselves do a lot of the heavy lifting flavor-wise.
- Ripe Bananas (3 large, mashed) – The riper, the better for sweetness and creaminess.
- Sweetened Condensed Milk (1 can, about 14 oz / 396 g) – Adds smooth sweetness and richness without fuss.
- Heavy Whipping Cream (2 cups / 480 ml) – Whipped to soft peaks to give that creamy, airy texture.
- Vanilla Extract (1 teaspoon) – For that warm, comforting vanilla note.
- Instant Vanilla Pudding Mix (1 package, about 3.4 oz / 96 g) – The secret to that unmistakable banana pudding flavor and thickness.
- Crushed Vanilla Wafers (optional, ½ cup / 60 g) – For adding the classic pudding crunch (I prefer Keebler brand for authentic taste).
- Salt (a pinch) – To balance the sweetness and enhance flavors.
For substitutions, you can swap the heavy cream with coconut cream if you want a dairy-free option—just keep in mind it will slightly change the flavor. If you don’t have instant pudding mix on hand, you can use homemade custard powder or cornstarch-thickened vanilla custard, but the instant mix really gives it that nostalgic banana pudding vibe.
Also, ripe bananas are key here. If yours are still greenish, pop them in a brown paper bag for a day or two to speed up the ripening. The natural sugars in well-ripened bananas are what make this ice cream sing.
Equipment Needed
- Mixing Bowls: A medium bowl for mashing bananas and another large bowl for whipping cream.
- Electric Mixer or Whisk: An electric hand mixer works best for whipping cream to soft peaks. If you’re feeling strong, a whisk will do but takes more elbow grease.
- Spatula: For folding ingredients gently to keep the airiness intact.
- Freezer-Safe Container: A loaf pan or airtight plastic container works well for freezing the ice cream.
- Measuring Cups and Spoons: For precise ingredient amounts.
If you don’t have an electric mixer, no worries! Whipping cream by hand is doable but expect it to take a few extra minutes. I’ve tried both ways, and honestly, the electric mixer saves time and gives a better texture.
For budget-conscious kitchens, consider glass or BPA-free plastic containers for freezing. Just make sure the lid seals tightly to avoid ice crystals forming overnight. I personally like to line the container with parchment paper before adding the ice cream mixture—it makes scooping easier and cleanup faster.
Preparation Method
- Mash the Bananas: In a medium bowl, mash 3 large ripe bananas with a fork until smooth but still slightly chunky. This should take about 3-4 minutes. The mashed bananas provide natural sweetness and that authentic banana pudding texture.
- Mix the Pudding Base: In a large mixing bowl, combine the sweetened condensed milk (1 can, 14 oz / 396 g) with 1 teaspoon vanilla extract and a pinch of salt. Stir until well blended. This mixture forms the creamy, sweet foundation of the ice cream.
- Add Instant Pudding Mix: Sprinkle the entire package of instant vanilla pudding mix (3.4 oz / 96 g) over the condensed milk mixture. Whisk vigorously for about 2 minutes until fully incorporated and slightly thickened. This is what gives the ice cream that luscious banana pudding flavor and body.
- Combine Bananas and Pudding Base: Fold the mashed bananas into the pudding mixture gently but thoroughly. You want the banana flavor to be evenly distributed without deflating the mixture.
- Whip the Cream: Using an electric mixer on medium-high speed, whip 2 cups (480 ml) heavy whipping cream until soft peaks form. This should take about 3-4 minutes. Be careful not to overwhip; you want the cream light and airy, not grainy.
- Fold in Whipped Cream: Add about one-third of the whipped cream to the banana pudding base and gently fold in to lighten the mixture. Then fold in the remaining whipped cream until fully combined and smooth. This step is crucial to keep the ice cream creamy and soft.
- Add Crushed Vanilla Wafers (Optional): For a classic texture, fold in ½ cup (60 g) crushed vanilla wafers. This adds delightful crunch and nostalgia to each bite.
- Transfer and Freeze: Pour the mixture into your freezer-safe container. Smooth the top with a spatula and cover tightly. Freeze for at least 6 hours, preferably overnight, until firm but scoopable.
- Serving Tip: Remove the ice cream from the freezer 5-10 minutes before scooping to soften slightly for easier spooning.
If you notice any icy texture after freezing, a quick stir every hour during the first 3 hours can help keep the ice cream smooth and creamy. I usually skip this step, and it still turns out great, but it’s there if you want to get fancy.
Cooking Tips & Techniques
One of the trickiest parts of homemade ice cream is getting that perfect creamy texture without an ice cream maker. Here’s what I’ve learned to make this recipe foolproof:
- Ripe Bananas Are Non-Negotiable: The riper the bananas, the sweeter and smoother your ice cream will be. Green bananas will result in a bland, chalky finish.
- Whip the Cream Just Right: Soft peaks are your goal. If you overwhip, the cream can turn grainy and curdle, which ruins that silky ice cream mouthfeel.
- Fold Gently: To keep the airiness from the whipped cream, fold ingredients carefully instead of stirring aggressively. This keeps the final texture light and creamy.
- Freeze in a Shallow Container: A shallow, wider pan freezes faster and more evenly, preventing ice crystals from forming.
- Stir During Freezing (Optional): If you want extra smoothness, stir the ice cream gently every hour for the first 3 hours of freezing. It’s a little extra work but helps avoid iciness.
My first attempt was a bit icy because I skipped the folding steps and whipped the cream too much. Since then, I’ve learned these small details make all the difference. It’s a recipe that rewards patience but is forgiving enough for busy cooks.
Variations & Adaptations
If you want to tweak this creamy banana pudding ice cream recipe without a machine, here are some ideas to mix things up:
- Dairy-Free Version: Swap heavy cream for coconut cream and use a dairy-free vanilla pudding mix. The flavor will shift slightly but still creamy and delicious.
- Chocolate Banana Pudding Ice Cream: Add ¼ cup (30 g) cocoa powder to the pudding base and mix in chocolate chips for a dessert twist that pairs perfectly with the banana flavor.
- Peanut Butter Swirl: Gently fold in ½ cup (125 g) creamy peanut butter after mixing the pudding base for a rich, nutty layer that complements the banana beautifully.
- Berry Banana Blend: Add ½ cup (75 g) mashed fresh or frozen berries (like strawberries or blueberries) to the banana mixture for a fruity pop and vibrant color.
- Nut-Free Crumble: Instead of vanilla wafers, try crushed graham crackers or gluten-free cookies if you need a nut-free or gluten-free version.
Personally, I once added a handful of crispy candied pecans into the mix for extra crunch and warmth. That combo was a game-changer for a cozy winter dessert.
Serving & Storage Suggestions
This banana pudding ice cream is best served slightly softened—think firm but scoopable. Pull it out of the freezer 5 to 10 minutes before serving to let it mellow. The creamy texture is perfect in bowls or waffle cones for a nostalgic treat.
For a fun presentation, try layering scoops with extra crushed vanilla wafers or drizzle with caramel sauce. It pairs wonderfully with a hot cup of coffee or even alongside a warm dessert like cinnamon roll casserole for a sweet brunch spread.
Store leftover ice cream in an airtight container in the freezer for up to two weeks. To avoid freezer burn or ice crystals, press a piece of parchment paper directly on the surface before sealing. When reheating or softening, avoid microwaving—just let it sit at room temperature for a bit instead.
Over time, the flavors meld even more, and the pudding taste deepens. If you want to freshen it up after storage, a quick fold-in of some fresh mashed banana before serving works wonders.
Nutritional Information & Benefits
This creamy banana pudding ice cream without a machine offers a satisfying treat with a bit of nutritional goodness thanks to its key ingredients. A typical serving (about half a cup or 125 ml) roughly contains:
| Nutrient | Amount |
|---|---|
| Calories | 200-250 kcal |
| Fat | 10-15 g (mostly from cream) |
| Sugar | 20-25 g (natural and added sugars) |
| Protein | 3-4 g |
Bananas bring potassium and fiber, while the pudding mix adds calcium. This recipe isn’t low-calorie, but it’s made from simple ingredients without artificial additives or preservatives. For those watching carbs or dairy, swapping ingredients like coconut cream or sugar-free pudding mix can help tailor it to dietary needs.
From a wellness perspective, I appreciate that this recipe offers a way to enjoy dessert mindfully—homemade, with recognizable ingredients and no mystery additives. It’s a sweet treat that feels honest and satisfying.
Conclusion
This creamy banana pudding ice cream recipe without a machine is proof that you don’t need fancy gadgets to make homemade frozen desserts that taste like a dream. It’s simple, reliable, and bursting with the flavors of classic banana pudding in a new, creamy form that everyone can enjoy.
Feel free to swap ingredients and add your favorite mix-ins to make it your own. Whether you’re serving it up for a casual family night or bringing a homemade touch to a gathering, this ice cream will bring smiles without the usual fuss.
From my kitchen to yours, I hope this recipe becomes one of those go-to comfort treats that you make and remake, just like I have. If you try it, I’d love to hear how you customize or enjoy it—drop a comment or share your experience!
FAQs About Creamy Banana Pudding Ice Cream Made Without a Machine
Can I use frozen bananas for this ice cream?
Yes! Frozen bananas work well and can even help with the creamy texture. Just thaw them slightly and mash before mixing.
How long does it take to freeze the ice cream properly?
Freeze for at least 6 hours or overnight for the best scoopable consistency.
Can I make this recipe vegan?
Swap heavy cream for coconut cream and use a dairy-free vanilla pudding mix. Make sure your sweetened condensed milk is vegan or use a substitute like sweetened coconut condensed milk.
Why is the pudding mix important in this recipe?
The instant vanilla pudding mix adds thickness and that classic banana pudding flavor, giving the ice cream a rich, custardy texture without cooking.
How do I prevent ice crystals from forming?
Fold whipped cream gently, freeze in a shallow container, and optionally stir the ice cream every hour during the first few hours of freezing to keep it smooth.
Pin This Recipe!
Creamy Banana Pudding Ice Cream Recipe Without Machine Easy Homemade Dessert

A quick and easy homemade banana pudding ice cream recipe that requires no ice cream machine, delivering a creamy, nostalgic dessert with simple ingredients.
- Prep Time: 15 minutes
- Cook Time: 0 minutes
- Total Time: 6 hours 15 minutes
- Yield: 6 servings 1x
- Category: Dessert
- Cuisine: American
Ingredients
- 3 large ripe bananas, mashed
- 1 can (14 oz / 396 g) sweetened condensed milk
- 2 cups (480 ml) heavy whipping cream
- 1 teaspoon vanilla extract
- 1 package (3.4 oz / 96 g) instant vanilla pudding mix
- ½ cup (60 g) crushed vanilla wafers (optional)
- Pinch of salt
Instructions
- Mash 3 large ripe bananas in a medium bowl until smooth but slightly chunky (3-4 minutes).
- In a large mixing bowl, combine sweetened condensed milk, vanilla extract, and a pinch of salt; stir until blended.
- Sprinkle instant vanilla pudding mix over the condensed milk mixture and whisk vigorously for about 2 minutes until thickened.
- Fold mashed bananas gently into the pudding mixture until evenly distributed.
- Whip 2 cups heavy whipping cream with an electric mixer on medium-high speed until soft peaks form (3-4 minutes).
- Fold one-third of the whipped cream into the banana pudding base to lighten it, then fold in the remaining whipped cream until smooth.
- Optionally, fold in ½ cup crushed vanilla wafers for added crunch.
- Transfer mixture to a freezer-safe container, smooth the top, cover tightly, and freeze for at least 6 hours or overnight until firm but scoopable.
- Remove from freezer 5-10 minutes before serving to soften slightly.
Notes
Use ripe bananas for best sweetness and creaminess. Whip cream to soft peaks to avoid grainy texture. Fold ingredients gently to keep airiness. Freeze in a shallow container for even freezing. Optional stirring during freezing can improve smoothness.
Nutrition
- Serving Size: About ½ cup (125 ml)
- Calories: 225
- Sugar: 22
- Sodium: 90
- Fat: 12
- Saturated Fat: 7
- Carbohydrates: 24
- Fiber: 2
- Protein: 4
Keywords: banana pudding ice cream, no machine ice cream, homemade ice cream, easy banana dessert, creamy banana pudding, no churn ice cream


