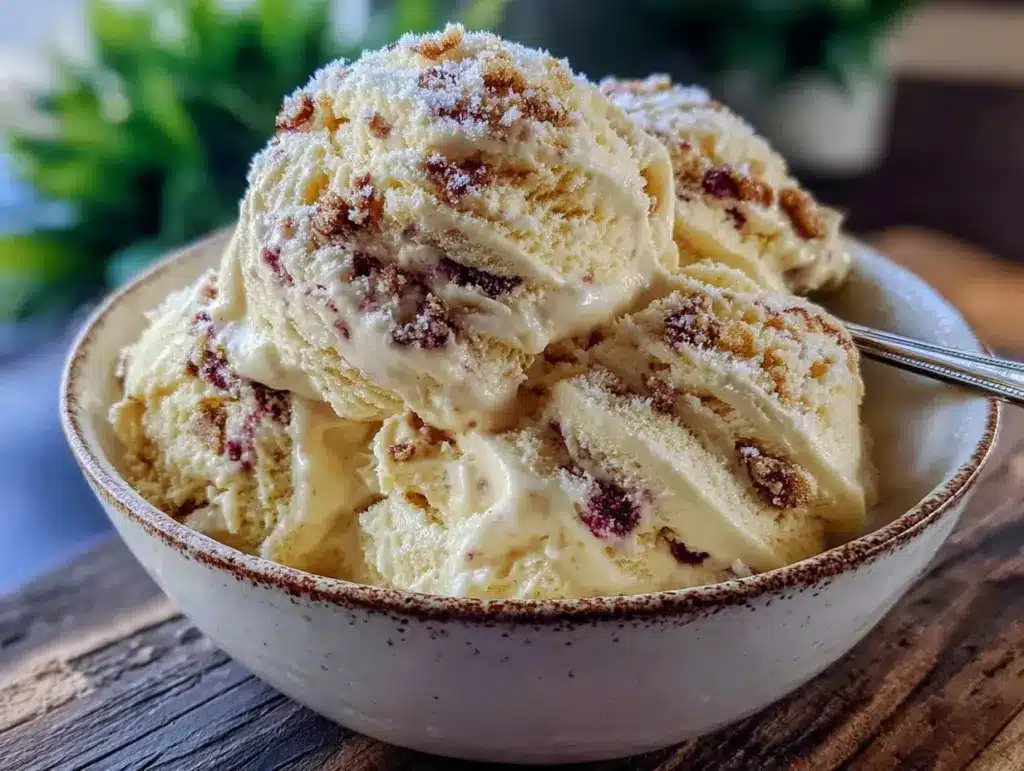
“You’re kidding, right? Only three ingredients?” my friend said skeptically the first time I mentioned this easy no-churn vanilla ice cream recipe. Honestly, I get it. Ice cream usually means hauling out the ice cream maker, babysitting it for hours, and crossing fingers it doesn’t turn into an icy mess. But this? It’s different. It started on a sweltering afternoon when my freezer was too full of leftovers, and I didn’t want to fuss with fancy equipment. I just whipped up some heavy cream, sweetened condensed milk, and vanilla extract, popped it in the freezer, and waited. The result? Creamy, dreamy vanilla ice cream that tasted like it came from a scoop shop, only better because it was mine.
That first batch was a revelation—smooth texture, rich flavor, and zero churning involved. I was honestly surprised how such a simple mix could feel like a treat you’d pay a pretty penny for. Since then, I’ve made it a dozen times (okay, maybe more), tweaking the vanilla just slightly, sometimes adding a pinch of salt to deepen the flavor. It’s become my go-to for those impromptu summer cravings or when I want to impress guests without sweating the small stuff. And the best part? You can trust this recipe because it’s been tested over and over—in my kitchen, my friends’ kitchens, and even at a last-minute backyard party where I was expected to bring dessert but forgot to buy any.
Now, the smell of vanilla and cream chilling in the freezer takes me right back to that quiet moment of realization: sometimes the simplest recipes make the biggest impact. This easy no-churn vanilla ice cream isn’t just a dessert; it’s a little scoop of comfort that’s both effortless and unforgettable.
Why You’ll Love This Recipe
After trying countless homemade ice cream recipes, I can say this easy no-churn vanilla ice cream stands out for several reasons. Here’s why it’s become a staple in my kitchen and why it might just become yours, too:
- Quick & Easy: No fancy machines, no complicated steps—just whip, mix, and freeze. Ready in under 4 hours, making it perfect for those last-minute summer cravings or casual get-togethers.
- Simple Ingredients: Uses only three pantry-friendly ingredients: heavy cream, sweetened condensed milk, and vanilla extract. No weird additives or stabilizers, just real, straightforward stuff.
- Perfect for Any Occasion: Whether you’re cooling off after a long day or hosting a casual BBQ, this recipe fits right in. It’s also fantastic as a base for toppings or mix-ins if you feel adventurous.
- Crowd-Pleaser: Kids, adults, picky eaters—they all love the creamy texture and classic vanilla flavor. It’s a safe bet to please everyone without stress.
- Unbelievably Delicious: The richness of the cream combined with the smooth sweetness of condensed milk creates a texture that’s silky, not icy, with the perfect balance of flavor.
What sets this recipe apart is how it manages to capture that homemade charm without the hassle. The whipped cream folded into the condensed milk creates airiness that mimics the churning process. Plus, using high-quality vanilla extract (I swear by Nielsen-Massey) makes a noticeable difference in depth. It’s the kind of dessert that makes you pause, close your eyes, and savor each bite because it’s just that good.
This recipe isn’t just good—it’s the kind of classic comfort food that feels like a little celebration in a bowl. And if you’re looking for other simple treats that bring joy without fuss, try pairing it with some snowball cookies or a slice of cranberry orange bread for an easy, crowd-pleasing dessert spread.
What Ingredients You Will Need
This recipe uses simple, wholesome ingredients to deliver bold flavor and satisfying texture without any fuss. You probably have most of these in your kitchen right now, making it perfect for spontaneous dessert cravings. Here’s what you’ll need:
- Heavy Cream (1 ½ cups / 360 ml): Cold and fresh. This is the star for creating that fluffy, creamy texture. I usually grab Organic Valley or a similar trusted brand for best flavor.
- Sweetened Condensed Milk (1 can, 14 oz / 396 g): The magic ingredient that adds sweetness and richness without granulated sugar. Look for brands without added preservatives if you can.
- Pure Vanilla Extract (1 tablespoon): Use a high-quality vanilla extract like Nielsen-Massey or McCormick for a rich, authentic flavor. Avoid imitation vanilla if possible—it really makes a difference here.
Optional additions to keep handy:
- A pinch of salt: enhances the vanilla flavor and balances the sweetness.
- Mix-ins (chocolate chips, crushed cookies, fruit): fold in after mixing for your own twist.
For substitutions:
- If you want a dairy-free version, try canned coconut milk (full fat) and a dairy-free whipped topping instead of heavy cream.
- You can swap vanilla extract with vanilla bean paste for a speckled, more intense vanilla experience.
Equipment Needed
- Mixing Bowl: A large bowl to whip the heavy cream comfortably. Glass or metal bowls work best to keep the cream cold.
- Electric Mixer or Stand Mixer: Essential for whipping the heavy cream to soft peaks. You can use a hand whisk, but it’s more labor-intensive.
- Spatula: A silicone spatula is perfect for folding the condensed milk and vanilla into the whipped cream gently, preserving the airy texture.
- Freezer-Safe Container: A loaf pan or airtight plastic container works well for freezing the ice cream evenly.
- Measuring Cups and Spoons: For precise ingredient amounts, especially important with vanilla extract.
If you don’t have an electric mixer, don’t sweat it—just give yourself extra time and muscle power to whisk the cream until it holds soft peaks. Also, chilling your mixing bowl in the freezer for 10-15 minutes before whipping can help speed things up and yield better volume.
Preparation Method

- Chill Your Tools: Place your mixing bowl and beaters in the freezer for about 10-15 minutes. Cold equipment helps whip the cream faster and with better volume.
- Whip the Heavy Cream: Pour 1 ½ cups (360 ml) of cold heavy cream into the chilled bowl. Using an electric mixer on medium-high speed, whip the cream until soft peaks form. This usually takes about 3-5 minutes. You want the cream to hold shape but still be smooth—not grainy or overwhipped.
- Combine Sweetened Condensed Milk and Vanilla: In a separate bowl, mix 1 can (14 oz / 396 g) of sweetened condensed milk with 1 tablespoon of pure vanilla extract. If you like, add a pinch of salt here to balance sweetness.
- Fold Mixture Into Whipped Cream: Gently fold the condensed milk mixture into the whipped cream using a spatula. Do this slowly and carefully to keep the airiness intact. The batter should look smooth and glossy without streaks.
- Transfer to Freezer-Safe Container: Pour the mixture into a loaf pan or airtight container. Smooth the top with a spatula to create an even surface.
- Freeze: Cover the container with a lid or plastic wrap. Freeze for at least 4 hours, preferably overnight, until firm. No stirring or churning required—just patience.
- Serve: Remove from freezer about 5 minutes before scooping to soften slightly for easier serving.
Tips: If the ice cream freezes too hard, letting it sit at room temperature for 5 to 10 minutes before scooping helps tremendously. Also, stirring in mix-ins like crushed cookies or chocolate chips after folding in the condensed milk adds a fun twist without losing creaminess.
Cooking Tips & Techniques
Making no-churn ice cream sounds foolproof, but a few little things can make a big difference between a creamy scoop and a freezer brick.
- Whip to Soft Peaks: Don’t stop whipping too early or go all the way to stiff peaks. Soft peaks keep the ice cream light and creamy. Overwhipping can cause the cream to turn grainy or separate.
- Use Cold Ingredients and Equipment: Keep everything chilled so the cream whips up properly and freezes evenly. I learned the hard way that room temperature cream just won’t fluff like it should.
- Fold Gently: When mixing the sweetened condensed milk and vanilla into the whipped cream, be patient and fold carefully. Stirring vigorously deflates the mixture and leads to denser ice cream.
- Freeze Properly: Use a shallow container to speed freezing and avoid icy texture. Cover tightly to prevent freezer burn or ice crystals.
- Don’t Rush Freezing Time: Resist the urge to scoop too early. The flavor and texture improve as it fully sets.
One time, I was so excited I tried to speed things up by stirring the ice cream halfway through freezing—big mistake. It turned grainy and icy. Now I just let it be and trust the process. Also, multitasking by prepping toppings or setting the table while the ice cream freezes makes the wait feel shorter.
Variations & Adaptations
While this easy no-churn vanilla ice cream is delicious on its own, it’s also a great base for a bunch of tasty twists. Here are some ideas I’ve tried and loved:
- Chocolate Swirl: Fold in ½ cup (120 ml) of melted, cooled dark chocolate before freezing for a delicious marbled effect.
- Berry Boost: Add 1 cup (150 g) of crushed fresh or frozen berries like strawberries or blueberries for a fruity punch. Great for summer picnics!
- Nutty Crunch: Stir in ½ cup (60 g) of toasted pecans or almonds (like the crunchy goodness in these crispy candied pecans) for texture contrast.
For a vegan/dairy-free option, swap heavy cream with full-fat canned coconut milk whipped (chill the can overnight first) and use vegan sweetened condensed milk alternatives. Vanilla bean paste also makes a lovely upgrade if you want to skip extract.
I’ve made this recipe in a loaf pan, but it also works beautifully in silicone molds or popsicle molds if you want frozen treats on a stick. The flexibility makes it perfect for adapting to whatever you have on hand or your flavor mood that day.
Serving & Storage Suggestions
This no-churn vanilla ice cream is best served slightly softened—about 5 minutes out of the freezer. It scoops easily and melts in the mouth with a smooth, velvety feel. I love serving it with fresh fruit or alongside a warm dessert like cinnamon roll casserole for a cozy combo.
Store leftovers in an airtight container in the freezer. It keeps well for up to 2 weeks without losing texture or flavor, though I rarely have leftovers!
For reheating or softening, place the container on the counter for 5-10 minutes before scooping. Avoid microwaving as it melts unevenly. Flavors actually deepen a bit after a day or two in the freezer, making it even more satisfying.
Nutritional Information & Benefits
This easy no-churn vanilla ice cream is a treat with a simple ingredient list. Here’s an approximate nutritional snapshot per ½ cup (125 ml) serving:
| Calories | 250 |
|---|---|
| Fat | 16 g |
| Sugar | 22 g |
| Protein | 3 g |
While it’s an indulgence, the recipe contains no artificial ingredients or preservatives. Heavy cream provides fat-soluble vitamins like A and D, and the pure vanilla extract adds antioxidants. For those watching carbs or sugar, you can experiment with sugar-free condensed milk alternatives, though texture may vary.
As a homemade recipe, it gives you control over ingredients, making it easier to avoid additives found in store-bought ice creams. Plus, it’s gluten-free by default, which is great for many dietary needs.
Conclusion
This easy no-churn vanilla ice cream recipe has become one of my favorite ways to enjoy homemade ice cream without any fuss. The simple list of three ingredients comes together effortlessly to create a creamy, dreamy dessert that feels special and satisfying every time. Whether you’re cooling off after a long day or need a quick treat to impress guests, this recipe is a reliable, delicious solution.
Don’t hesitate to make it your own by adding your favorite mix-ins or pairing it with other desserts. I love how versatile and forgiving it is—it really invites experimentation and personalization.
Give it a try, and if you do, I’d love to hear how you customize your batch or what your favorite mix-ins are. Sharing those little changes is what keeps the kitchen fun and inspiring. Here’s to many sweet, easy moments ahead!
Frequently Asked Questions (FAQs)
Can I use low-fat cream or milk instead of heavy cream?
Heavy cream is essential for the creamy texture and whipping ability. Using low-fat milk won’t whip properly and will result in icy, dense ice cream.
How long does the ice cream keep in the freezer?
Stored in an airtight container, it stays fresh for up to 2 weeks. After that, texture and flavor may start to decline.
Can I add mix-ins like chocolate chips or nuts?
Absolutely! Fold in your favorite add-ins after mixing the condensed milk and vanilla but before freezing.
Is this recipe suitable for vegans?
Not as is, but you can substitute coconut cream for heavy cream and use a vegan sweetened condensed milk to make a dairy-free version.
Do I need to stir the ice cream during freezing?
No stirring or churning is needed. The whipped cream creates air pockets that keep the texture smooth as it freezes.
Pin This Recipe!
Easy No-Churn Vanilla Ice Cream Recipe with 3 Simple Ingredients Perfect for Summer

A creamy, dreamy no-churn vanilla ice cream made with just heavy cream, sweetened condensed milk, and vanilla extract. Perfect for quick, fuss-free summer desserts without any special equipment.
- Prep Time: 15 minutes
- Cook Time: 4 hours
- Total Time: 4 hours 15 minutes
- Yield: 6 servings 1x
- Category: Dessert
- Cuisine: American
Ingredients
- 1 ½ cups (360 ml) cold heavy cream
- 1 can (14 oz / 396 g) sweetened condensed milk
- 1 tablespoon pure vanilla extract
- Pinch of salt (optional)
- Mix-ins like chocolate chips, crushed cookies, or fruit (optional)
Instructions
- Chill your mixing bowl and beaters in the freezer for 10-15 minutes.
- Pour 1 ½ cups (360 ml) of cold heavy cream into the chilled bowl and whip with an electric mixer on medium-high speed until soft peaks form, about 3-5 minutes.
- In a separate bowl, mix 1 can (14 oz / 396 g) sweetened condensed milk with 1 tablespoon pure vanilla extract. Add a pinch of salt if desired.
- Gently fold the condensed milk mixture into the whipped cream using a spatula, preserving the airiness until smooth and glossy.
- Pour the mixture into a freezer-safe container and smooth the top.
- Cover and freeze for at least 4 hours or preferably overnight until firm.
- Remove from freezer about 5 minutes before serving to soften slightly.
Notes
Use cold ingredients and chilled equipment for best whipping results. Do not overwhip the cream; soft peaks are ideal. Fold gently to keep airiness. Freeze in a shallow container to speed freezing and avoid icy texture. Let ice cream soften 5-10 minutes before scooping. Mix-ins can be added after folding in condensed milk.
Nutrition
- Serving Size: ½ cup (125 ml)
- Calories: 250
- Sugar: 22
- Fat: 16
- Protein: 3
Keywords: no-churn ice cream, vanilla ice cream, easy ice cream recipe, summer dessert, no ice cream maker, homemade ice cream


