“Are you sure that’s rice and not glue?” my partner joked one evening as I nervously lifted the lid of the Instant Pot. I had just followed the directions on an online recipe, hoping for fluffy rice but expecting a sticky mess. But instead, I found perfectly separated grains, tender yet firm, steaming away like a little cloud of comfort. Honestly, I wasn’t expecting such a win from something so simple—especially since I’d been burned by soggy rice batches before.
This perfect Instant Pot rice recipe came from a bit of trial, error, and stubborn tweaking over several weeks. I was juggling back-to-back dinners and wanted a no-fuss, reliable side that wouldn’t require babysitting the stove or endless rinsing. I remember one late night, with only leftover chicken and veggies in the fridge, I threw together a quick meal and used this rice method—no measuring cups in sight—and it still turned out amazing. That quiet little victory stuck with me.
What really sold me was how this approach managed to keep the grains fluffy and distinct without turning mushy or clumping together. It’s a game-changer for me because I’m not always in the mood for fancy sides but crave that satisfying base you can build everything on. If you’ve struggled with rice disasters or just want a foolproof way to get it right every single time, this recipe might just become your new kitchen MVP.
At the end of the day, it’s not about complicated ingredients or special tricks—just a few simple steps and a bit of love from your Instant Pot. And honestly, there’s something quietly satisfying about perfect rice that makes even the simplest meal feel a little more special.
Why You’ll Love This Recipe
After countless tests and tweaks, this recipe has earned its spot as my go-to for making rice in the Instant Pot. Here’s why it’s worth keeping in your back pocket:
- Quick & Easy: Takes about 20 minutes from start to finish, freeing you up for other meal prep or just relaxing after work.
- Simple Ingredients: Only rice, water, and a pinch of salt—no specialty items or complicated steps.
- Perfect for Any Meal: Whether you’re serving it with butter chicken or a quick stir-fry, it blends effortlessly.
- Crowd-Pleaser: I’ve made this for potlucks and family dinners; the feedback is always the same—no mush, just fluffy goodness.
- Consistent Results: The pressure cooking method locks in moisture just right, making it nearly impossible to mess up once you get the hang of it.
What really sets this apart is the balance between moisture and cooking time. Many recipes either undercook or overdo the rice, but this one nails the texture every time. Plus, the method is forgiving enough that you don’t need to rinse the rice obsessively, which I appreciate on busy days.
Honestly, it feels like a little kitchen secret that lets you enjoy perfect rice without fuss, and it’s become a reliable side that always makes me feel like I’ve got dinner under control—even on chaotic evenings.
What Ingredients You Will Need
This recipe relies on a handful of straightforward ingredients that come together to produce tender, fluffy rice without fuss. Most of these are pantry staples, and you might already have everything on hand.
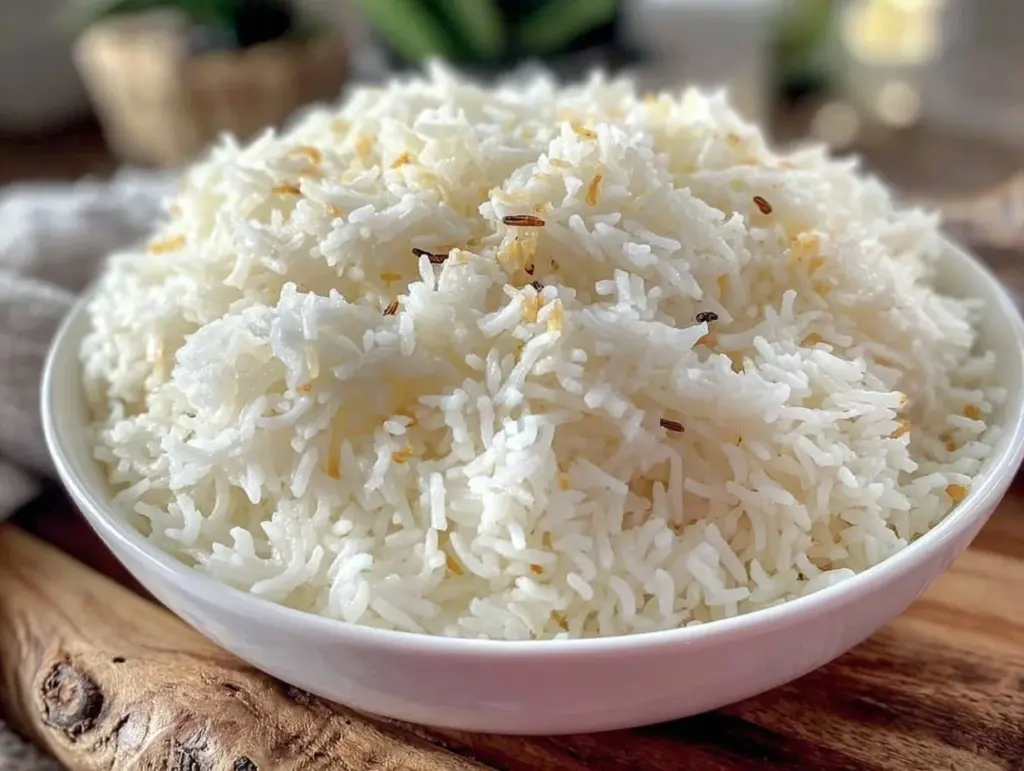
- Long-grain white rice (1 cup / 190 grams) – This type works best for fluffiness; I usually pick a trusted brand like Lundberg or Mahatma.
- Water (1 ¼ cups / 300 ml) – The precise amount is key to avoid mushiness or dryness.
- Salt (½ teaspoon) – Enhances flavor; kosher salt or sea salt works well.
- Olive oil or melted butter (1 teaspoon) – Optional, adds a subtle richness and helps keep grains separate.
If you want to switch things up:
- Try basmati or jasmine rice for a fragrant twist—just adjust water slightly to 1 cup (240 ml) for basmati.
- For a healthier option, substitute with brown rice but note it requires a longer cooking time (about 22 minutes high pressure and 15 minutes natural release).
- If you’re gluten-free or avoiding grains, quinoa can be cooked with similar water-to-grain ratio in the Instant Pot.
Using quality rice and measuring water carefully are my top tips here. I’ve learned that the right ratio makes all the difference—too much water and it gets sticky, too little and it’s dry or undercooked. Also, I like tossing in a teaspoon of butter sometimes to give the rice a silky finish.
Equipment Needed
Cooking rice in the Instant Pot requires minimal equipment but having the right tools makes the process smoother:
- Instant Pot or any electric pressure cooker: The star of the show. Mine’s a 6-quart Duo model, but similar brands work fine.
- Measuring cup: For accurate rice and water measurement. I use a standard 1-cup (240 ml) measuring cup.
- Fine mesh strainer: Handy for rinsing rice if you choose to do so, though it’s optional here.
- Wooden spoon or silicone spatula: To fluff rice after cooking without breaking grains.
If you don’t have an Instant Pot, a stovetop rice cooker or pot with a tight-fitting lid will work, but timings and water ratios differ. Trust me, I’ve tested stovetop rice plenty, and the Instant Pot really takes the guesswork out of it.
For maintenance, keep the sealing ring clean and replace it every 12-18 months for best pressure performance. A cheap silicone spatula is perfect to avoid scratching the pot’s inner surface.
Preparation Method
- Measure and rinse the rice (optional): Measure 1 cup (190 grams) of long-grain white rice and rinse under cold water until it runs mostly clear. This step removes excess starch but can be skipped if you’re short on time.
- Add rice, water, salt, and oil/butter to the Instant Pot: Pour the rinsed rice into the Instant Pot insert. Add 1 ¼ cups (300 ml) of water, ½ teaspoon salt, and 1 teaspoon olive oil or melted butter. Gently stir to combine.
- Seal and set cooking time: Secure the lid and set the valve to sealing. Select the “Pressure Cook” or “Manual” mode on high pressure and set the timer for 4 minutes.
- Natural pressure release: When cooking finishes, let the pressure release naturally for 10 minutes. This step helps the rice finish steaming and prevents it from turning mushy.
- Fluff and serve: Carefully open the lid and use a fork or silicone spatula to fluff the rice gently. The grains should be tender, separate, and perfectly cooked. Serve immediately or keep warm on the “Keep Warm” setting for up to 30 minutes.
Pro tip: Avoid stirring the rice before cooking; it can cause uneven cooking or mushiness. Also, don’t skip the natural release—rushing this step often leads to sticky rice.
Timing is key with the Instant Pot. If you find the rice too firm, increase water by a tablespoon next time. Too soft? Reduce water slightly. After a couple of tries, you’ll have it dialed in perfectly.
Cooking Tips & Techniques
Getting perfectly fluffy rice in the Instant Pot isn’t magic—it’s about understanding a few simple principles:
- Rice-to-water ratio matters: Too much water turns rice mushy; too little leaves it undercooked. Stick to 1 cup rice to 1 ¼ cups water for long-grain white rice.
- Rinsing rice: Helps remove excess starch for fluffier texture but isn’t absolutely necessary if you’re in a hurry.
- Don’t open the lid early: Let the pressure release naturally for at least 10 minutes to allow rice to finish steaming gently.
- Use oil or butter: Just a teaspoon keeps grains from sticking and adds subtle flavor.
- Fluff with a fork: Avoid mashing the rice; a gentle fluff separates grains nicely.
I’ve made the mistake of rushing the pressure release and ended up with sticky, clumpy rice more than once. Patience is key here. Also, if you’re using different rice types, adjust water and cooking time accordingly—brown rice needs more time, jasmine rice a slightly different ratio.
Multitasking tip: While rice cooks, you can prep your main dish or toss a quick salad, like the fresh apple pecan salad I love for balancing richer meals.
Variations & Adaptations
Once you have the base perfected, this method adapts well to different rice types and flavor profiles:
- Basmati or Jasmine rice: Use 1 cup rice to 1 cup water, cook for 4 minutes high pressure with 10 minutes natural release. Perfect for Indian or Thai dishes.
- Brown rice: Increase water to 1 ½ cups and cook for 22 minutes high pressure, followed by a 15-minute natural release. Great for a nuttier, chewier texture.
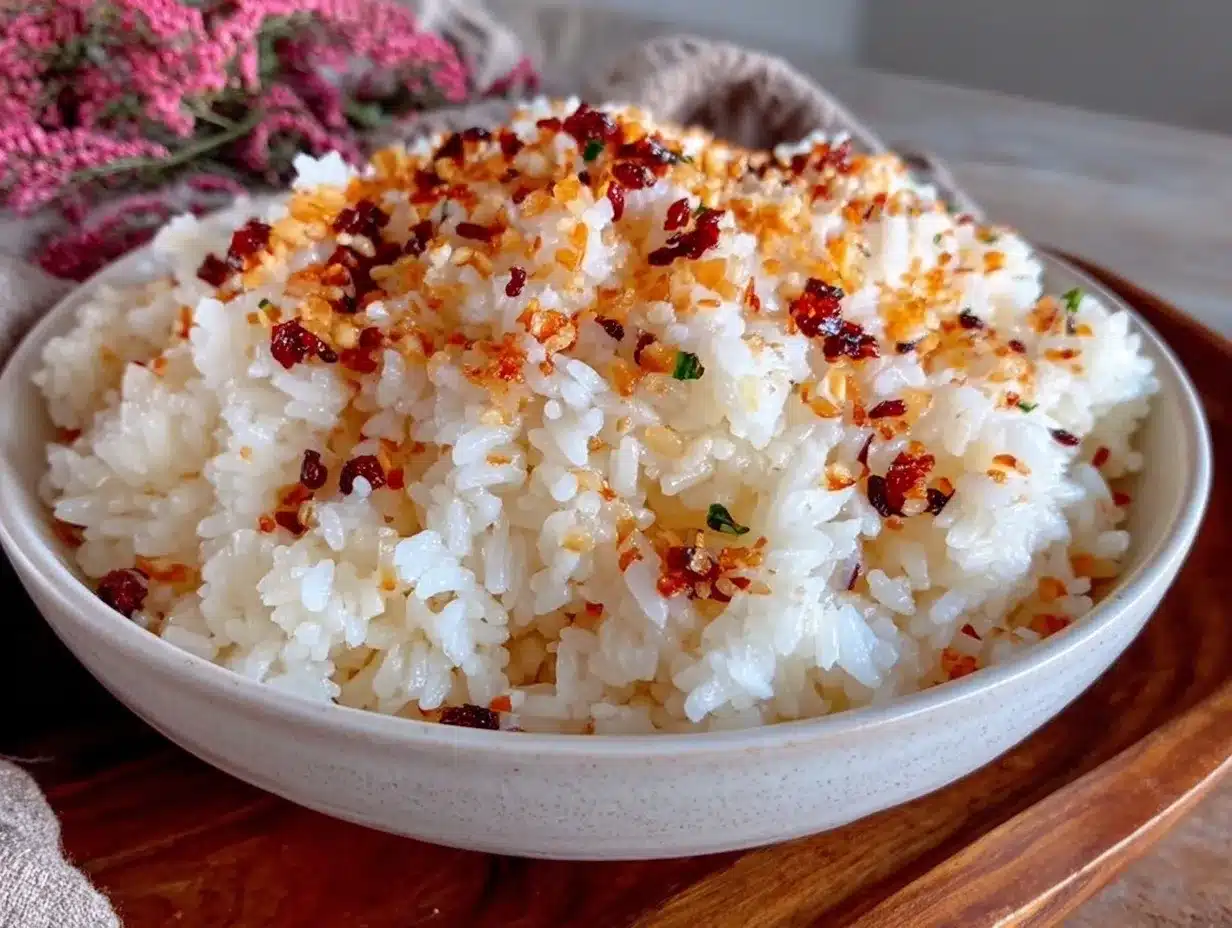
- Infused flavors: Add a cinnamon stick, bay leaf, or a clove of garlic to the pot for subtle aromatics.
- Vegetable broth substitution: Swap water for broth for an umami boost—ideal if serving with lemon chicken piccata.
- Allergy-friendly: Use coconut oil instead of butter or olive oil to keep it vegan and dairy-free.
I tried adding frozen peas and corn to the pot during the last minute of cooking for a quick veggie boost—worked surprisingly well without affecting texture.
Serving & Storage Suggestions
Serve this rice warm, straight from the pot, ideally fluffed just before plating. It pairs beautifully with saucy mains like butter chicken or simple sautéed veggies.
For storage:
- Keep leftovers in an airtight container in the refrigerator for up to 4 days.
- Freeze in portioned freezer bags for up to 3 months.
- Reheat gently in the microwave or on the stove with a splash of water to rehydrate.
Flavors tend to mellow over time, so freshly cooked rice has the best texture and aroma. But reheating with a sprinkle of water and covering it helps retain moisture and fluffiness.
Nutritional Information & Benefits
One serving (about ½ cup cooked) of this Instant Pot rice provides roughly:
| Calories | 110 |
|---|---|
| Carbohydrates | 23g |
| Protein | 2g |
| Fat | 0.5g (plus optional oil) |
| Fiber | 0.5g |
Rice is a gluten-free grain, making it a safe staple for many dietary needs. Long-grain white rice is easy to digest and provides quick energy. Using minimal added fats keeps it light, and swapping to brown rice boosts fiber and nutrients.
From a wellness perspective, this recipe fits well in balanced meals and supports varied diets—from plant-based to low-fat plans. Just be mindful of portion sizes and pairing with nutrient-dense sides.
Conclusion
This perfect Instant Pot rice recipe has quietly become a kitchen staple for me because it delivers what so many rice recipes promise but often don’t: fluffy, separate grains with minimal effort. I love how it frees me up to focus on the rest of the meal without worrying about a sticky or mushy side dish.
Feel free to tweak the water ratio or cooking times to suit your rice type or texture preference—that’s the beauty of this method. Whether it’s a quick weekday dinner or part of a feast with dishes like honey sriracha glazed meatballs, this rice fits in effortlessly.
I hope you find as much comfort and confidence in this recipe as I did. If you try it, I’d love to hear what you think or any little twists you add!
FAQs About Perfect Instant Pot Rice
Can I use this recipe for brown rice?
Yes! Increase water to 1 ½ cups (360 ml) and cook on high pressure for 22 minutes, then let pressure release naturally for 15 minutes.
Do I need to rinse the rice before cooking?
Rinsing helps remove excess starch for fluffier rice but isn’t essential. If you’re short on time, you can skip it.
What if my rice turns out mushy?
Next time, reduce the water slightly (try 1 cup water per 1 cup rice) and avoid stirring before cooking. Also, allow natural pressure release—it really makes a difference.
Can I add seasonings or broth?
Absolutely! Adding a pinch of salt, a bay leaf, or cooking rice in broth instead of water adds flavor without extra effort.
How do I store and reheat leftover rice?
Store in an airtight container in the fridge for up to 4 days or freeze for up to 3 months. Reheat with a splash of water in the microwave or stovetop to restore moisture.
Pin This Recipe!
Perfect Instant Pot Rice Recipe

A foolproof Instant Pot rice recipe that yields fluffy, tender, and perfectly separated grains with minimal effort and simple ingredients.
- Prep Time: 5 minutes
- Cook Time: 14 minutes
- Total Time: 19 minutes
- Yield: 4 servings 1x
- Category: Side Dish
- Cuisine: American
Ingredients
- 1 cup long-grain white rice (190 grams)
- 1 1/4 cups water (300 ml)
- 1/2 teaspoon salt (kosher or sea salt)
- 1 teaspoon olive oil or melted butter (optional)
Instructions
- Measure 1 cup (190 grams) of long-grain white rice and rinse under cold water until it runs mostly clear (optional).
- Add the rinsed rice to the Instant Pot insert. Pour in 1 1/4 cups (300 ml) of water, 1/2 teaspoon salt, and 1 teaspoon olive oil or melted butter. Gently stir to combine.
- Secure the lid and set the valve to sealing. Select the ‘Pressure Cook’ or ‘Manual’ mode on high pressure and set the timer for 4 minutes.
- When cooking finishes, let the pressure release naturally for 10 minutes.
- Carefully open the lid and use a fork or silicone spatula to fluff the rice gently. Serve immediately or keep warm for up to 30 minutes.
Notes
Avoid stirring rice before cooking to prevent mushiness. Do not skip the natural pressure release step to ensure fluffy texture. Adjust water slightly if rice is too firm or too soft. Rinsing rice is optional but helps remove excess starch.
Nutrition
- Serving Size: About 1/2 cup cooked
- Calories: 110
- Fat: 0.5
- Carbohydrates: 23
- Fiber: 0.5
- Protein: 2
Keywords: Instant Pot rice, fluffy rice, pressure cooker rice, easy rice recipe, no-fuss rice, long-grain rice, quick rice


