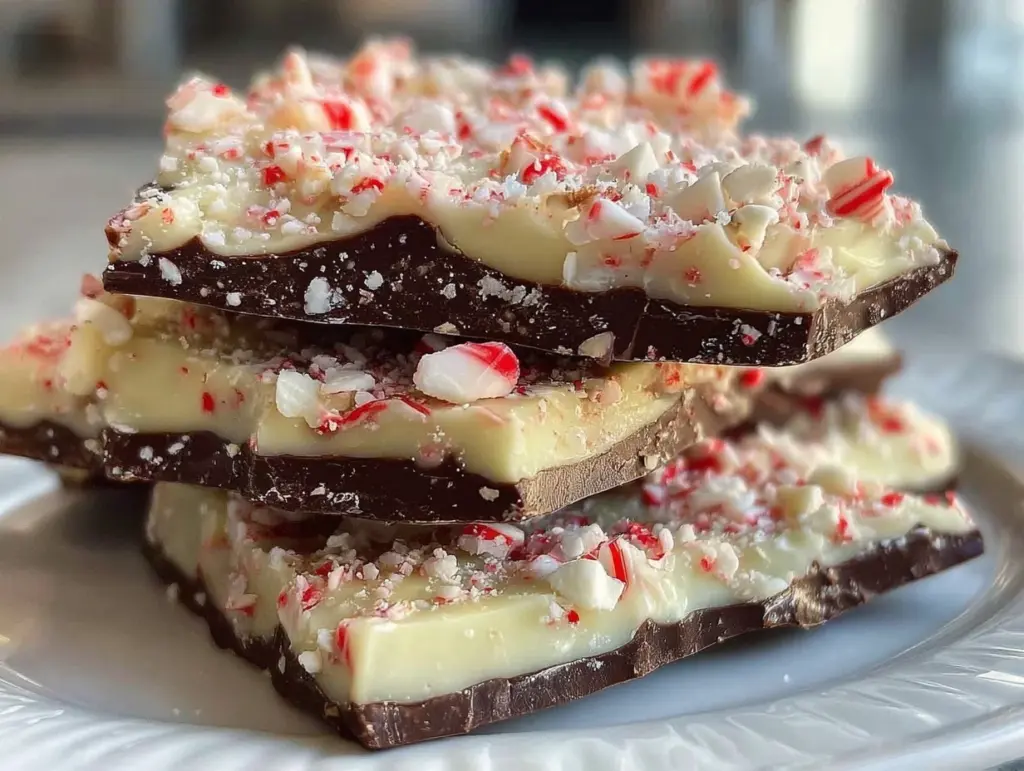
Let me tell you, the first whiff of melted dark chocolate mingling with icy peppermint always takes me straight back to cozy December afternoons (the kind where you can practically taste the anticipation in the air). The snap of perfectly tempered chocolate, the creamy white chocolate layer, and those bright pops of peppermint candy—honestly, just thinking about it makes me crave another batch of this perfect peppermint bark. I remember the first time I made this recipe: snow was swirling outside, holiday music was drifting through the house, and there I was, elbow-deep in chocolate, chasing that perfect swirl. It was a moment where I had to pause, take a deep breath, and smile because I knew I’d stumbled onto something truly special.
This peppermint bark recipe with dark and white chocolate isn’t just a dessert—it’s pure, nostalgic comfort. My grandma used to make a version every Christmas, and you know what? She’d always let me smash the candy canes (best job ever!). Years ago, I tried to recreate her magic, but it wasn’t until I found the right balance of chocolate and peppermint that it finally felt just right. When I brought out the first tray, my family couldn’t stop sneaking pieces off the cooling rack (and I can’t really blame them). It’s become our go-to for gifting, holiday parties, and those “just because” moments. Honestly, I wish I’d discovered this dangerously easy method much sooner; it’s the kind that makes you want to hoard a secret stash for yourself.
Whether you’re looking to brighten up your Pinterest holiday board, whip up a sweet treat for your kids, or pull together a last-minute hostess gift, this perfect peppermint bark recipe is your ticket to holiday happiness. I’ve tested it more times than I’ll admit (in the name of research, of course), and every time, it feels like a warm hug. Trust me—you’re going to want to bookmark this one, especially if you love peppermint bark with dark and white chocolate as much as I do.
Why You’ll Love This Recipe
Okay, so why is this perfect peppermint bark recipe with dark and white chocolate such a standout? After years of trial and error (and more chocolate smears than I care to count), I’ve learned what really sets this version apart. I’ve made hundreds of pans—seriously, my kitchen turns into a chocolate factory every December—and these are the reasons I keep coming back:
- Quick & Easy: Comes together in under 30 minutes, which is a lifesaver during those busy holiday weeks when you’re juggling a million things.
- Simple Ingredients: No fancy chocolate tempering machines or rare ingredients required. You probably have everything you need already (and if not, your local grocery store sure does).
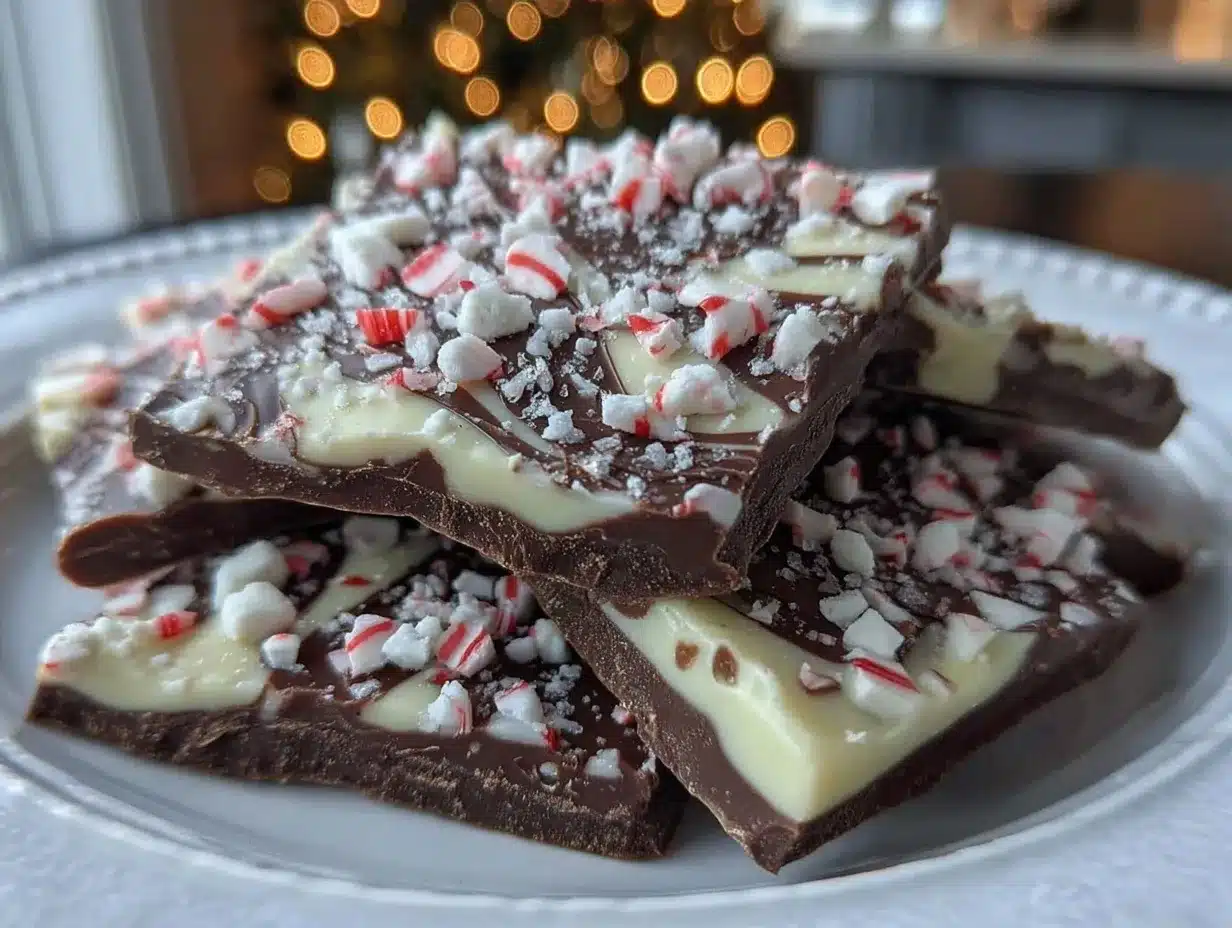
- Perfect for Gifting: Whether you need a last-minute hostess gift, stocking stuffer, or something to share at work, this peppermint bark is always a hit. Cut into festive shapes or break into rustic shards—either way, it looks beautiful on a holiday platter.
- Crowd-Pleaser: Kids love the sweet crunch, adults appreciate the rich chocolate layers. I’ve never seen anyone turn down a piece—seriously, not once.
- Unbelievably Delicious: The combo of deep, bittersweet dark chocolate and creamy white chocolate is pure magic. Add that peppermint crunch, and you’ve got the ultimate holiday treat.
What makes my peppermint bark different? The secret’s in the layering technique—using high-quality chocolate (I’m partial to Ghirardelli and Callebaut), and letting each layer set just enough for a perfect snap. Plus, I add a tiny touch of peppermint extract to the chocolate itself, so you get flavor in every bite (not just from the crushed candies).
This recipe isn’t just good—it’s the kind that makes you close your eyes after the first bite and savor the moment. It’s comfort food reimagined: faster, easier, but with the same soul-soothing satisfaction. Whether you want to impress guests without stress or make memories with your kids, this peppermint bark delivers every time. Give it a try—your holiday season will thank you!
What Ingredients You Will Need
This perfect peppermint bark recipe with dark and white chocolate uses simple, wholesome ingredients to deliver bold holiday flavor and that signature, satisfying snap. Most of these are pantry staples, but a couple might need a quick trip to the store (totally worth it!). Here’s what you’ll need:
- For the Chocolate Layers:
- Dark chocolate (12 oz/340 g, roughly chopped or in chips; I love Ghirardelli or Callebaut for best texture)
- White chocolate (12 oz/340 g, chopped or in chips; use a good baking bar for ultra-smooth results)
- For the Peppermint Flavor:
- Peppermint extract (1/2 tsp; adds depth to both chocolate layers—McCormick is my go-to brand)
- Crushed peppermint candies or candy canes (about 1/2 cup/80 g; smash them in a zip-top bag with a rolling pin for perfect shards)
- Optional, but recommended:
- Sea salt flakes (a pinch, for sprinkling—balances sweetness and makes the bark pop)
- Coconut oil (1 tsp, helps chocolate melt smoothly and snap better)
Ingredient notes & tips: If you’re making a vegan version, swap regular white chocolate for a dairy-free brand (I’ve had good luck with Enjoy Life). For gluten-free, double-check your peppermint candies—some brands add wheat starch (weird, but true). In warmer months, you can sub crushed freeze-dried strawberries for a fruity twist.
Substitution suggestions: Want to make it nutty? Toss in a handful of chopped pistachios with the peppermint. Prefer milk chocolate? Swap in milk chocolate for the dark layer (just reduce the sugar elsewhere). If you’re out of peppermint extract, a few drops of vanilla will mellow the flavor.
Honestly, the best part about this peppermint bark recipe is how flexible it is. I’ve used everything from leftover Halloween candy to artisanal chocolate bars—each batch turns out delicious and unique. Don’t be afraid to experiment!
Equipment Needed
- Baking sheet or rimmed tray (about 9×13 inches/23×33 cm works well; lined with parchment paper for easy removal)
- Microwave-safe bowls or double boiler (for melting chocolate; I usually use glass bowls for easy cleanup)
- Rubber spatula (helps spread chocolate evenly)
- Small offset spatula (optional, but makes smoothing the layers a breeze)
- Measuring spoons (for peppermint extract and coconut oil)
- Zip-top bag and rolling pin (for smashing peppermint candies—kids love this job!)
- Sharp knife (for cutting bark into neat squares or rustic shards)
If you don’t have a double boiler, no worries—the microwave method works great. Just melt in 20-second bursts and stir often. I’ve used everything from silicone baking mats to wax paper, and parchment is my favorite (no sticking, no fuss). For budget-friendly options, IKEA and Target have good sheet pans and spatulas that hold up for years.
Pro tip: Keep your rubber spatula dry between layers; a hint of water can make chocolate seize up (learned that the hard way!). If you use an offset spatula, wash it right after—chocolate sets fast and makes cleanup a bear.
Preparation Method
- Prep your workspace: Line a rimmed baking sheet (9×13 inches/23×33 cm) with parchment paper. Make sure the surface is flat and corners are snug (this helps the bark come out in one piece).
- Crush the peppermint: Place 1/2 cup (80 g) of peppermint candies or candy canes in a zip-top bag. Smash with a rolling pin until you have a mix of chunky and fine pieces (don’t pulverize—variety is good).
- Melt the dark chocolate: Place 12 oz (340 g) chopped dark chocolate in a microwave-safe bowl. Heat in 20-second bursts, stirring each time, until almost melted (about 1–2 minutes). Add 1/4 tsp peppermint extract and 1/2 tsp coconut oil (optional). Stir until smooth and glossy.
- Spread the dark chocolate: Pour melted chocolate onto prepared sheet. Use a spatula to spread evenly to about 1/4 inch (6 mm) thick. Tap the tray gently on the counter to release air bubbles. Let set at room temperature for 10–15 minutes (or pop in the fridge for 5 minutes if you’re impatient, but avoid over-chilling).
- Melt the white chocolate: In a clean bowl, melt 12 oz (340 g) white chocolate in the microwave, 20 seconds at a time, stirring between bursts. Add 1/4 tsp peppermint extract and 1/2 tsp coconut oil (if using). Stir until creamy and lump-free.
- Layer the white chocolate: Pour white chocolate over the set dark chocolate. Gently spread with an offset spatula or back of a spoon, covering the dark layer completely. Work quickly—the dark chocolate may soften slightly, which is normal. If you want a swirled effect, drag a toothpick through both layers before they firm up.
- Add the peppermint crunch: Sprinkle crushed peppermint candies evenly over the top. Press gently with clean hands so they stick, but don’t sink into the chocolate. Add a pinch of sea salt flakes if you like a sweet-salty finish.
- Set and cool: Let bark set at room temperature for 30–45 minutes, or refrigerate for 15 minutes until firm and snappy (don’t freeze, as this can cause sweating and discoloration).
- Slice and serve: Lift parchment paper to remove bark from tray. Cut into squares or break into rustic shards with your hands. Store pieces in an airtight container at cool room temperature (or fridge if your kitchen is warm).
Troubleshooting: If chocolate seizes (gets grainy), add a teaspoon of coconut oil and stir gently. If layers separate after chilling, let bark warm slightly before cutting. When white chocolate is stubborn, stir well and add a few drops more coconut oil. If your peppermint candies bleed color, try a different brand next time.
Personal tip: To speed up setting, I keep my sheet pan outside on chilly days—nature’s fridge! For extra shine, use a silicone spatula and work quickly. Oh, and always taste test (for science!).
Cooking Tips & Techniques
Making peppermint bark with dark and white chocolate isn’t hard, but a few pro moves make a big difference. Here’s what I’ve learned (sometimes the hard way):
- Layering matters: Let the dark chocolate set just enough before adding white chocolate—too soon and you’ll get muddy swirls, too late and the layers won’t bond. Aim for slightly tacky, not rock-hard.
- Temperature control: Melt chocolate slowly, stirring between bursts. Overheating causes chocolate to seize or burn (been there, done that!). If you use a double boiler, keep water simmering—not boiling—and never let steam touch the chocolate.
- Use good chocolate: Cheap chips often contain waxes and don’t melt as smoothly. For the best snap and taste, stick to high-quality baking bars or couverture chocolate (Ghirardelli and Callebaut are my favorites).
- Don’t skip the extract: Peppermint extract in both layers boosts flavor. But go easy—more than 1/2 tsp and the bark can taste medicinal.
- Multitasking trick: Crush your peppermint candies while the chocolate melts. That way, you’re ready to sprinkle as soon as the top layer goes on.
- Cutting for Pinterest-perfect pics: Use a warm knife (run under hot water, dry well) for clean slices. Or break into rustic shards for a fun, homemade look.
Common mistakes? Rushing the set time (layers separate), using wet spatulas (chocolate seizes), or overmixing white chocolate (it can get chalky). I’ve botched a few trays by using old peppermint candies—they melted and bled color everywhere. Fresh is best. Consistency comes from practice, but honestly, even imperfect bark tastes amazing.
Variations & Adaptations
One thing I love about this perfect peppermint bark recipe is how easy it is to customize. Here are some fun twists I’ve tried (and a few I still want to!):
- Gluten-Free Version: Use gluten-free peppermint candies and double-check your chocolate (some brands add wheat starch—sneaky!).
- Dairy-Free/Vegan: Swap white chocolate for a plant-based version (Enjoy Life makes a good one), and use dark chocolate that’s dairy-free. Coconut oil helps the melt and snap.
- Nutty Bark: Stir in a handful of chopped roasted pistachios or almonds with the peppermint for extra crunch and flavor.
- Fruity Twist: Instead of peppermint, sprinkle freeze-dried raspberries or strawberries for a summery take. I love this in July when peppermint feels too wintery.
- Spiced Up: Add a pinch of cayenne or cinnamon to the dark chocolate layer for a spicy kick (surprisingly delicious!).
- Milk Chocolate Lovers: Use milk chocolate for the base and keep the white chocolate on top—great for kids and anyone who prefers sweeter bark.
Personal adaptation? Last year, I made a batch with orange extract instead of peppermint and topped it with candied orange peel. It was so good, my husband requested it for his birthday (in July!). Try your own twist—half the fun is experimenting.
Serving & Storage Suggestions
Peppermint bark with dark and white chocolate is best served at room temperature, where the layers have a perfect snap and the flavor shines brightest. Arrange pieces on a festive platter or tuck them in treat bags for easy gifting.
Pair with hot cocoa, coffee, or even mulled wine for a cozy holiday vibe. For dessert boards, I like to mix bark shards with shortbread cookies and chocolate-dipped pretzels—looks gorgeous and tastes even better.
Storage is simple: keep bark in an airtight container at cool room temperature (it stays fresh for up to 2 weeks). If your kitchen is warm, stash it in the fridge—it’ll keep up to a month. To freeze, wrap tightly in parchment and a zip-top bag; thaw at room temp for best texture.
Reheating isn’t usually needed, but if bark gets too cold in the fridge, let it sit out for 10–15 minutes before serving. Honestly, the flavors mellow and deepen over time—day two is even better than day one!
Nutritional Information & Benefits
This perfect peppermint bark recipe with dark and white chocolate is a treat, so enjoy in moderation! Each 1 oz (28 g) piece has approximately:
- Calories: 140
- Fat: 7 g
- Carbs: 17 g
- Sugar: 14 g
- Protein: 2 g
Dark chocolate is packed with antioxidants and can boost mood (I swear by this after a long day). Peppermint aids digestion and adds a refreshing twist. For gluten-free or dairy-free diets, use the recommended substitutions above. Major allergens: dairy (in white chocolate), possible soy (in some brands), and peppermint candies (check for gluten in ingredients).
From a wellness perspective, homemade bark means you control the ingredients—no weird additives or excess sugar. I find a small piece satisfies my sweet tooth and gives me a little holiday pick-me-up.
Conclusion
In a world of holiday treats, this perfect peppermint bark recipe with dark and white chocolate stands out for its simplicity, wow-factor, and pure comfort. It’s easy to make, easy to gift, and honestly—impossible to mess up. Whether you stick to the classic or mix things up, you’ll end up with a tray of delicious, crowd-pleasing bark that looks as good as it tastes.
I love this recipe because it brings people together—kids smashing candy, parents sneaking pieces, friends swapping stories. Customize your bark, share your tweaks, and let it become part of your own holiday tradition. If you make it, leave a comment below, share your photo on Pinterest, or tag me with your creative adaptations!
Here’s to sweet moments, easy recipes, and a holiday season filled with chocolate and cheer. You’ve got this—happy baking!
Frequently Asked Questions
Can I use only dark or only white chocolate for this peppermint bark recipe?
Absolutely! You can make all-dark or all-white chocolate bark. Just double up on whichever chocolate you prefer and follow the same layering method. The flavor will be a bit different, but still delicious!
How do I keep the chocolate layers from separating?
Let the first layer set until tacky—not completely hard—before adding the second layer. Gently press the top layer so they bond. If your bark does separate, just press the pieces together when serving (no one will mind!).
Can I make peppermint bark ahead of time?
Yes! Peppermint bark with dark and white chocolate keeps well for up to 2 weeks at room temperature or a month in the fridge. It’s a perfect make-ahead treat for busy holidays or gifting.
What’s the best way to crush peppermint candies for topping?
Put them in a sturdy zip-top bag and smash with a rolling pin. Don’t pulverize completely—small and chunky pieces add the best texture and look. Kids love helping with this step!
Is this recipe gluten-free?
Most chocolates and peppermint candies are gluten-free, but always check ingredient labels. Some brands add unexpected gluten, so look for certified gluten-free options if needed.
Pin This Recipe!
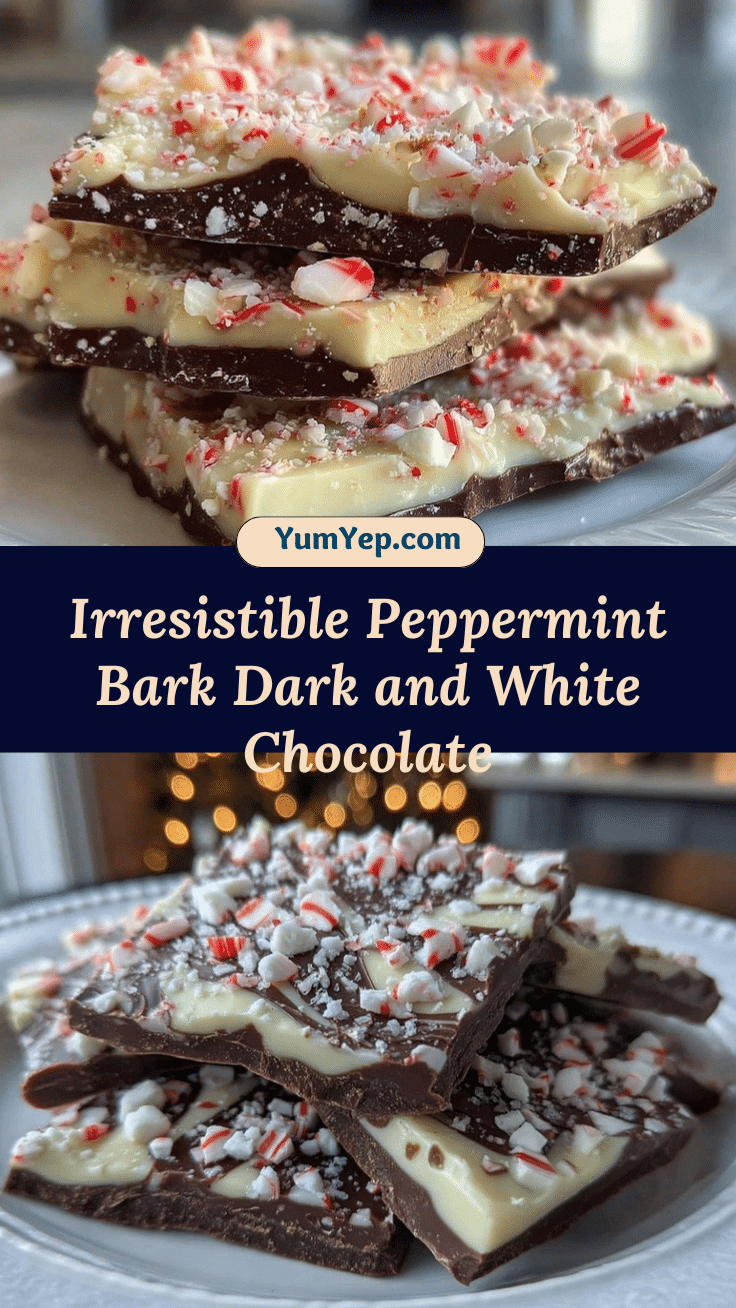
Perfect Peppermint Bark Recipe with Dark and White Chocolate

This easy peppermint bark features layers of rich dark chocolate and creamy white chocolate, topped with crunchy peppermint candy for a festive holiday treat. Quick to make and perfect for gifting, it’s a nostalgic favorite that brings comfort and cheer to any celebration.
- Prep Time: 10 minutes
- Cook Time: 10 minutes
- Total Time: 30 minutes
- Yield: 16 servings 1x
- Category: Dessert
- Cuisine: American
Ingredients
- 12 oz dark chocolate (roughly chopped or in chips)
- 12 oz white chocolate (chopped or in chips)
- 1/2 tsp peppermint extract (divided)
- 1/2 cup crushed peppermint candies or candy canes
- 1 tsp coconut oil (optional, divided)
- Pinch of sea salt flakes (optional)
Instructions
- Line a rimmed baking sheet (9×13 inches) with parchment paper.
- Place peppermint candies or candy canes in a zip-top bag and crush with a rolling pin until you have a mix of chunky and fine pieces.
- Melt dark chocolate in a microwave-safe bowl in 20-second bursts, stirring each time, until almost melted (about 1–2 minutes). Add 1/4 tsp peppermint extract and 1/2 tsp coconut oil (optional). Stir until smooth.
- Pour melted dark chocolate onto prepared sheet and spread evenly to about 1/4 inch thick. Tap tray gently to release air bubbles. Let set at room temperature for 10–15 minutes or refrigerate for 5 minutes.
- Melt white chocolate in a clean bowl in the microwave, 20 seconds at a time, stirring between bursts. Add 1/4 tsp peppermint extract and 1/2 tsp coconut oil (if using). Stir until creamy.
- Pour white chocolate over set dark chocolate. Spread gently to cover the dark layer completely. For a swirled effect, drag a toothpick through both layers before they firm up.
- Sprinkle crushed peppermint candies evenly over the top. Press gently so they stick. Add a pinch of sea salt flakes if desired.
- Let bark set at room temperature for 30–45 minutes, or refrigerate for 15 minutes until firm.
- Lift parchment paper to remove bark from tray. Cut into squares or break into shards. Store in an airtight container at cool room temperature or in the fridge.
Notes
For best results, use high-quality chocolate and fresh peppermint candies. Let the dark chocolate layer set until tacky before adding the white chocolate to prevent separation. Store bark in an airtight container at room temperature for up to 2 weeks or in the fridge for up to a month. For vegan or dairy-free, use plant-based white chocolate and dairy-free dark chocolate. Always check labels for gluten if needed.
Nutrition
- Serving Size: 1 oz piece
- Calories: 140
- Sugar: 14
- Sodium: 20
- Fat: 7
- Saturated Fat: 4
- Carbohydrates: 17
- Fiber: 1
- Protein: 2
Keywords: peppermint bark, holiday dessert, chocolate bark, Christmas treat, easy candy, edible gift, dark chocolate, white chocolate, peppermint candy


